Opening the Points of View Screen
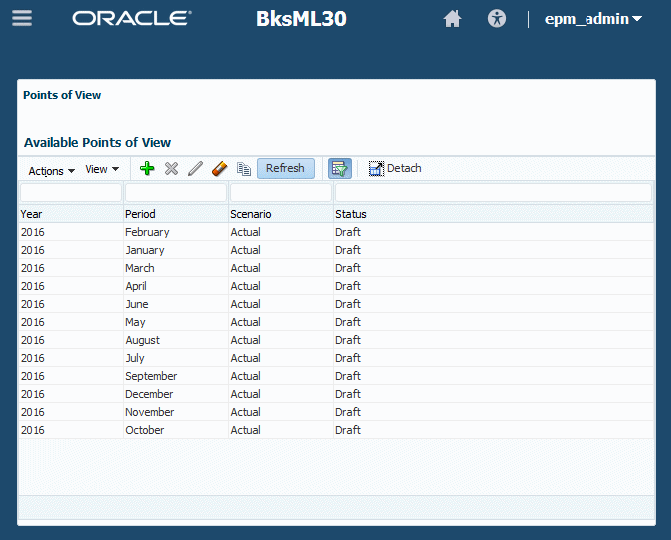
The Points of View screen enables you to create, modify, and delete POVs.
To display the Points of View screen using the Navigator menu:
- On the Home page, click
 , and then select Points of View.
The Points of View screen lists all available POVs.
Figure 7-1 Points of View Screen

- Use the Actions menu and buttons to perform the following actions:
Table 7-1 POV Management Actions
Actions Menu Option Button Details Create Point of View 
Creating POVs Delete Point of View 
Deleting POVs and All Artifacts Change Point of View State 
Modifying the POV State Clear Point of View 
Clearing Selected Artifacts from POVs Copy Point of View 
Copying POVs Note:
You can perform similar actions on the Execution Control screen. To display it, on the Home page, click Models, and then Execution Control.
- Optional: Use the View menu and buttons to perform the following tasks:
-
Columns—Show all or selected dimension columns
-
Detach and Attach the table of POVs,

-
Reorder Columns—Use the arrow controls to move the selected dimension column toward the beginning or end of the POV table
-
Query By Example—Select to filter data using Query by Example (QBE),
 :
:
-
Click Query By Example,
 .
.
-
Enter the first few letters of the target value in one or more QBE fields that appear above each data column.
-
Click
 again.
Only matching members are displayed. To show all members again, follow these steps and clear all fields.
-
-