2Setting Up Permits
Setting Up Agency-Level Options
You set up the Oracle Intelligent Advisor for Permits and Planning and Zoning on the Permit Options page during agency setup. You can also configure the summary title and text for the Anonymous User Landing Page and the Registered User Landing page.
Select .
Click a row on the Agency Information tab.
Select the Features tab.
Oracle delivers the list of offerings on the Features tab. The Permits offering encompasses both Permits and Planning and Zoning.
Disregard the Enabled column for the Permit offering. The offering is enabled in the Functional Setup Manager (FSM).Click Options for the Permits offering.
On the Permit Options page, you can update values for the following fields:
Page Elements
Definition
Oracle Policy Automation ID
Enter the unique identifier for the Oracle Policy Automation policy model to be used for this offering.
The offering-specific policy model that you specify here takes priority over any agency-wide policy definition that you enter on the main Agency Information page.
Message Title
Enter a short text version of the landing page message in a title format. If you leave this field blank, the value in the Label field on the Link Details page for the menu navigation link Online Permits is displayed.
Message Summary
Enter a longer version of the landing page message title in a sentence format. If you leave this field blank, the value in the Description field on the Link Details page for the menu navigation link Online Permits is displayed.
Button Content URL
Enter a content URL for the Read More button. Public users click this button to access the agency’s own permit information page, outside of Oracle Public Sector Permits. If you leave this field blank, the Read More button opens a dialog box that displays the Landing Page Message.
Note: If you want to link to a page outside of Oracle Public Sector Permits, you must enter a URL here.Landing Page Message
Enter a welcome message in rich text to appear in a dialog box on the landing page, if a URL to access the agency’s page is not defined.
For more information on Oracle Intelligent Advisor, see Overview of Oracle Intelligent Advisor Configuration.
For more information on the Landing Page Message Definition, see Defining Summary Details.
Setting Up Plan Reviewer Departments
A plan review department represents an area of expertise for reviewers of plan documents.
For example, a plan review department of Building is associated with experts in building-related codes and regulations whereas a plan reviewer department of Fire is associated with experts in fire-related codes and regulations.
You select a plan review department for a plan reviewer when you add a department job attribute for your plan reviewer job function during agency staff setup. For more information on adding job functions and job attributes, see Managing Agency Staff Profiles.
System administrators add, modify, and delete plan reviewer departments on the Plan Reviewer Department page.
Adding Plan Reviewer Departments
Select .
On the Plan Reviewer Department page, click Add.
On the Plan Reviewer Department Details page, enter an ID, name, and description for the department.
Turn on the Enabled switch to make the plan reviewer department available as a value on other pages.
Click Save.
Modifying Plan Reviewer Departments
Select .
On the Plan Reviewer Department page, select the plan reviewer department that you want to modify.
On the Plan Reviewer Department Details page you can:
Edit the description. You cannot change the values of the Department ID and Department fields.
Enable or disable the plan reviewer department using the Enabled switch.
Note: When you disable a plan reviewer department that is already associated with a plan review the department remains associated with that plan review.Delete the plan reviewer department. You will be prompted to confirm the permanent deletion.
Click Save.
Deleting Plan Reviewer Departments
Select .
Click Edit.
Select the check boxes next to all the plan reviewer departments you want to delete.
Click Delete. You will be prompted to confirm the permanent deletion.
Setting Up Plan Review Statuses
Use delivered plan review statuses to identify the progression through a plan review cycle. You can review the statuses on the status definition pages.
You review the plan review statuses on the Plan Review Status and Decision Status pages. You cannot delete the system-defined statuses or add new statuses, but you can modify the descriptions. The descriptions allow you to enter a different status name to be displayed to agency staff.
The system derives the overall plan review status from the individual plan reviewer decisions, and updates the overall plan review with the most severe decision status. The system-defined decision statuses are listed here from most to least severe: Rejected, Revision Required, Approved with Comments, Approved, and Not Required. If plans have one or more rejections, or revisions are required, the applicant must correct the plans and resubmit them for another review cycle.
Modifying Plan Review Cycle Statuses
You can edit only the Description field on the Plan Review Status Details page. The agency-defined description is exposed to agency staff and public users on the plan review pages in the permit record detail.
Select .
Select the Plan Review Status tab.
You can review the delivered review cycle statuses in the Review Status column:
In Progress
Canceled
Completed
Select the row for the review status that you want to modify.
On the Plan Review Status Details page you can edit only the description.
Click Save to save any changes.
Modifying Plan Review Decision Statuses
You can edit only the Description field on the Decision Status Details page. The agency-defined description is exposed to agency staff and public users on the plan review pages in the permit record detail.
Select .
Select the Plan Review Decision tab.
You can review the delivered plan review decision statuses in the Decision Status column:
Approved
Approved with comments
Revision required
Rejected
Not required
The plan review decision statuses are delivered as enabled. The only review decision status that you can disable is Approved with comments.
Select the row for the decision status that you want to modify.
On the Decision Status Details page you can edit only the description.
Click Save to save any changes.
Setting Up Permit Types
Define the types of permits supported by an agency. You add a permit type and associate workflow process definitions on the Permit Type definition page.
Before you can create an application form, you must first create a permit type on the permit type definition page.
Adding Permit Type Definitions
Select .
On the Transaction Type – Permit Types page, click the Add button.
On the Permit Type page, enter values for the following fields:
Page Element
Description
Classification
Displays the type of application. The classification for this page indicates this is a permit application.
Subclassification
For use with planning applications. Accept the default value, Not Applicable.
Permit Type
Enter a name for the type of permit type.
Permit Type ID
Enter a unique alphanumeric code or short name for the permit type. Do not use special characters, including symbols or punctuation, or spaces.
Status
Select from the following to indicate the permit type status:
Preliminary: The permit type is being defined but is not available for use.
Ready: The permit type is enabled for immediate use.
Note: The permit design must be published in the Intake Form Designer prior to setting the permit type status to Ready.Void: The permit type is no longer available.
Autonumber Rule
Select the autonumbering rule to increment numbers for permits.
For more information, see Setting Up Autonumbering.
Valid from Date and Valid to Date
Enter a range of dates when this permit type is valid. The default from date is the current date. The default end date is Open. You can update these dates as needed.
Public User Enabled
Select from the following to indicate whether this permit type is enabled for public users:
Enabled for all users
Enabled for registered users
Not enabled for public users (default)
Initially, for a newly created permit this is always set to Not enabled for public users. When you are ready to publish the new permit, update this value. See Publishing Intake Forms.
Expiration Group
Enter the expiration group that defines the expiration rules for permits with this permit type. Expiration rules determine the expiration dates for different phases of the permit lifecycle. For more information about permit expiration, see Setting Up Permit Expiration Rules.
Application Group
Select a permit application group that you want to associate with the permit type.
For more information, see Setting Up Transaction Groups.
Category
Select an application category that you want to associate with the permit type.
For more information, see Setting Up Transaction Categories.
Subcategory
Select an application subcategory that you want to associate with the permit type.
For more information, see Setting Up Transaction Subcategories.
Document Group
Select a document group to manage attachments for the application type.
When you specify a document group, document attachments can be classified into categories and subcategories during the application process and when you upload files. Then you can see the category for a document on the attachments page in the application details.
For more information, see Setting Up Document Groups.
Inspection Group
Select an inspection group to associate with the permit type. The inspection group identifies all inspections necessary for the permit.
For more information, see Setting Up Inspection Groups.
Fee Schedule
Select a fee schedule that you want to associate with the permit type. A department is required if the permit type has a fee schedule ID.
For more information, see Setting Up Fee Schedules.
Bill Type
Select a bill type to associate with the permit type.
The billing type identifies the type of invoice that can be generated from the record. The bill type is required.
For more information, see Setting Up Bill Types.
Department
Select a department that you want to associate with the permit type. A department is required if you add a Fee Schedule ID to the permit type.
If a department is specified on the Fee Item setup page, the fee item department overrides the department specified here on the permit type.
For more information, see Setting Up Departments.
Terms of Use ID
Select a terms of use definition to associate with the permit type. When you set up terms of use, you can make the terms available to the public user registration process, to the permit application process, or to both. The user must accept the terms and conditions for using online permits.
For more information, see Setting Up Terms of Use.
Description
Enter a user-facing description of the permit type. On the Apply page, this description appears under the permit type name.
The description helps public users understand the purpose of the permit type.
URL
Enter a URL for a web page that gives public users more information about the permit type.
If you enter a URL, then a Learn More link appears at the end of the permit type description on the Apply page. The user clicks this link to open the specified URL.
If you leave this field blank, the Learn More link is not visible on the Apply page.
Setting Up Workflow for a Permit Type
You set up workflow using the Oracle Autonomous Integration Cloud (OIC) before associating the workflow with the permit type.
For more information, see Setting Up Process Definitions for Workflow.
Select .
On the Transaction Type – Permits page, click the Add button.
In the Workflow Setup section on Permit Type page, enter values for the following fields:
Page Element
Description
Workflow Space Name
Enter the space where the workflow process application is stored. You can group related applications in a space as well as enable users to collaborate when developing applications.
Workflow Application ID
Enter the name of the workflow process application in OIC. For more information, see Creating and Managing Applications.
Workflow Version
Enter the version of the workflow process application.
Workflow Process Definition
Enter the name of the workflow process definition that applies to this particular permit.
Setting Up Plan Reviews for a Permit Type
Define how plan reviews are conducted for permits associated with the permit type.
Select .
On the Transaction Type – Permits page, click the Add button.
In the Plan Reviews section on Permit Type page, enter values for the following fields:
Page Element
Description
Plan Review Type
Select the method used for reviewing plans for permits associated with the permit type.
Manual: Plan reviews are tracked as part of permitting workflow, but are performed without the use of integrated electronic document review software.
Not Used: Plan reviews are not tracked as part of permitting workflow.
Electronic: Plan reviews are tracked as part of permitting workflow, and are performed through integration with electronic document review software.
For more information on plan reviews, see Managing Manual Plan Review Cycles and Managing Electronic Plan Review Cycles.
Plan Reviewer Departments
Select the departments that should be included in any plan reviews associated with this permit type. Plan coordinators should add a reviewer from each of the required departments. The Reviewers grid of the Plan Review page displays the required departments that you select here.
For more information about plan reviewer departments, see Setting Up Plan Reviewer Departments.
For more information about plan reviews, see Electronic Plan Review Process Flow and Manual Plan Review Process Flow.
Saving a Transaction Type
When you first save a transaction type definition, it may take a few moments to complete. On the first save, the system:
saves all the transaction type attributes.
creates the custom database objects (such as view objects).
creates the REST endpoint for that transaction type.
creates the Fusion Application sandbox needed for developing the application form layout.
Cloning Permit Types
Click the Clone button to create a clone of the current permit type, which you can then use to create a different permit or to create a different version of the current permit.
For more information on cloning permits, see Cloning Transaction Type Definitions.
Designing Intake Forms
After you have entered the appropriate initial information for a permit, you can then begin to design the intake form that end users will use to submit an online application. You create an application form using the Intake Form Designer. To access the designer, click Design Form.
For more information on designing intake forms, see Using the Intake Form Designer.
Setting Up Permit Display Groups
Use the Display Group setup pages to add permit display groups that appear on your agency’s landing page, where a user starts an application.
A permit display group identifies a meaningful grouping of permit and planning application types displayed as a list on the Apply page. The list appears as the permits or planning applications that agency staff or a guest user can select to initiate the application process.
For more information about how the Apply page looks and is used, see Choosing an Application Type.
Before setting up permit display groups, you must set up transaction types for your agency. See Setting Up Permit Types.
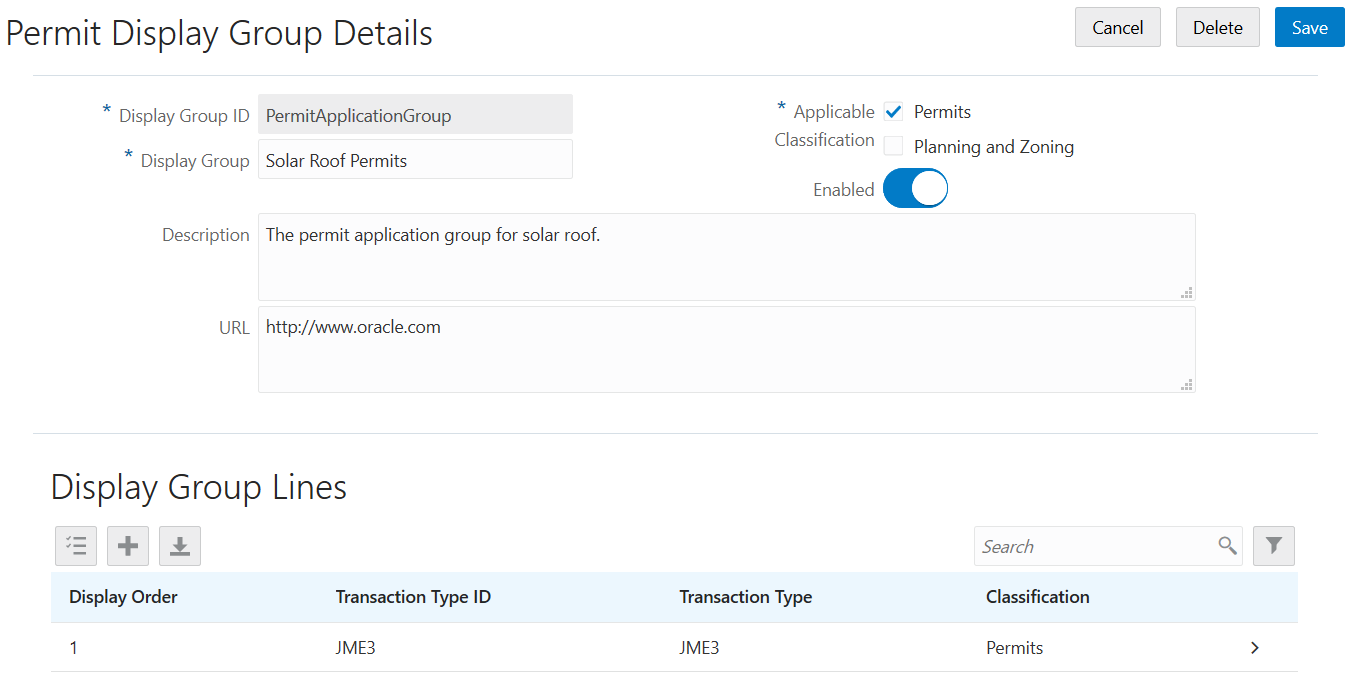
This example illustrates the Permit Display Group Details page which is described in the following text.
Adding Permit Display Groups
Select .
On the Permit Display Group page, click Add to add a new group.
On the Permit Display Group Details page, enter values for the following:
Page Element
Description
Display Group
Enter a permit display group name.
Description
Enter a description of the display group that appears on the Apply page for guests.
URL
Enter a URL used to access additional information about a transaction type.
Applicable Classification
Select the check box for the applications to which this display group applies. Choose from these options:
Permits
Planning and Zoning
This option determines whether a display group type is shown on the Apply page for public users. A display group can be included with both the Permit Applications and the Planning Applications.
Verify that the Enabled switch is turned on. The switch is turned on by default for new permit display groups.
In the Display Group Lines section, click Add to set up a line on the Display Group Line Details page. The display group lines are transaction types that make up the list in the new display group.
Note: Both permit transaction types and planning application transaction types can be added to a display group. For example, you can add a planning application transaction type to a permit application display group and the other way around.Page Element
Description
Display Order
Enter a numerical value in this field to specify the order in which you want the permit type to be displayed, if desired. The default value is 0 and upon saving, the system automatically assigns the next value.
Transaction Type ID
Select an existing transaction type ID.
The description for the ID you enter here will appear in the Transaction Type field.
Transaction type information
Review the attribute information for the permit type to verify you have selected the correct transaction type ID:
Transaction Type
Classification
Application Group
Category
Subcategory
For more information about transaction type attributes, see Setting Up Permit Types.
On the Permit Display Group Details page, click Save.
Modifying Permit Display Groups and Lines
You can modify permit display groups and lines on the Permit Display Group Details and Display Group Line Details pages, respectively.
Select .
On the Permit Display Group page, select the row for the permit group that you want to modify.
On the Permit Display Group Details page, you can:
Modify the description. You cannot change the group name.
Turn the Enabled switch on or off to enable or disable the display group.
If you made any changes, click Save.
To modify the display group lines (the list of permits in a display group), select the row for the permit group that you want to modify on the Permit Display Group page.
On the Permit Display Group Details page, select a display group line in the Display Group Lines grid.
On the Display Group Line Details page, you can change the values in these fields:
Update the Display Order field to change the order in which the lines appear.
Update the Transaction Type ID field with another existing permit type ID.
If you made any changes, click Save.
Deleting Permit Display Groups and Lines
Select .
On the Permit Display Group page, select the row for the permit group that you want to delete.
If you want to delete the display group, click Delete on the Permit Display Group Details page.
If you want to delete multiple display groups, you can delete them from the Permit Display Group page:
Click Edit.
Select the check boxes for the display groups to delete.
Click Delete.
To delete a display group line, go to the Permit Display Group Details page and select a display group line in the Display Group Lines grid.
On the Display Group Line Details page, click Delete.
If you want to delete multiple display group lines, you can delete them from the Permit Display Group Details page:
Click Edit.
Select the check boxes for the display group line rows to delete.
Click Delete.
Setting Up Permit Expiration Rules
You can set up expiration rules for the different phases of the permit application lifecycle.
You set up expiration rules for permit applications to define:
When an inactive pending application expires.
When the application expires.
When the permit expires.
First, you define the rules in an effective-dated group. After setting up the expiration rules, you add the rules group ID to the application type definition and periodically run batch rules processing to update permit expiration statuses.
Setting Up Expiration Rule Groups
Here’s how to set up the rule group:
Select or .
On the Permit Expiration Group page, enter values for these fields:
Page Element
Description
Expiration Group ID, Expiration Group Name, and Description
Enter an ID for the expiration group, a group name, and description.
Effective Start Date and Effective End Date
Enter the range of dates when the group is effective. If you want to leave the effective dates open-ended, don’t enter a date for the end date.
To see the effective date history for an expiration group, click Show All Dates. On the History Data page, you can search history by effective start date or click Add to add new effective-dated rules for an expiration group.
Show All Dates
Click to access the effective-dated history of the rules definition. This button is available after you create the first rule.
You can also search history by effective start date. Click Add to create a new effective-dated row for an expiration group.
Verify that the Enabled switch is turned on. The option is active by default for a new expiration group.
Create expiration rules in the Expiration Rules section.
Defining Expiration Rules
Here’s how to set up the details about the expiration rules in the group:
Select .
Click Add in the Expiration Rules section.
Enter these values to create each rule:
Page Element
Description
Expiration Basis
Select the type of expiration for the rule, based on the status of the application:
Inactive pending application – When the application is in a pending status, users must submit the application before the expiration date.
The expiration timeframe begins when the user saves an application and ends with application submission.
Application expiration – Users must complete permit requirements such as the plan review before the permit can be issued. If the permit is not issued by the expiration date, the application and all tasks are canceled.
The expiration timeframe begins when the agency accepts application and ends when the permit is issued.
Permit expiration – Users must complete the final inspection before the permit expires.
The expiration timeframe begins when the agency issues the permit and ends when the Certificate of Occupancy is issued or the permit is completed.
Note: Because start and end dates require specific statuses, workflow processes must include status update tasks for Application Accepted ( Accepted) and Certificate of Occupancy ( Certificate) or Completed ( Completed).Expiration Duration
Enter the amount of time that the user has before the expiration date.
About to Expire
Enter when you would like a notification to appear on the application that shows the user how long until the application expires. For example, you can enter 2 days to show that a pending application expires in 2 days.
You can manually extend a permit on the Overview page in the transaction details during the about to expire period. For example, if the about to expire period is 15 days, the permit can be manually extended starting at 15 days before the expiration date.
Grace Period
Enter the amount of time the application is valid beyond the expiration date. For example, if a pending application expires in 30 days, you may want to provide a grace period of an additional 3 days.
You can also manually extend a permit on the Overview page in the transaction details during the grace period.
Number of Extensions
Enter the number of allowed extensions beyond the expiration date. For example, to allow up to 2 extensions you would enter 2.
You can manually extend the expiration during the About to Expire and Grace Period timeframes, when the Extend link is available on the Overview page in the application details. This link is available only for agency staff with appropriate permissions. You can’t manually extend the expiration for applications in a pending status.
Communication
Select an option to send out communications when the permit is about to expire or expired, and the recurrence of the communication. Agency staff and the contact listed on the application receive the notifications.
You must set up the About to Expire Permit and Expired Permit events to send out communications. For more information about configuring the communication templates for the email or notification you want to send, see Setting Up Communication Events.
Caution: After setting up communication rules, you must periodically run batch expiration rule processing to update the about to expire and expired statuses. The system updates the statuses and sends out the communications according to the setup. Oracle recommends that you schedule expiration rule processing to run daily.Verify that the Enabled switch is turned on for each rule. The option is active by default for a new expiration rule.
Click Save.
Setting Up Automatic Permit Extensions
After you add a permit expiration rule, you have the option to automatically extend a permit’s validity based on inspection activity. This is how it works: You define whether the extension occurs only when the inspection is completed with a pass result or any result, and specify the duration of the extension in number of days. Automatic extensions are counted toward the number of available extensions defined in the rule. Agency staff with system administrator permissions can still manually extend the expiration.
Here’s how to automatically extend a permit:
Select the option to automatically push out the permit expiration date.
In the Result field, select one of the options:
Any Result: Extend the expiration date when an inspection is completed regardless of the inspection result.
Pass Only: Extend the expiration date only when an inspection is complete with a passing result.
In the Extension Duration fields, select the number of days, months, or weeks to extend the permit.
You might have multiple inspections for a permit, in which case the system extends the permit with each completed inspection.
If you have communications set up, notifications are sent when the extended permit is about to expire or when it expires.
Associating Expiration Rules with Permit Types
After you create an expiration group, you associate the group of rules with a permit type.
Select .
Click the row for the permit type.
On the selected Permit Type page, enter the expiration group ID. You can look up the expiration group by expiration group name and description.
Click Save.
For more information about assigning rules to a permit type, see Setting Up Permit Types.
Running the Expiration Rule Process
After setting up expiration rules and adding an expiration rule group ID to the permit type definition, you must set up expiration rule processing to periodically update the expiration statuses.
Run the process that updates permit and planning application expiration statuses on the Process Expiration Rules page, which you access by selecting . Oracle recommends that you schedule expiration rules processing to run daily.
For information about setting up expiration rules processing, see Updating Application Expiration Status.
Importing Solution Packages
Public Sector Compliance and Regulation system administrators and implementation consultants use the Oracle Cloud Customer Connect to access the Public Sector Compliance and Regulation Solution Library – a collection of configurations that address common community development functionality with industry best practices, provided in the form of Solution Packages.
A solution package contains all the necessary configuration files in a compressed file format along with a metadata file.
Review the solution package contents online, download specific solutions that contain the corresponding setup data, review them and deploy those solutions to your pre-production environment for your understanding. Each solution package provides a link that allows you to download and review a white paper describing the contents of the particular solution package. You can review the white paper before you decide to download the solution package.