Retirement Assistant
The Retirement Assistant simplifies and streamlines the asset retirement process through an intuitive conversational experience that helps fixed asset accountants submit, review, and process retirement activity more efficiently. The assistant also supports the processing of retirement requests submitted through the Fixed Asset Retirement Request Assistant.
The following options are presented when you open the assistant:
- Retire Assets
- Show Retirement Requests
- Show Exception Transactions
Retire Assets
You can retire assets directly through the assistant. The guided experience walks through the required retirement details, including asset identification, retirement information, and supporting inputs needed to process the request. This reduces manual navigation and simplifies the overall retirement process.
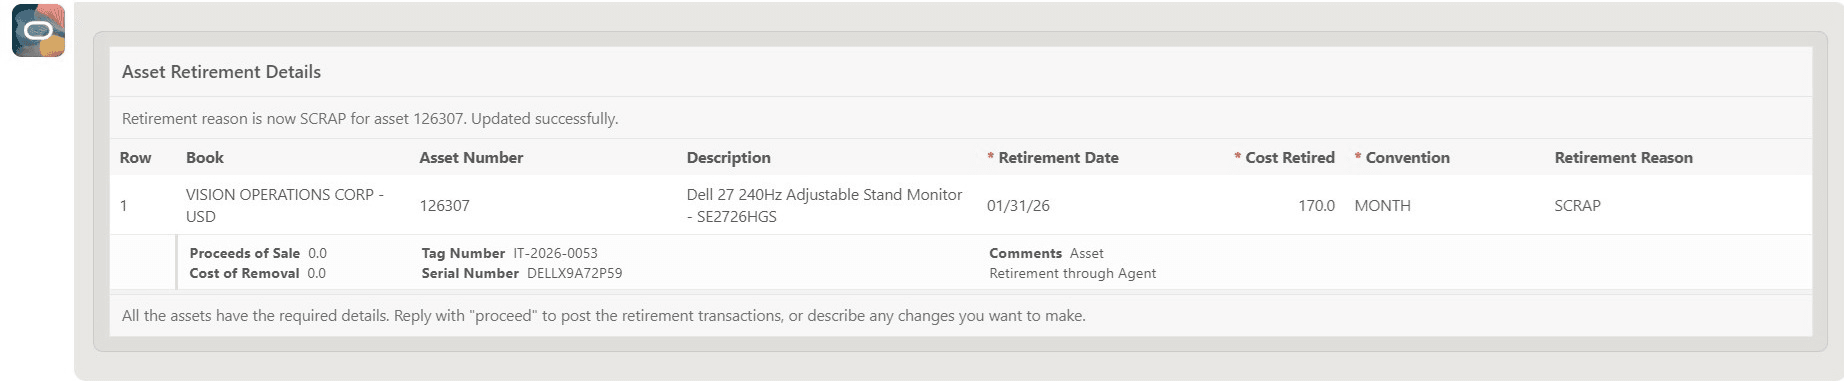
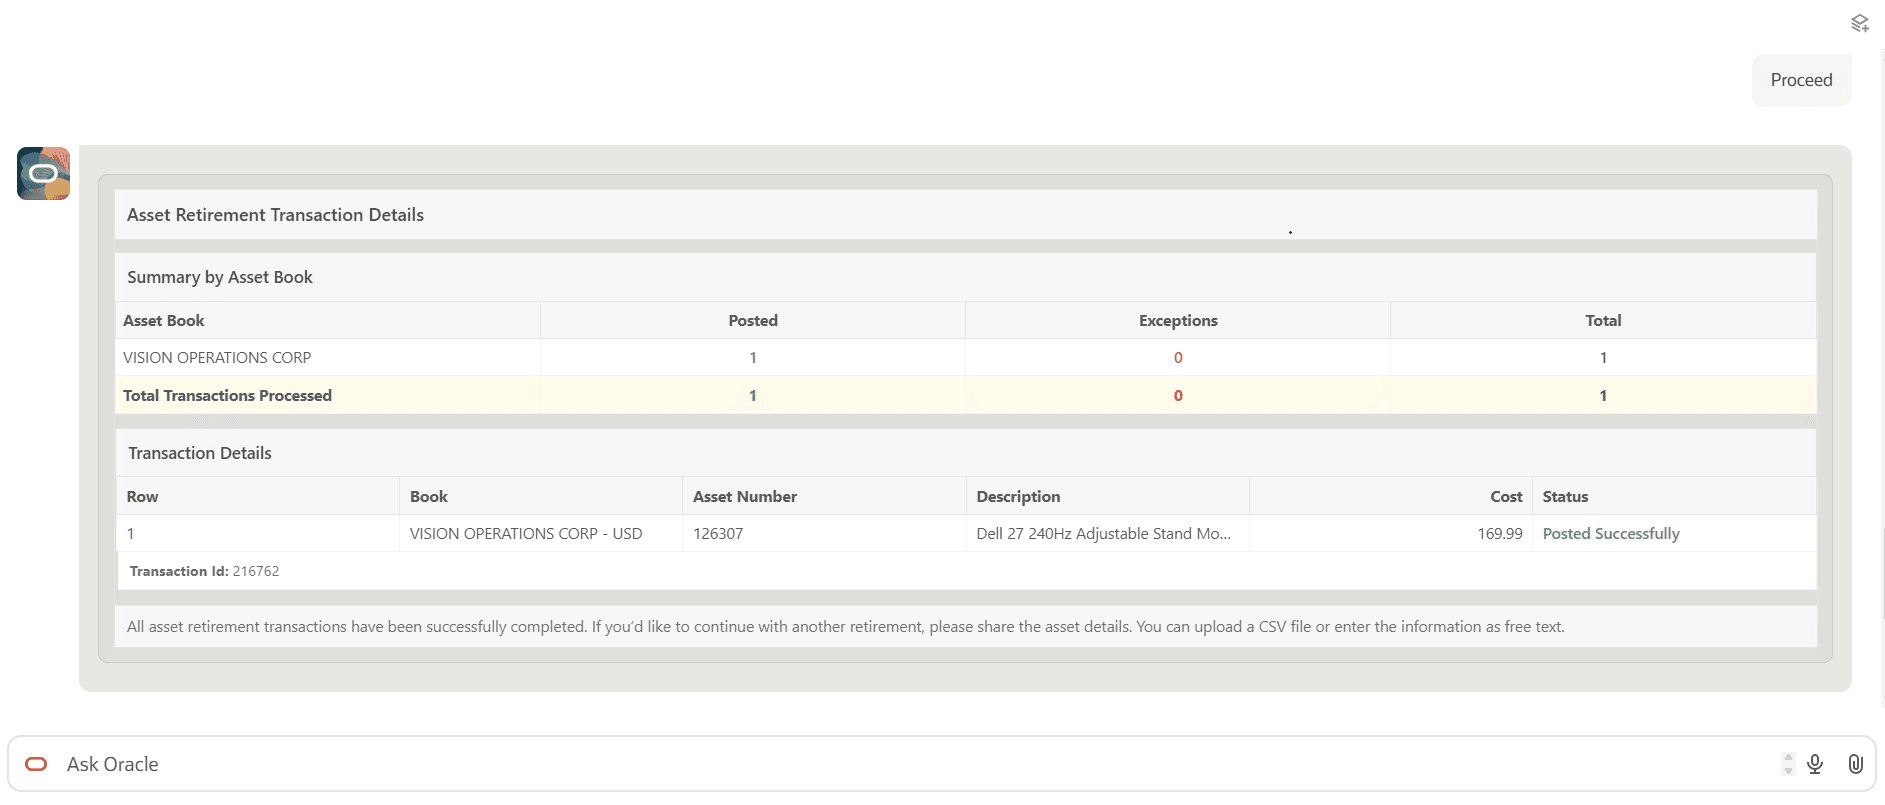
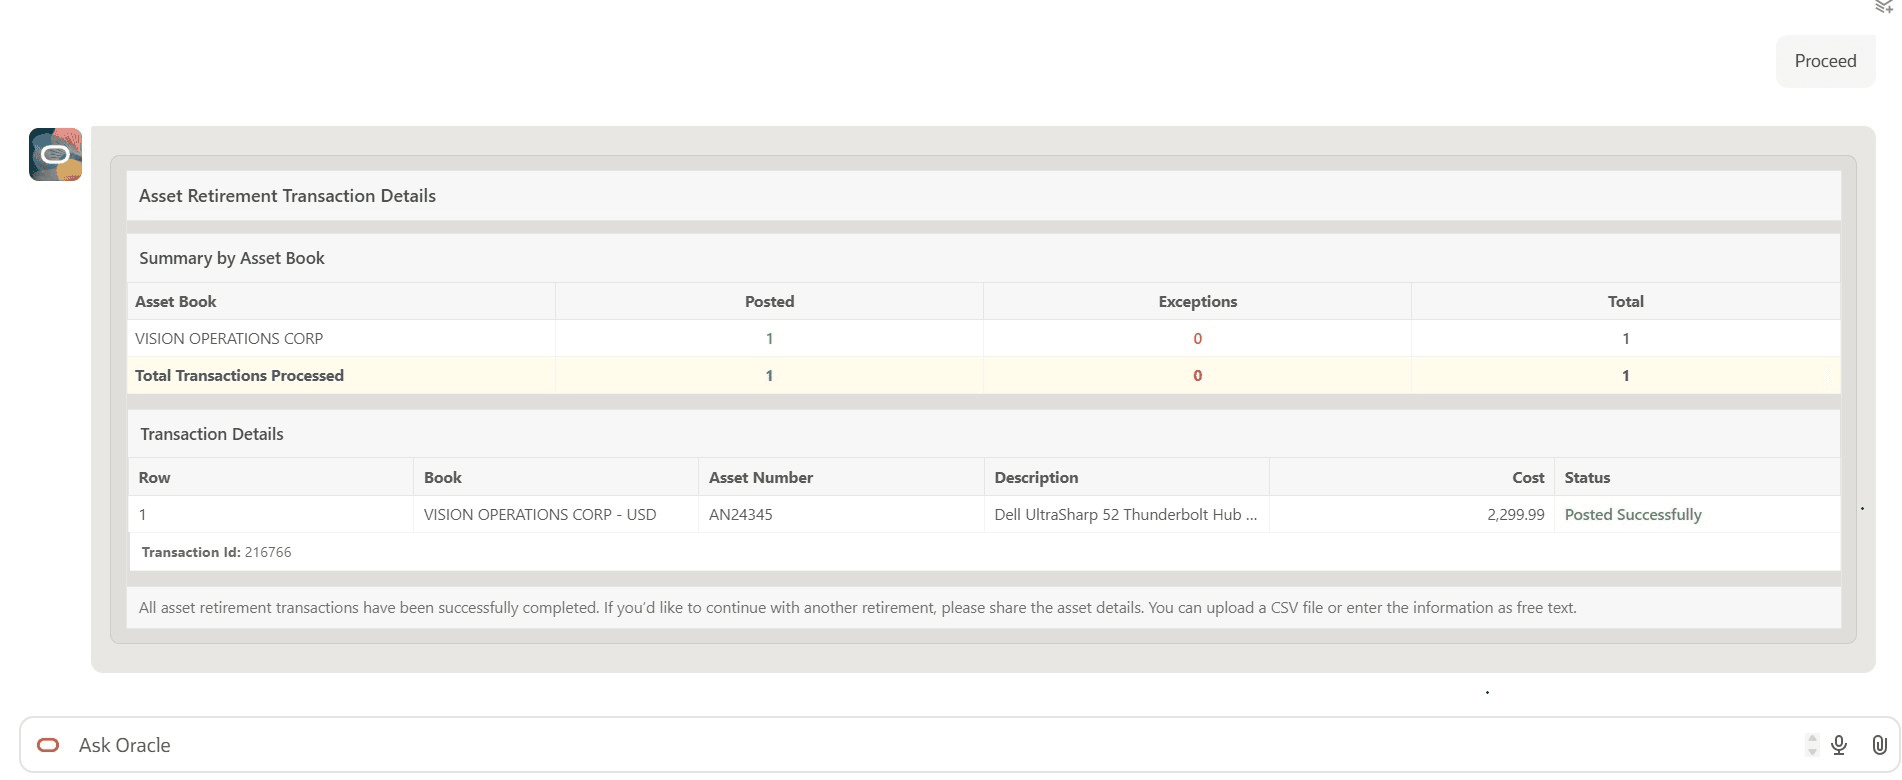
After entering the required retirement details for each asset, including Retirement Date and Retirement Convention, you can optionally provide additional information, such as Proceeds of Sale, Cost of Removal, and Retirement Reason, before posting the retirements. The assistant then displays the posting status for each asset to support review and validation. If any retirements fail during processing, you can review the failed retirements, update the necessary information, and resubmit the process.
Note: Retirement details can also be provided by pasting text for one or more assets or by uploading a file into the assistant.
Show Retirement Requests
Fixed asset accountants can review and process retirement requests that were previously submitted through the Retirement Request Assistant. You can review retirement details, update fields such as Retirement Date, Retirement Convention, Proceeds of Sale, and Cost of Removal, and then post the retirement transactions directly from the assistant.
Note: Users can only access the Retirement Request submissions for asset books for which they have data access.
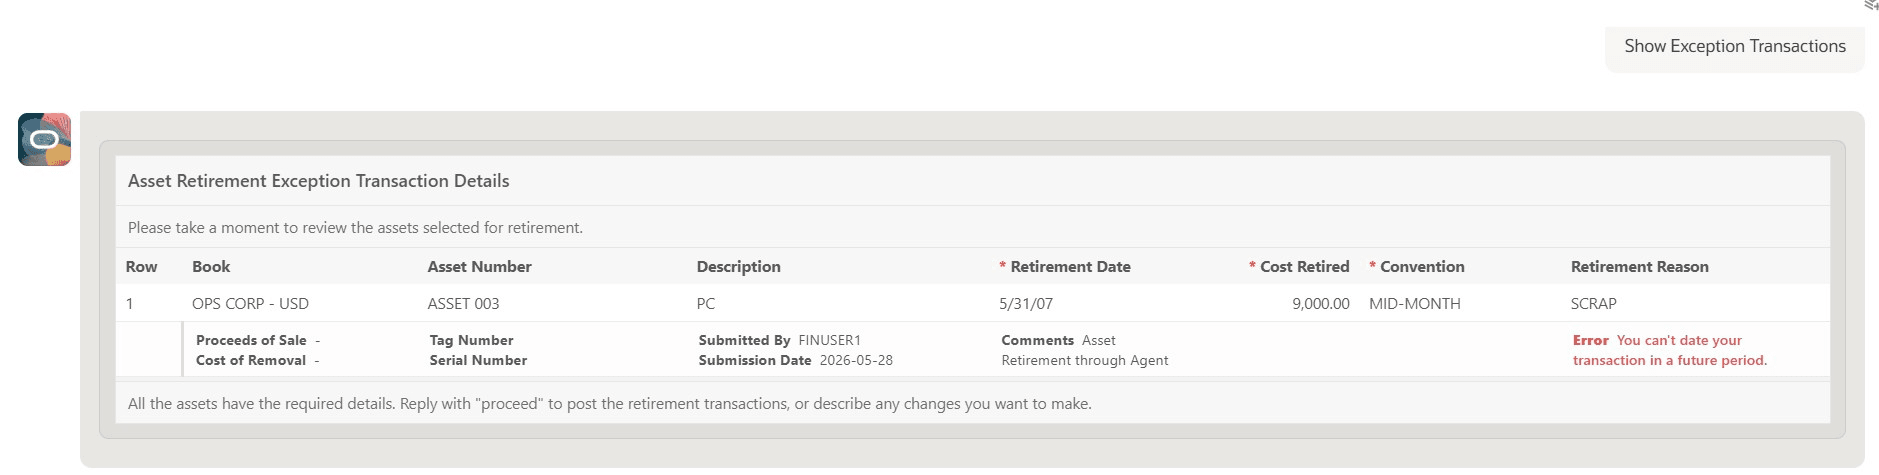
Show Exception Transactions
You can review retirement transactions that were previously submitted through the Retirement Assistant but failed during processing due to validation or business rule errors. The assistant displays the retirement transactions that require attention, along with the associated error information. You can update the necessary retirement details, correct the identified issues, and resubmit the transactions directly from the assistant. This capability helps to efficiently resolve processing exceptions and complete retirement transactions without restarting the retirement process.
Business benefits include:
- Simplifies the asset retirement process through a guided experience.
- Reduces manual effort and simplifies complex retirement activities, helping complete retirements faster and with greater accuracy.
- Built-in validation and structured data collection help reduce errors.
- Reduces rework by allowing failed retirements to be corrected and completed without starting over.
Steps to enable and configure
You don't need to do anything to enable this feature.
Tips and considerations
- For the best user experience, manually resize the assistant window to full screen.
- Enter Help in the assistant to access the help screen and view user guidance.
- Only full cost retirement is supported. Unit retirement, partial retirement, source line retirement, and reinstatements are not supported.
- The assistant does not support displaying alternate ledger currencies.
- No workflow approvals are triggered when retirement transactions are processed through this assistant, even if the asset book is enabled for Retirement Approvals. This behavior applies to both retirements created directly within the assistant and retirements originating from the Retirement Request Assistant.
- Entry of Descriptive Flexfield (DFF) details is not supported when performing retirements through this assistant.
- Retire up to ten assets in a single interaction. Create additional interactions if you have more than ten assets to retire.
- Natural language conversation is English-only.
Key resources
Explore AI Agents for Oracle Fusion Cloud Applications
How do I use AI Agent Studio?
Access requirements
This Retirement Assistant requires data security access to asset book to create retirements, and to view and process retirement requests submitted through the Retirement Request Assistant. Access to asset book data can be granted through the custom job role. If the user already has an Assets job role, then the existing book access granted to that role is sufficient. The job role should have the Retire Fixed Asset data security policy.
To provide user access the Retirement Assistant, complete these steps:
- Navigate to the Security Console.
- Create a new custom job role with the following details:
- Role Name: Specify a name, for example, Retirement Agent Custom Role
- Role Code: Specify a code, for example, RETIREMENT_AGENT_CUSTOM_ROLE
- Role Category: Financials – Job Roles
- Enable the Enable Permission Groups option
- Navigate to Function Security Policies and add the following privileges:
- Access FSCM Integration Rest Service
- Retire Fixed Asset
- View Fixed Asset Books
- Post Mass Fixed Asset Retirement
- Navigate to Role Hierarchy > Roles and Permission Groups and add the following roles:
- ORA_FA_FIXED_ASSET_RETIREMENT_ASSISTANT_DUTY
- Add the required users to the custom job role, then save and submit the role.