Generate Workforce Schedule Introduction
As a schedule manager, you can generate workforce schedules for workers in the specified staffing departments that you support. Generate schedules for only fixed-time work patterns, open shifts matching the workload and fixed-time work patterns, or automatically assigned schedules for all workers in the staffing department.
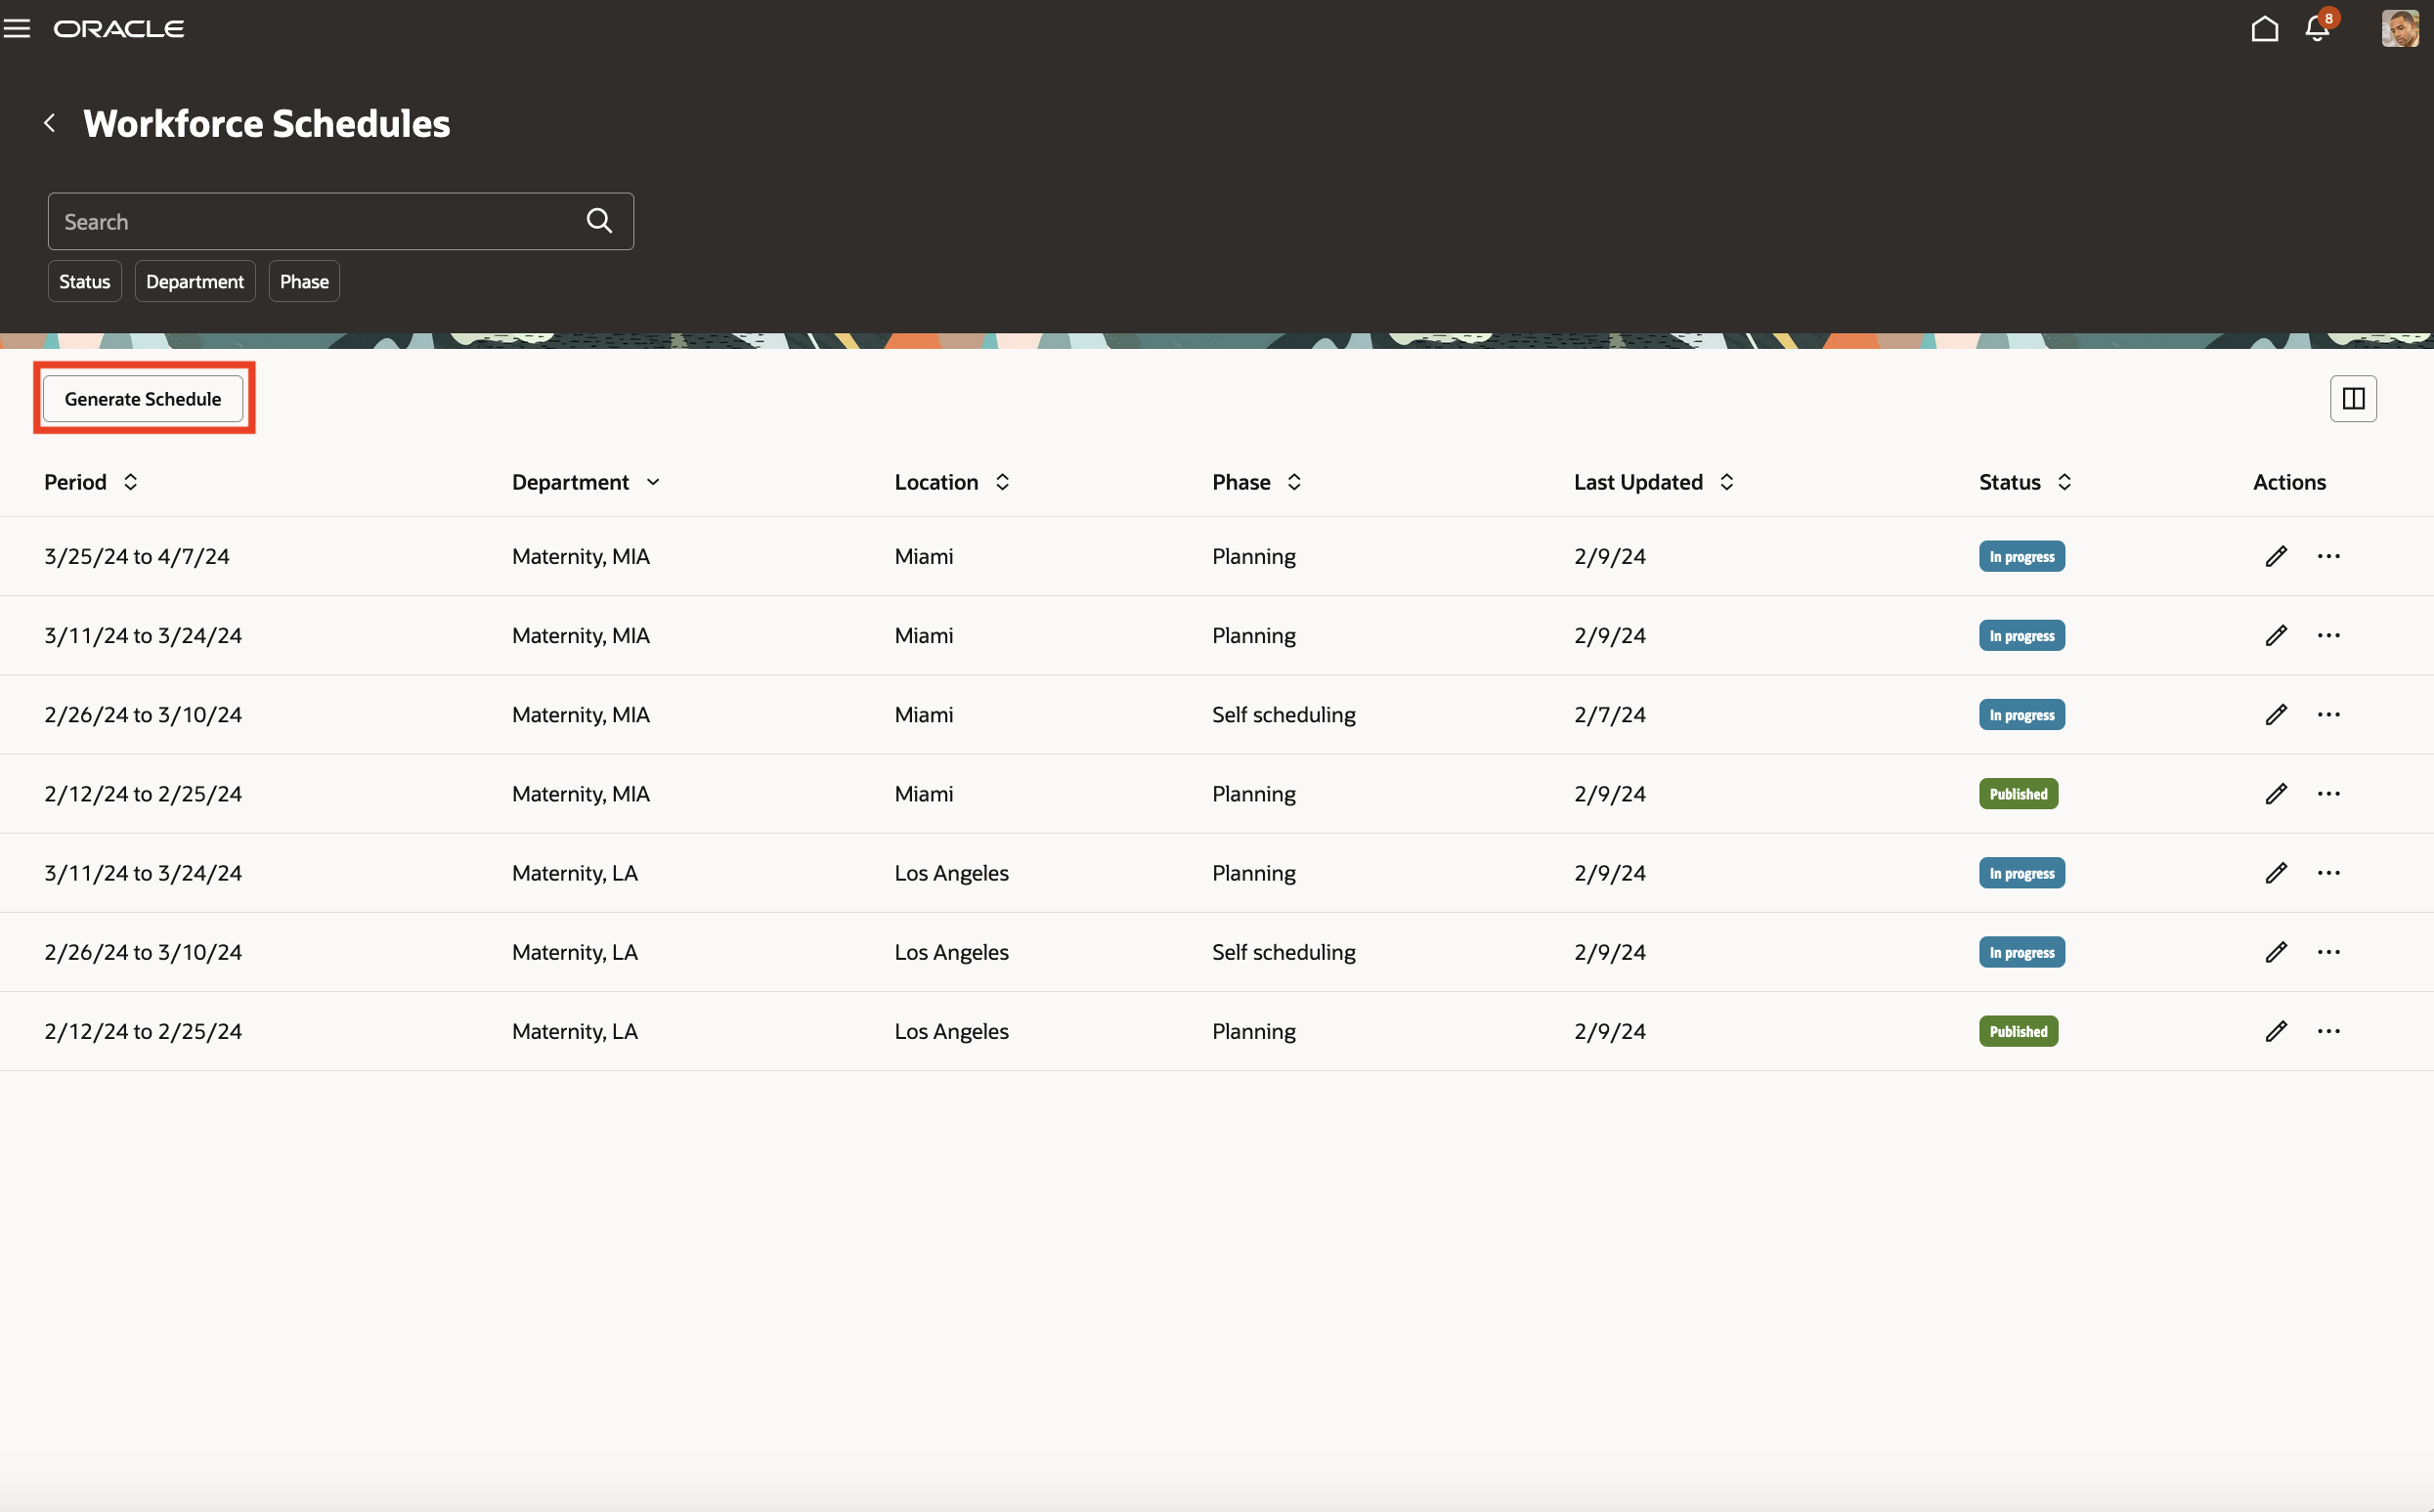
Workforce Schedules Page with the Generate Schedule Button
The Generate Schedule button opens the Generate schedule drawer where you select the appropriate schedule generation profile, staffing departments, scheduling period, and schedules.
| Generate Schedule Option | Description |
|---|---|
| Profile |
Drop-down list with all of the schedule generation profiles where you're listed as a schedule manager. |
|
Staffing departments |
List of staffing departments associated with the selected schedule generation profile for which you're responsible for. |
|
Schedule period |
List of schedule periods that you can generate schedules for. The process won't generate schedules for periods that already have published schedules. |
|
What schedules do you want to generate? |
|
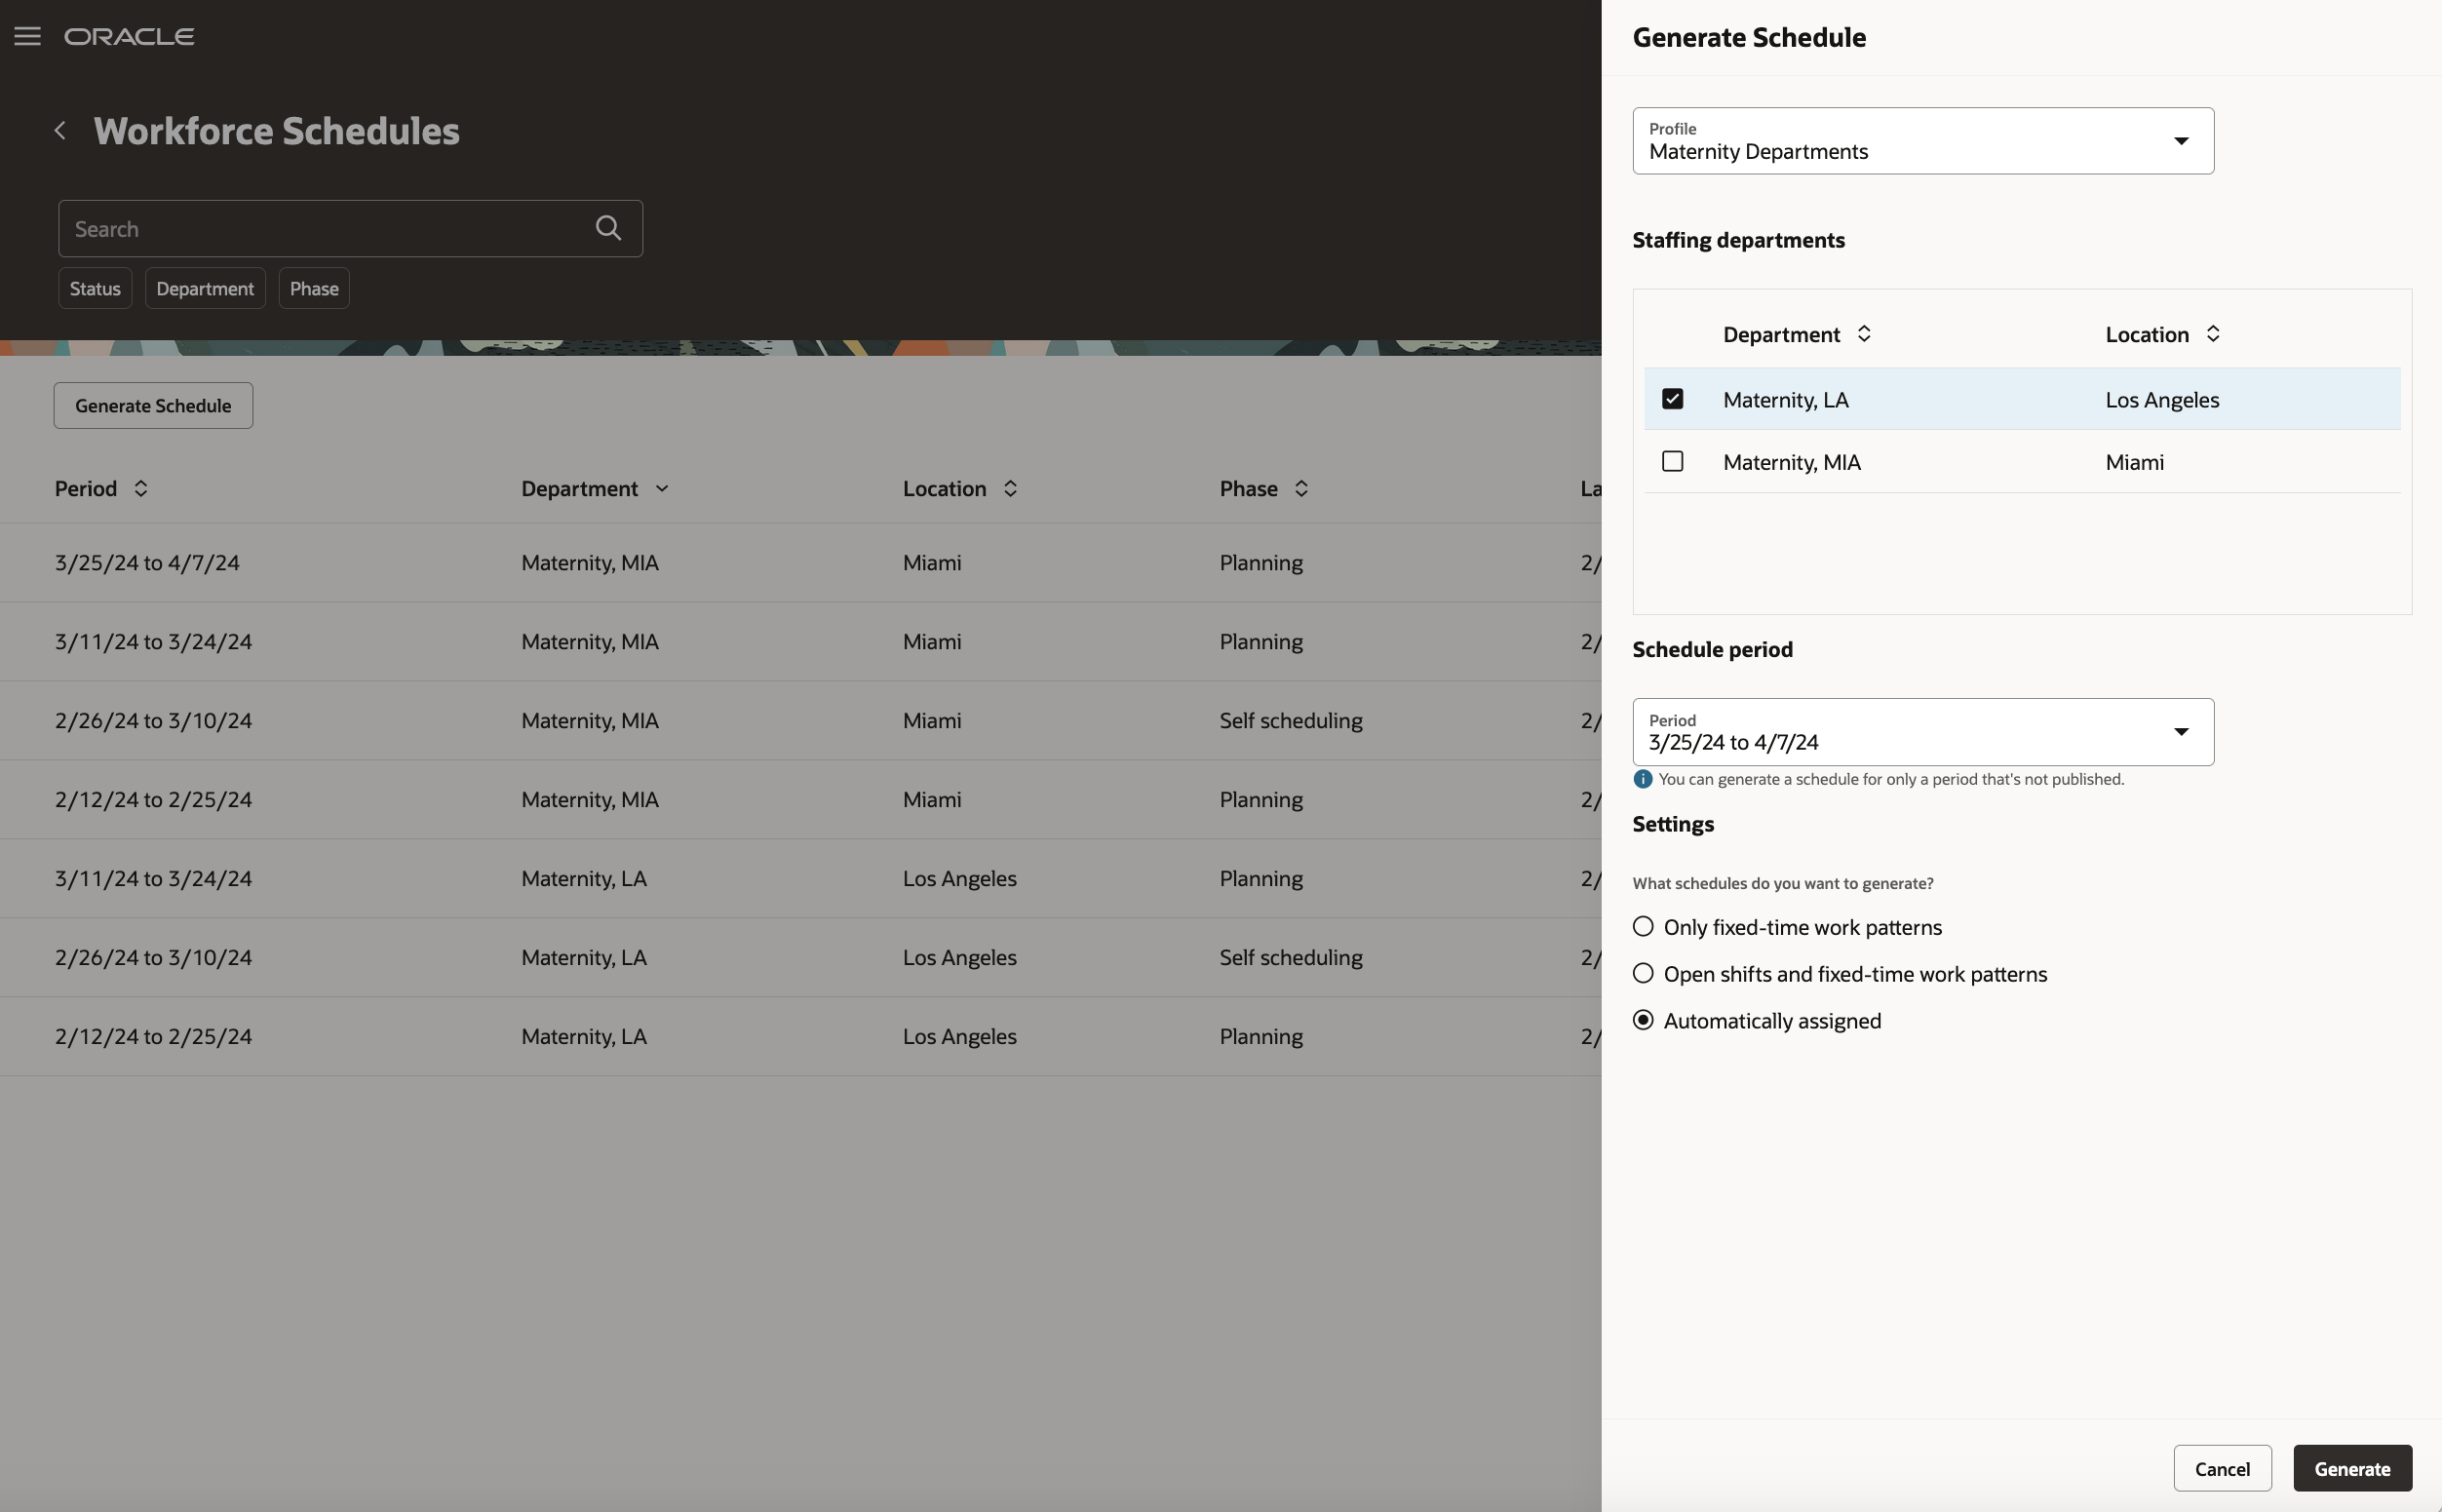
Generate Schedule Drawer Opened from the Workforce Schedules Page
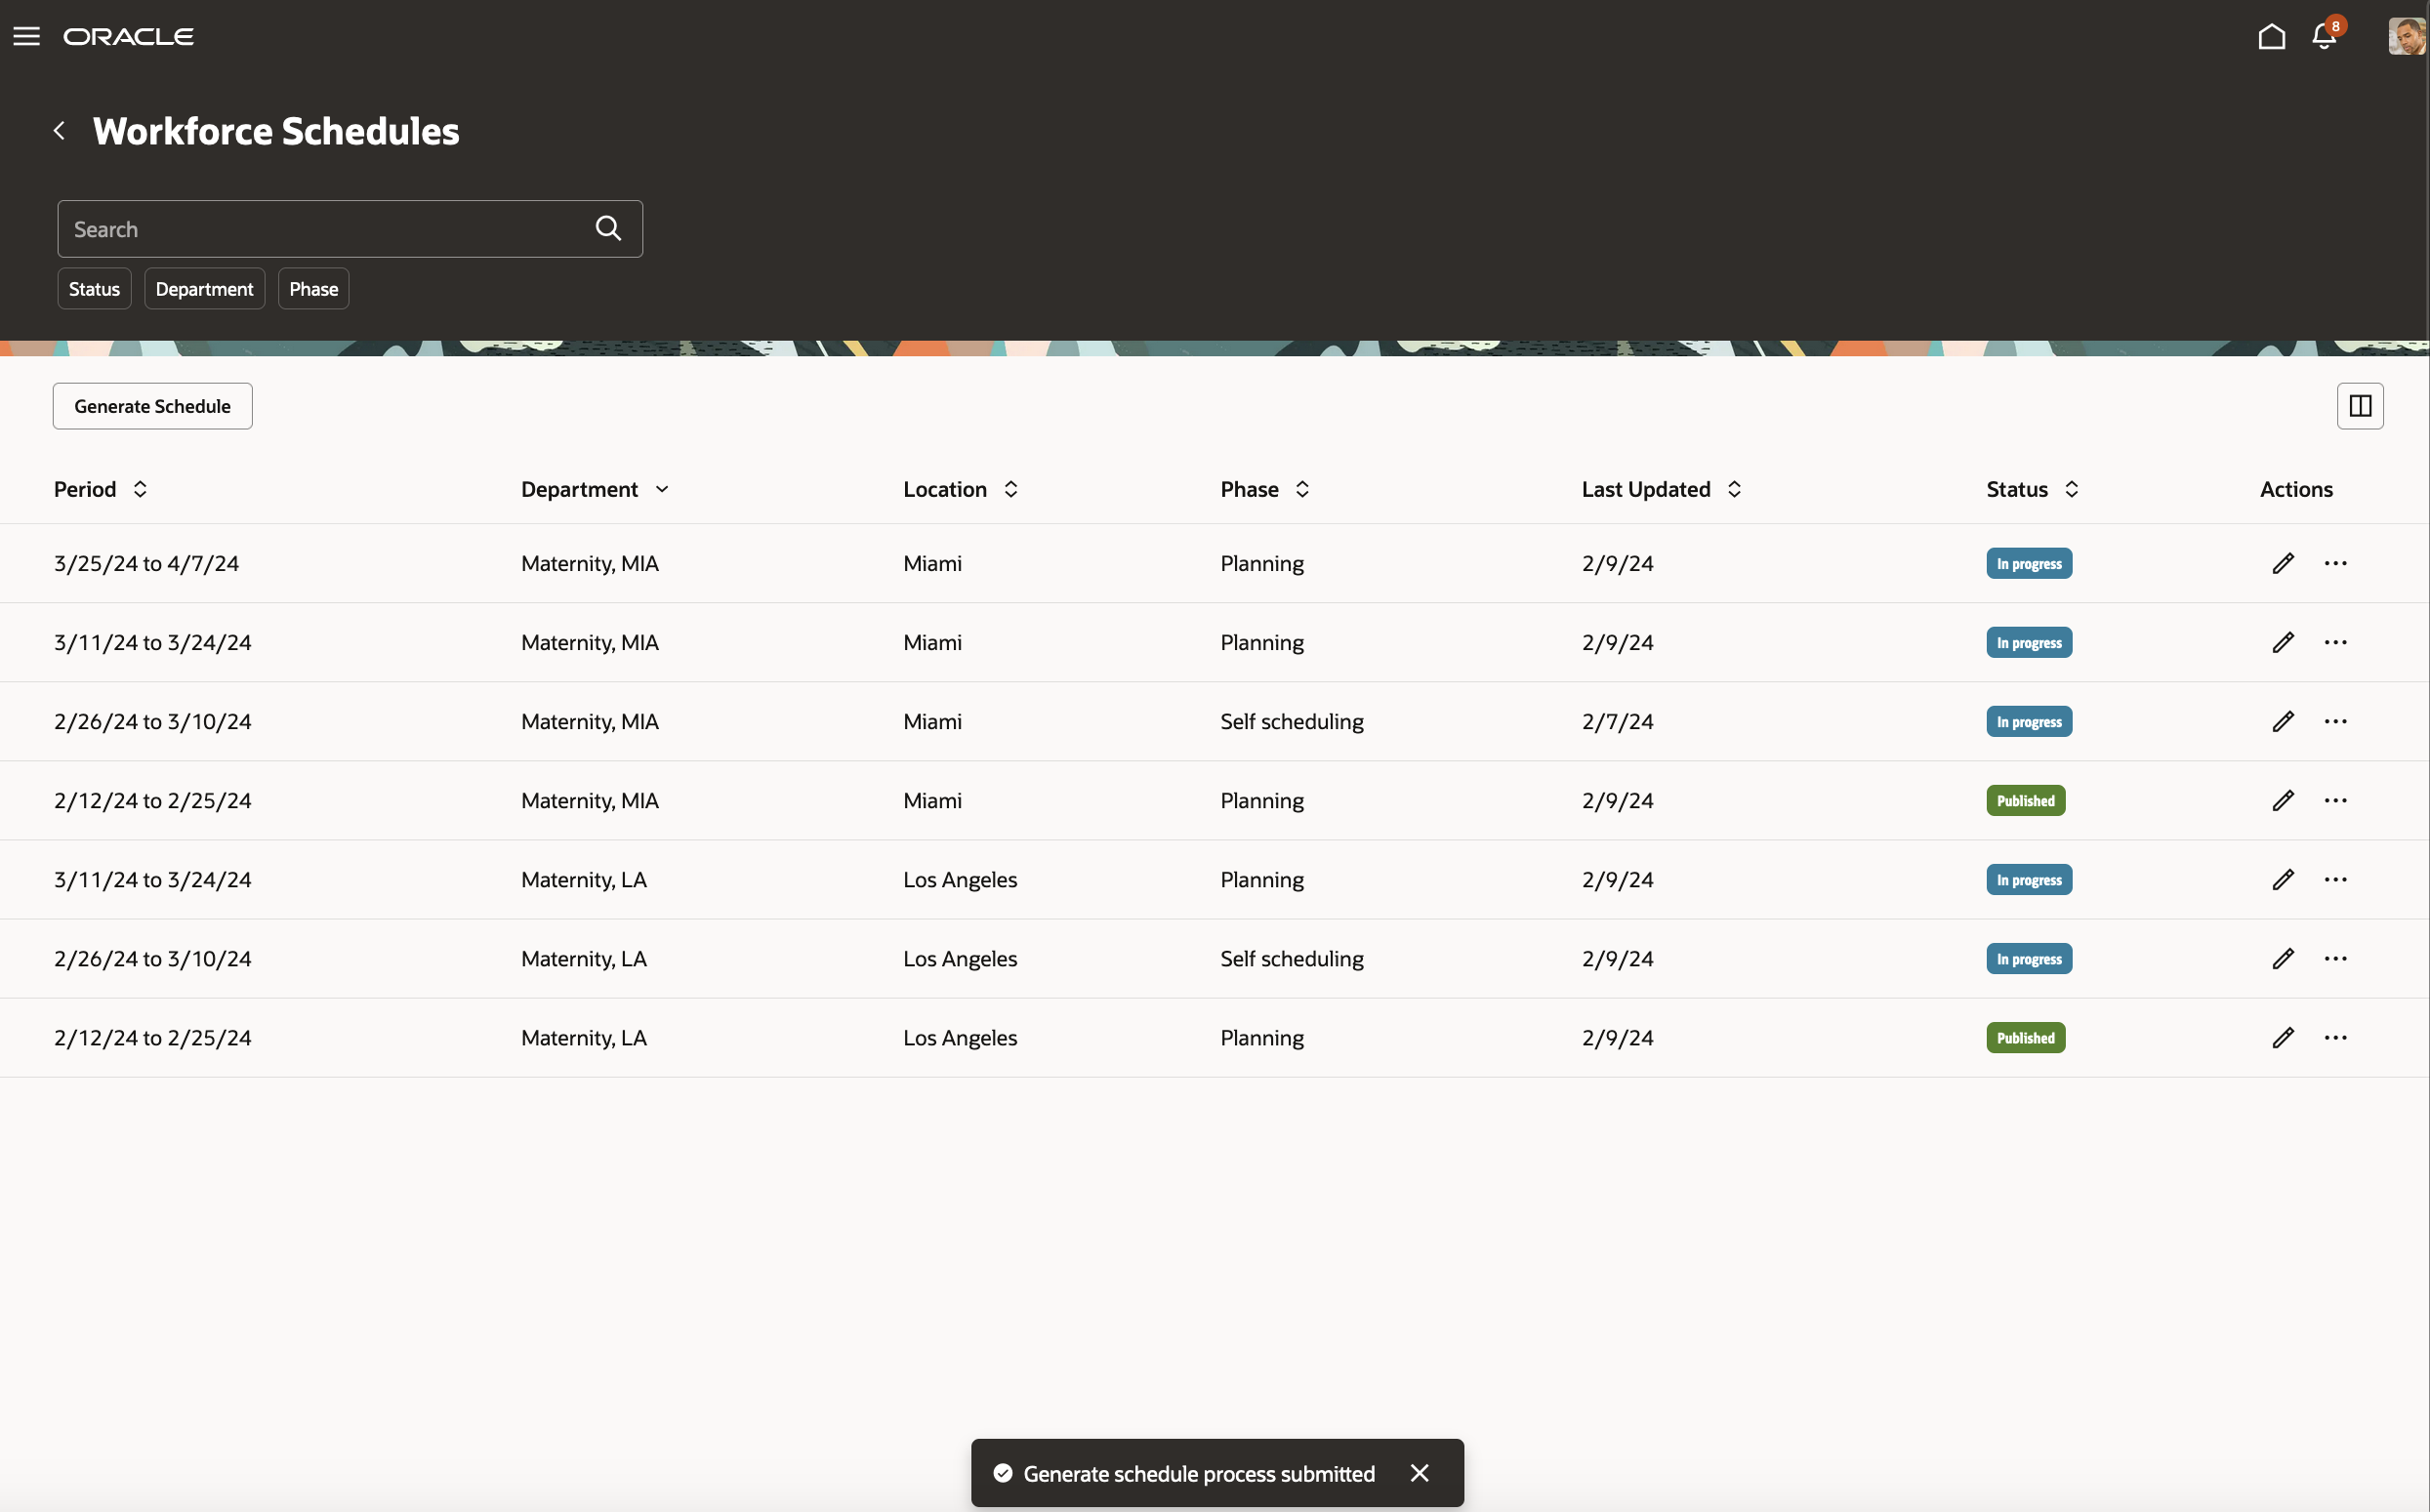
Generate Schedule Process Submitted Confirmation Message
This feature lets you more effectively schedule workers to provide appropriate coverage for staffing departments while balancing workload.
Steps to Enable
- Optionally add codes to the Shift Types extended lookup and edit existing extended names, since they're the values people see on the various shift and scheduling pages.
- In the Setup and Maintenance work area, on the Tasks panel tab, click Search.
- On the Search page, search for and click the Manage Extended Lookup Codes task.
- On the Extended Lookup Codes page, scroll to and select the Workforce Schedule Shift Types lookup type.
- In the Workforce Schedule Shift Types: Extended Lookup Codes section, add your codes. You can also edit the extended names.
- Review the additional information for the delivered shift types and add it for any shift types you added. The context value for all workforce schedule shift types needs to be Workforce Schedule Shift Type Properties. By default, the Percentage of productivity value is 100, but you can change it to match your policies.
- Save your changes.
- Optionally create your shift categories.
- In the Setup and Maintenance work area, on the Tasks panel tab, click Search.
- On the Search page, search for and click the Manage Common Lookups task.
- On the Manage Common Lookups page, search for and select the ORA_HTS_ENT_SHIFTS_CATEGORY lookup type.
- In the ORA_HTS_ENT_SHIFTS_CATEGORY: Lookup Codes section, edit and add categories, as appropriate.
- Save your changes.
- Create shifts using the My Client Groups > Workforce Scheduling, Shifts quick action. Be sure that times and durations are in 15-minute intervals.
- Create work pattern types. Be sure break durations are in 15-minute intervals.
- In the Setup and Maintenance work area, on the Tasks panel tab, click Search.
- On the Search page, search for and click the Work Pattern Types task.
- From the Work Pattern Types page, create and save your work pattern types.
- Optionally create work pattern templates using the My Client Groups > Workforce Scheduling, Work Pattern Templates quick action. Be sure that times and durations are in 15-minute intervals.
- Create work patterns using the My Client Groups > Workforce Scheduling, Work Patterns quick action. Be sure that times and durations are in 15-minute intervals.
- Create schedule generation profiles using the My Client Groups > Workforce Scheduling, Schedule Generation Profiles quick action.
Key Resources
For more information about shifts, work pattern types, and work patterns, see the Workforce Scheduling chapter of the Implementing Global Human Resources guide in Oracle Help Center.
For more information about scheduler generation profiles, see the What's New feature: Schedule Generation Profile Introduction.
Access Requirements
Here are the privileges that schedule managers need to generate and manage workforce schedules:
| Privilege | Code | Type | Description |
|---|---|---|---|
|
Generate Workforce Schedule |
HTS_GENERATE_WORKFORCE_SCHEDULE |
Function |
Allows generation of workforce schedules. |
|
Manage Workforce Schedule |
ORA_HTS_MANAGE_WORKFORCE_SCHEDULE |
Aggregate |
Allows users to manage the workforce schedules for which they are responsible. |
|
Use Workforce Labor Optimization |
HTS_USE_WORKFORCE_LABOR_OPTIMIZATION |
Function |
Allows use of workforce labor optimization features. |