Managing Workforce Schedules
As a schedule manager, you can now generate and manage schedules for your staffing departments using the Workforce Schedules quick action under My Client Groups > Workforce Scheduling.
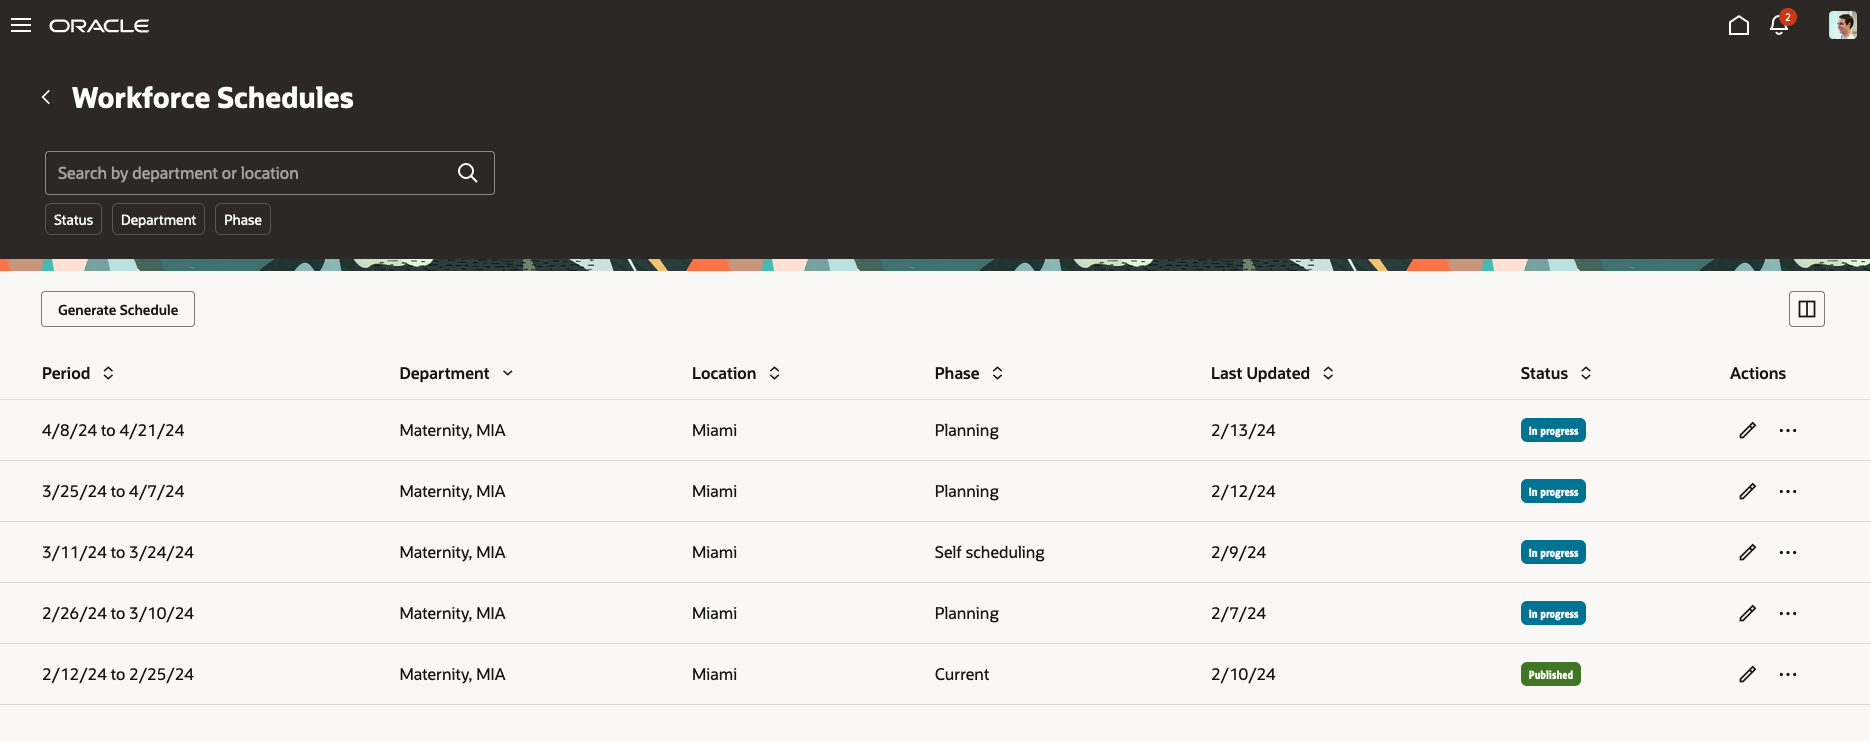
Workforce Schedules Page
You can specify which columns to show and hide on the page to give you the only information you need.
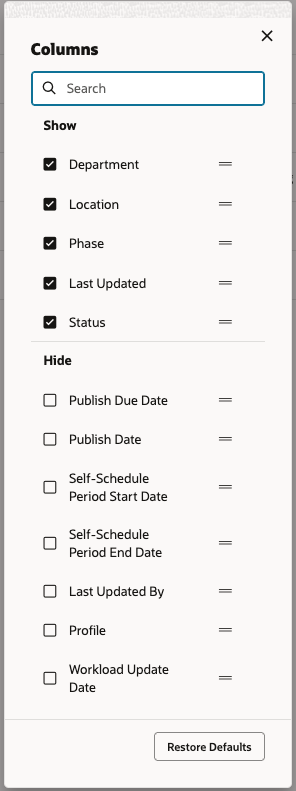
Columns to Show and Hide on the Workforce Schedules Page
You can filter the listed schedules by status, such as Generated or Published, department, and phase, such as Current, Completed, Completed, Planning, Overdue, or Self-scheduling.
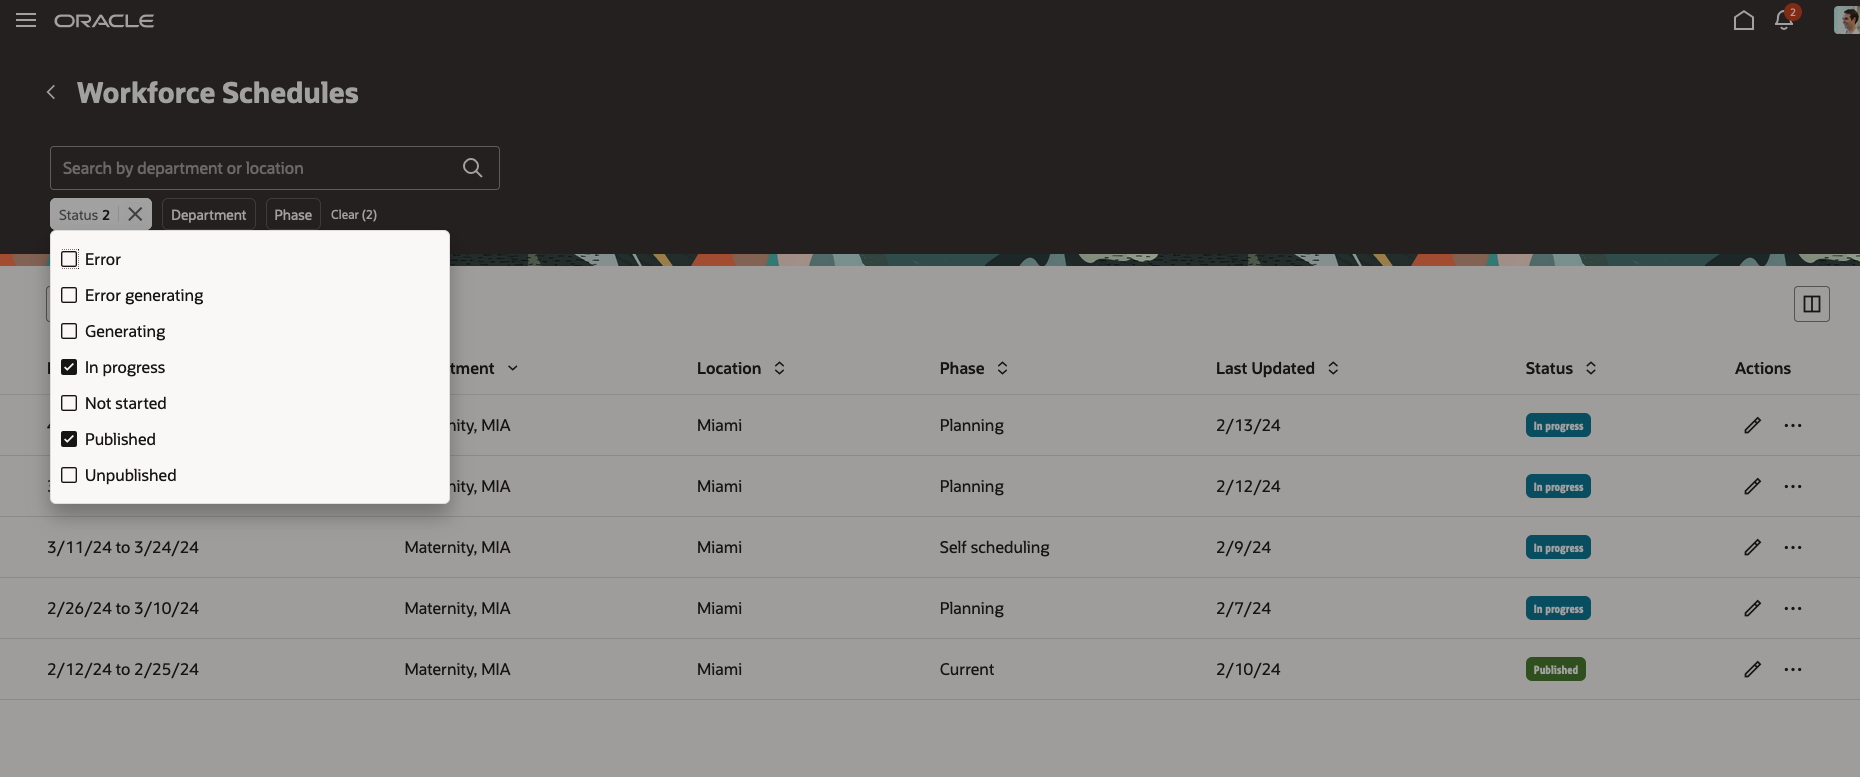
Workforce Schedules Page Showing the Status Filters
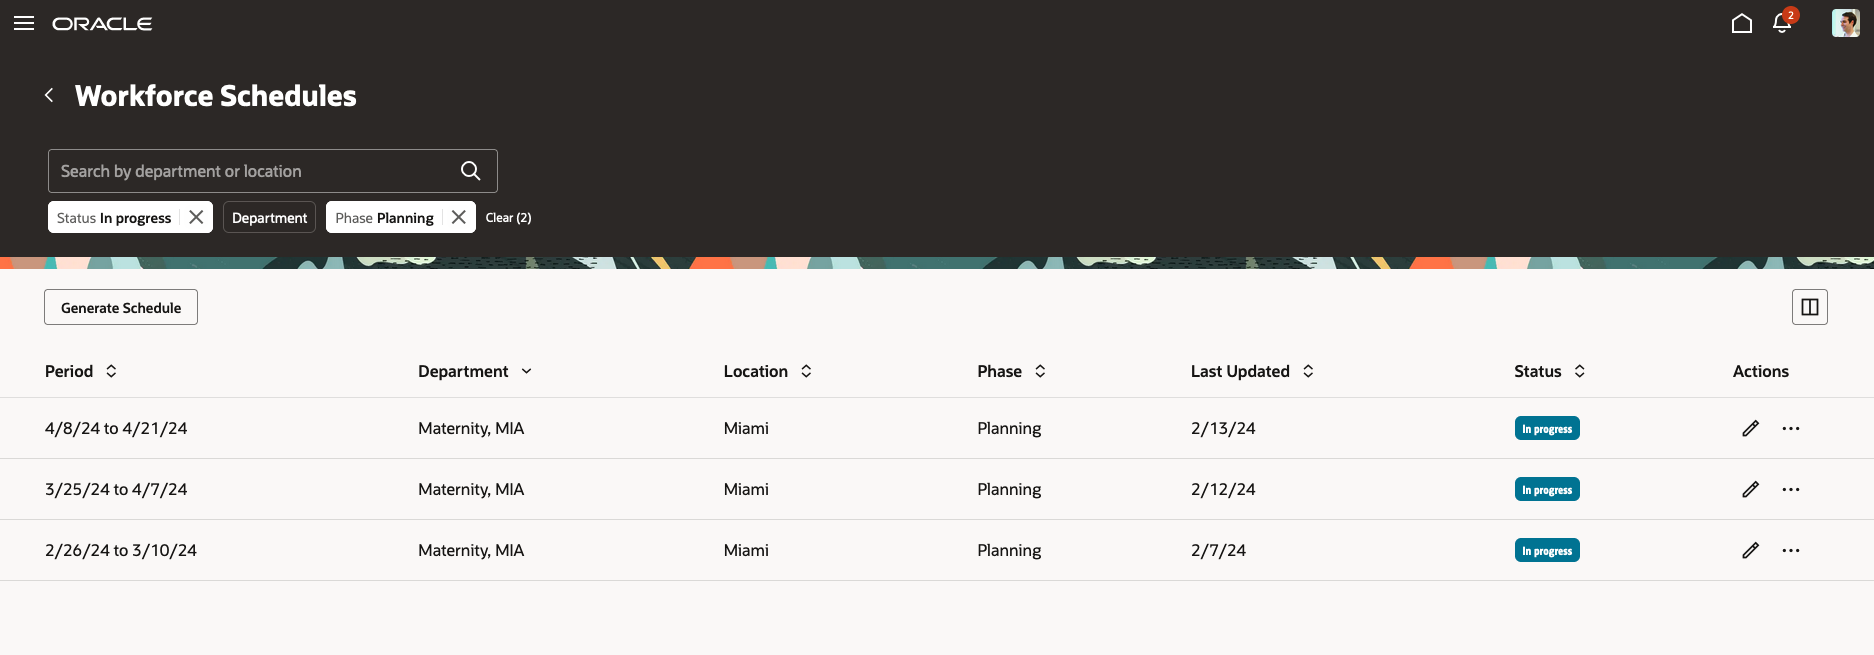
Workforce Schedules Page Filtered to Show Only Schedules with an In Progress Status and Planning Phase
And you can view a schedule and any associated notes. You can also unpublish any published future schedules.
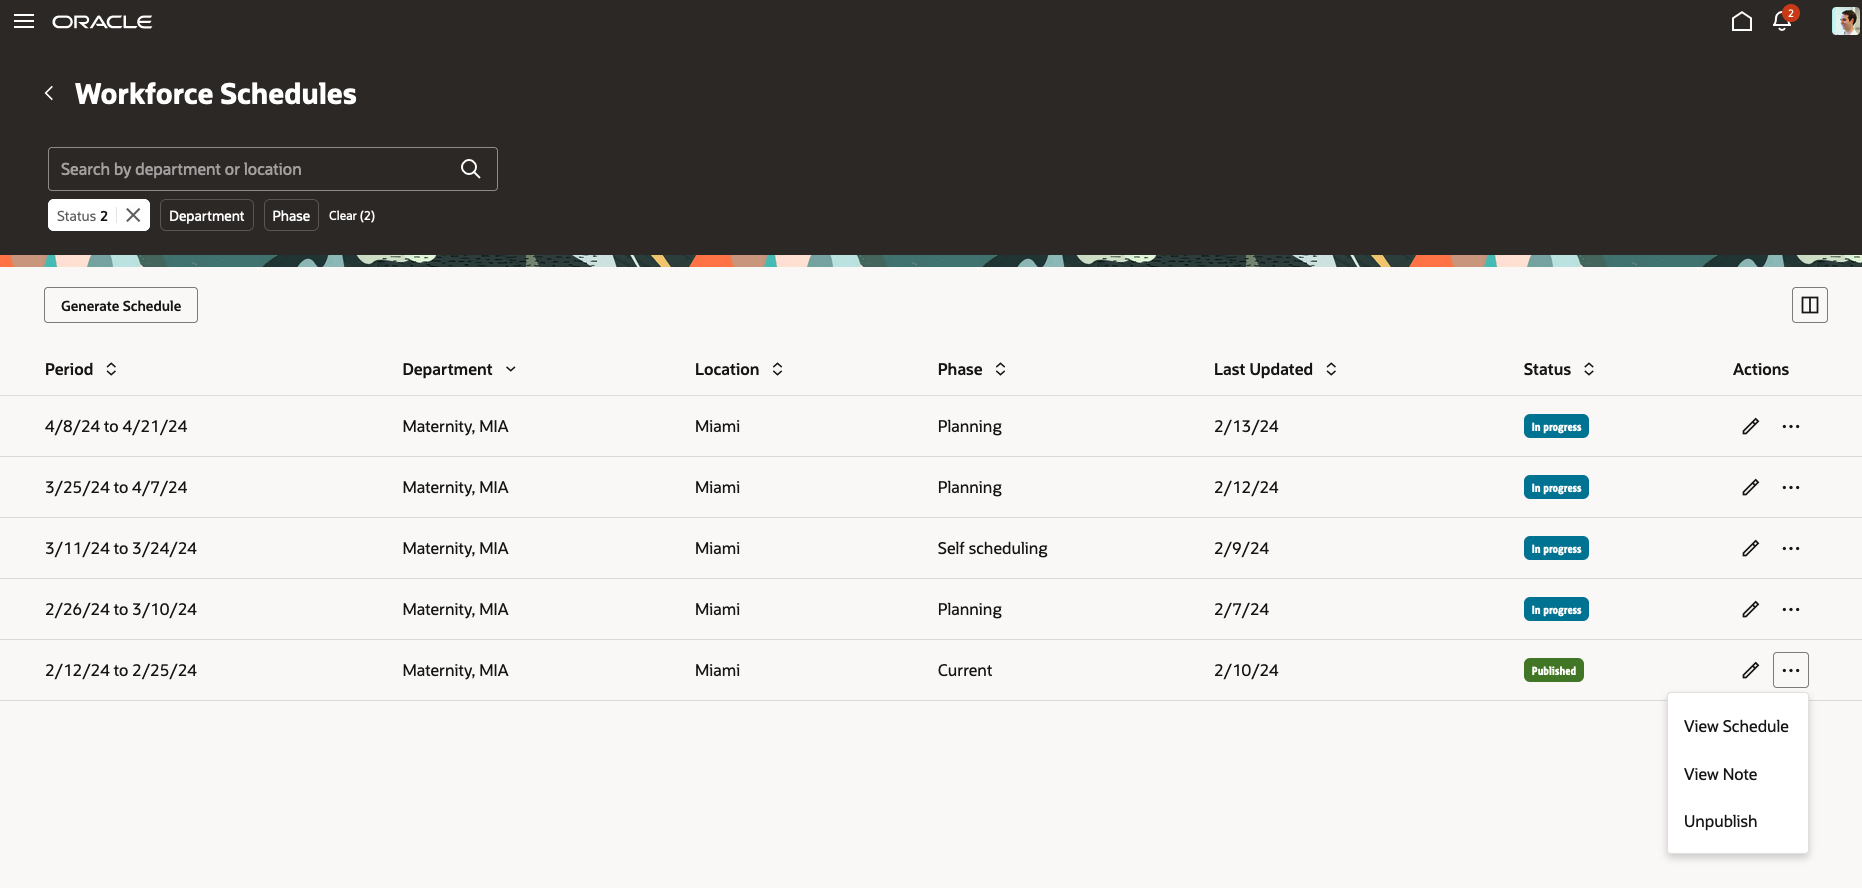
Row-Level Actions Available on the Workforce Schedules Page

Workforce Schedule Page Header for an Unpublished Schedule
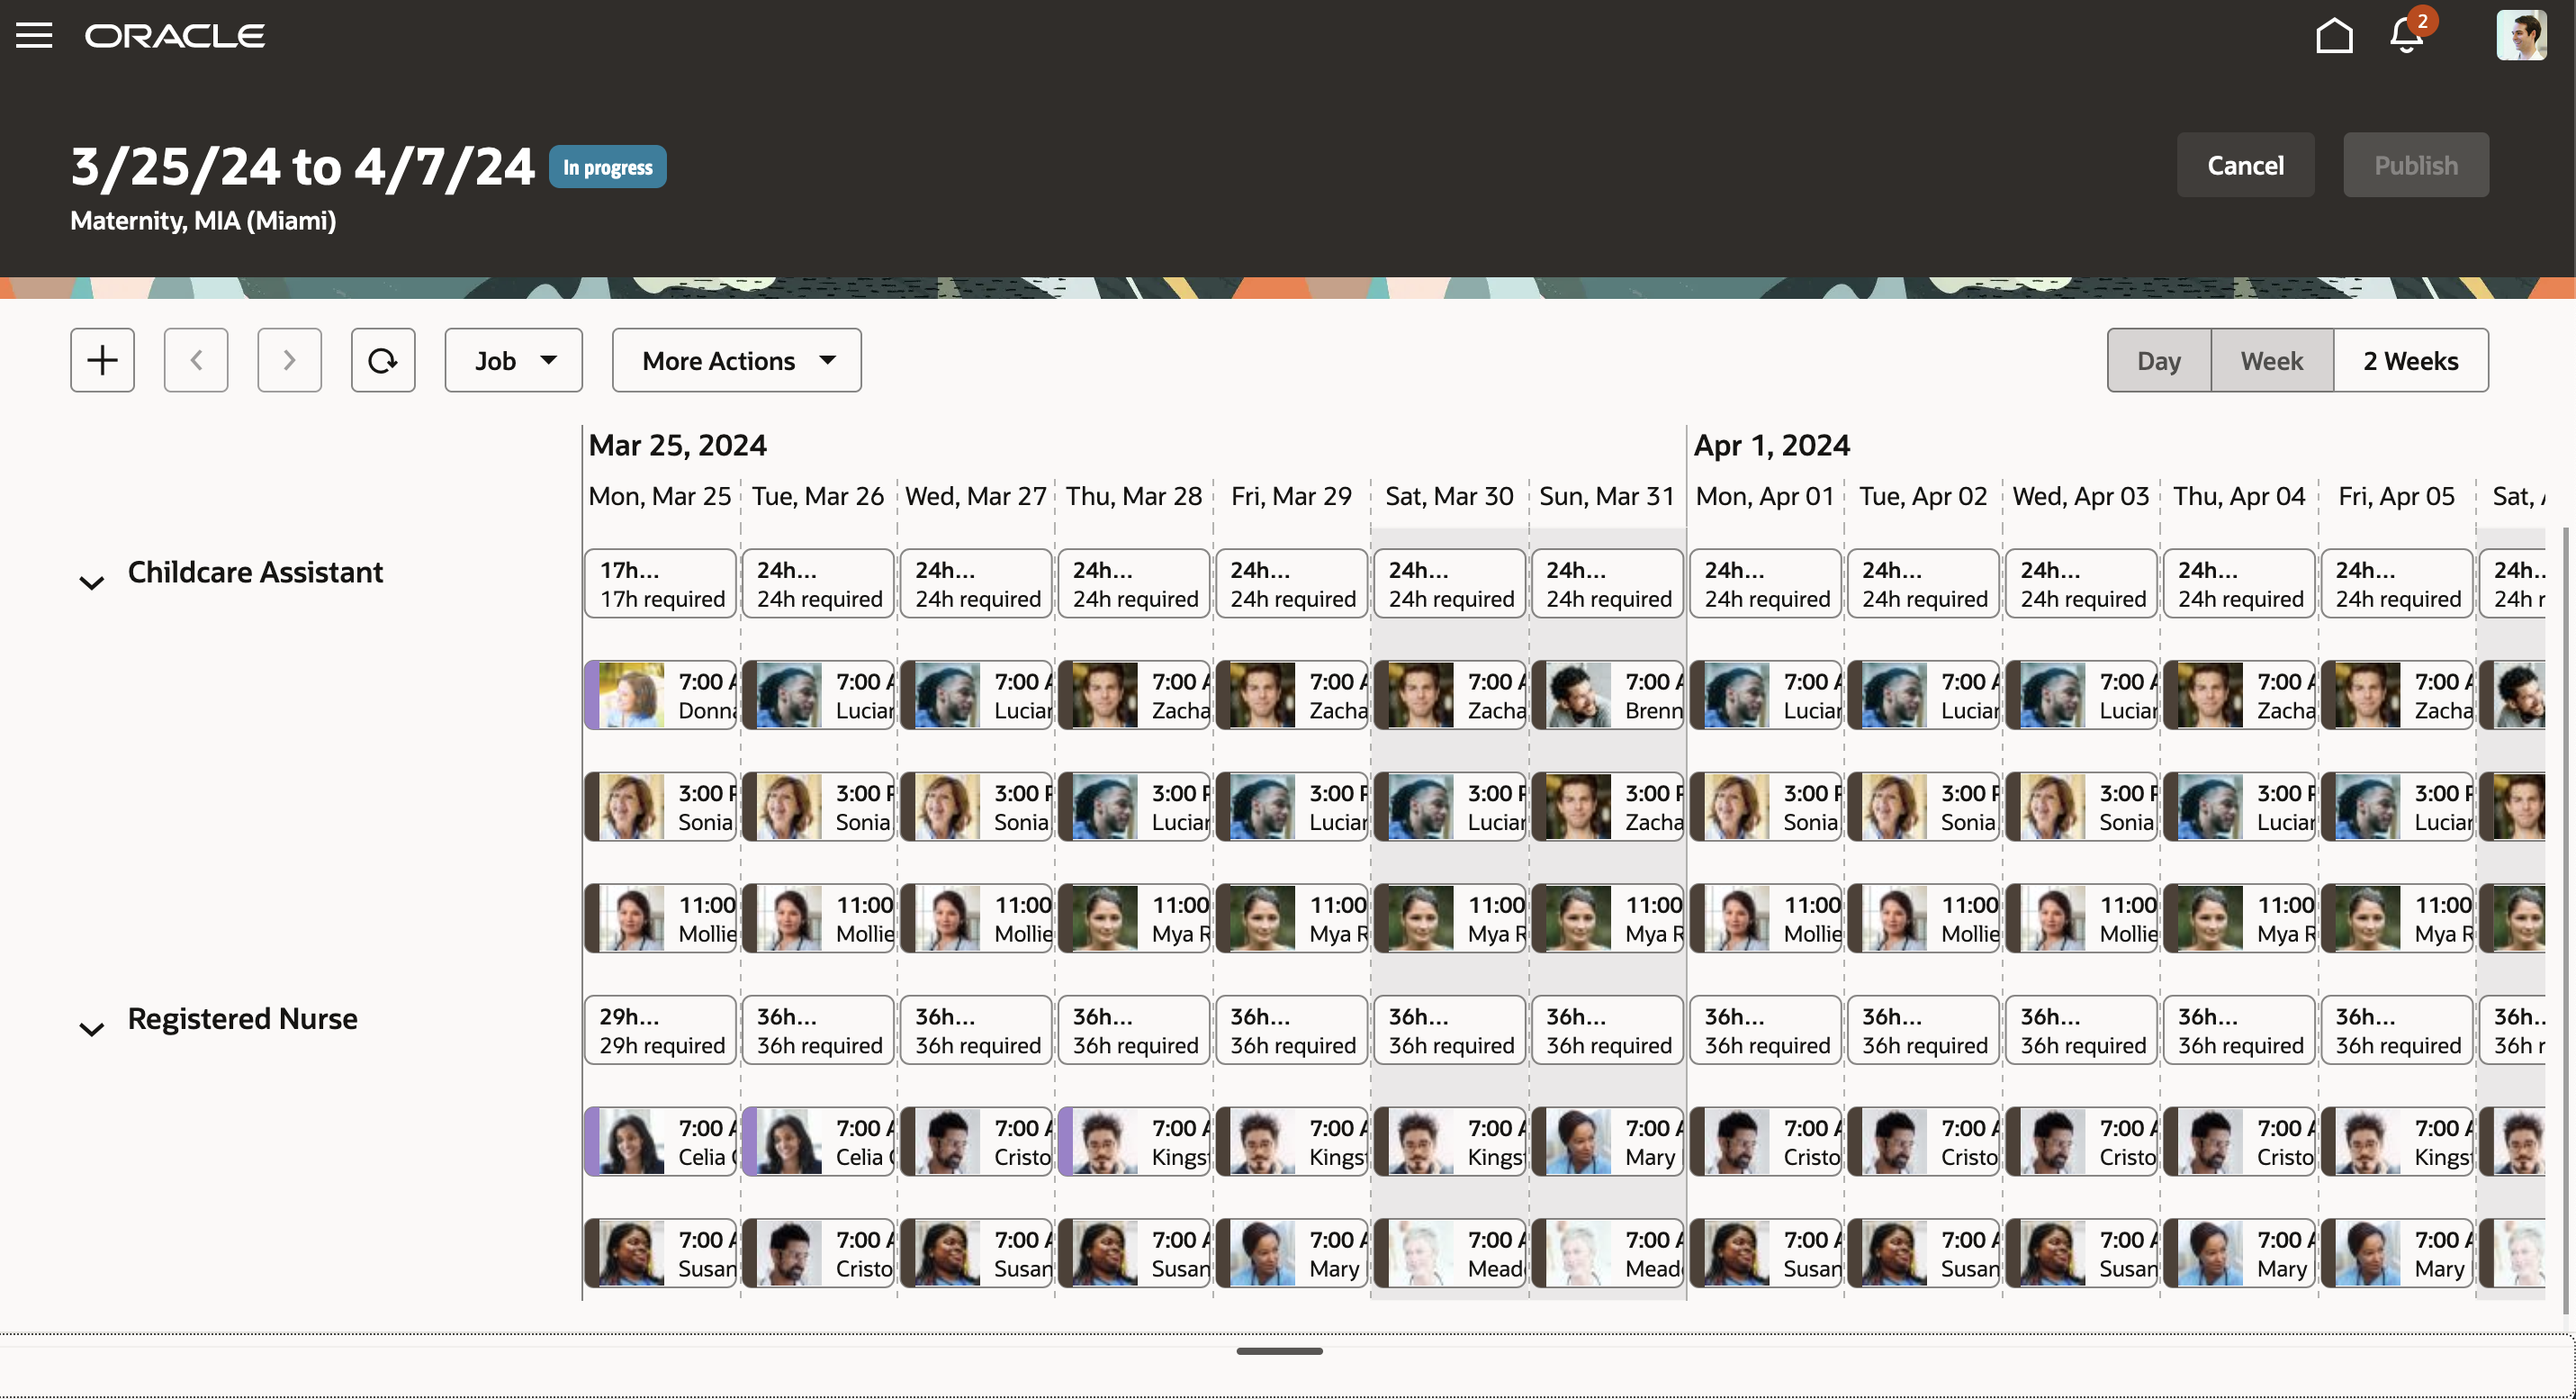
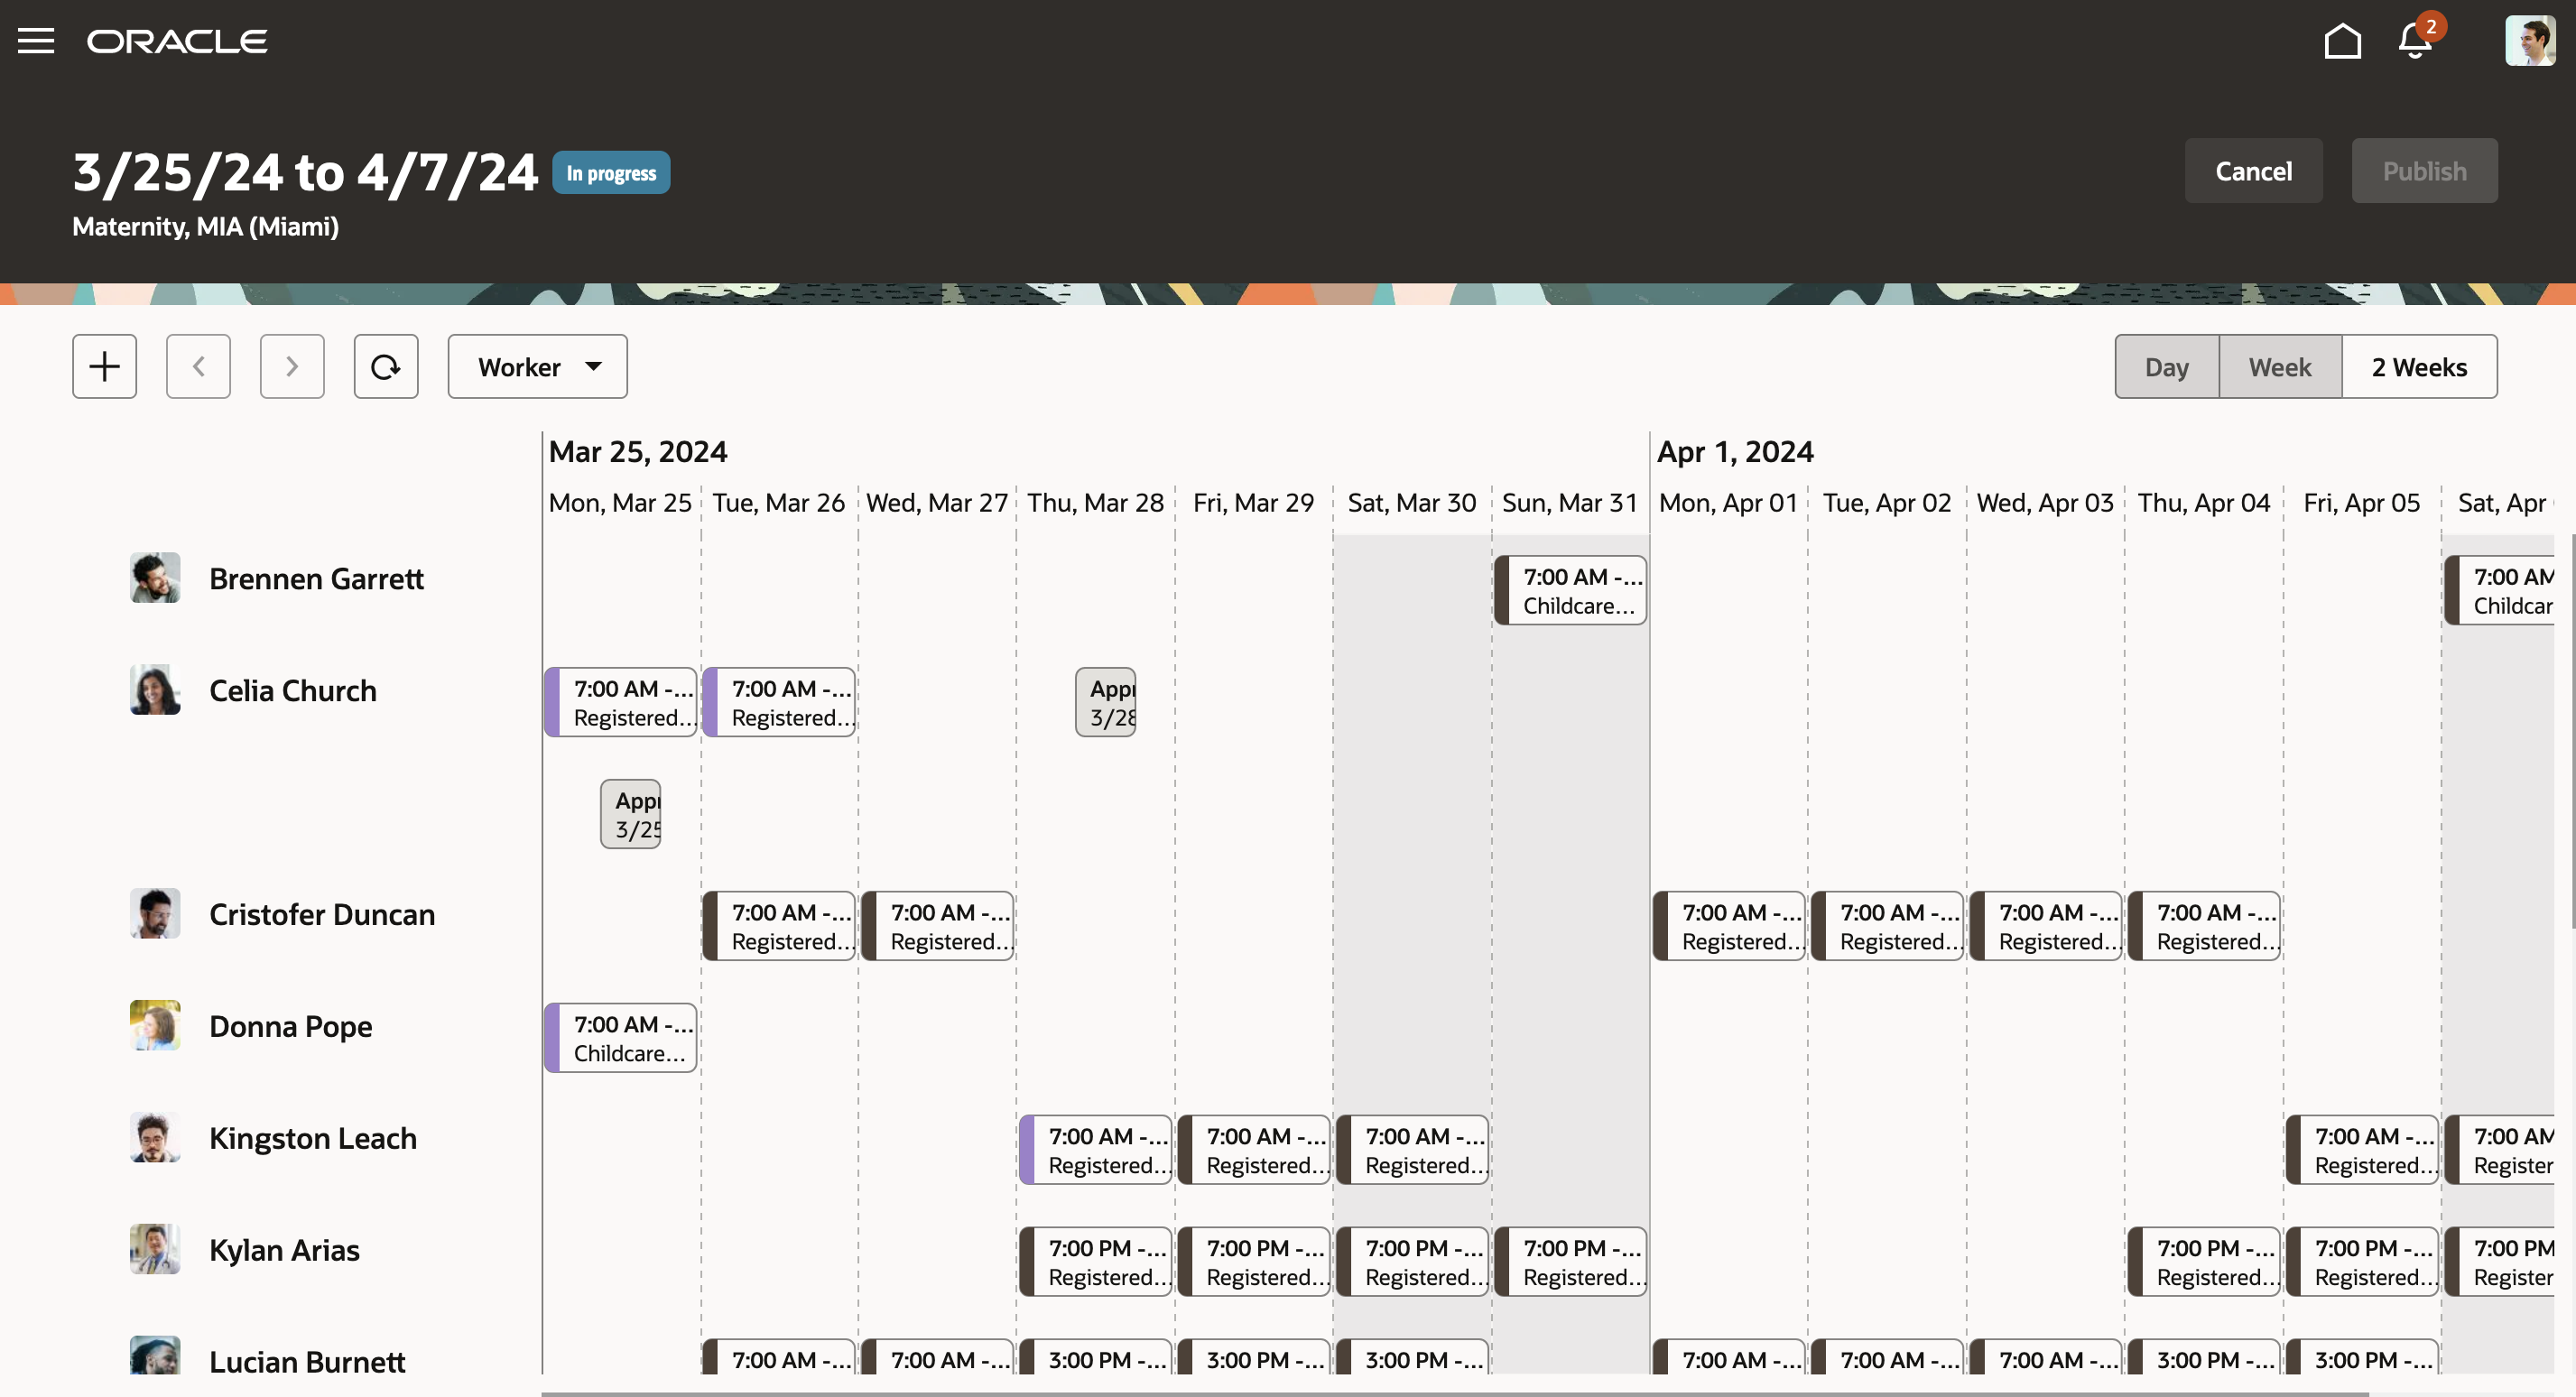
You can view schedules by worker or job and day-by-day, or 1 or 2 weeks at a time. Open shifts appear at the top of the schedule. And the job view has a summary of scheduled and required hours for each job. During self-scheduling periods, you're limited in what you can do with shifts, so an information banner appears at the top of the schedule for the duration of the self-scheduling window to remind you. For example, you can’t publish the schedule during this window or make changes to worker-claimed shifts.
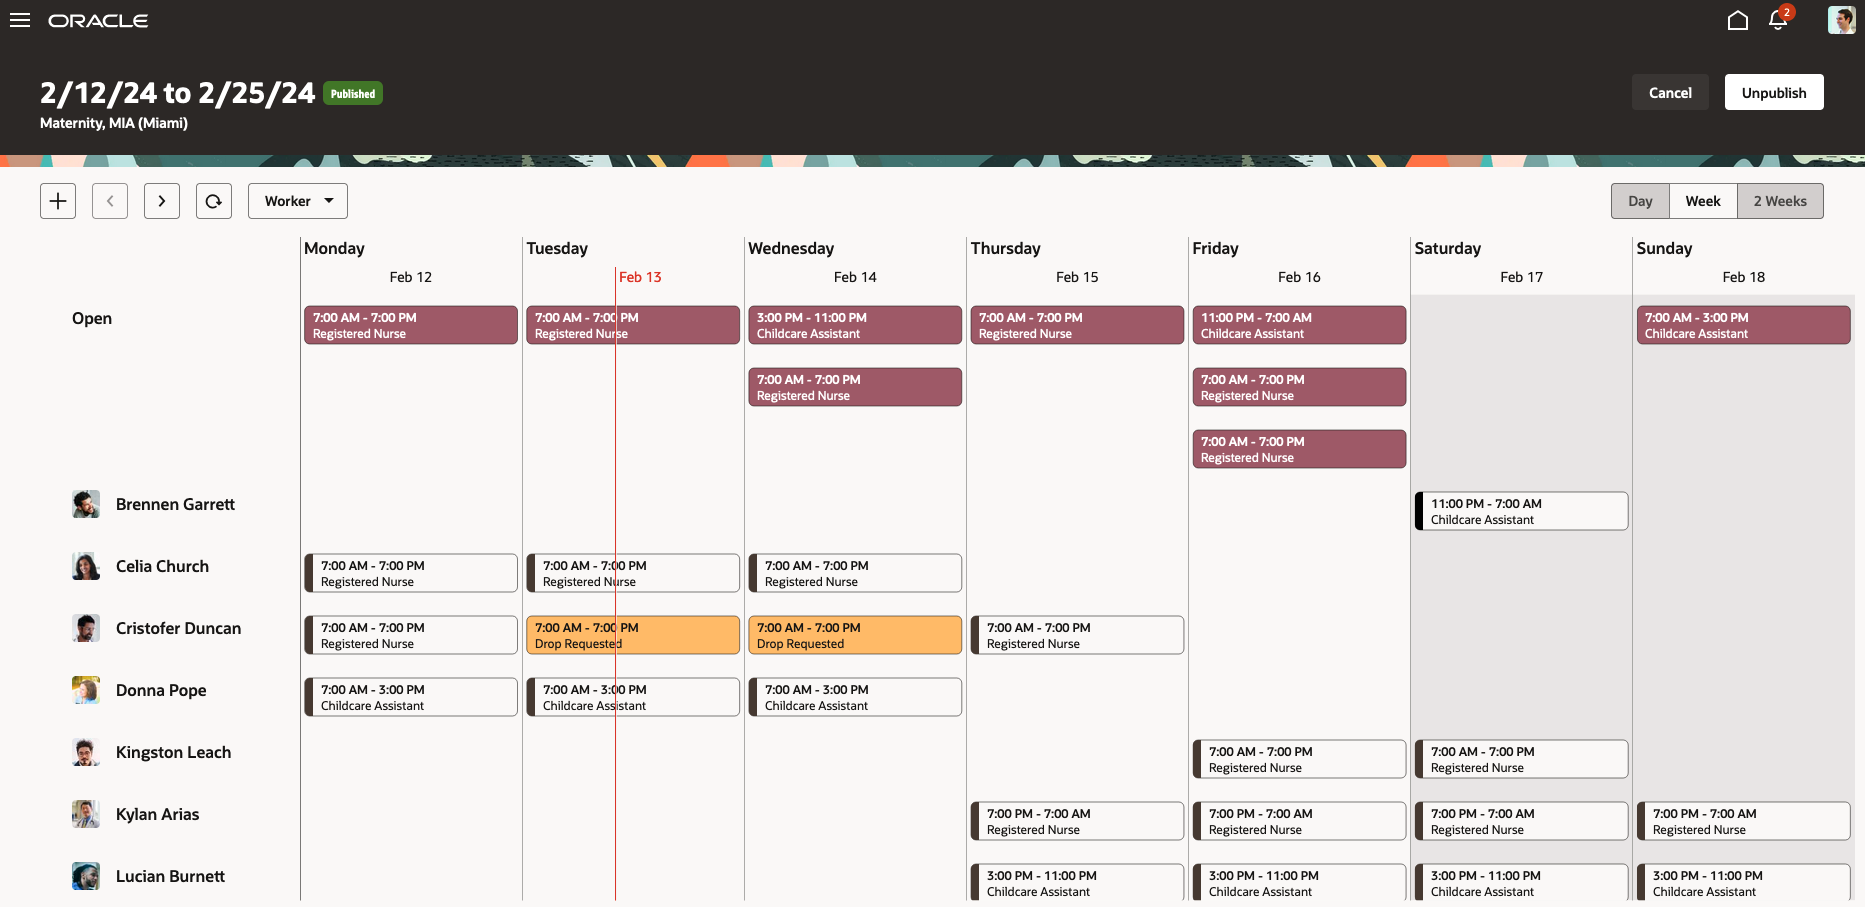
Workforce Schedule Page with Shifts Organized by Worker, for the Week
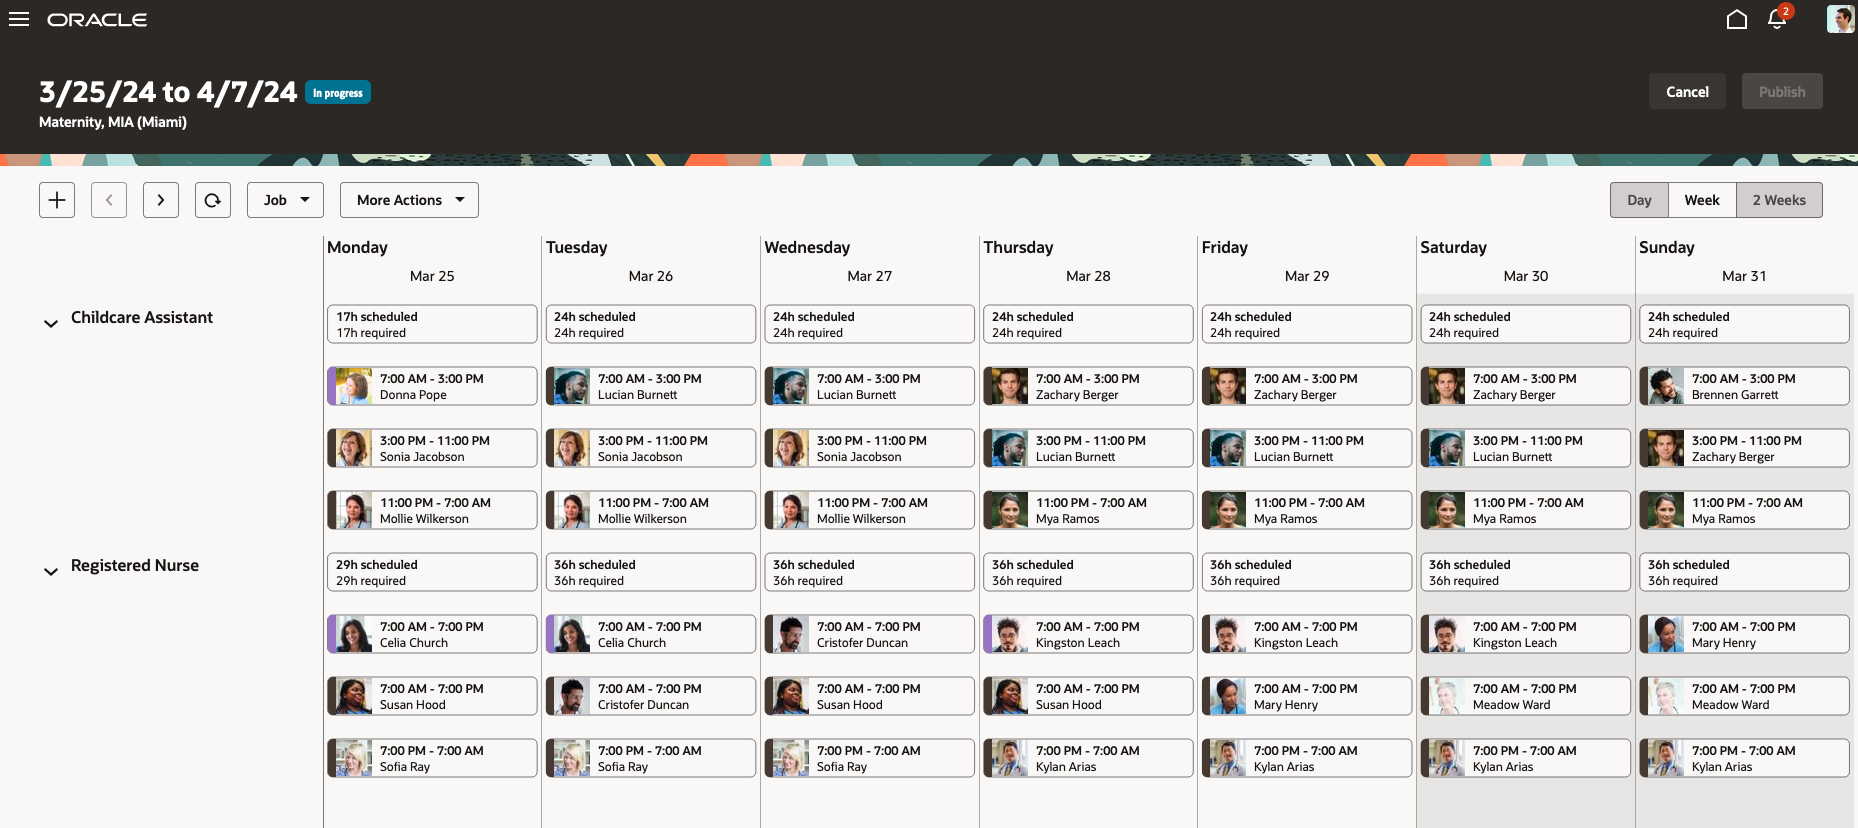
Workforce Schedule Page with Shifts Organized by Job, for the Week
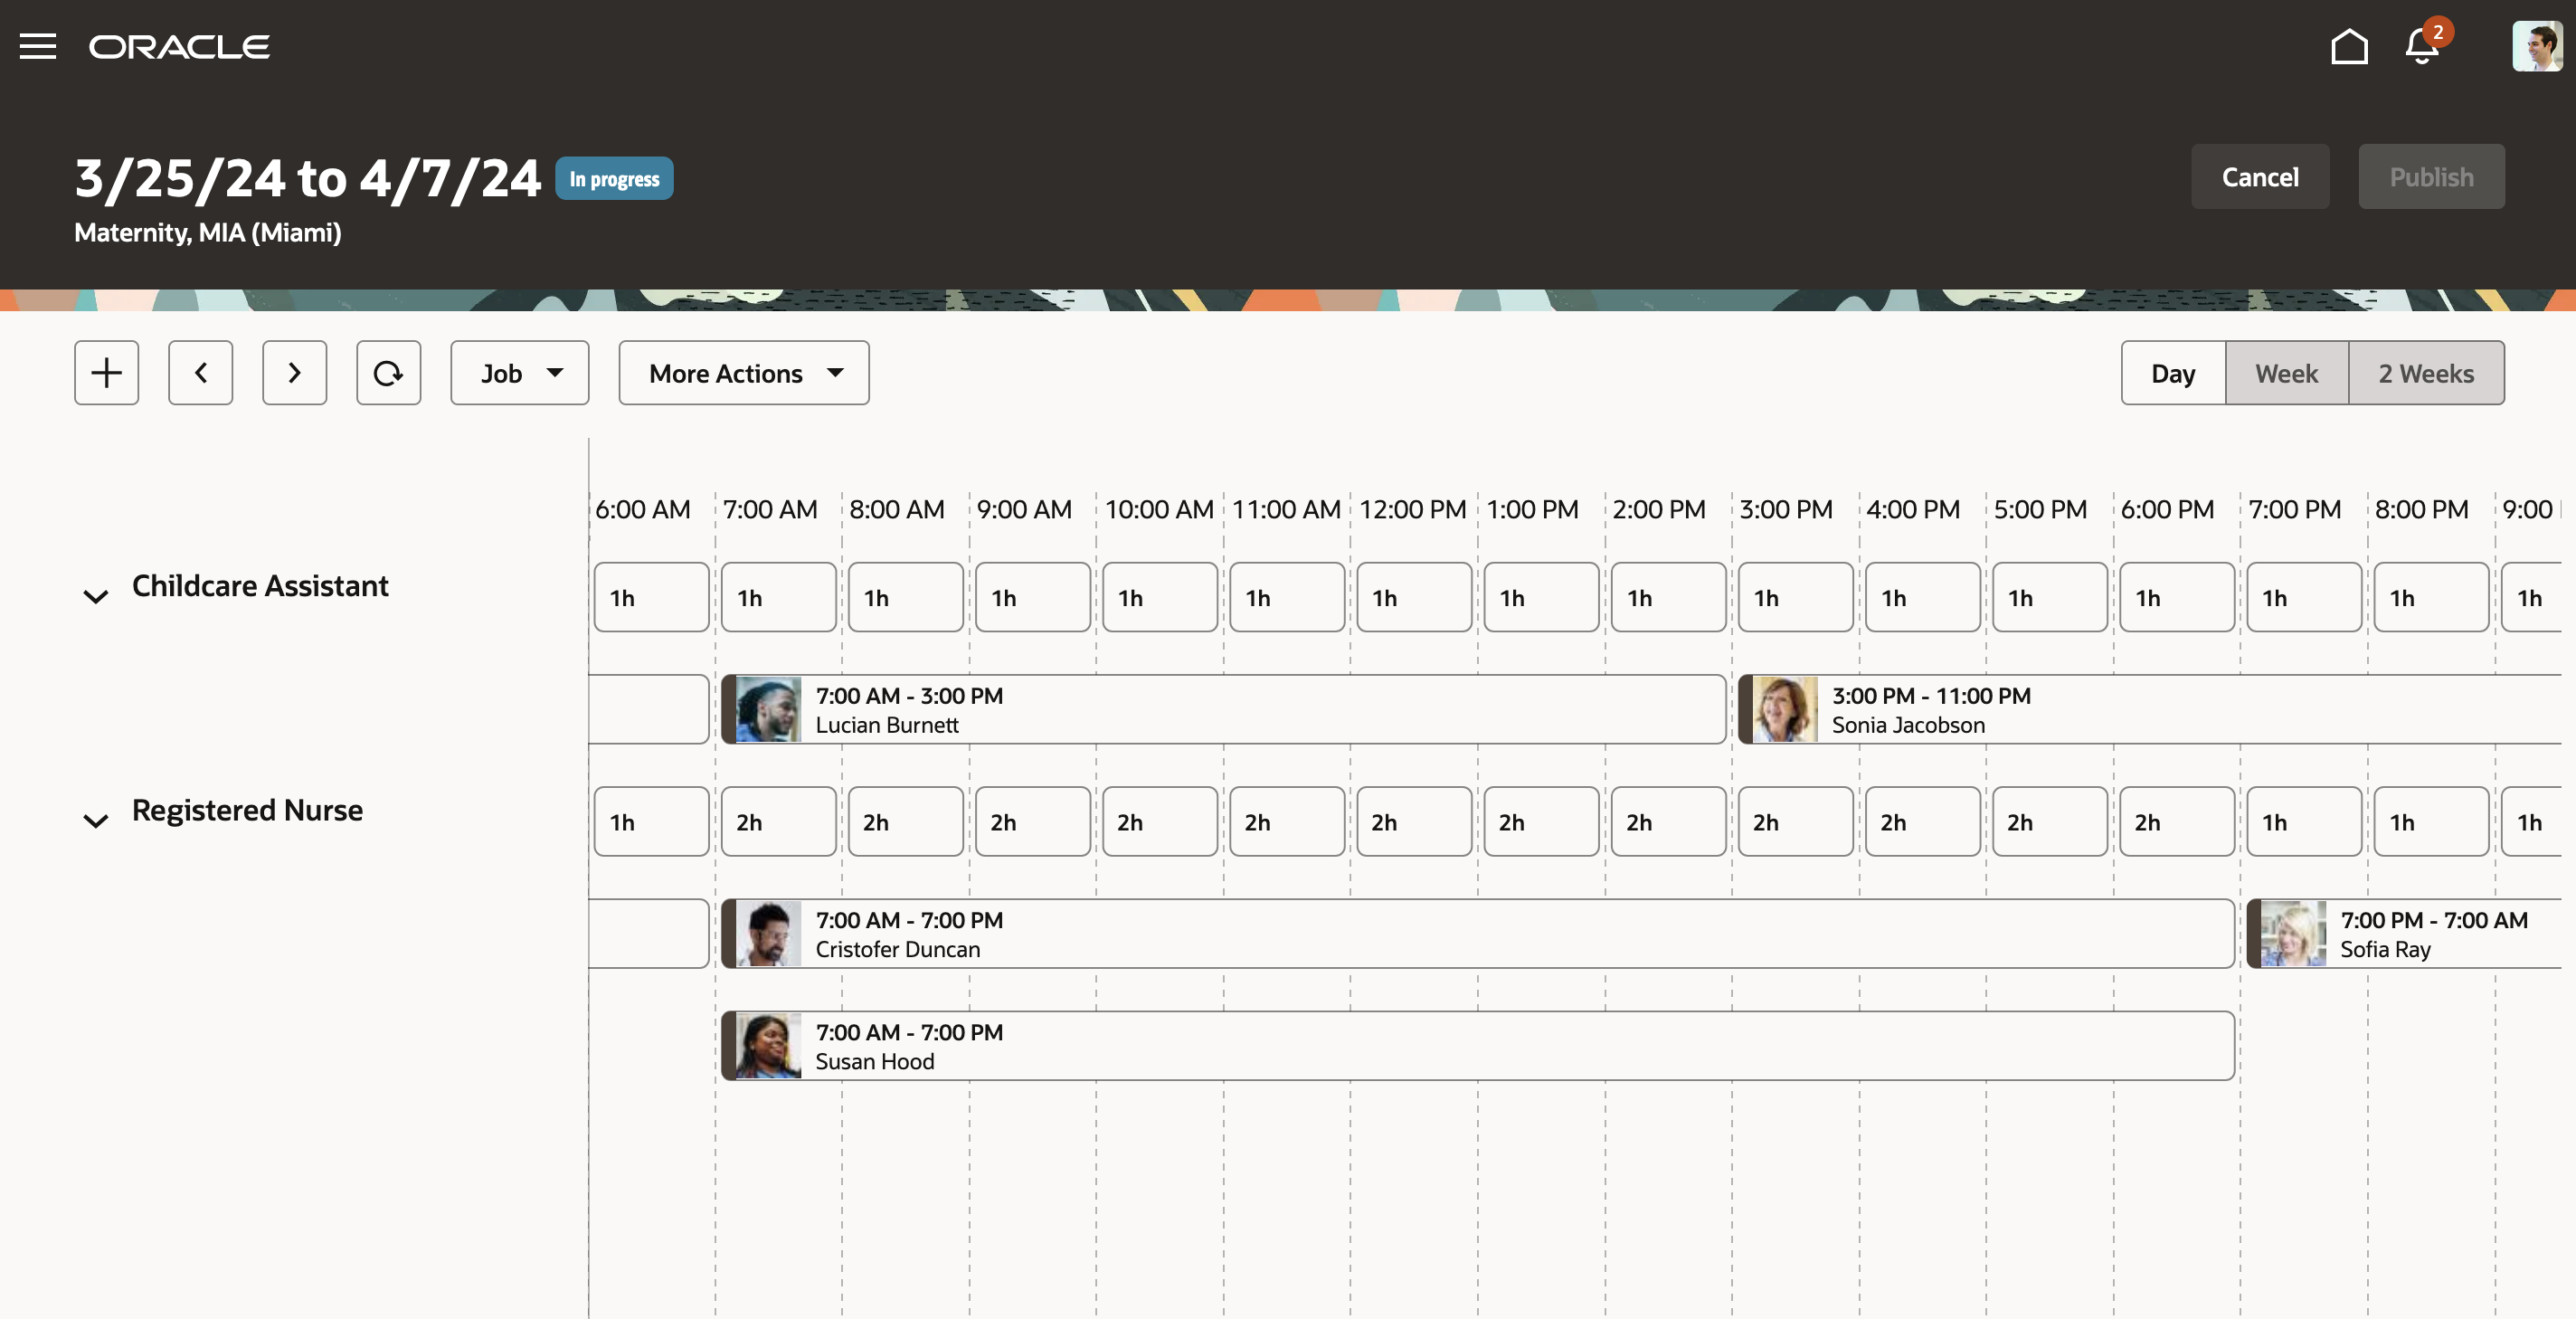
Workforce Schedule Page with Shifts Organized by Job, for the Day
Workforce Schedule Page with Shifts Organized by Job, for 2 Weeks
Workforce Schedule Page with Shifts Organized by Worker, for 2 Weeks
You can hover over a shift or absence to see key details, such as the shift type. Work shift types also show productivity percentages.
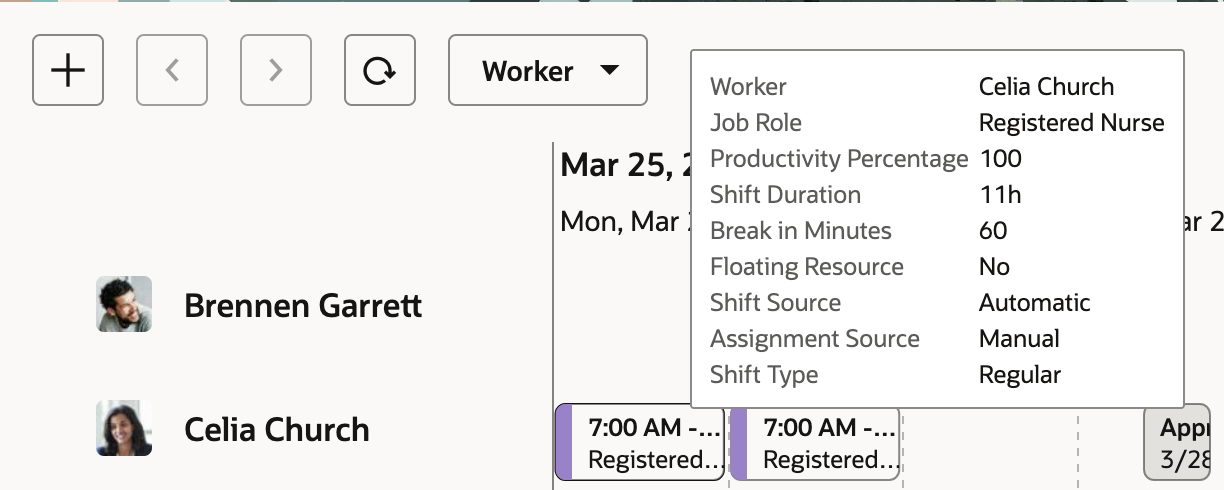
Hover Details for an Assigned Shift
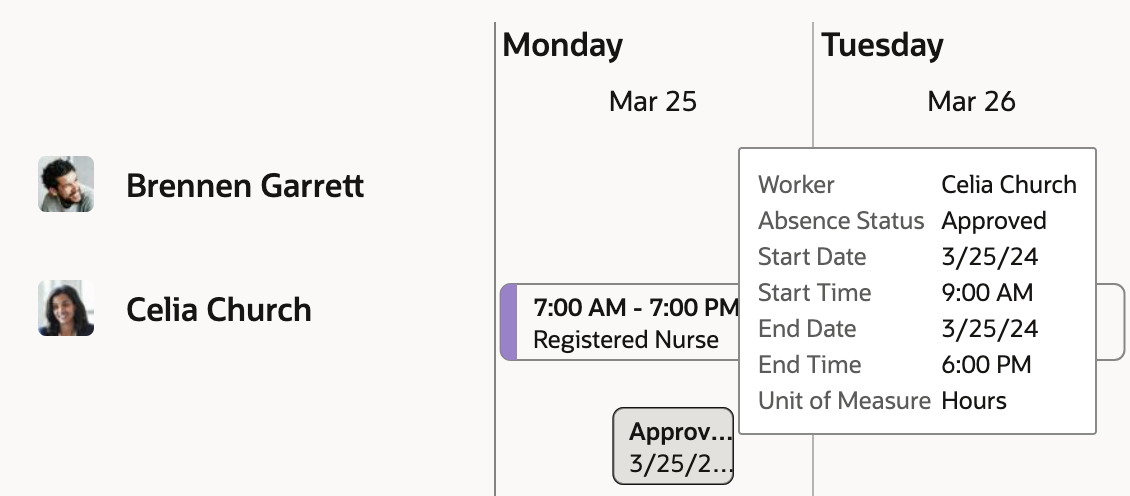
Hover Details for an Approved Absence
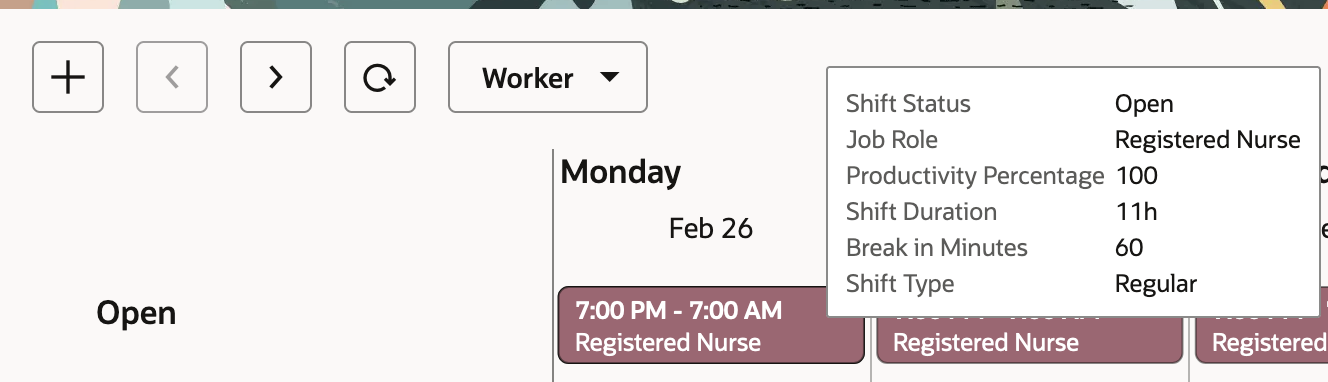
Hover Details for an Open Shift
You can add open shifts to the schedule by clicking the Add icon and completing the required information on the Add shifts panel drawer.
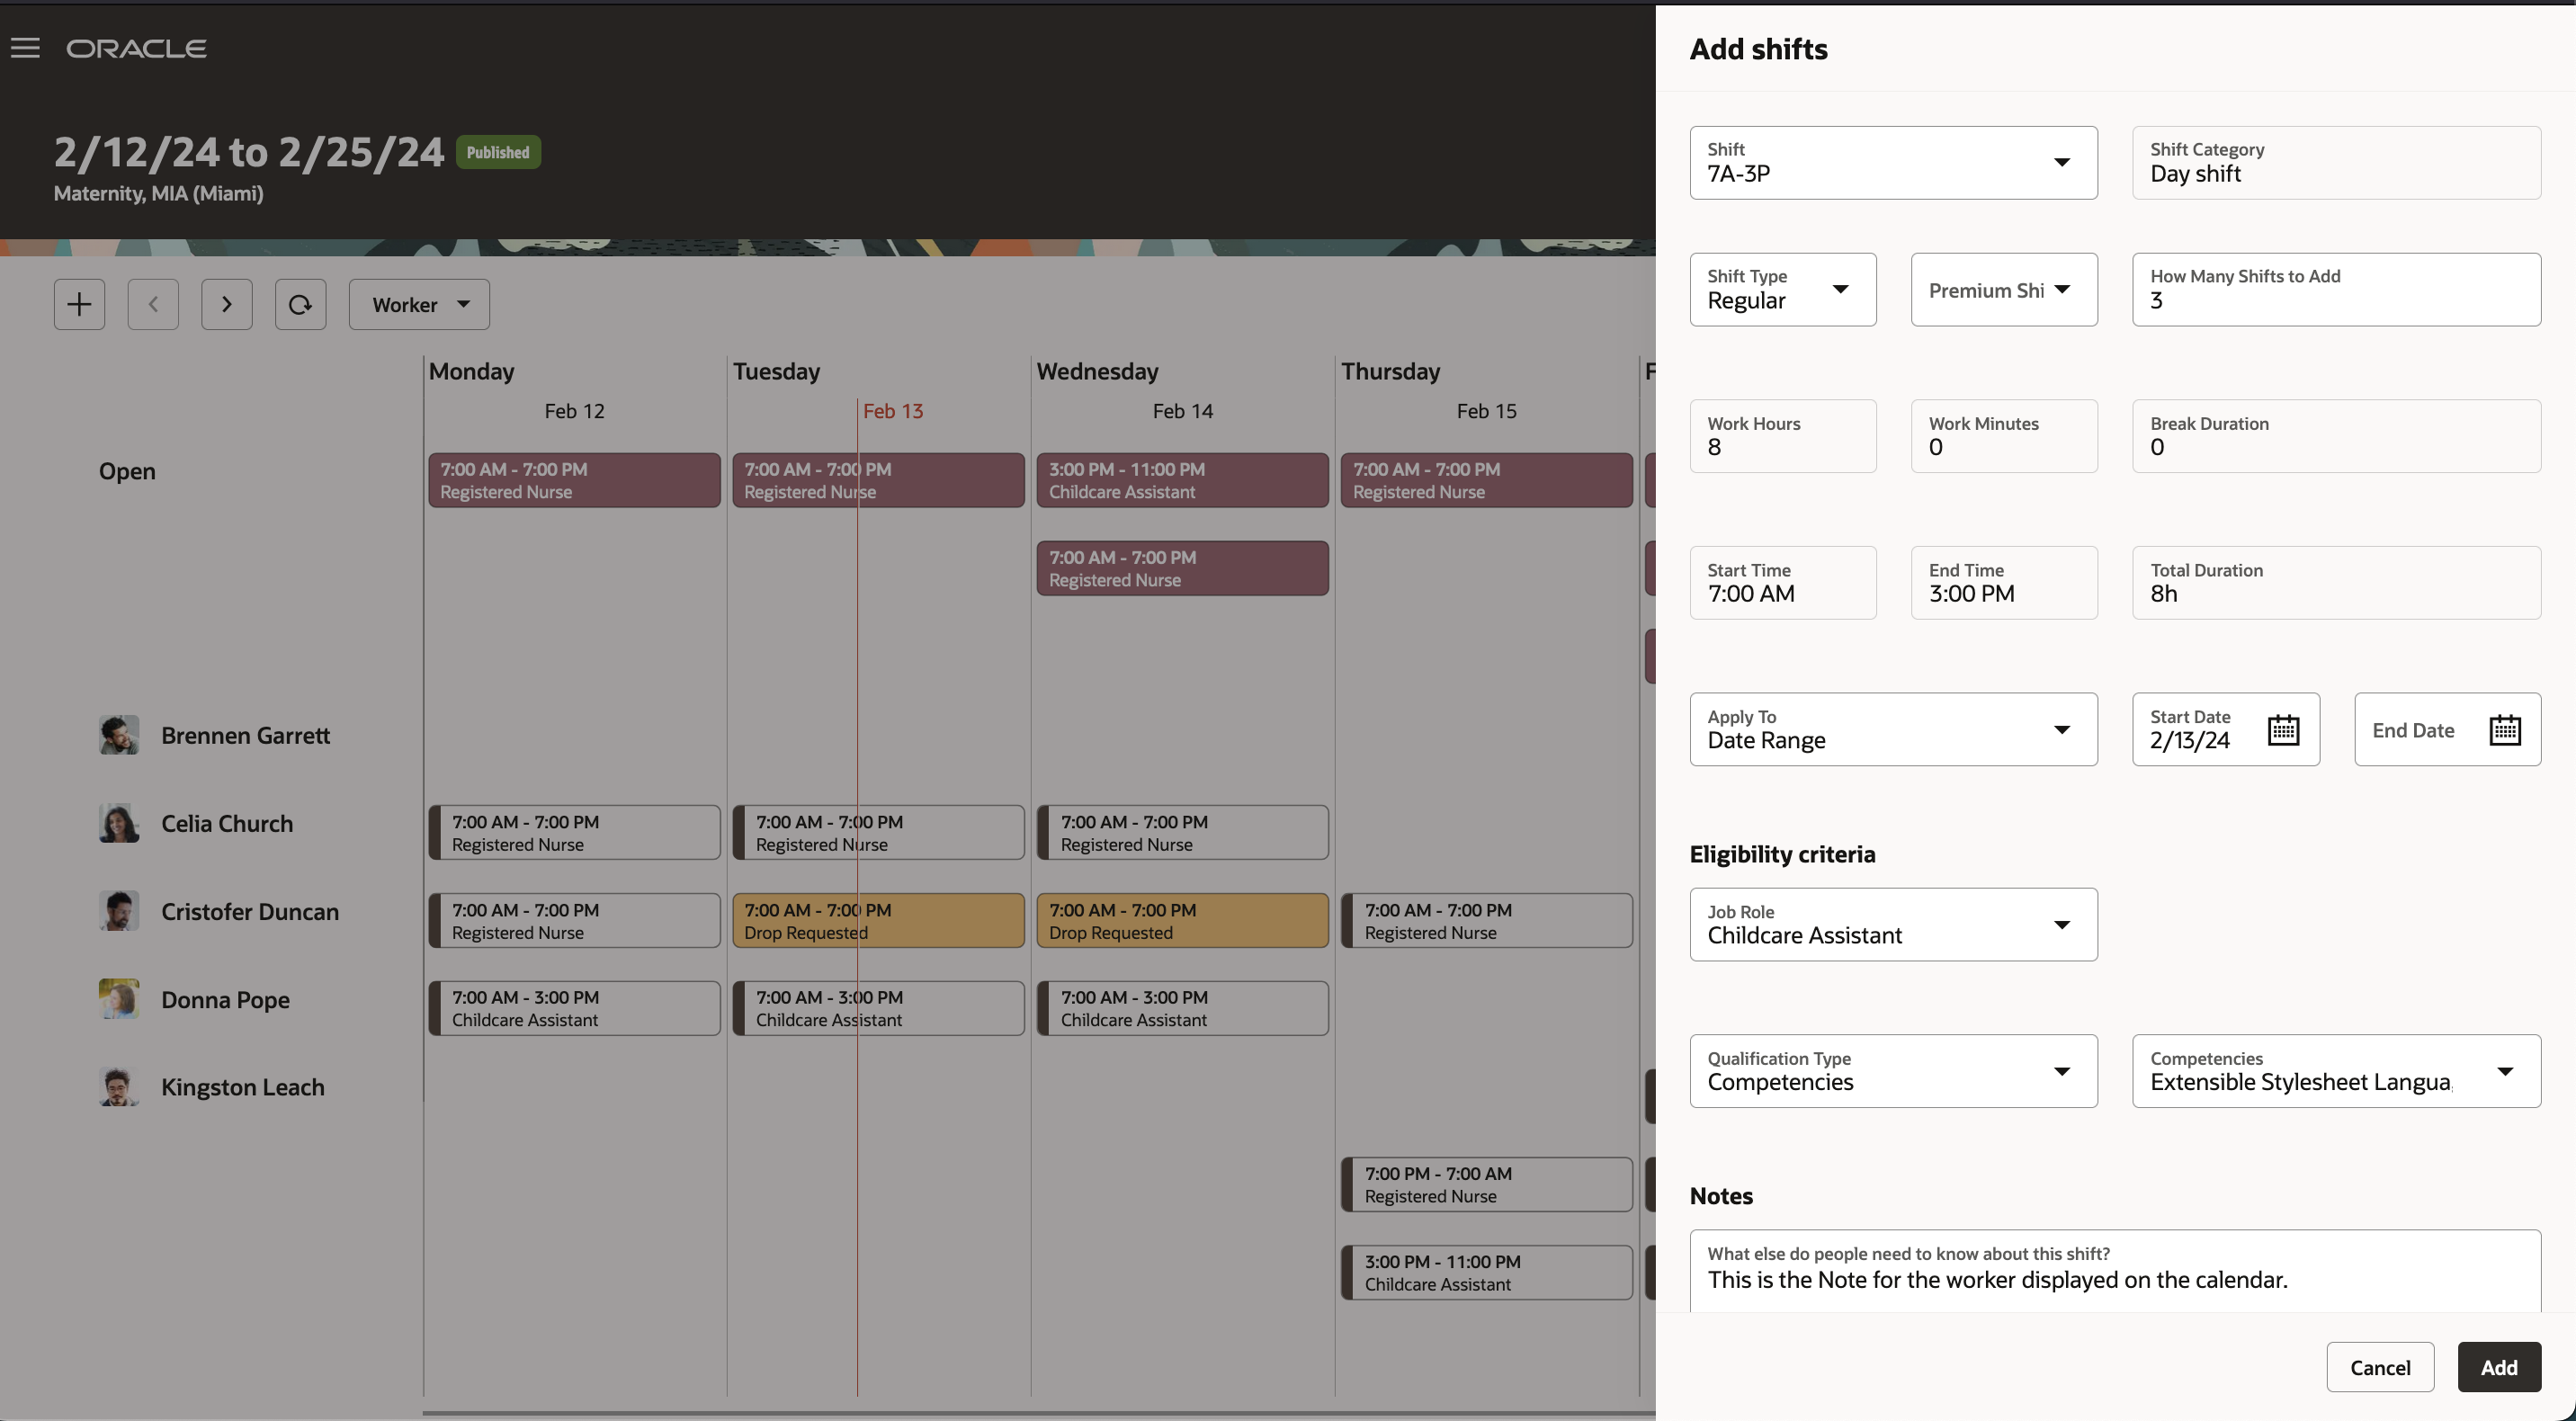
Workforce Schedule Page Showing the Add Shifts Drawer
To view details, edit, assign or unassign, or delete the shift or view approved absence details, right-click the shift or absence.
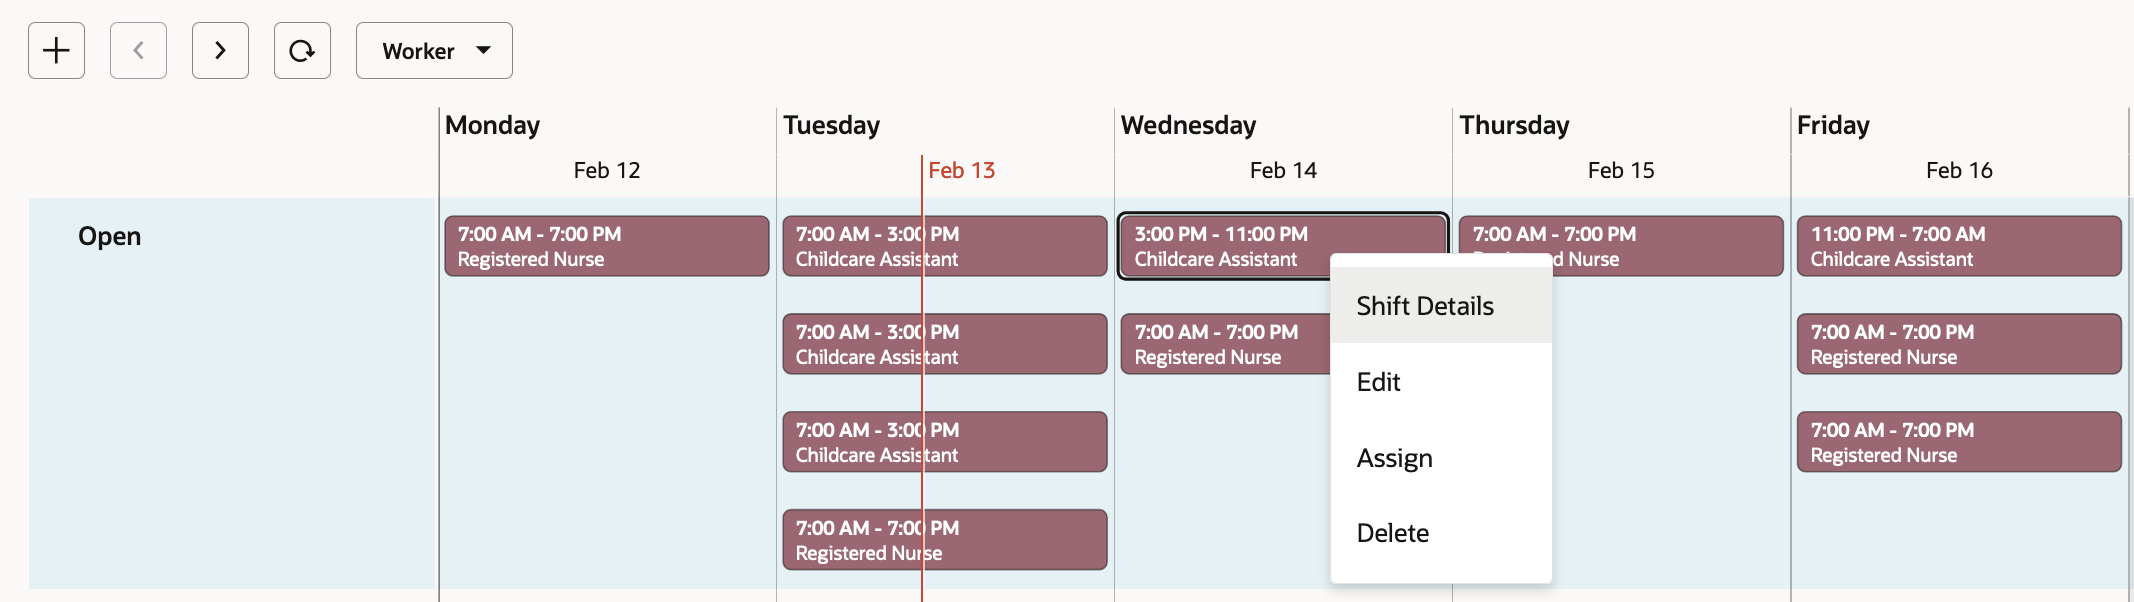
Right-Click Actions for an Open Shift

Right-Click Actions for an Assigned Shift
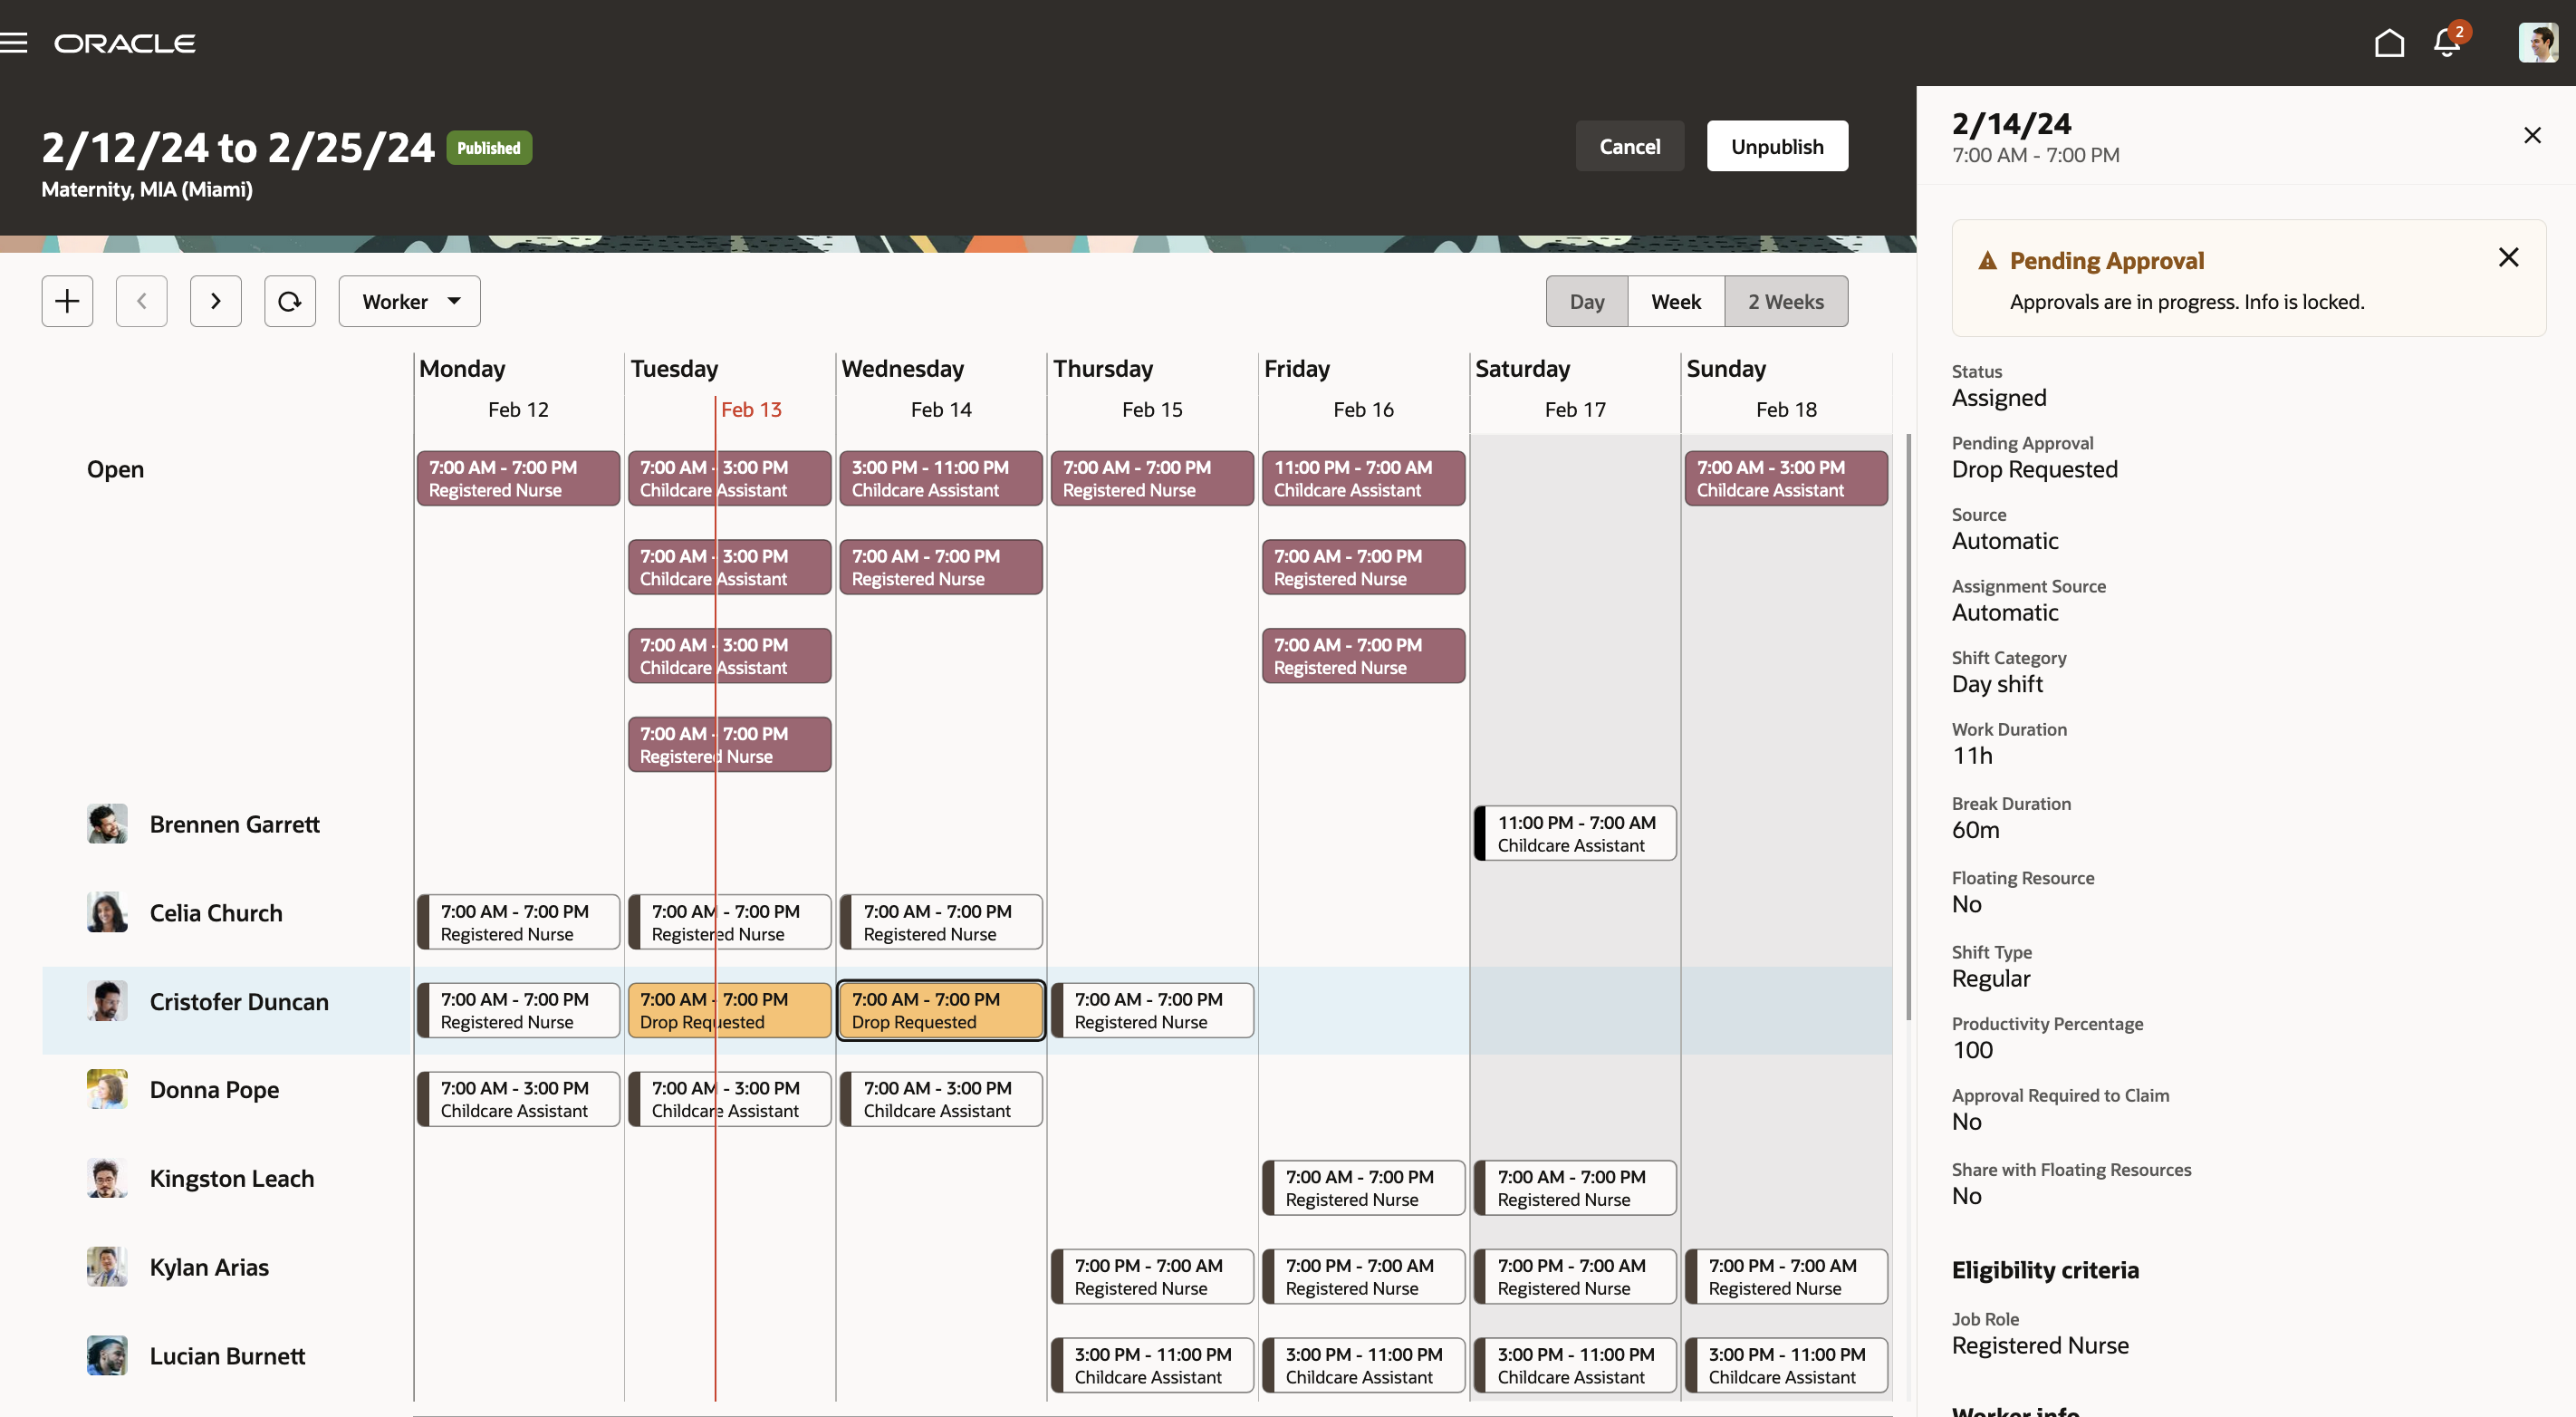
Workforce Schedule Page Showing the Shift Details Drawer
You can edit shifts, but you can't change the eligibility criteria of an assigned shift.
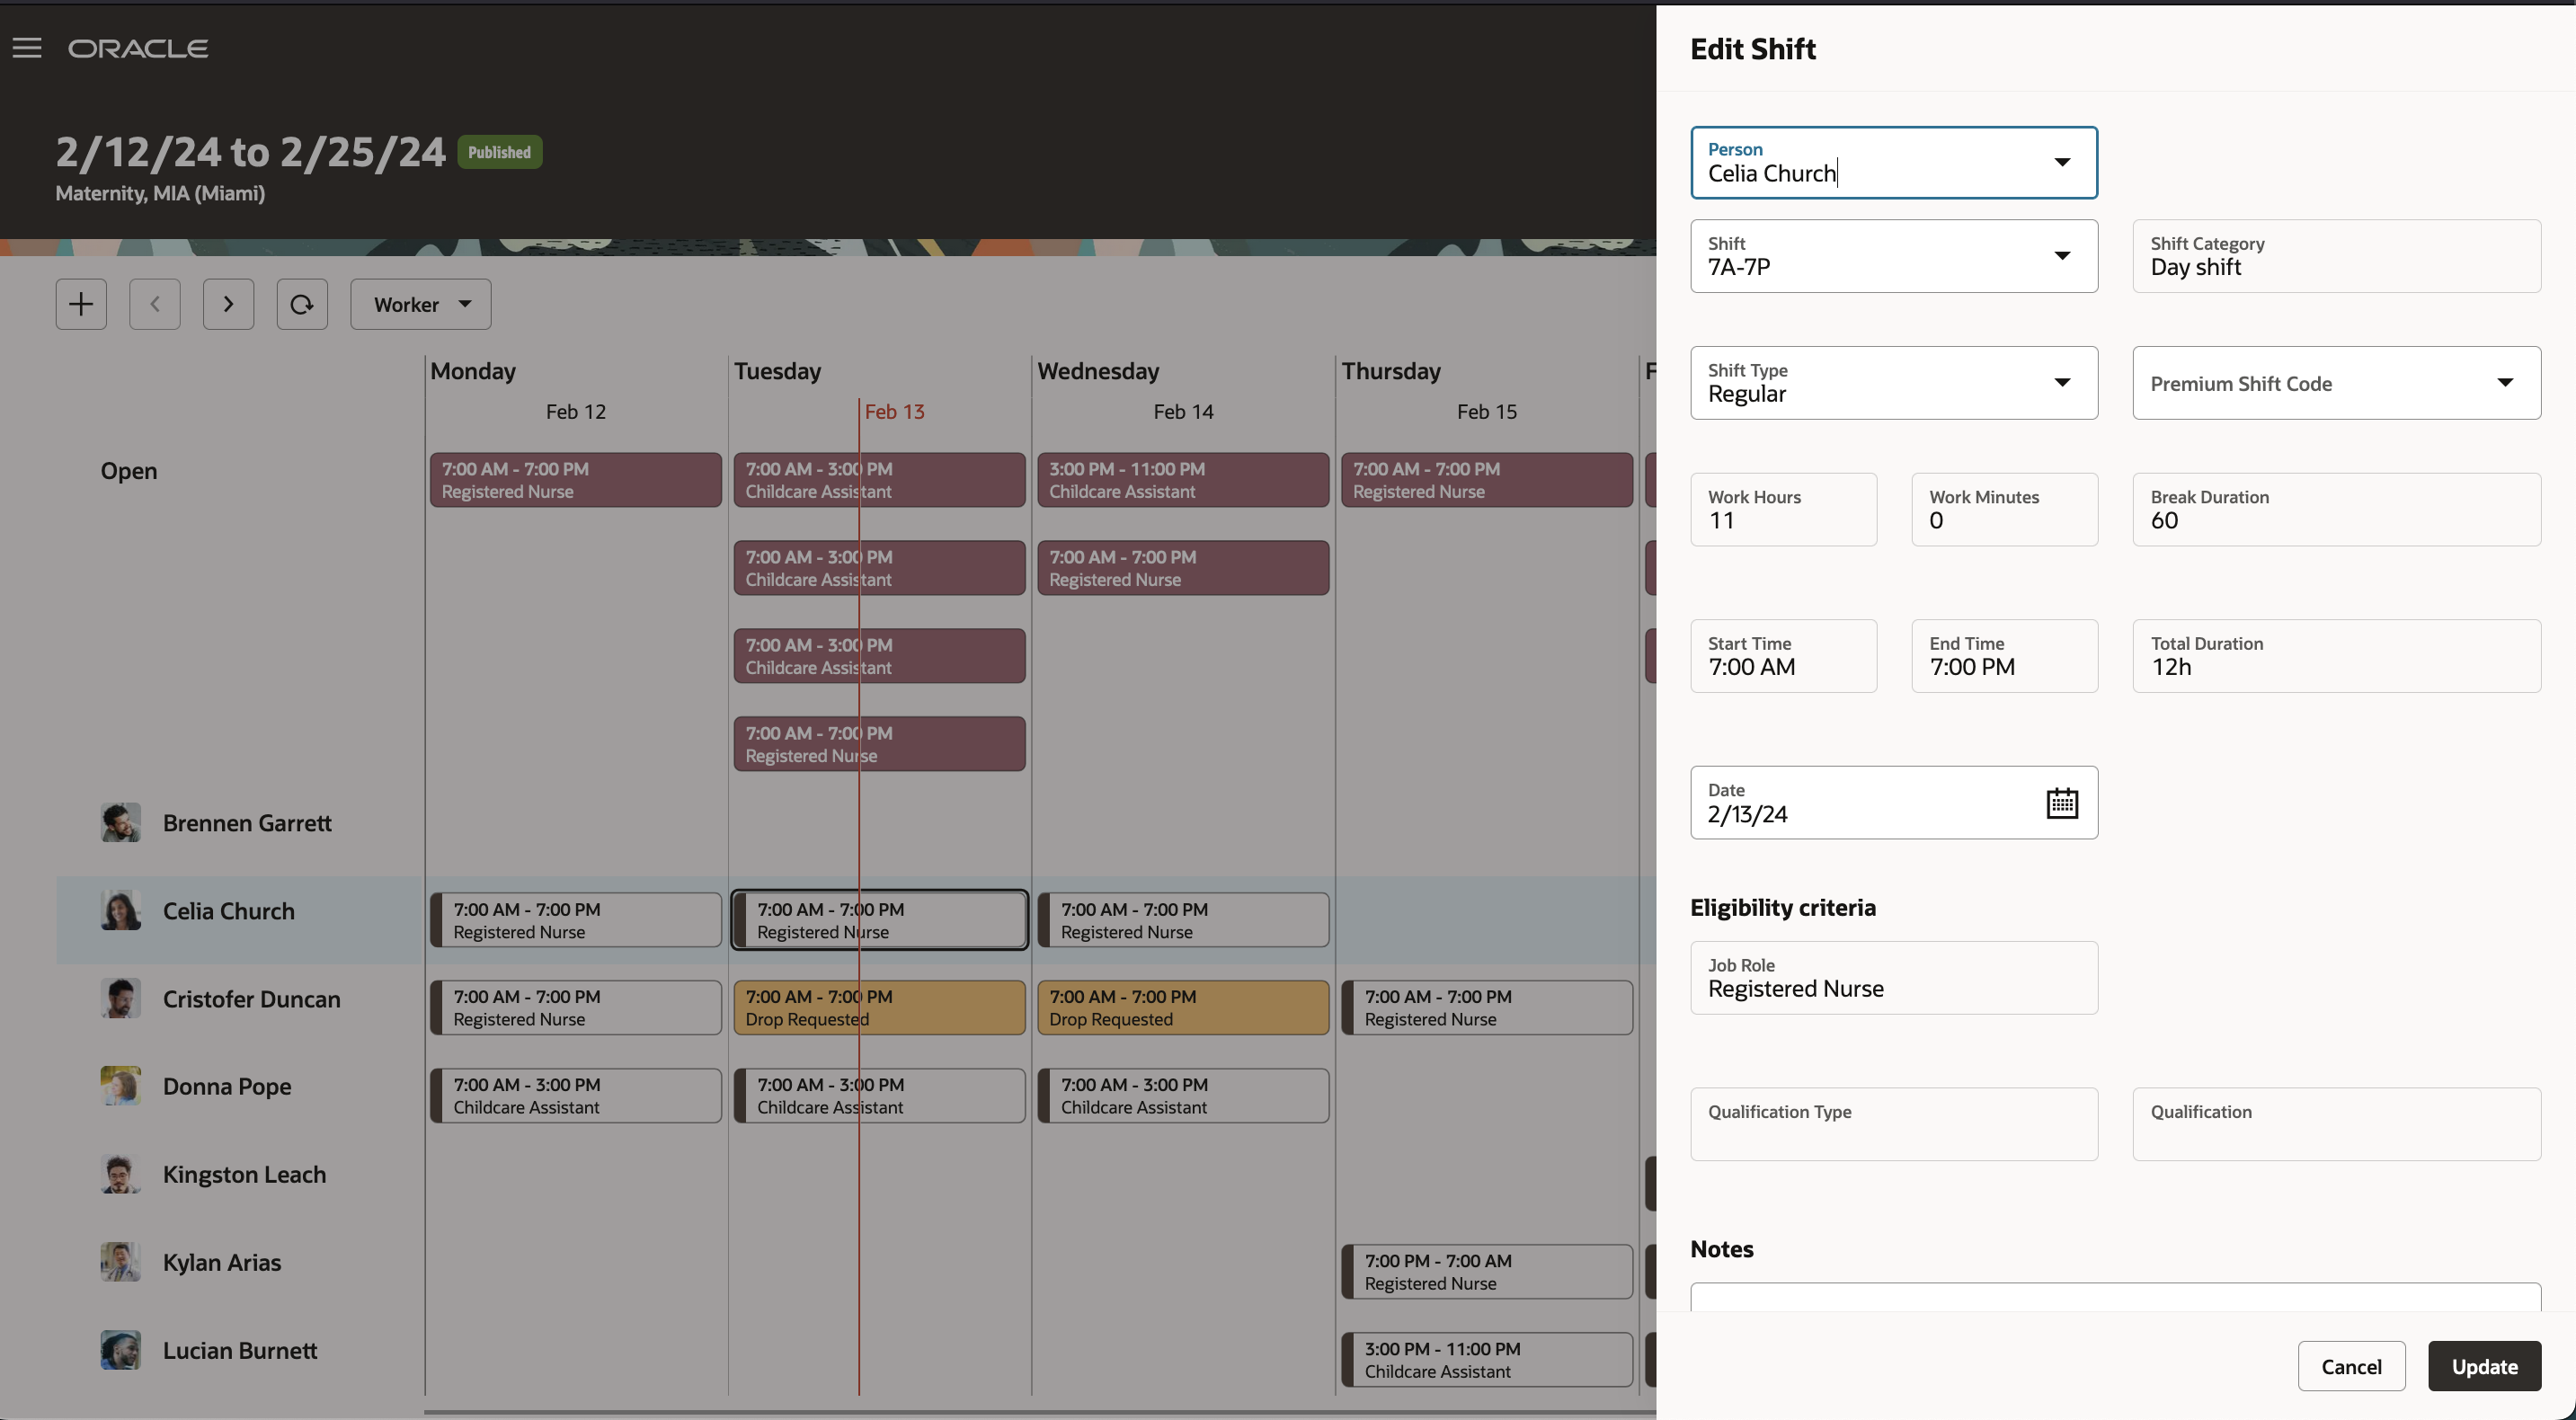
Workforce Schedule Page Showing the Edit Shift Drawer
To assign an open shift, right-click the shift and complete the required fields on the Assign shift panel drawer. Based on the schedule generation profile, you might be able to assign the shift to a floating worker, when appropriate.
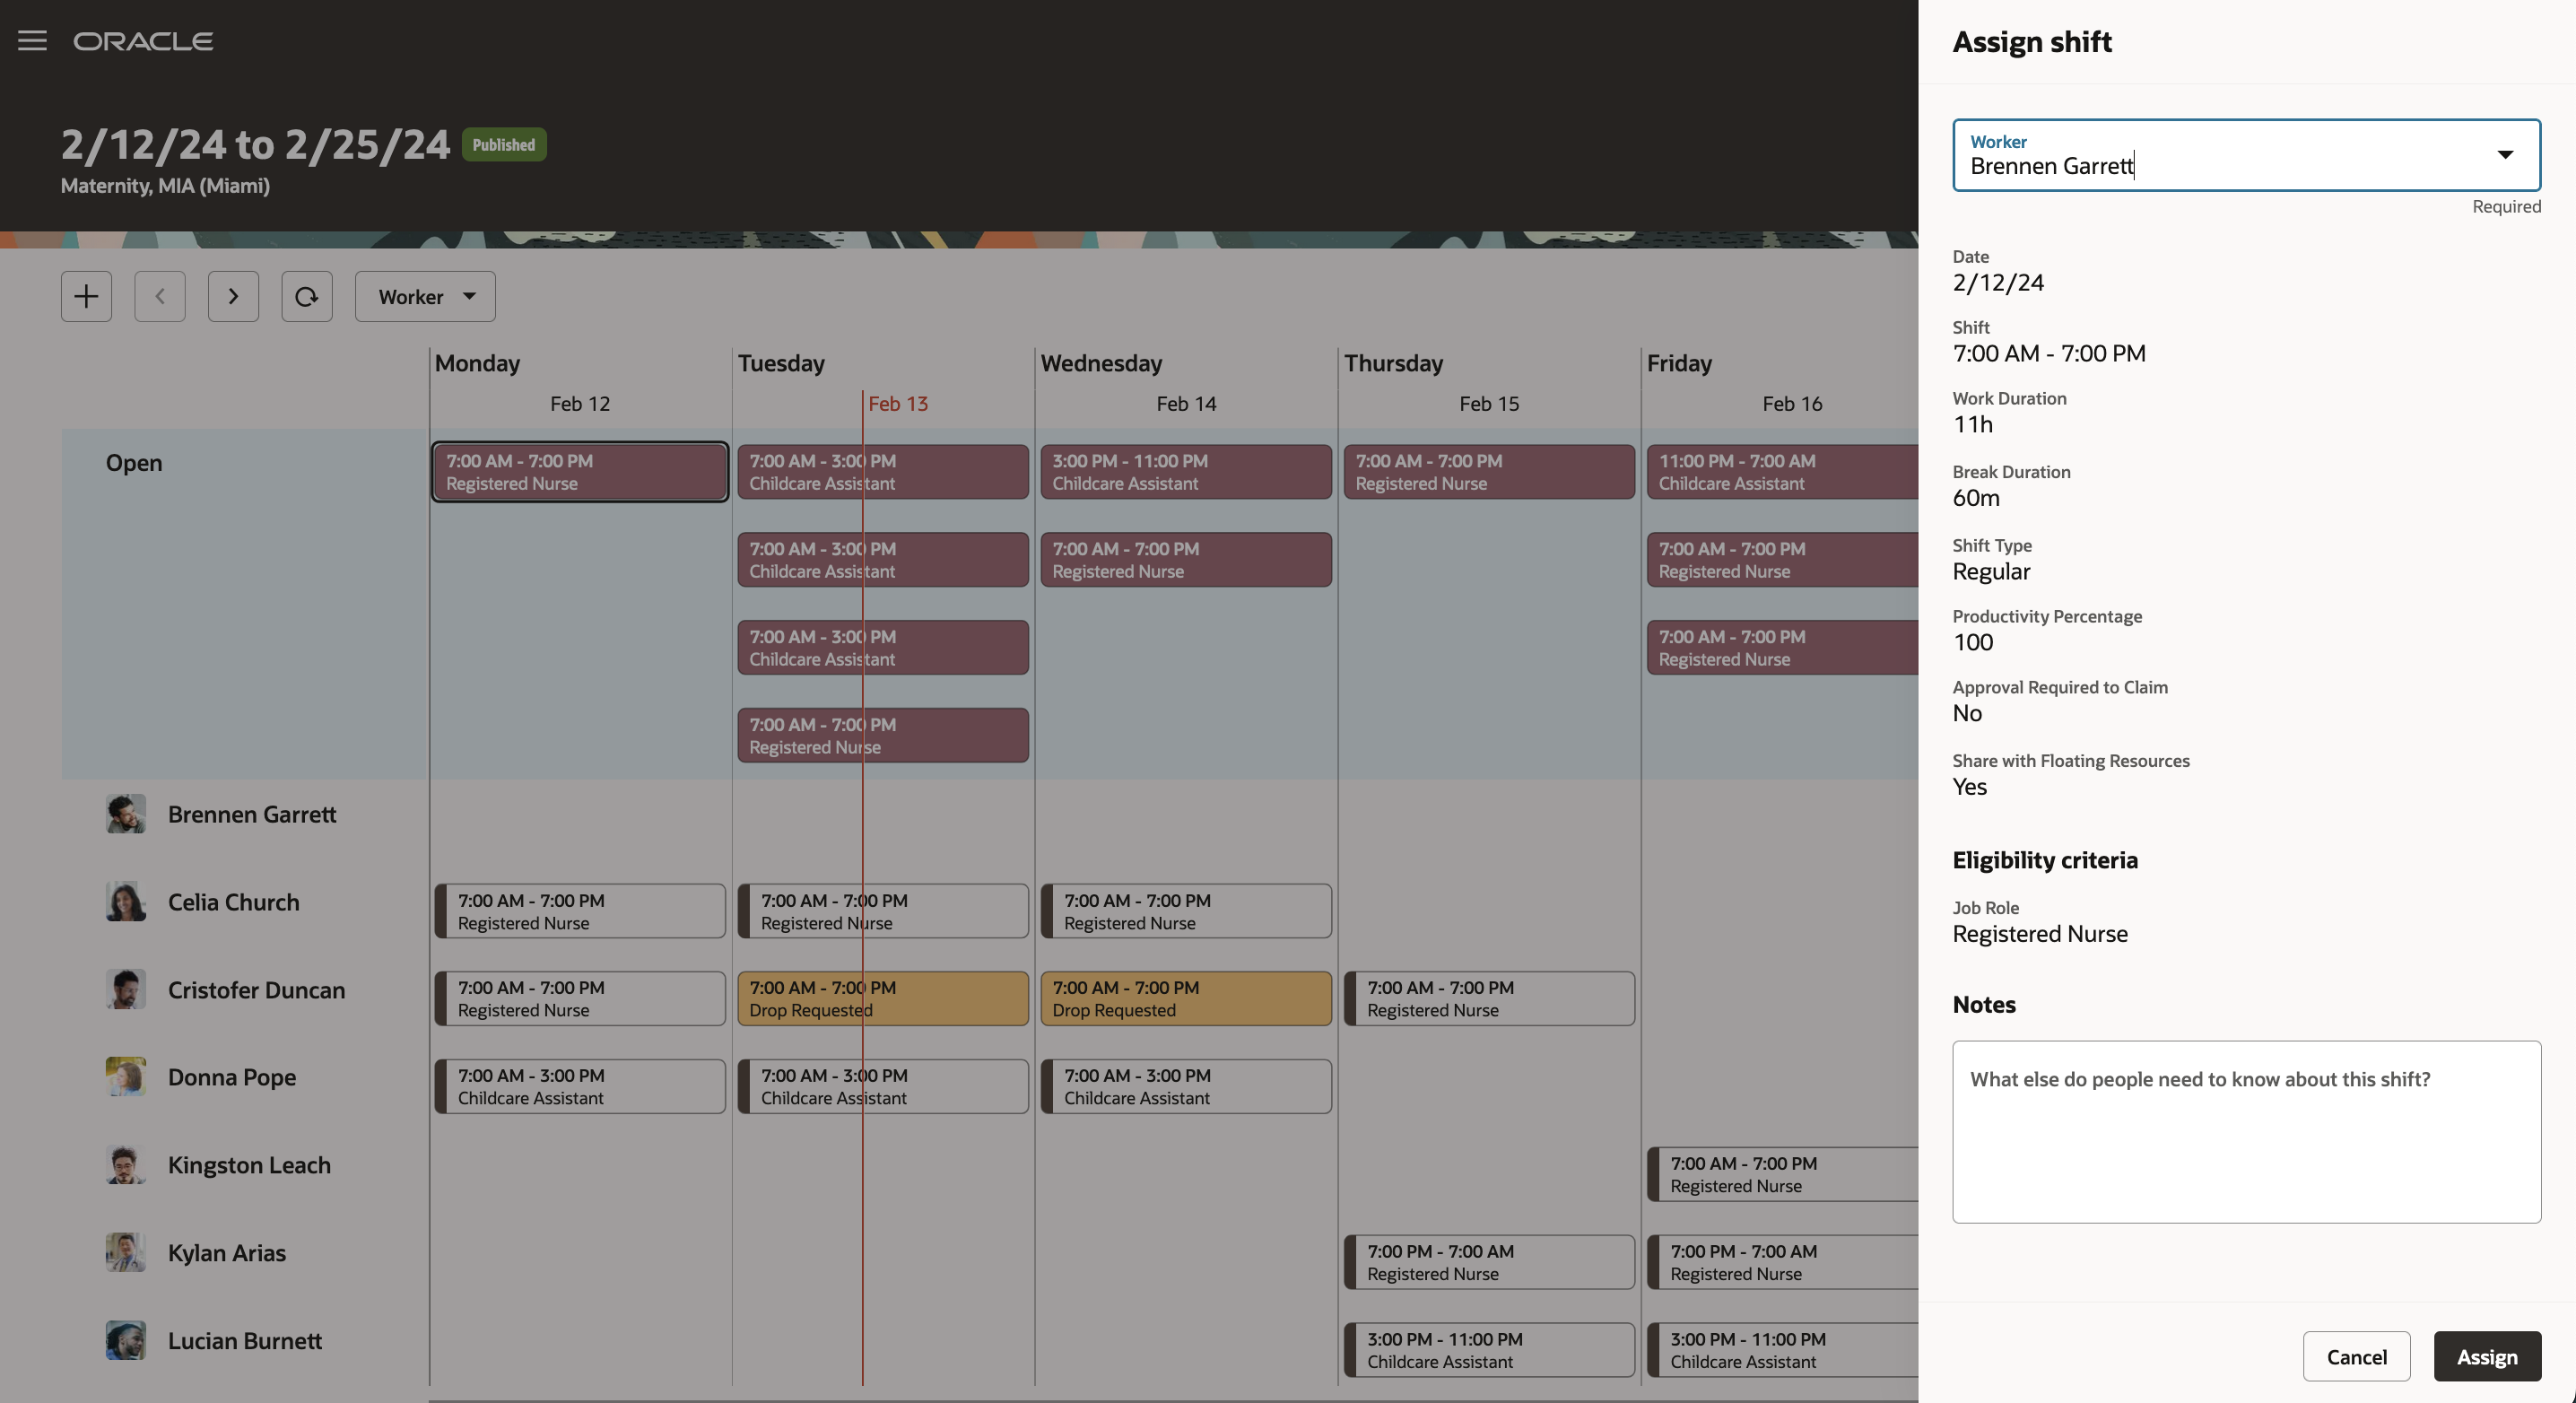
Workforce Schedule Page Showing the Assign Shifts Drawer When Assignees Can't Be Floaters
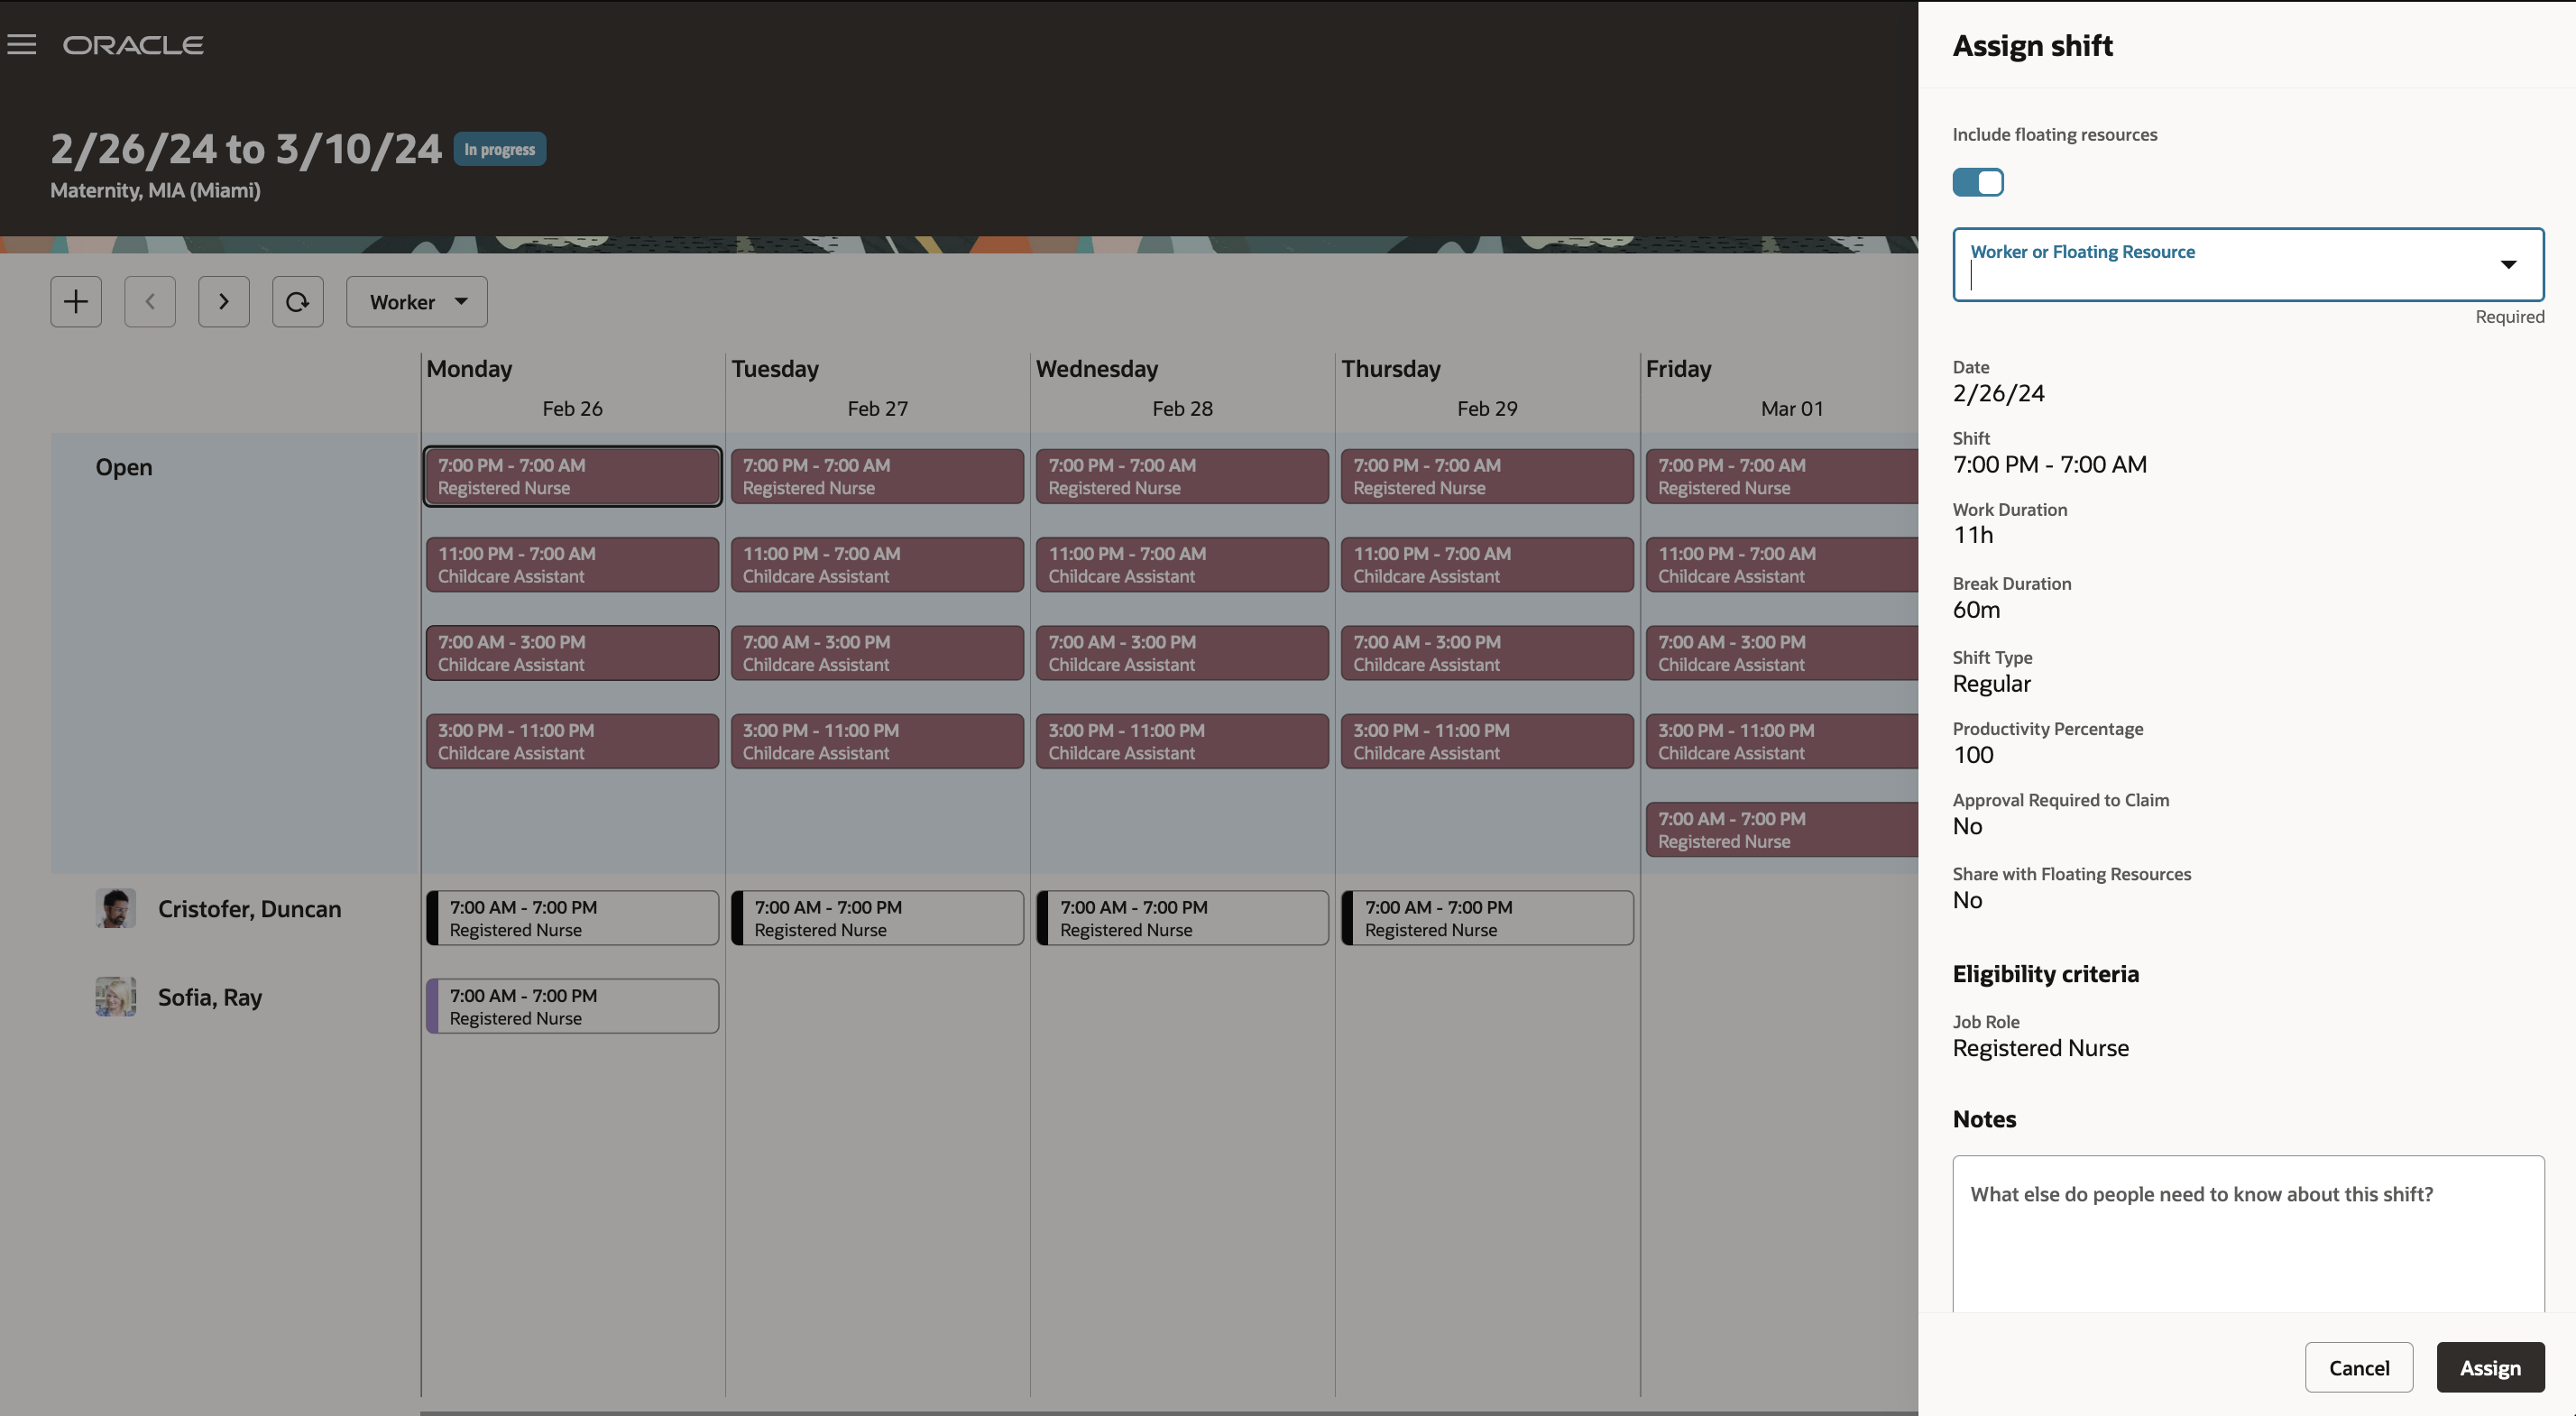
Workforce Schedule Page Showing the Assign Shifts Drawer When Assignees Can Be Floaters
When you're ready, you can use the page-level action to publish the schedule.
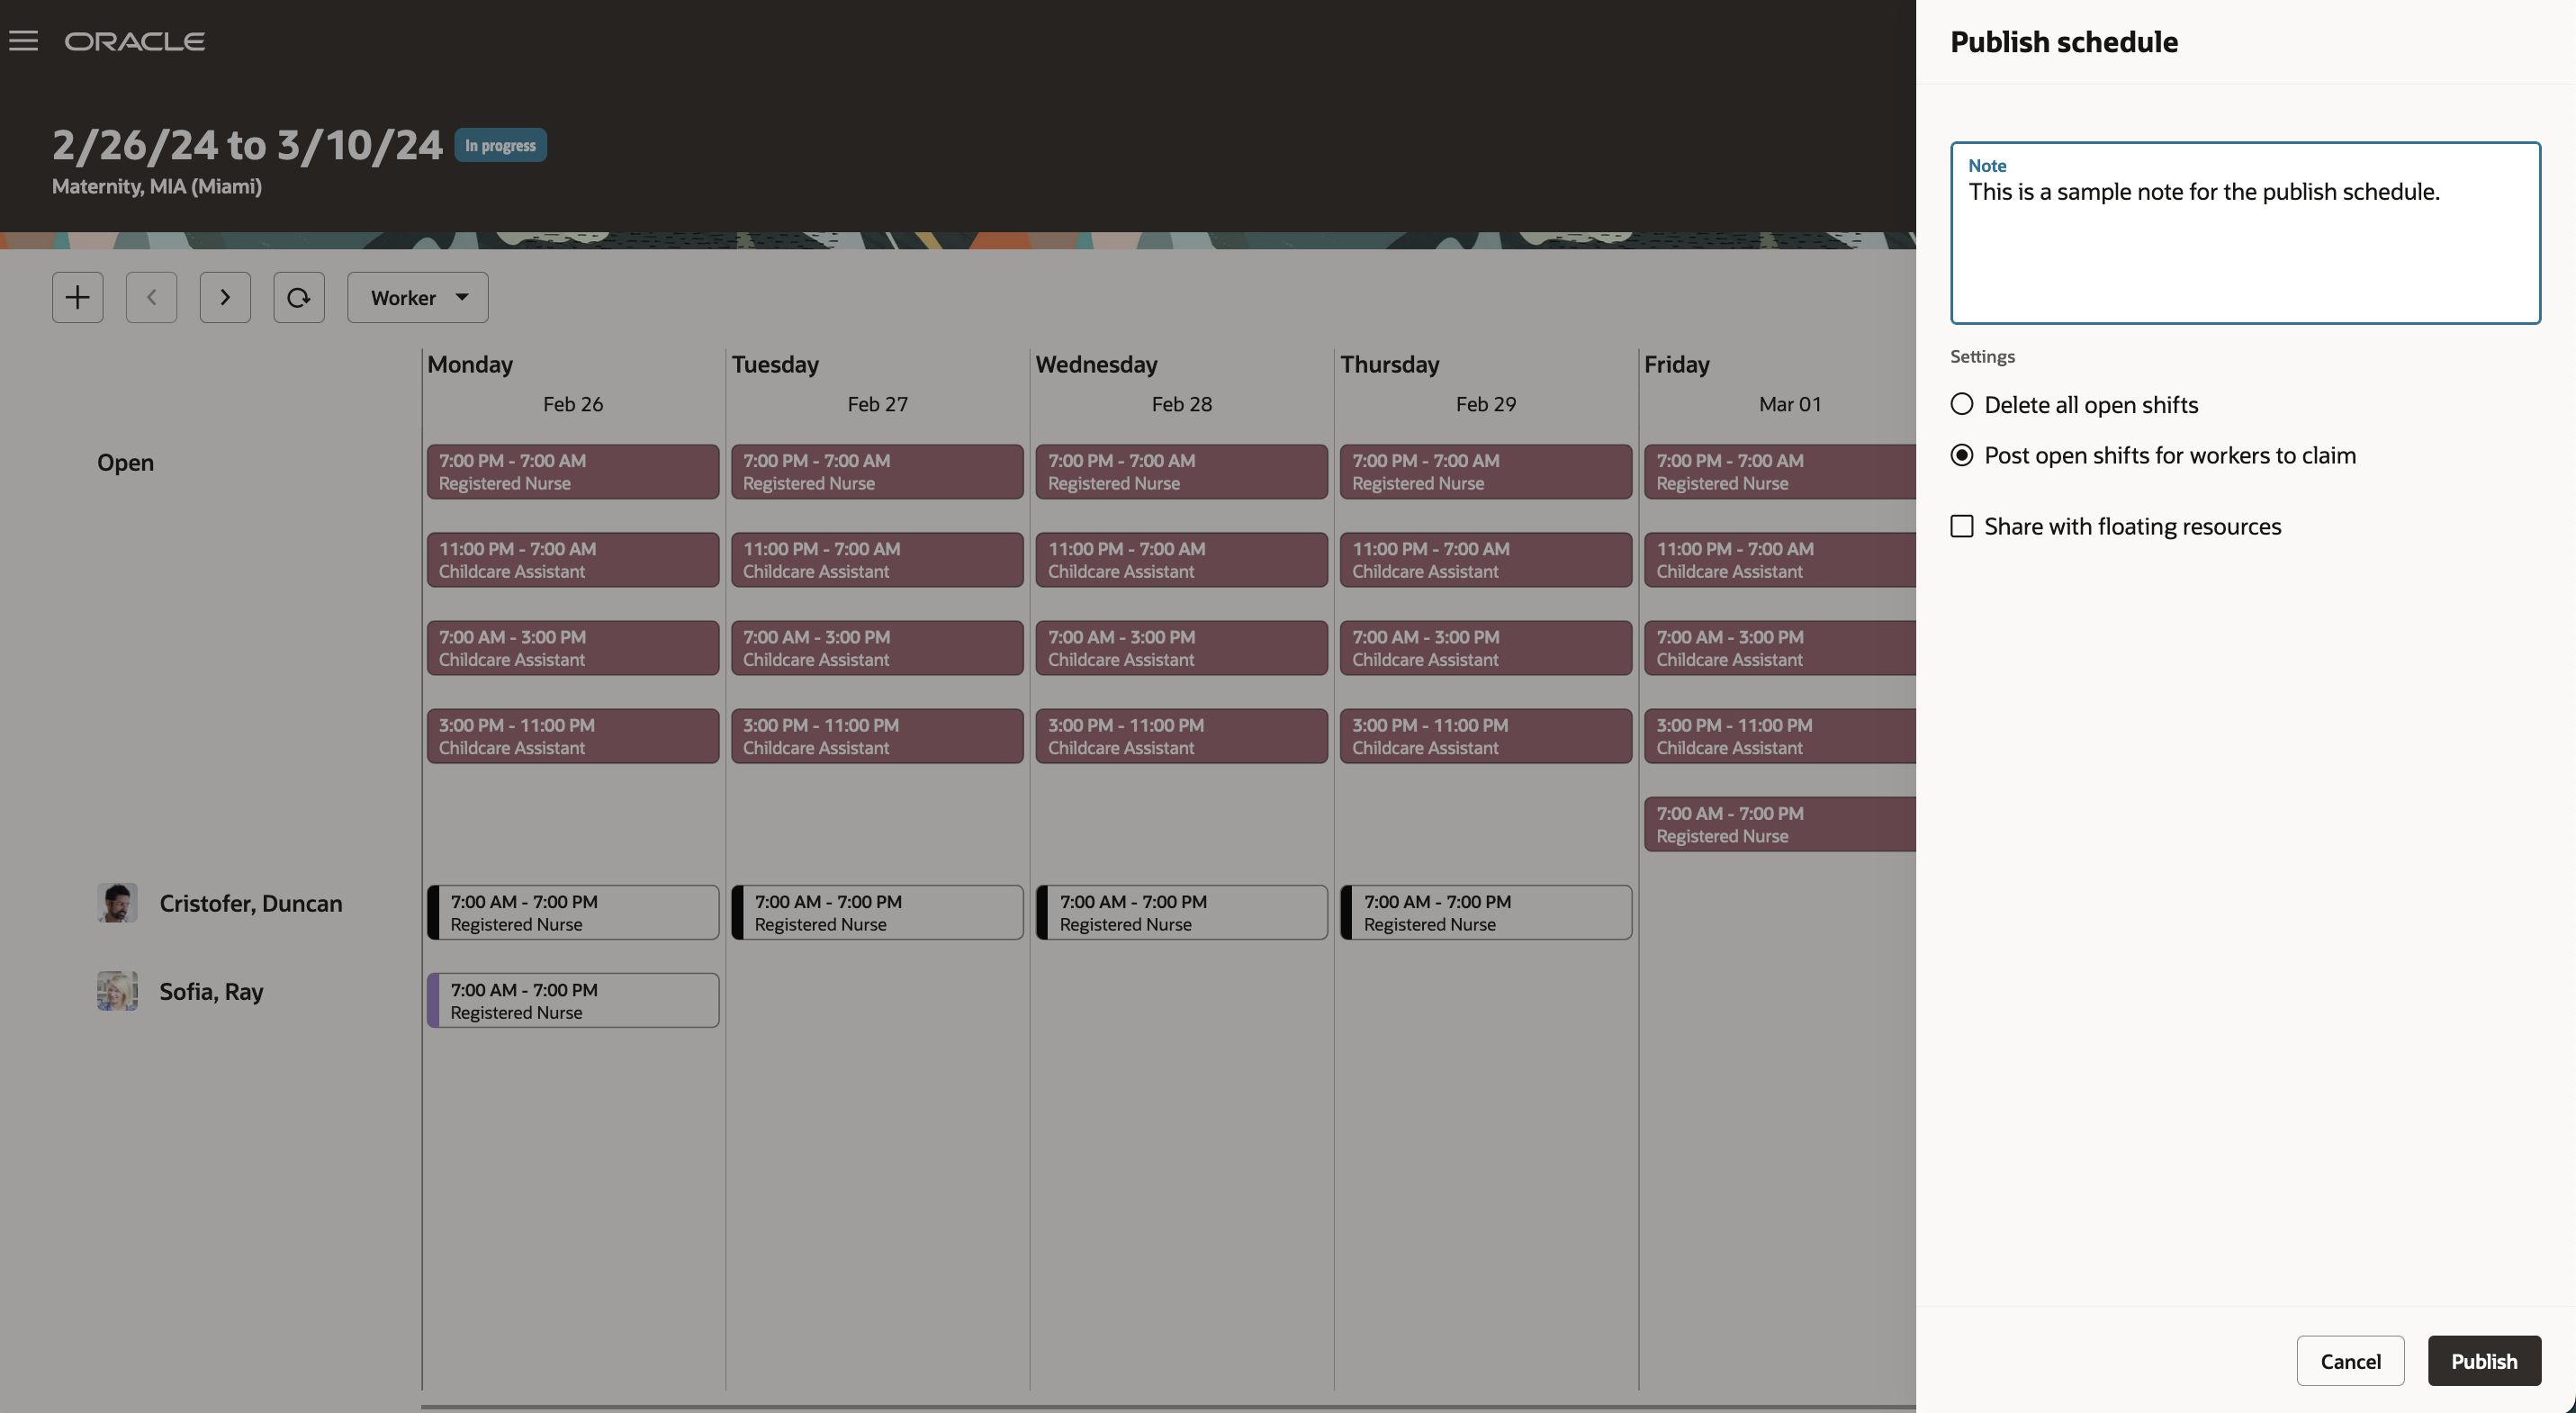
Workforce Schedule Page Showing the Publish Schedule Drawer with Floating Allowed
This feature empowers schedulers to manage the full workforce scheduling lifecycle in a secure, collaborative, and efficient way.
Steps to Enable
- Optionally add codes to the Shift Types extended lookup and edit existing extended names, since they're the values people see on the various shift and scheduling pages.
- In the Setup and Maintenance work area, on the Tasks panel tab, click Search.
- On the Search page, search for and click the Manage Extended Lookup Codes task.
- On the Extended Lookup Codes page, scroll to and select the Workforce Schedule Shift Types lookup type.
- In the Workforce Schedule Shift Types: Extended Lookup Codes section, add your codes. You can also edit the extended names.
- Review the additional information for the delivered shift types and add it for any shift types you added. The context value for all workforce schedule shift types needs to be Workforce Schedule Shift Type Properties. By default, the Percentage of productivity value is 100, but you can change it to match your policies.
- Save your changes.
- Optionally create your shift categories.
- In the Setup and Maintenance work area, on the Tasks panel tab, click Search.
- On the Search page, search for and click the Manage Common Lookups task.
- On the Manage Common Lookups page, search for and select the ORA_HTS_ENT_SHIFTS_CATEGORY lookup type.
- In the ORA_HTS_ENT_SHIFTS_CATEGORY: Lookup Codes section, edit and add categories, as appropriate.
- Save your changes.
- Create shifts using the My Client Groups > Workforce Scheduling, Shifts quick action. Be sure that times and durations are in 15-minute intervals.
- Create work pattern types. Be sure break durations are in 15-minute intervals.
- In the Setup and Maintenance work area, on the Tasks panel tab, click Search.
- On the Search page, search for and click the Work Pattern Types task.
- From the Work Pattern Types page, create and save your work pattern types.
- Optionally create work pattern templates using the My Client Groups > Workforce Scheduling, Work Pattern Templates quick action. Be sure that times and durations are in 15-minute intervals.
- Create work patterns using the My Client Groups > Workforce Scheduling, Work Patterns quick action. Be sure that times and durations are in 15-minute intervals.
- Create schedule generation profiles using the My Client Groups > Workforce Scheduling, Schedule Generation Profiles quick action.
- Import workload plans using My Client Groups > Data Exchange.
- On the Data Exchange page, under HCM Data Loader, click Import and Load Data.
- On the Import and Load data page, click Import File.
- On the Import File dialog box, specify the file to import, optionally review the parameters or submit the import request.
- Generate and publish the workforce schedules using the My Client Groups > Workforce Scheduling, Workforce Schedules quick action.
Tips And Considerations
You can personalize this page using constants and business rules. For more information refer to the Extending HCM Redwood Applications Using Visual Builder Studio guide.
Key Resources
For information on how schedule managers and administrators access their workforce schedules based on their schedule generation profile and area of responsibility see the Update 24B What's New feature: Workforce Schedule Access
Access Requirements
These privileges let schedule managers manage their workforce schedules. Schedule managers need the REST service privilege to view absences in their workforce schedules. The REST service privileges are part of the delivered Schedule Manager job role.
| Privilege | Code | Type | Description |
|---|---|---|---|
|
Manage Workforce Schedule |
ORA_HTS_MANAGE_WORKFORCE_SCHEDULE |
Aggregate |
Allows users to manage the workforce schedules for which they are responsible. |
|
Publish Workforce Schedule |
HTS_PUBLISH_WORKFORCE_SCHEDULE |
Function |
Allows publishing and unpublishing of workforce schedules. |
|
Use REST Service - Public Absences Read Only |
ANC_REST_SERVICE_ACCESS_PUBLIC_ABSENCES_RO |
Aggregate |
Allows users to call the GET method with the Public Absences REST service. |