View Schedule Coverage Variance
As a schedule manager, you can review coverage variances between the workload demand requirements and scheduled shifts directly from the Workforce Schedule pages. To access the coverage variances, select a job view. You can then see a summary of required versus scheduled hours for each listed job, for every day of the week or 2 weeks, depending on the schedule timeline you select.
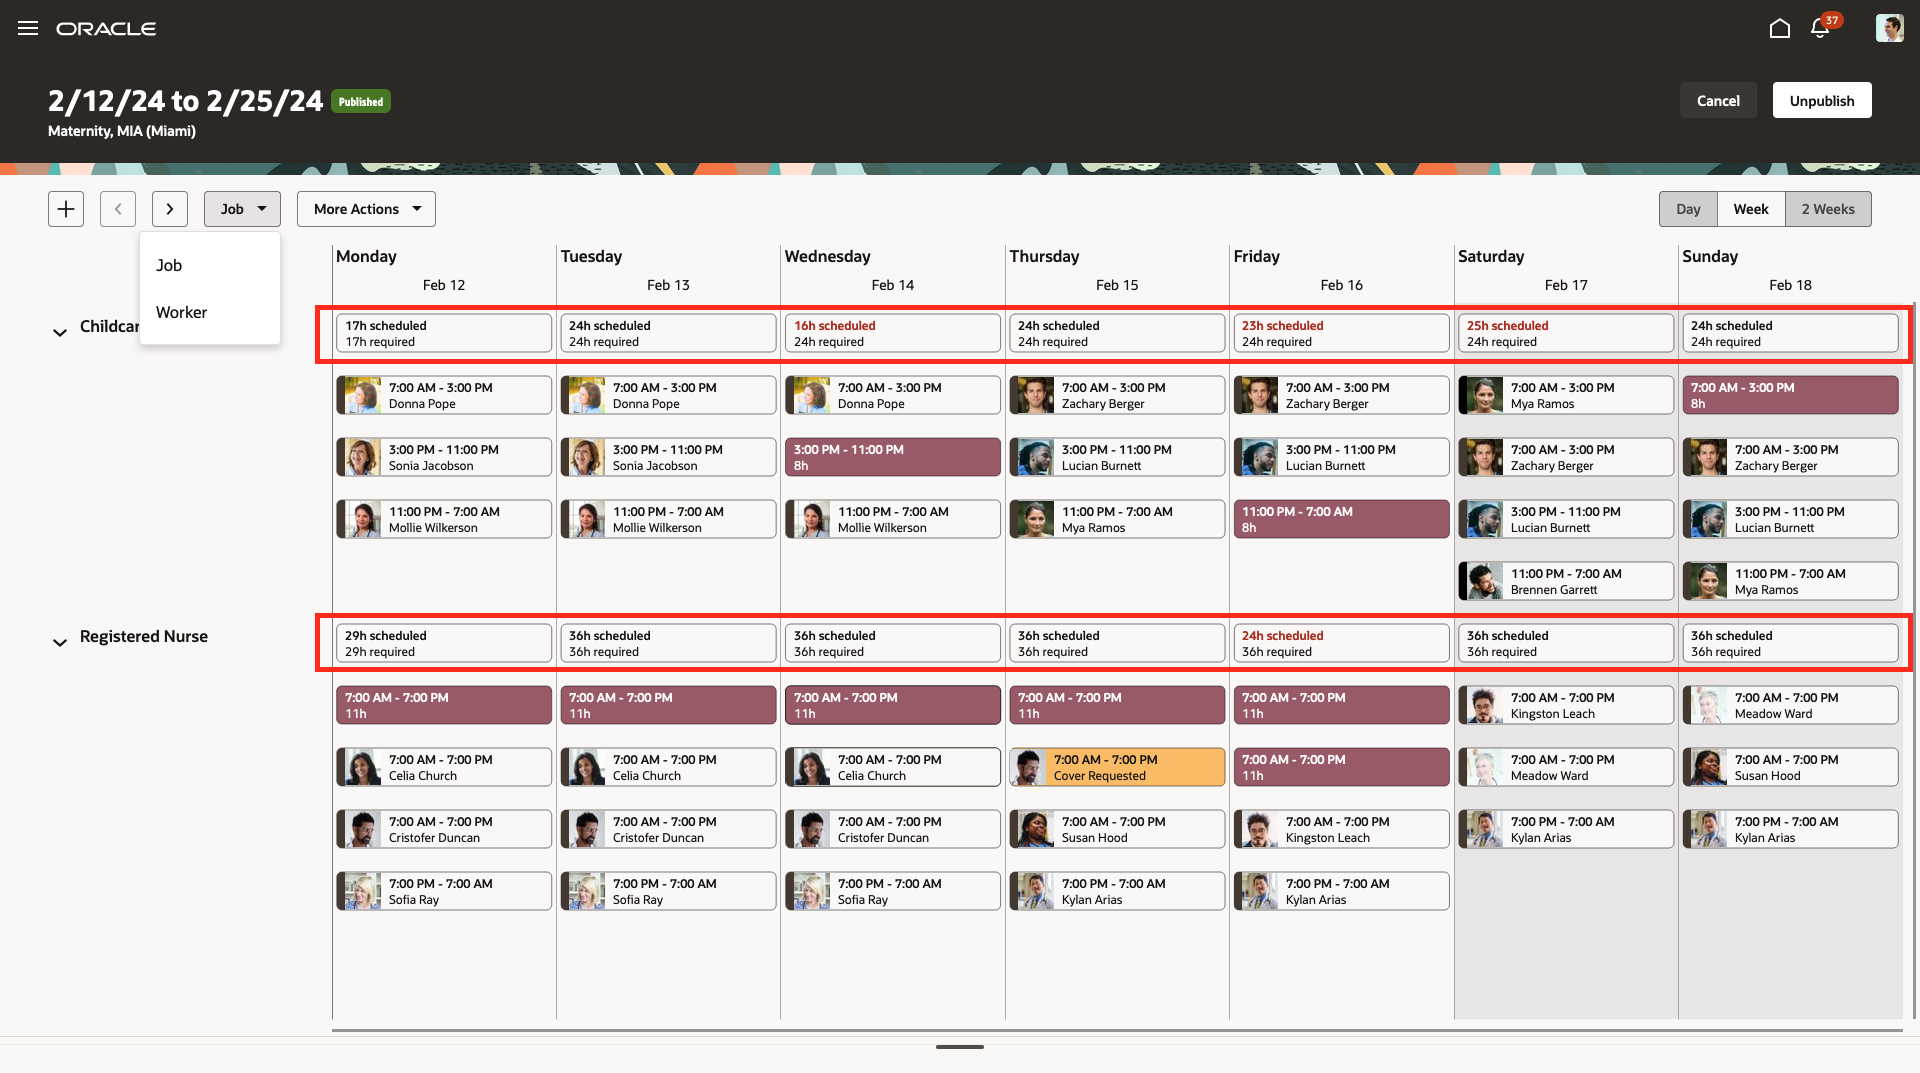
Workforce Schedule with Shifts Grouped by Job and Each Job's Summary Details Row Highlighted
To review coverage variance details for each day, in both 1-week and 2-week timelines, open the coverage variance panel drawer at the bottom of the schedule. The coverage variance shows as the number of hours you're overstaffed or understaffed for each given interval for the day, for each job listed. Overstaffing and understaffing variance hours appear in red to help you quickly identify schedule gaps. Use the More Actions > View Variance By menu options to view coverage by workers or hours. The day intervals shown here come from the corresponding schedule generation profile.
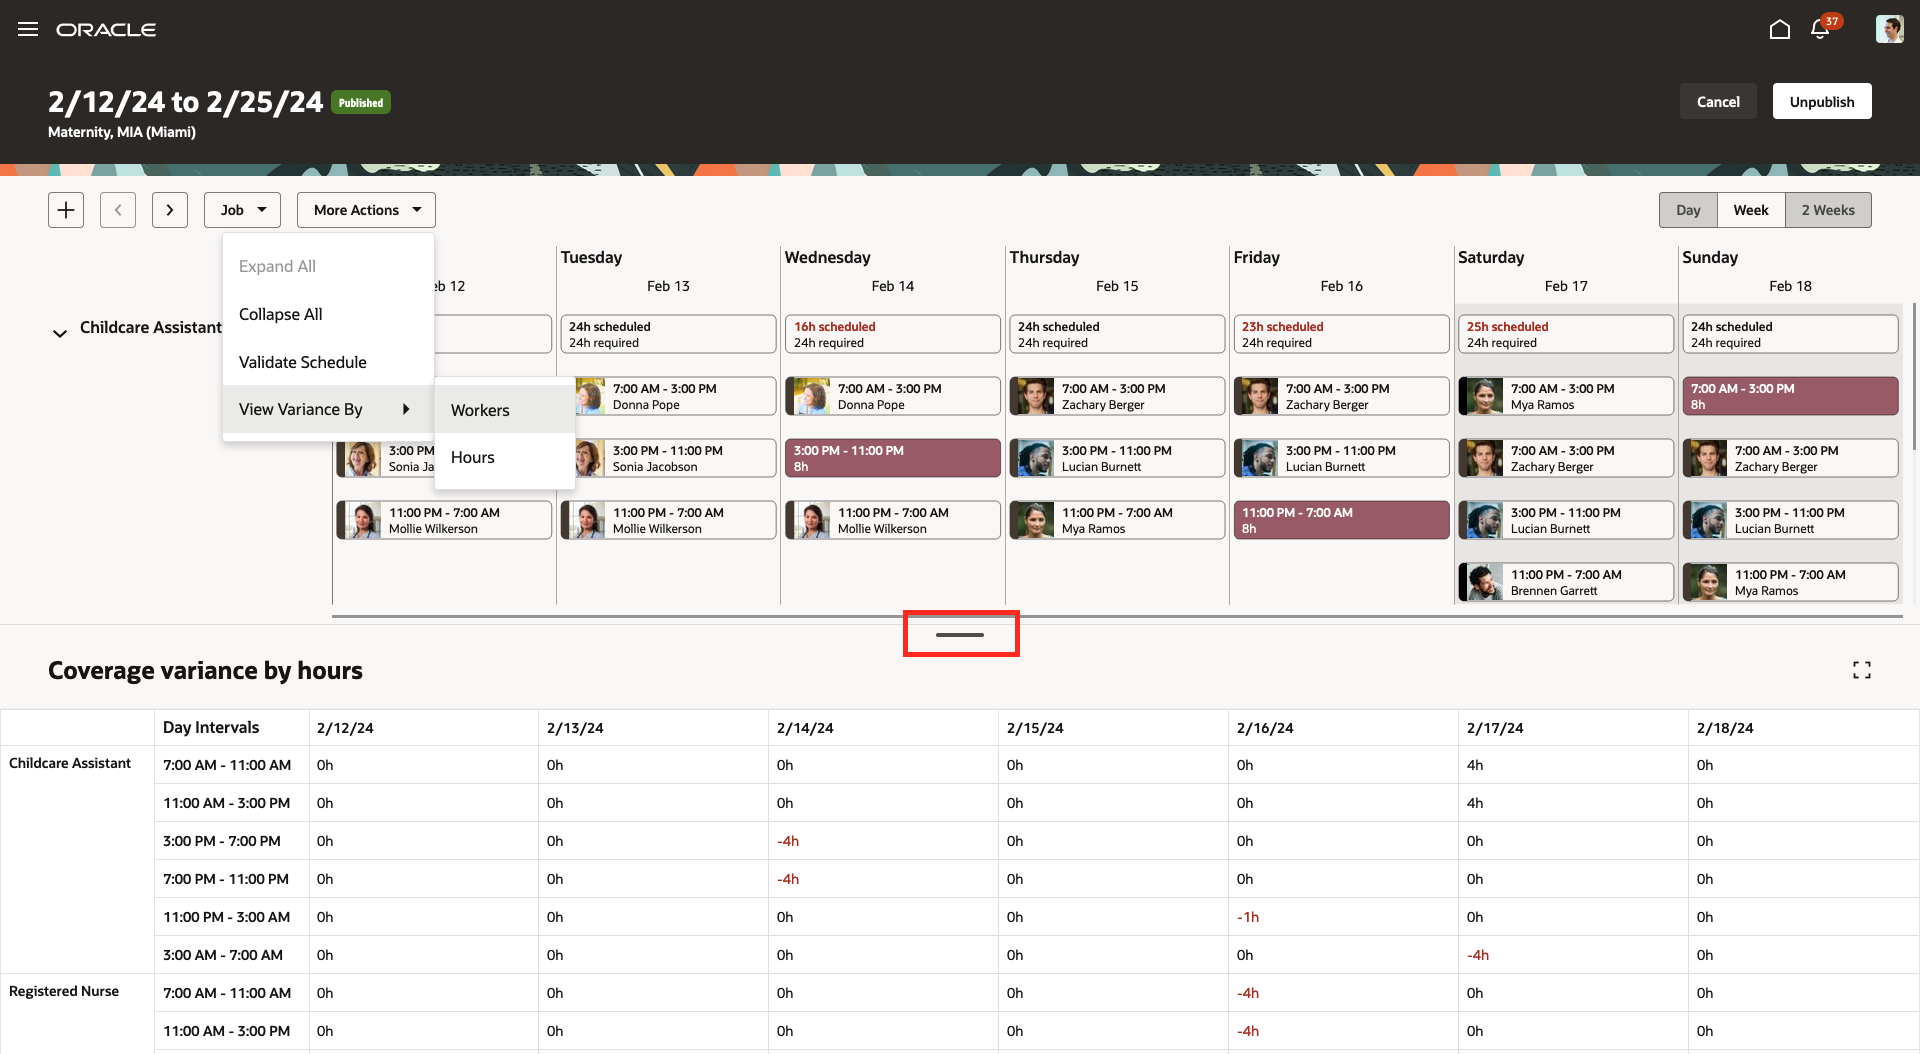
1-Week View of a Workforce Schedule with the Coverage Variances by Hours Drawer Open
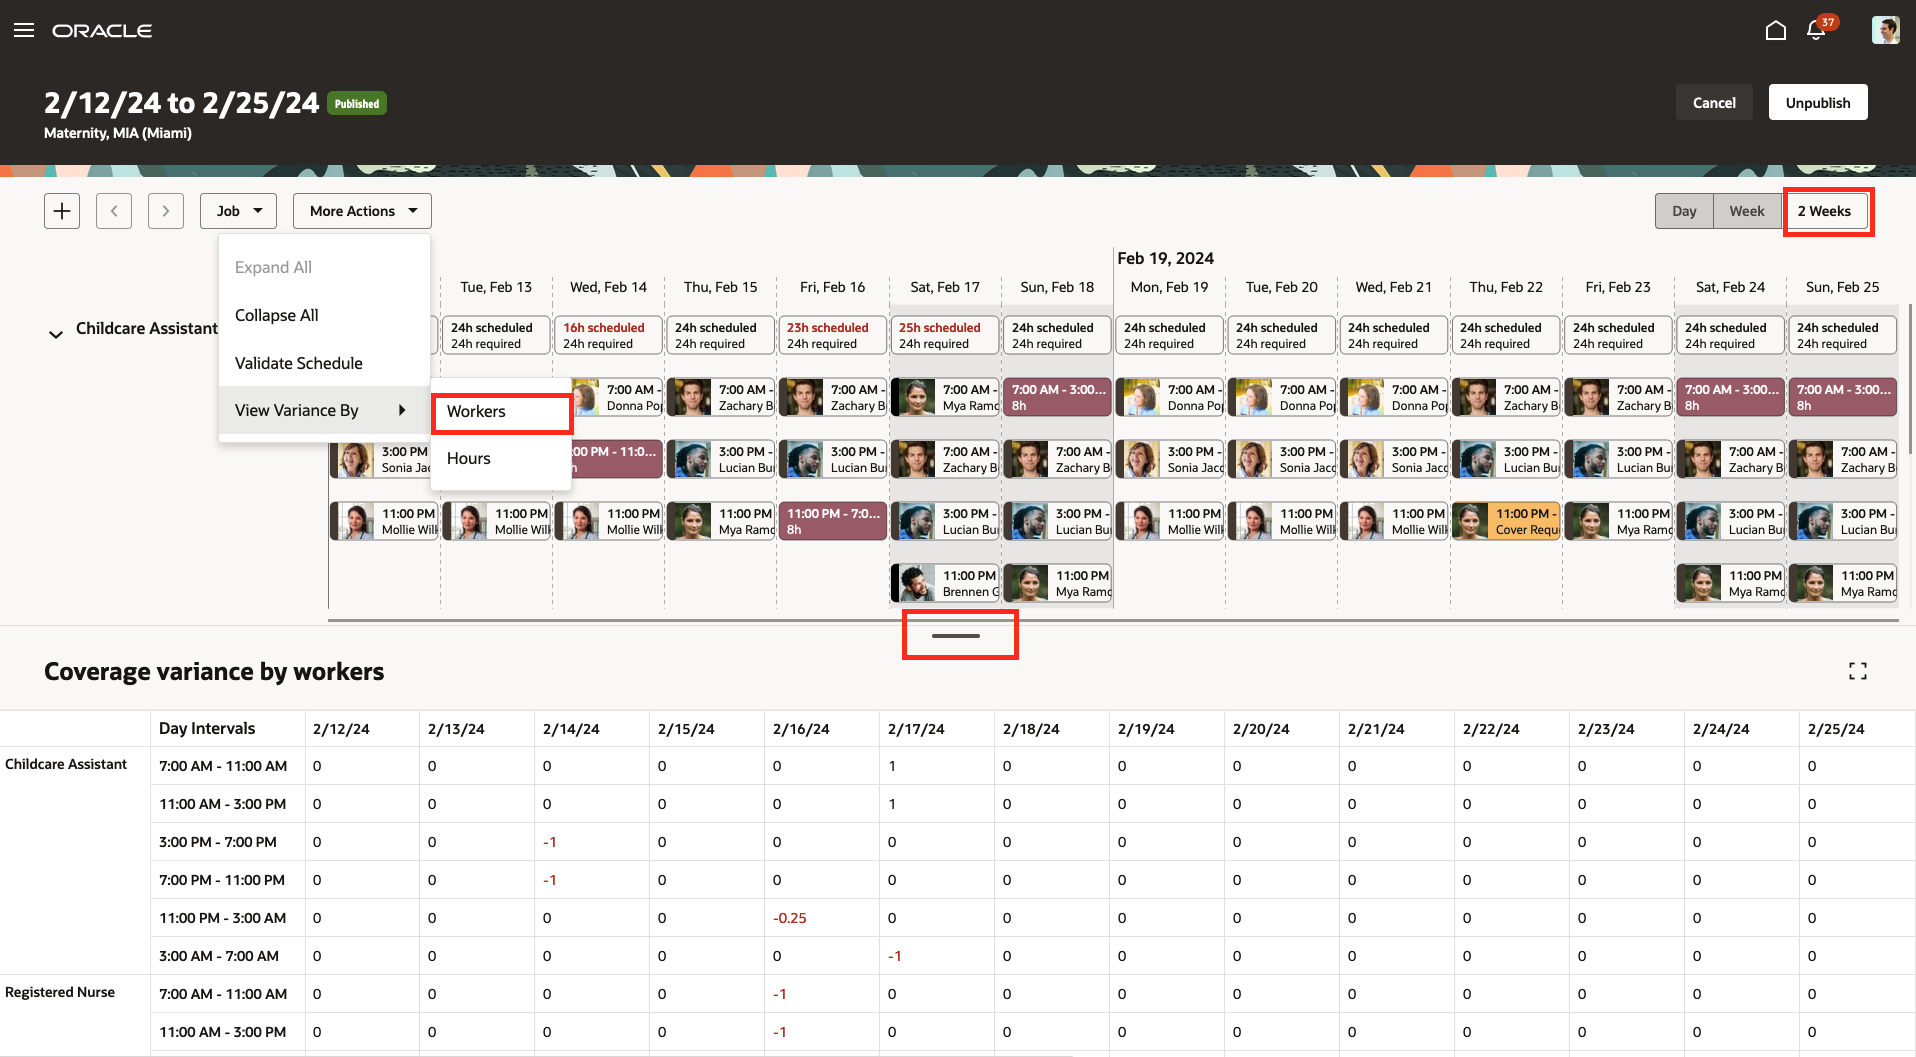
2-Weeks View of a Workforce Schedule with the Coverage Variances by Workers Drawer Open
When you click a daily summary in a row with a job name, the corresponding variances are highlighted in the coverage panel drawer. This behavior helps you easily identify any critical staffing gaps for each interval of that day.
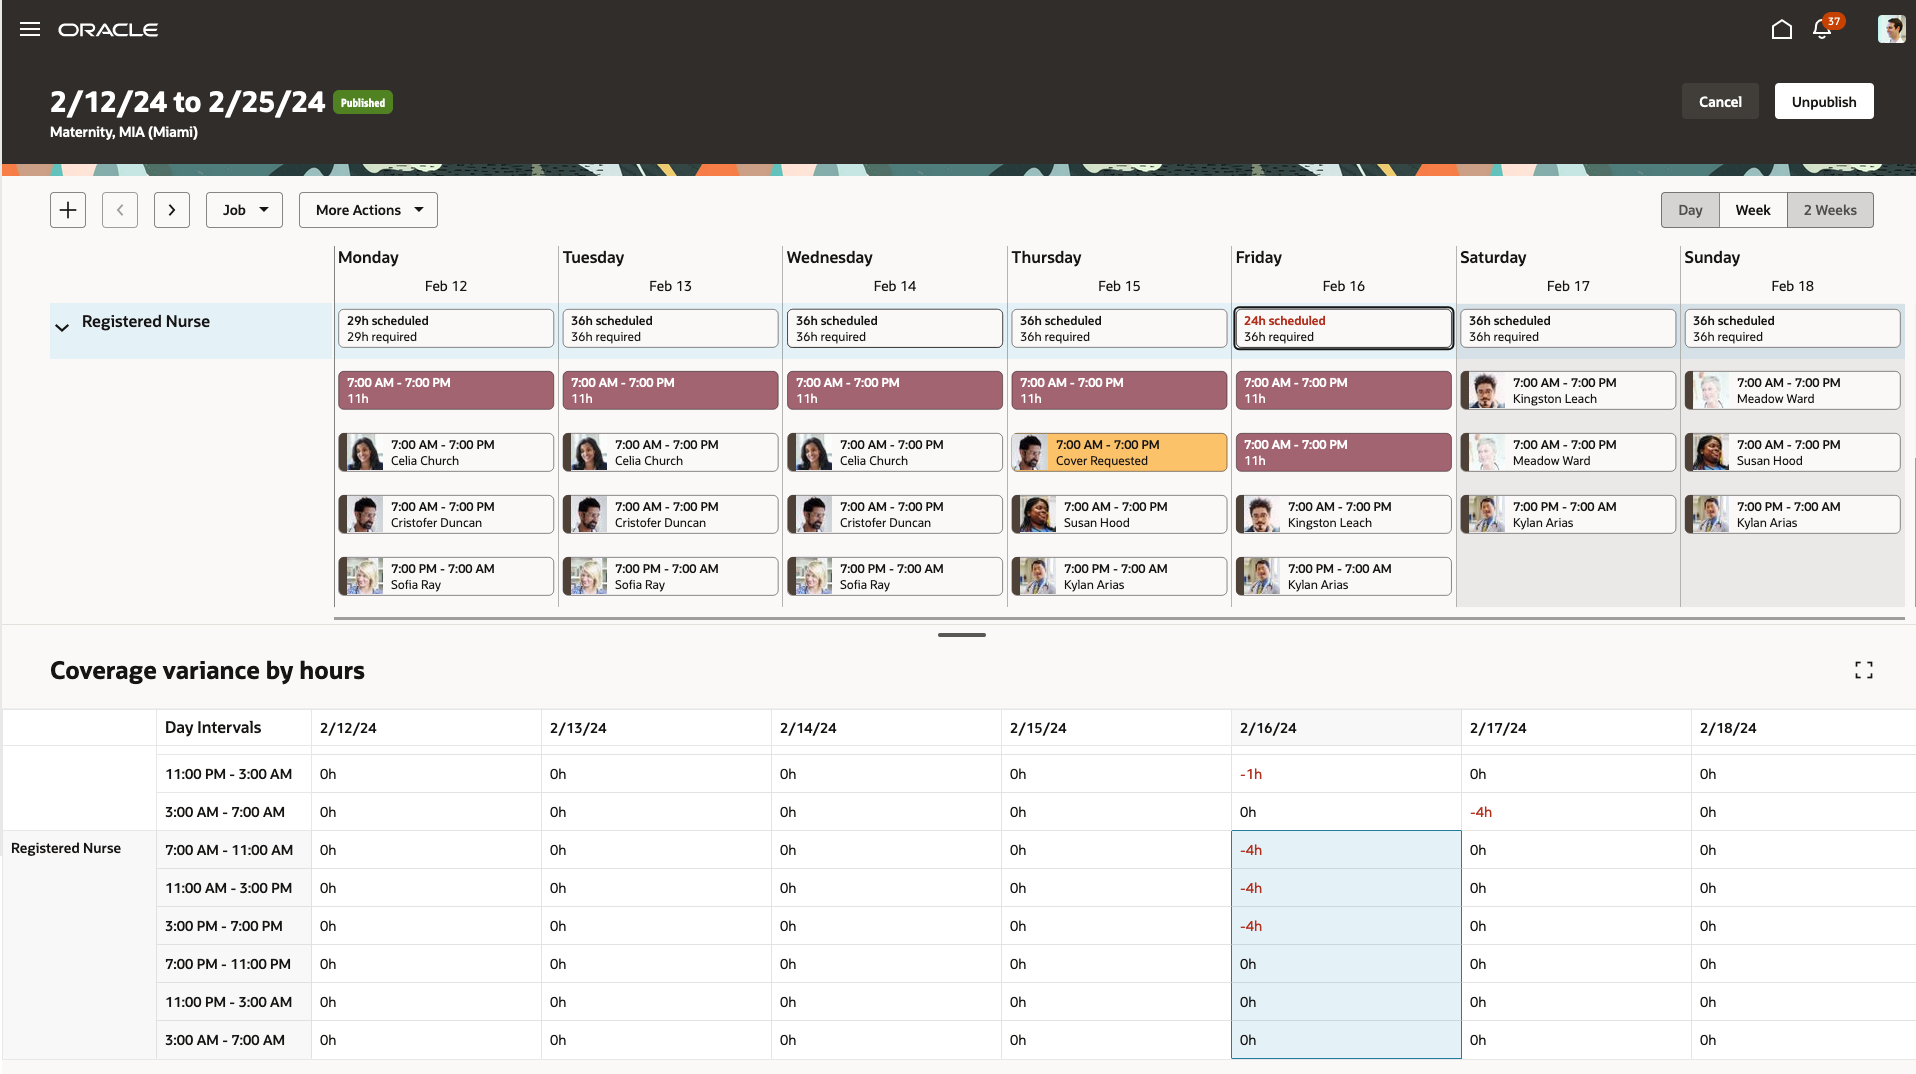
Workforce Schedule with the Friday, Registered Nurse Summary Details Selected and the Corresponding Coverage Variance by Hours Column Highlighted
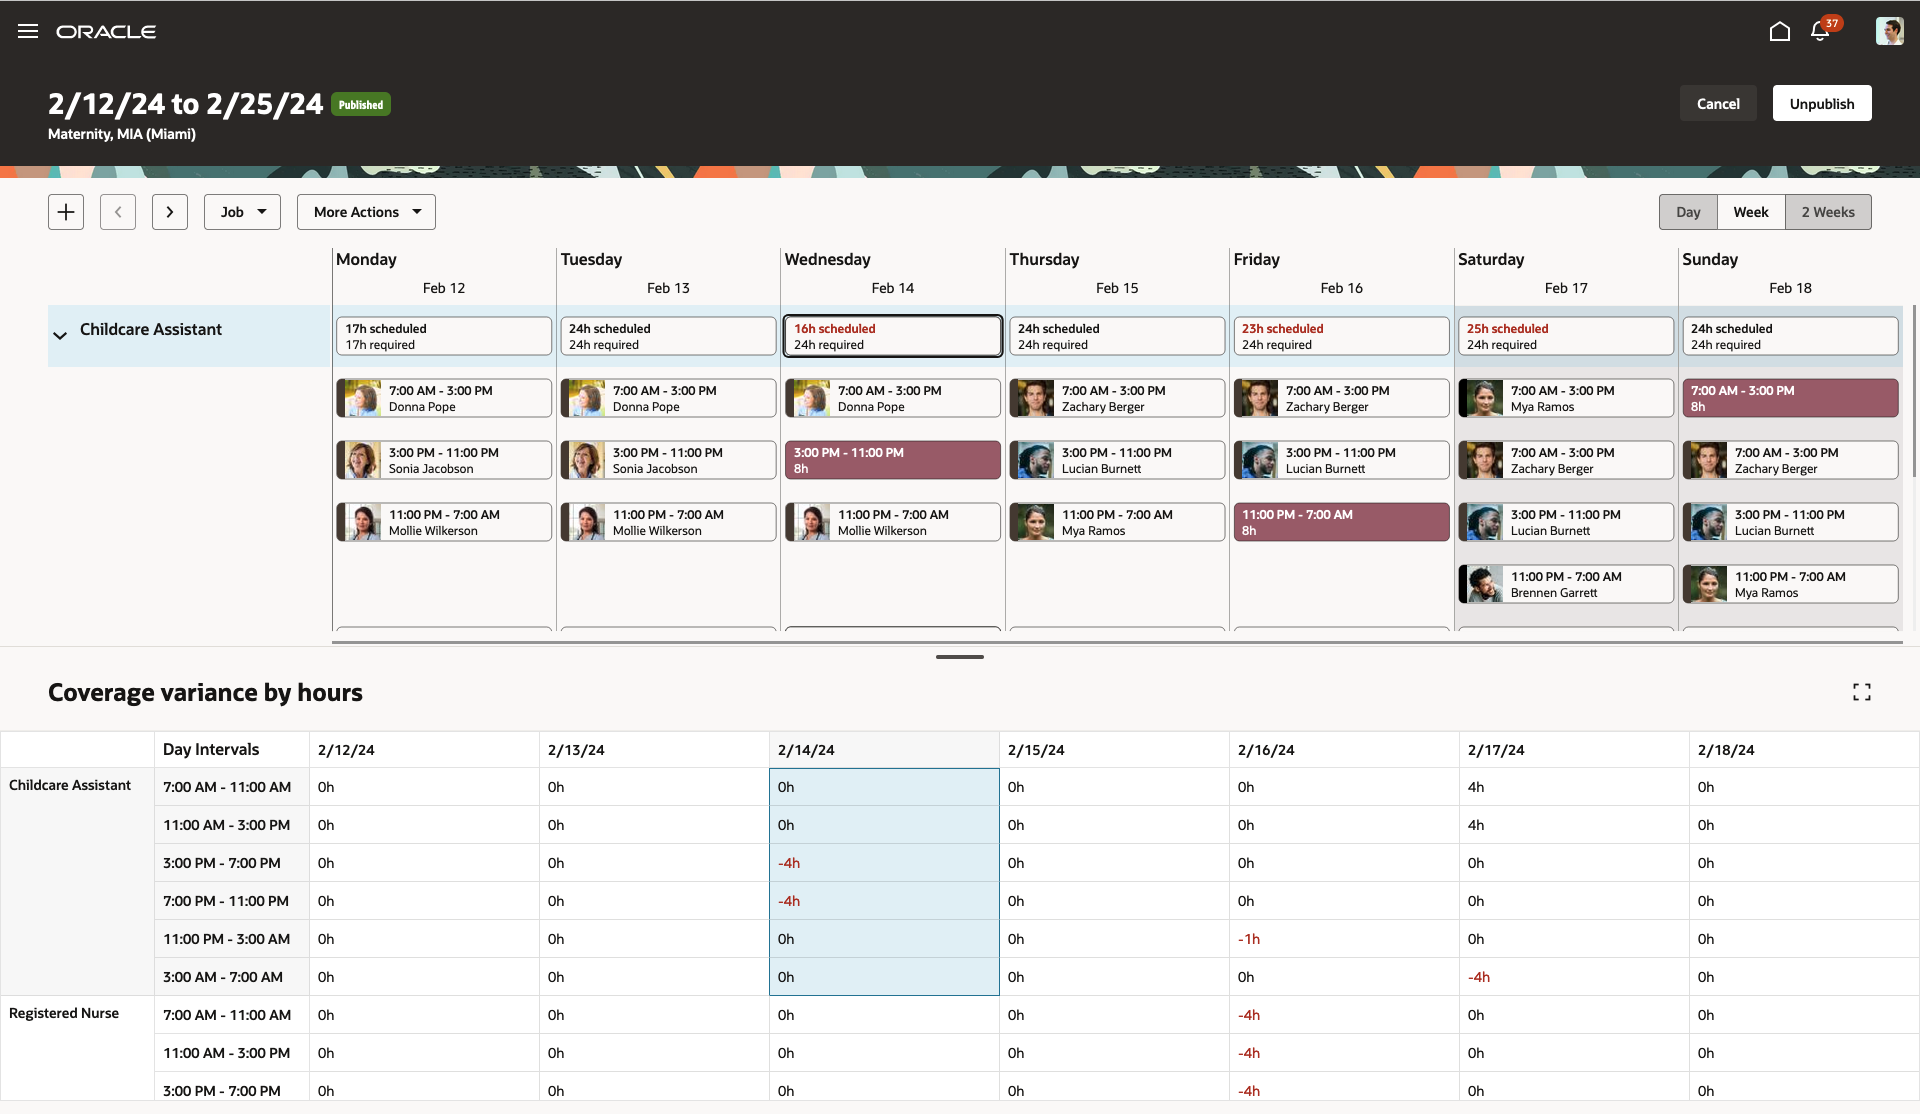
Workforce Schedule with the Wednesday, Childcare Assistant Summary Details Selected and the Corresponding Coverage Variance by Hours Column Highlighted
You can also review coverage variance in hourly increments when you show the schedule in the Day view. You see the number of required, scheduled, and variance hours for each hour of that day.
This feature helps schedule manager respond more efficiently to the scheduling gaps and make necessary schedule updates to avoid overstaffing or understaffing their departments.
Steps to Enable
- Optionally add codes to the Shift Types extended lookup and edit existing extended names, since they're the values people see on the various shift and scheduling pages.
- In the Setup and Maintenance work area, on the Tasks panel tab, click Search.
- On the Search page, search for and click the Manage Extended Lookup Codes task.
- On the Extended Lookup Codes page, scroll to and select the Workforce Schedule Shift Types lookup type.
- In the Workforce Schedule Shift Types: Extended Lookup Codes section, add your codes. You can also edit the extended names.
- Review the additional information for the delivered shift types and add it for any shift types you added. The context value for all workforce schedule shift types needs to be Workforce Schedule Shift Type Properties. By default, the Percentage of productivity value is 100, but you can change it to match your policies.
- Save your changes.
- Optionally create your shift categories.
- In the Setup and Maintenance work area, on the Tasks panel tab, click Search.
- On the Search page, search for and click the Manage Common Lookups task.
- On the Manage Common Lookups page, search for and select the ORA_HTS_ENT_SHIFTS_CATEGORY lookup type.
- In the ORA_HTS_ENT_SHIFTS_CATEGORY: Lookup Codes section, edit and add categories, as appropriate.
- Save your changes.
- Create shifts using the My Client Groups > Workforce Scheduling, Shifts quick action. Be sure that times and durations are in 15-minute intervals.
- Create work pattern types. Be sure break durations are in 15-minute intervals.
- In the Setup and Maintenance work area, on the Tasks panel tab, click Search.
- On the Search page, search for and click the Work Pattern Types task.
- From the Work Pattern Types page, create and save your work pattern types.
- Optionally create work pattern templates using the My Client Groups > Workforce Scheduling, Work Pattern Templates quick action. Be sure that times and durations are in 15-minute intervals.
- Create work patterns using the My Client Groups > Workforce Scheduling, Work Patterns quick action. Be sure that times and durations are in 15-minute intervals.
- Create schedule generation profiles using the My Client Groups > Workforce Scheduling, Schedule Generation Profiles quick action. Be sure when configuring the schedule plan portion to set all applicable day intervals that show on the coverage panel.
- Import workload plans using My Client Groups > Data Exchange.
- On the Data Exchange page, under HCM Data Loader, click Import and Load Data.
- On the Import and Load data page, click Import File.
- On the Import File dialog box, specify the file to import, optionally review the parameters or submit the import request.
- Generate and publish the workforce schedules using the My Client Groups > Workforce Scheduling, Workforce Schedules quick action.
Key Resources
For information on how schedule managers and administrators access their workforce schedules based on their schedule generation profile and area of responsibility see the Update 24B What's New feature: Workforce Schedule Access.
Access Requirements
Here's the aggregate privilege that schedule managers manage the workforce schedules they're responsible for: Manage Workforce Schedule (ORA_HTS_MANAGE_WORKFORCE_SCHEDULE)