Enable Redwood Experience for Approvals and Alerts in Benefits Report a Life Event Page
The Report a Life Event page was recreated in the Redwood Toolset Visual Builder Studio to improve the user experience by providing the same consistent functionality across Redwood pages. The enhanced page allows employees to submit qualifying life events for approval and administrators to review, approve, reject, or request for more information before processing the event. The rest of the functionality remains the same.
You can now use the standard Alerts functionality to send automatic notifications to benefits participants for self-reported life events (submission confirmation, approval, rejection, and requests for more information).
Here’s how you use this page.
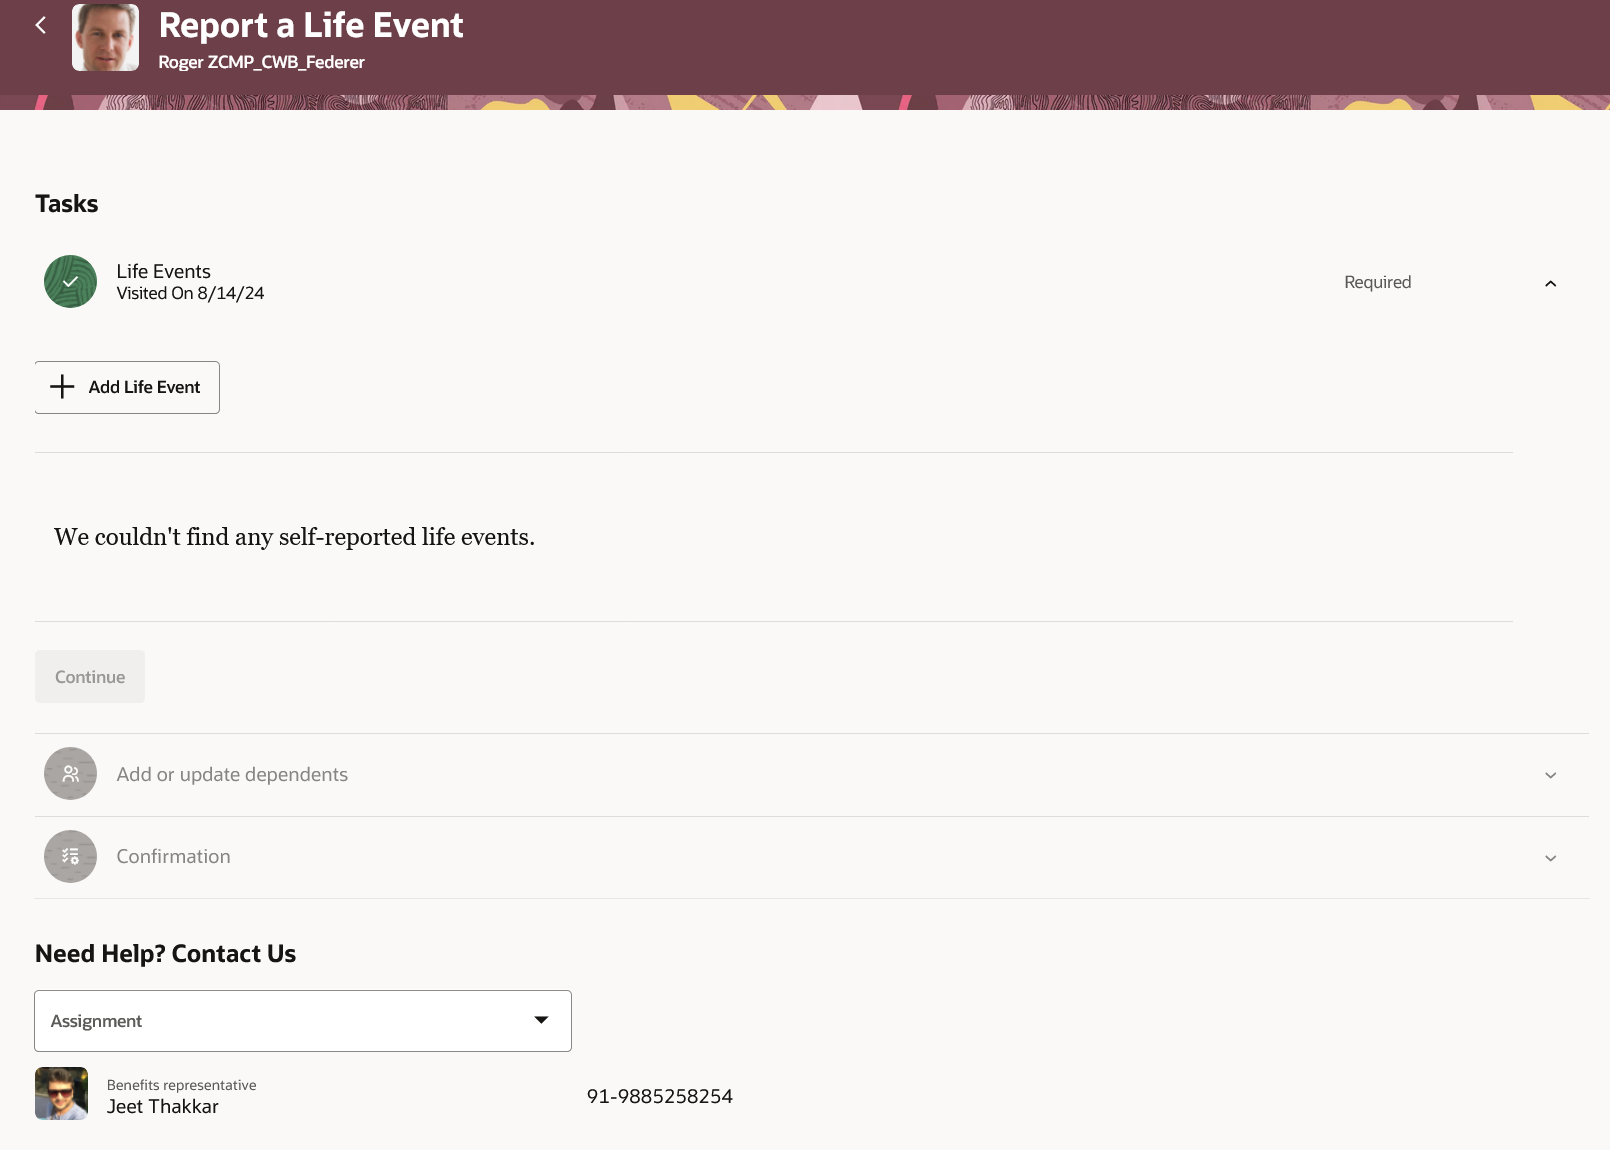
- On the Home page, click Me, Benefits.
- Click Report a Life Event.
- Click Add Life Event in the Life Events task.
- Complete rest of the tasks that are available for you. Click Continue to navigate.
- Click Done after completing the tasks.
After an employee self-reports a life event, they will receive a confirmation alert. For this, the Successful Submission of Self-Reported Life Event Alert (BEN_SELF_REPORTED_LIFE_EVENT_SUBMIT) should be enabled.
Report a Life Event Page
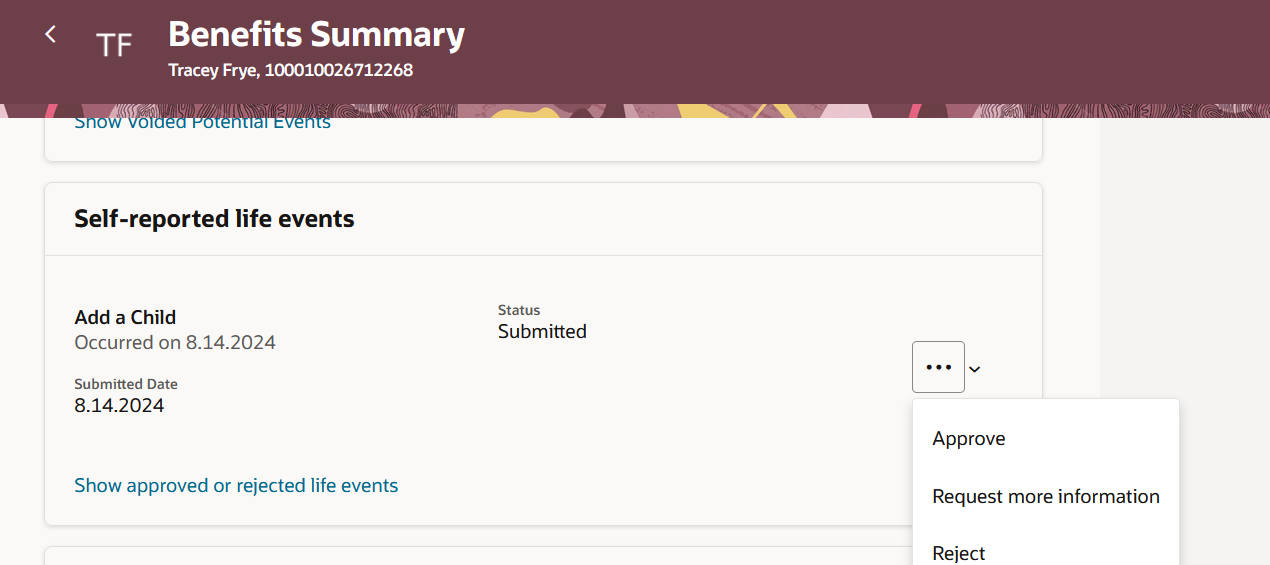
The administrator searches for the employee in Benefits Service Center in the Benefits Summary page. The scorecard now shows the count of self-reported life events that are submitted and require more information. Administrators can do one of these actions:
- Approve
- Request more Information
- Reject
Report a Life Event Page
This feature lets you experience Redwood’s high-fidelity interactions.
Here's the demo of these capabilities:
Steps to Enable
Here’s how you enable the Report a Life Event Redwood page:
- Navigate to the Setup and Maintenance work area.
- Search for and click the Manage Administrator Profile Values task.
- Search for and select the ORA_HCM_VBCS_PWA_ENABLED profile option and enable Site level access.
- Click Save.
- Search for and select the ORA_BEN_SELF_SERVICE_ENROLLMENT_REDWOOD_ENABLED profile and enable Site level access.
- Click Save and Close.
Here’s how you enable the self-assigned life event rule:
- Click Benefits Administration, Plan Configuration.
- In the Tasks panel drawer, click Benefit Life Events.
- Select an existing life event or create a life event.
- The Self-Assigned check box under additional Information must be selected.
- Select Self-Service Grouping.
- Select the Self-assigned Event Rule tab
- Click the Add Self-Assigned Event Rule button
- Optionally, select the Approval alert required check box if you want to send alerts.
- Optionally, select the Document required check box if document is required for the self-assigned life event.
- Enter Document Description to guide users on what documents are required.
- Save.
Access Requirements
Required Privileges, Duty Roles, and Data Security Policies (DSP)
- If you have custom roles, ensure that the respective privileges and aggregate privileges of the functional modules are part of your role hierarchy.
- After adding the privileges and aggregate privileges, regenerate the data role and verify the user interfaces.
- If you have direct job roles assigned to users, you need to create data role out of the job role for the data security to work.
Roles:
- Human Capital Management Application Administrator (To enable the required profile options)
- Employee
- Benefits Manager
- Benefits Specialist
- Benefits Administrator
Consolidated Security Details:
You need to ensure that these privileges and roles are part of the custom role hierarchy for the Benefits Service center and self-service benefits to work properly.
Benefits Service Center
- Access HCM Common Components (HRC_ACCESS_HCM_COMMON_COMPONENTS_PRIV)
- Enable Worker Searches Using Effective Date (PER_ENABLE_WORKER_SEARCHES_USING_EFFECTIVE_DATES)
- Use REST Service - Worker Assignments List of Values (ORA_PER_REST_SERVICE_ACCESS_WORKER_ASSIGNMENTS_LOV)
- Use REST Service - Benefit Relations List of Values (ORA_BEN_REST_SERVICE_ACCESS_BENEFIT_RELATIONS_LOV)
- Use REST Service - Benefit Balances List of Values (BEN_REST_SERVICE_ACCESS_BENEFIT_BALANCES_LOV_PRIV)
- Use REST Service - Benefits Group List of Values (BEN_REST_SERVICE_ACCESS_BENEFITS_GROUP_LOV_PRIV)
- Use REST Service - Contacts List of Values (ORA_PER_REST_SERVICE_ACCESS_CONTACTS_LOV)
- Elect Benefits (BEN_ELECT_BENEFITS_PRIV)
- Manage Beneficiary Organization Details (BEN_MANAGE_BENEFICIARY_ORGANIZATION_DETAILS_PRIV)
- Manage Benefit Contacts (BEN_MANAGE_BENEFIT_CONTACTS_PRIV)
- Access Family and Emergency Contacts by Worker (ORA_PER_PERSON_CONTACT_DETAILS_VIEW_DUTY)
- Manage Person Benefits Balance (BEN_MANAGE_PERSON_BENEFITS_BALANCE_PRIV)
- Use REST Service - Person Benefit Balances (ORA_BEN_REST_SERVICE_ACCESS_PERSON_BENEFIT_BALANCES)
- Manage Benefit Person Benefit Group (BEN_MANAGE_PERSON_BENEFIT_GROUP_PRIV)
- Use REST Service - Person Benefit Groups (ORA_BEN_REST_SERVICE_ACCESS_PERSON_BENEFIT_GROUPS)
- Manage Benefit Person Habits (BEN_MANAGE_BENEFIT_PERSON_HABITS_PRIV)
- Manage Benefits Additional Person Info (ORA_BEN_MANAGE_ADDITIONAL_PERSON_INFO)
- Manage Benefit Maintenance Batch Reporting (BEN_MANAGE_BENEFIT_MAINTENANCE_BATCH_REPORTING_PRIV)
- Manage Person Beneficiary Organizations (ORA_BEN_MANAGE_PER_BNF_ORG)
- Manage Benefit Relation (BEN_MANAGE_BENEFIT_RELATION_PRIV)
- Manage Person Benefit Relationship (ORA_BEN_MANAGE_PER_BNFT_RELATION)
- Manage Benefit Court Orders (ORA_BEN_MANAGE_PER_BENEFIT_COURT_ORDERS)
- Manage Person Benefits Billing (ORA_BEN_MANAGE_PER_BILLING)
- View Person Life Event (BEN_VIEW_PERSON_LIFE_EVENT_PRIV)
- Benefits Administrator Access (BEN_ADMIN_ACCESS_PRIV)
- Manage Benefit Participant Enrollment Result by Administrator (ORA_BEN_MANAGE_ENROLLMENT_RESULT_BY_ADMIN)
- Manage Benefit Person Potential Life Events (ORA_BEN_MANAGE_PERSON_POTENTIAL_LIFE_EVENT)
Self-Service Benefits:
- View Benefits Self Service Configuration (BEN_VIEW_BENEFITS_SELF_SERVICE_CONFIGURATION_PRIV)
- Submit Elections (BEN_SUBMIT_ELECTIONS_PRIV)
- Elect Benefits (BEN_ELECT_BENEFITS_PRIV)
- Manage Benefit Participant Enrollment Result by Worker (ORA_BEN_MANAGE_ENROLLMENT_RESULT_BY_WORKER)
- Self Report a Life Event (ORA_BEN_SELF_REPORT_A_LIFE_EVENT)
- Manage Benefits Additional Person Info ( ORA_BEN_MANAGE_ADDITIONAL_PERSON_INFO)
- Manage Person Beneficiary Organizations (ORA_BEN_MANAGE_PER_BNF_ORG)
- Access Family and Emergency Contacts by Worker (ORA_PER_PERSON_CONTACT_DETAILS_VIEW_DUTY)