 Redwood Experience for Journey Templates
We have enriched the user experience with the new Journey Templates page developed using the Redwood toolset. The page is built from the ground up using Visual Builder Studio (VB Studio) to give you a unique experience of Oracle applications.
You can navigate to the page by using the Journeys Setup app under the My Client Groups tab on the home page.
The Redwood Journeys Templates page is the equivalent of the existing Checklist Templates page and has the same functionality, including validations.
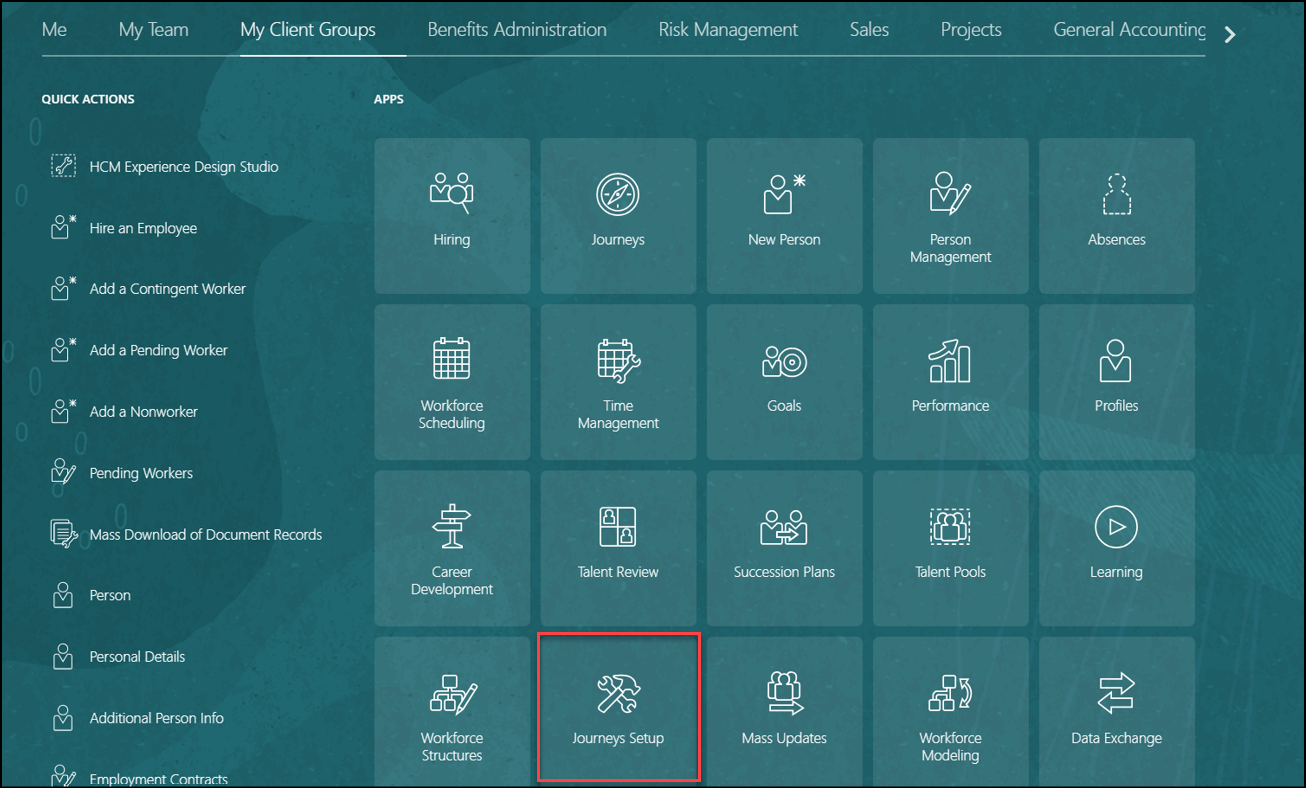
Journeys Setup App

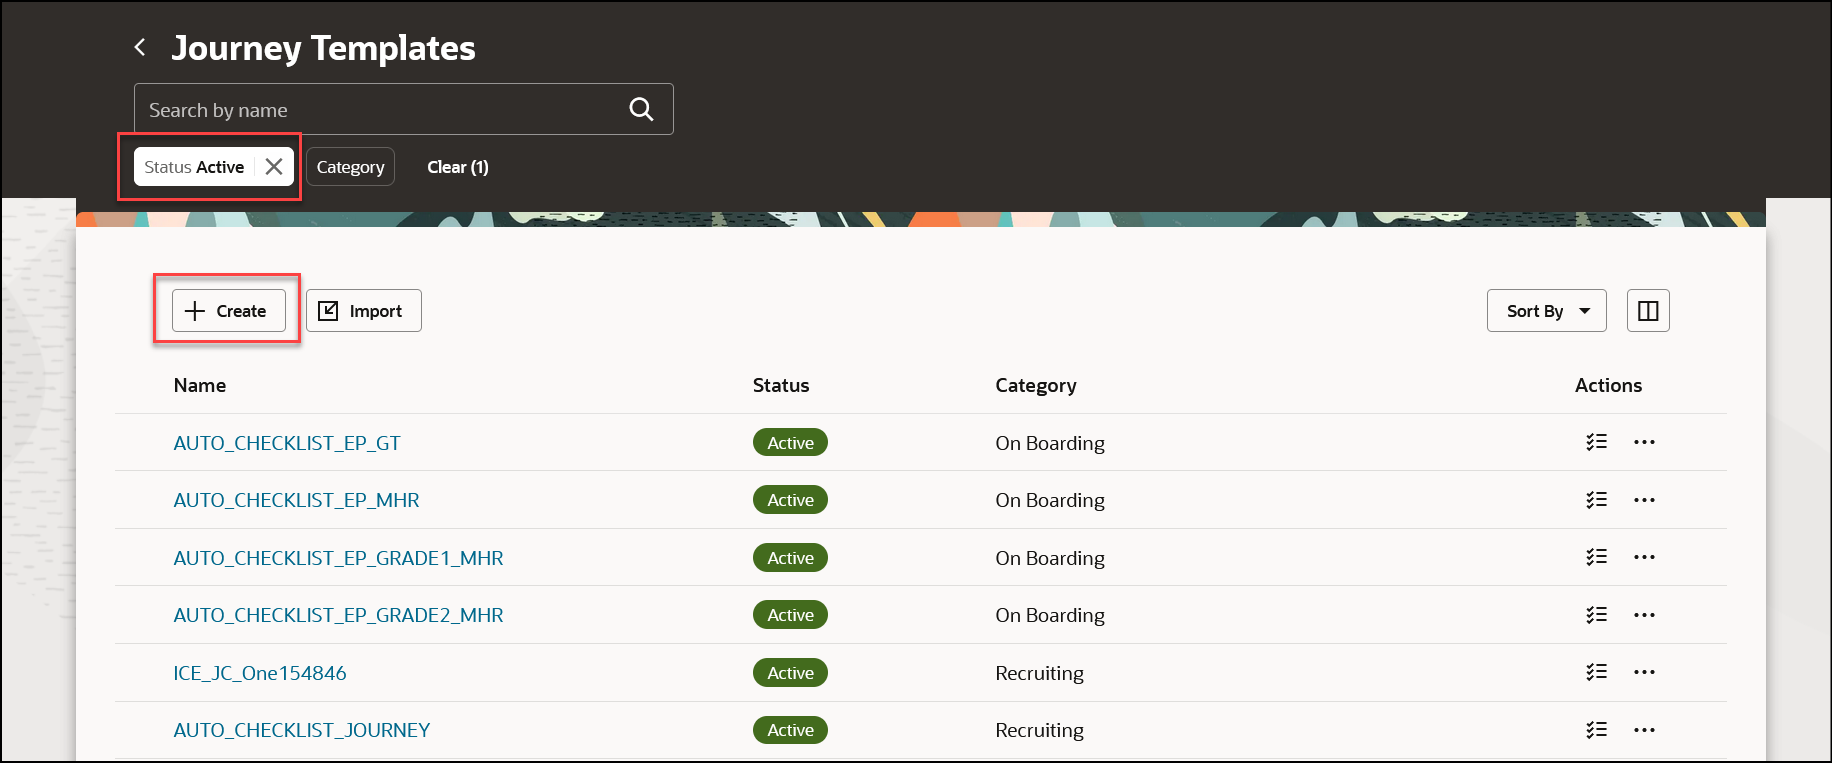
Journey Templates Action
The Active filter is applied by default on the Journey Templates page to display only active journeys. You have the option to import journey templates.
Create a Journey
You can create a new journey or use an existing journey to create a new one. The Use existing option replaces the duplicate option for creating a journey.
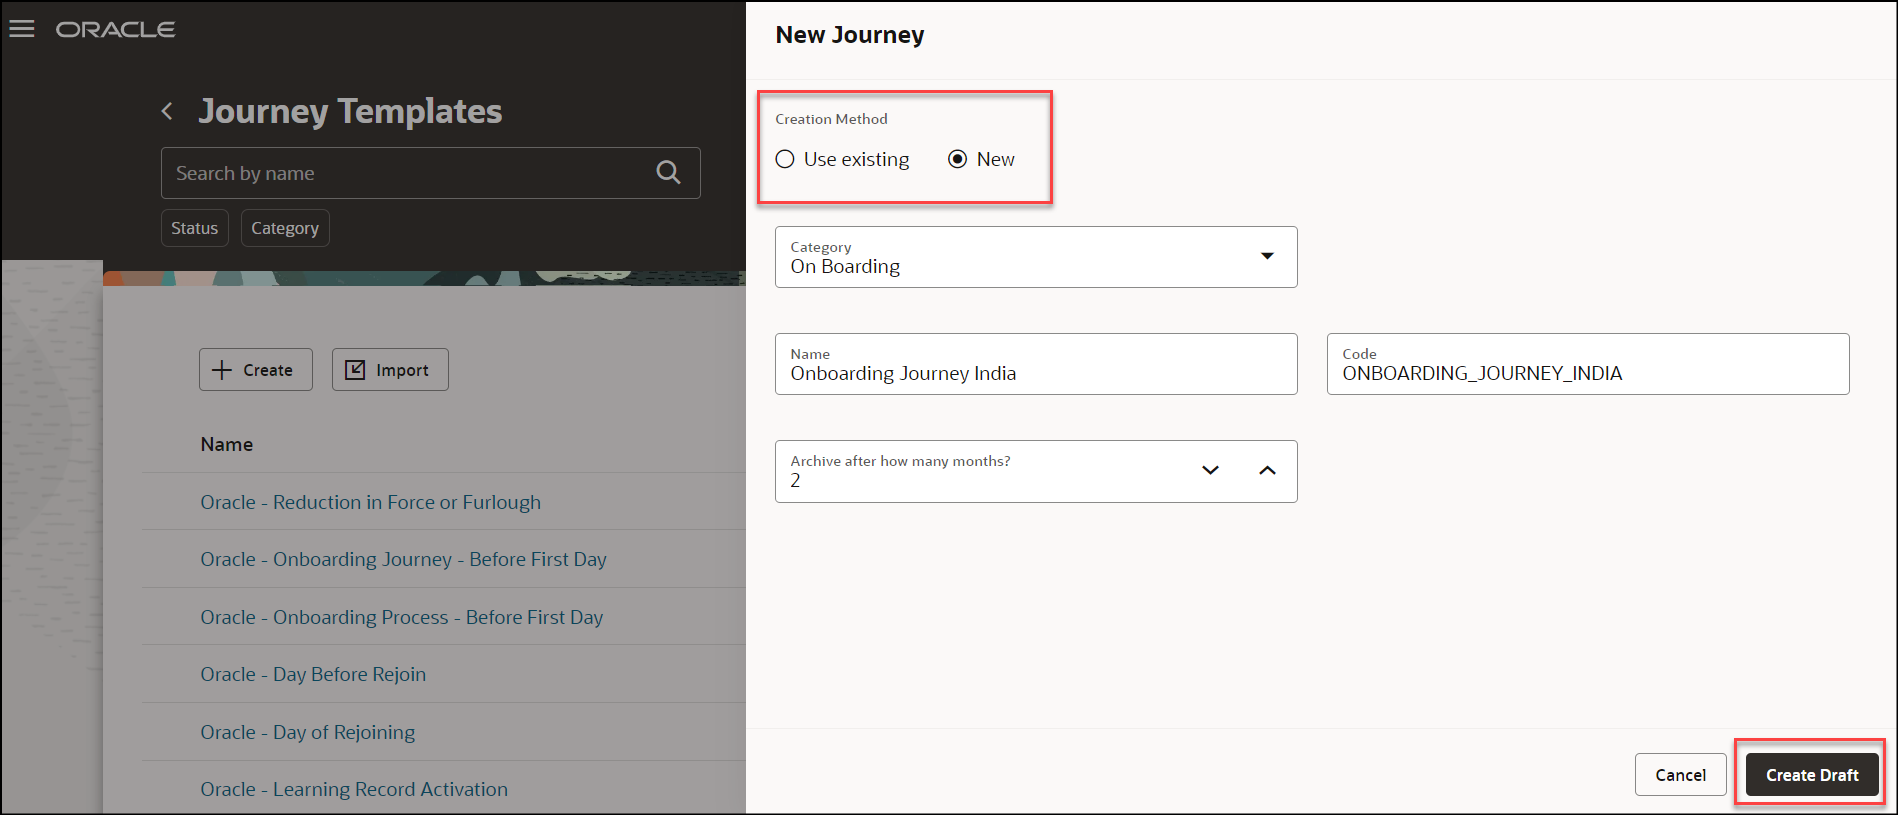
Enter Details for New Journey
These sections under the Overview tab contain a mix of fields taken from different tabs of the Checklist Templates UI:
-
Basic Details: The fields in this section are a combination from the General and Message tab. The Completion Criteria field displays the default value which can be modified by clicking the Edit icon.
-
Background image: The fields in this section are from the Message tab.
-
Tasks: The fields in this section are from the Tasks tab.
-
Note Board: The fields in this section are from the Dashboard tab.
-
Events and happenings: The fields in this section are from the Dashboard tab.
-
Get in touch: The fields in this section are from the Message tab.
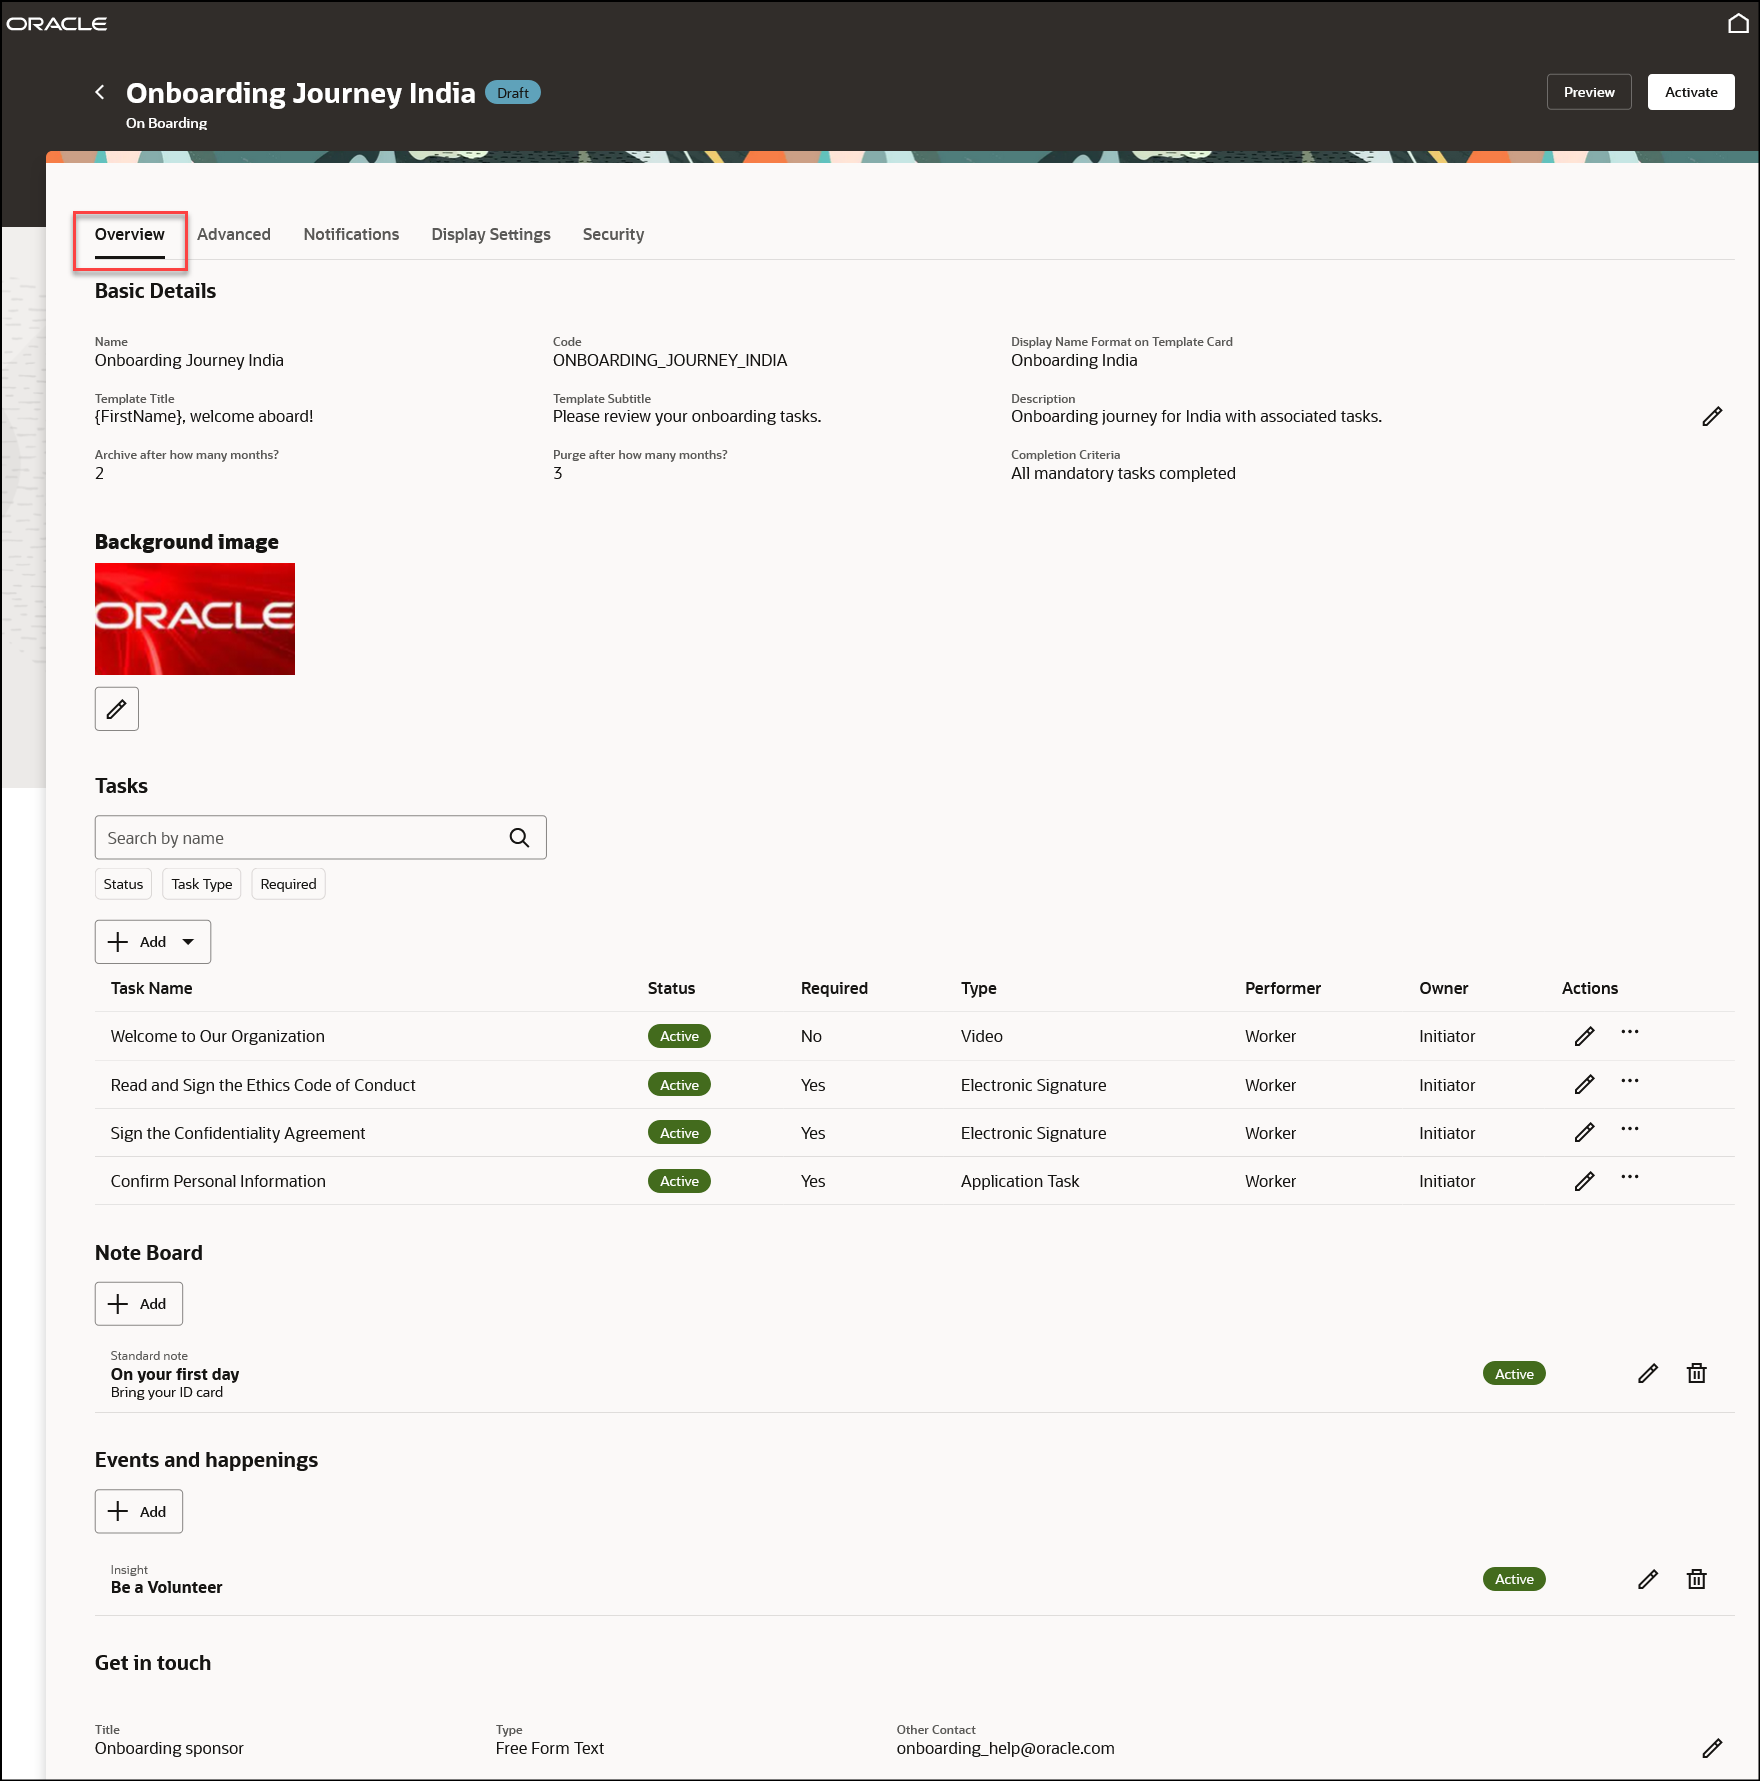
Enter Overview Details for Journey
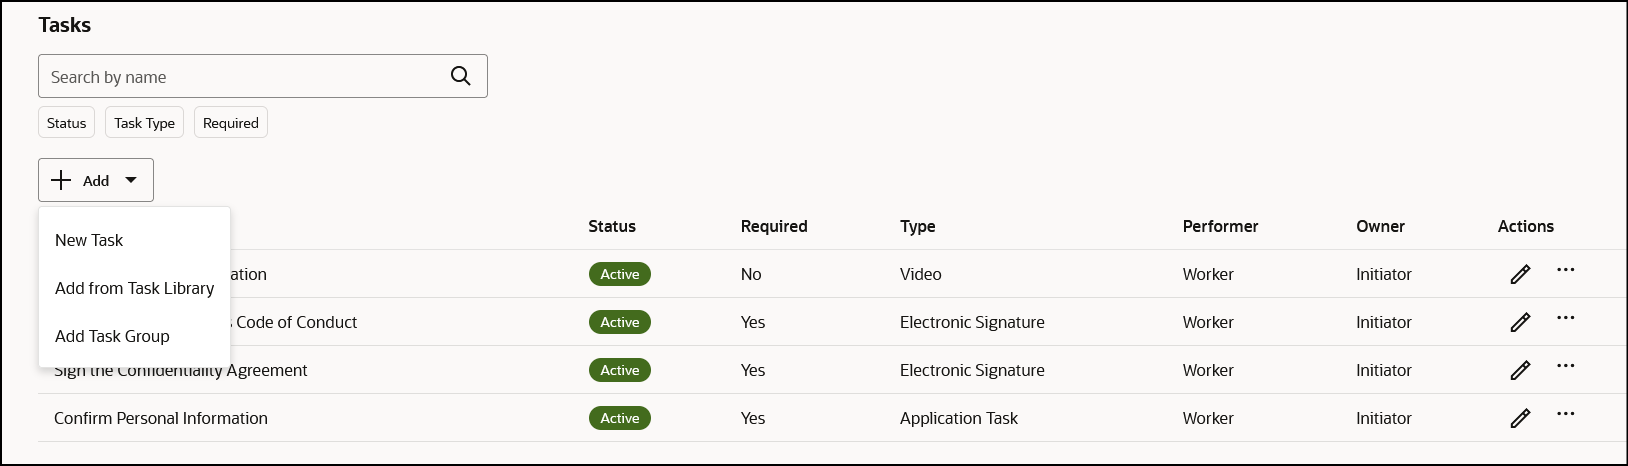
Tasks Section
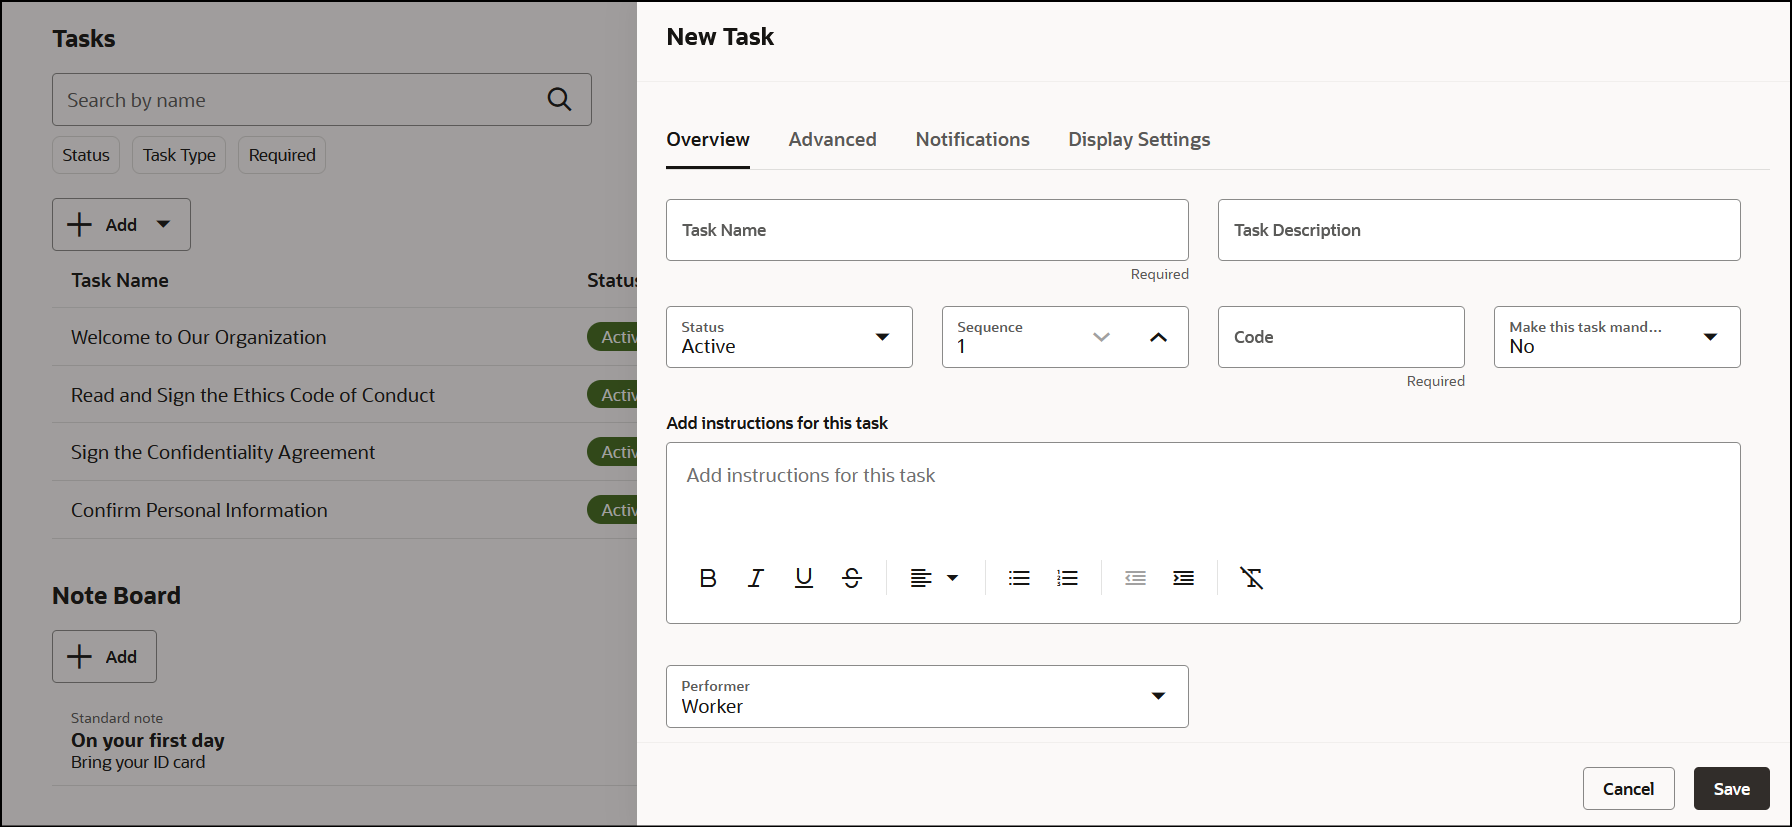
Create New Task for Journey
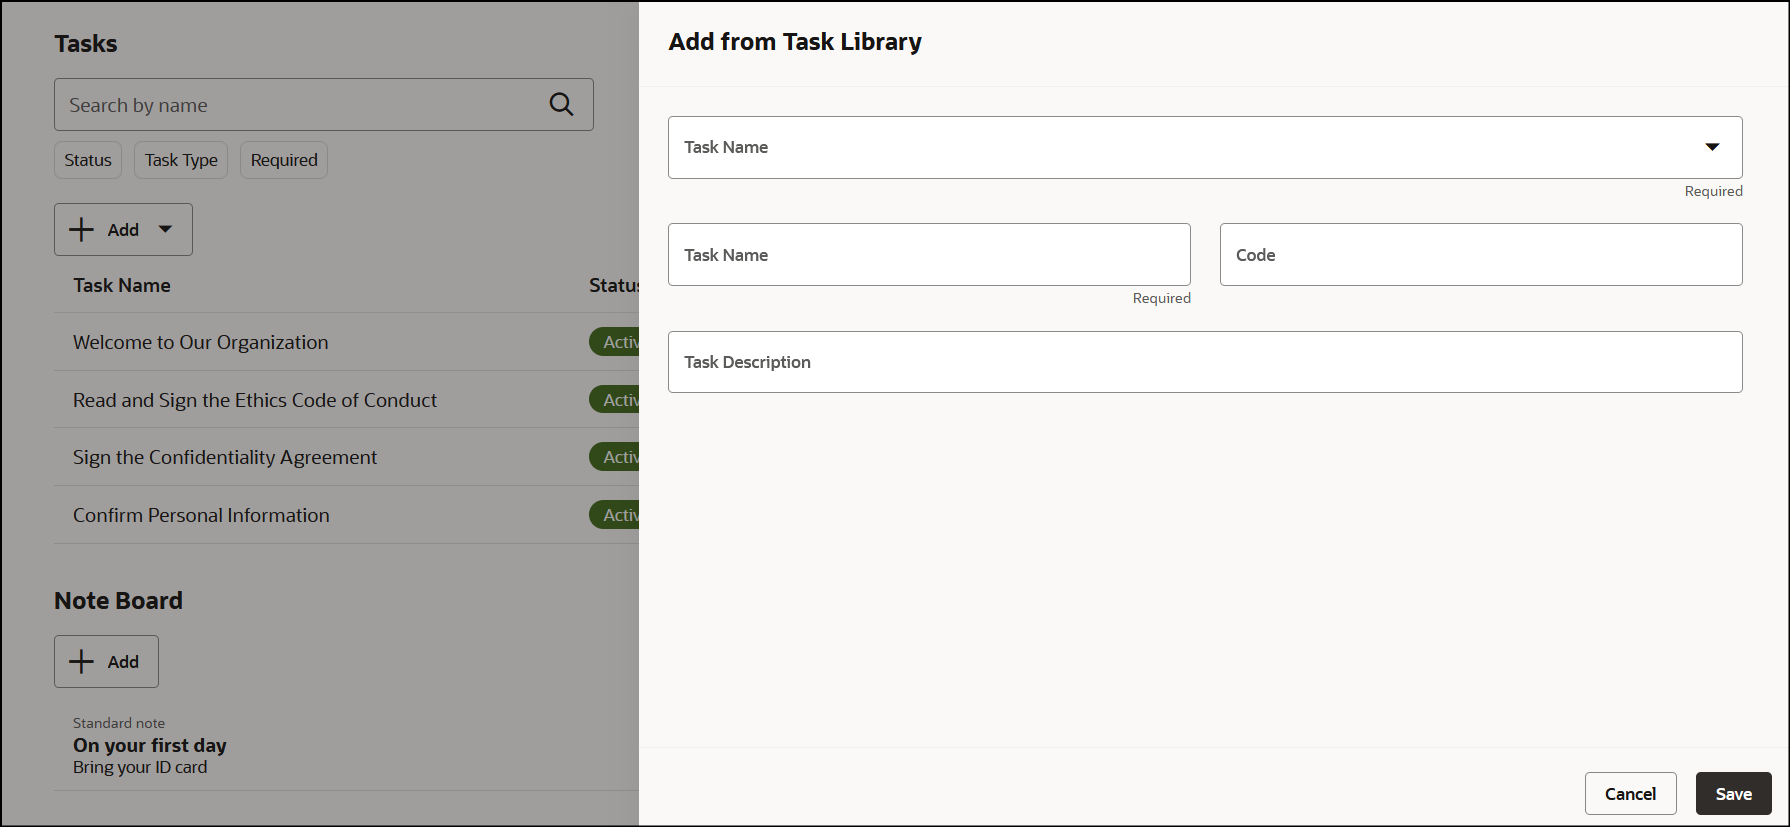
Add Task from Task Library
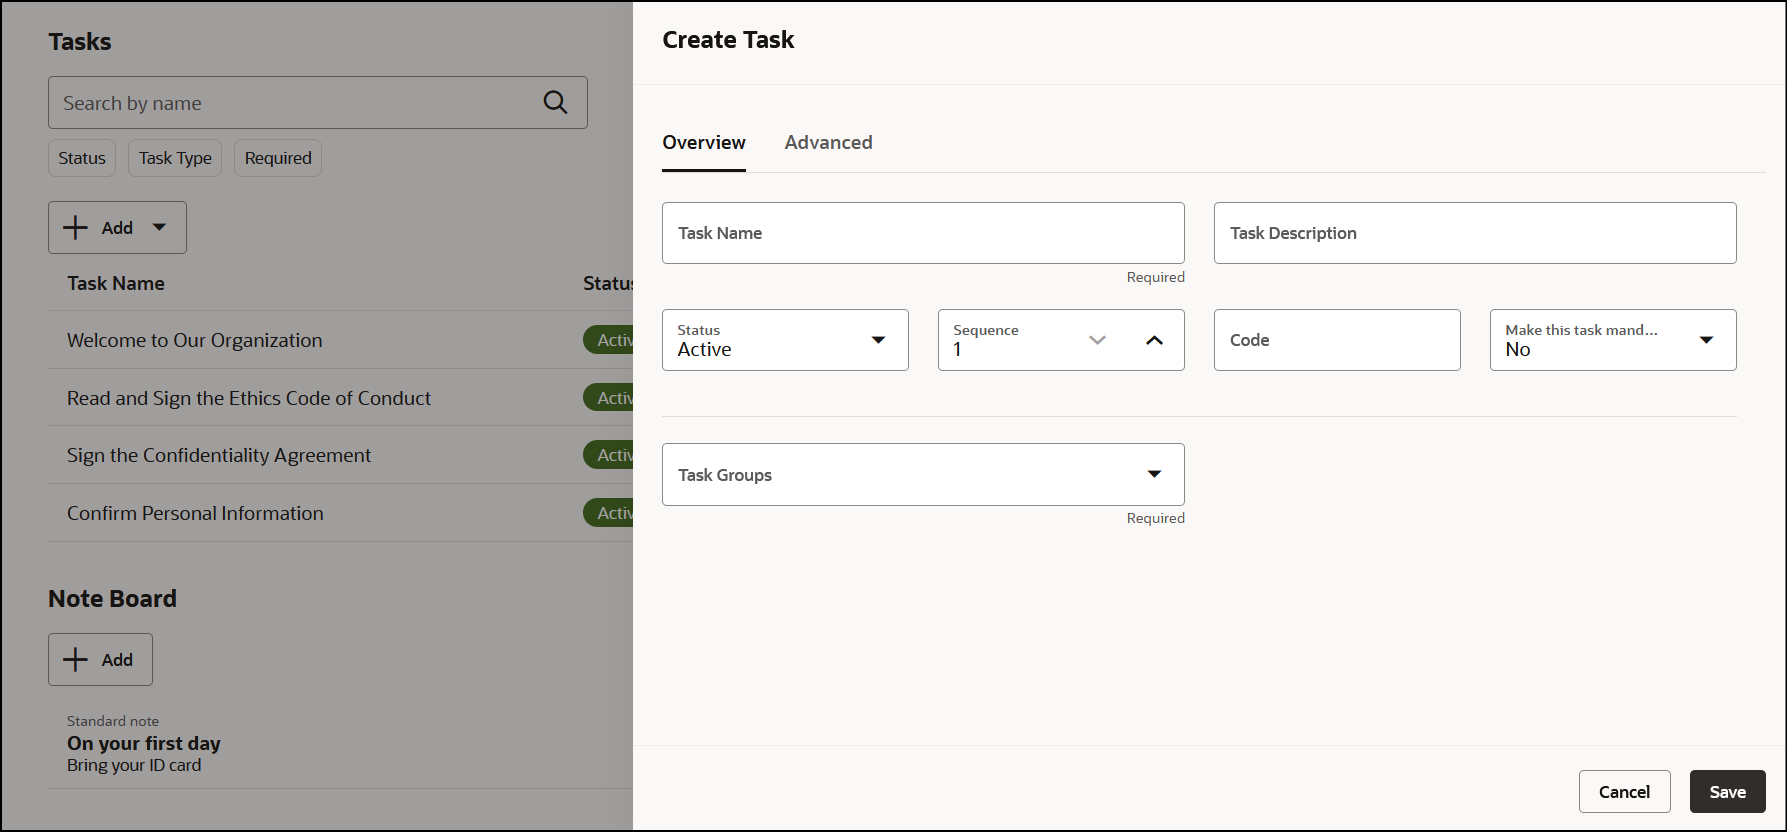
Add Task Group
Preview the journey before you set it to Active.
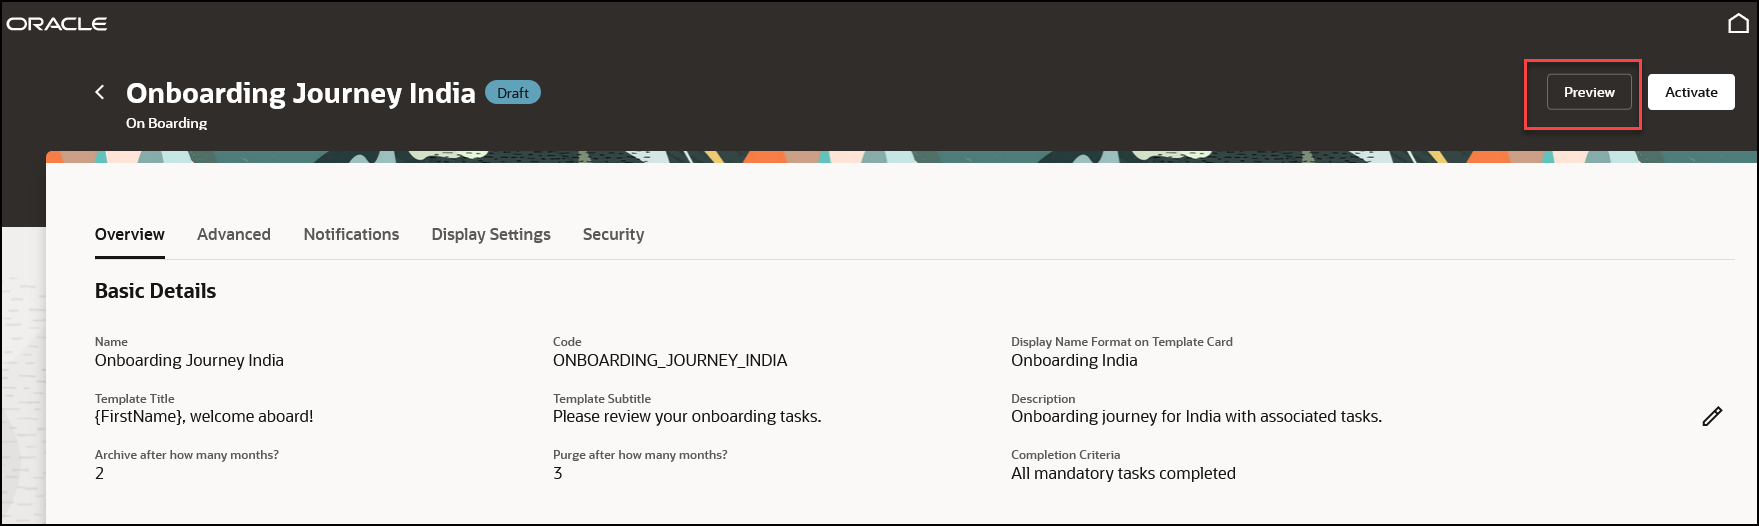
Preview Journey
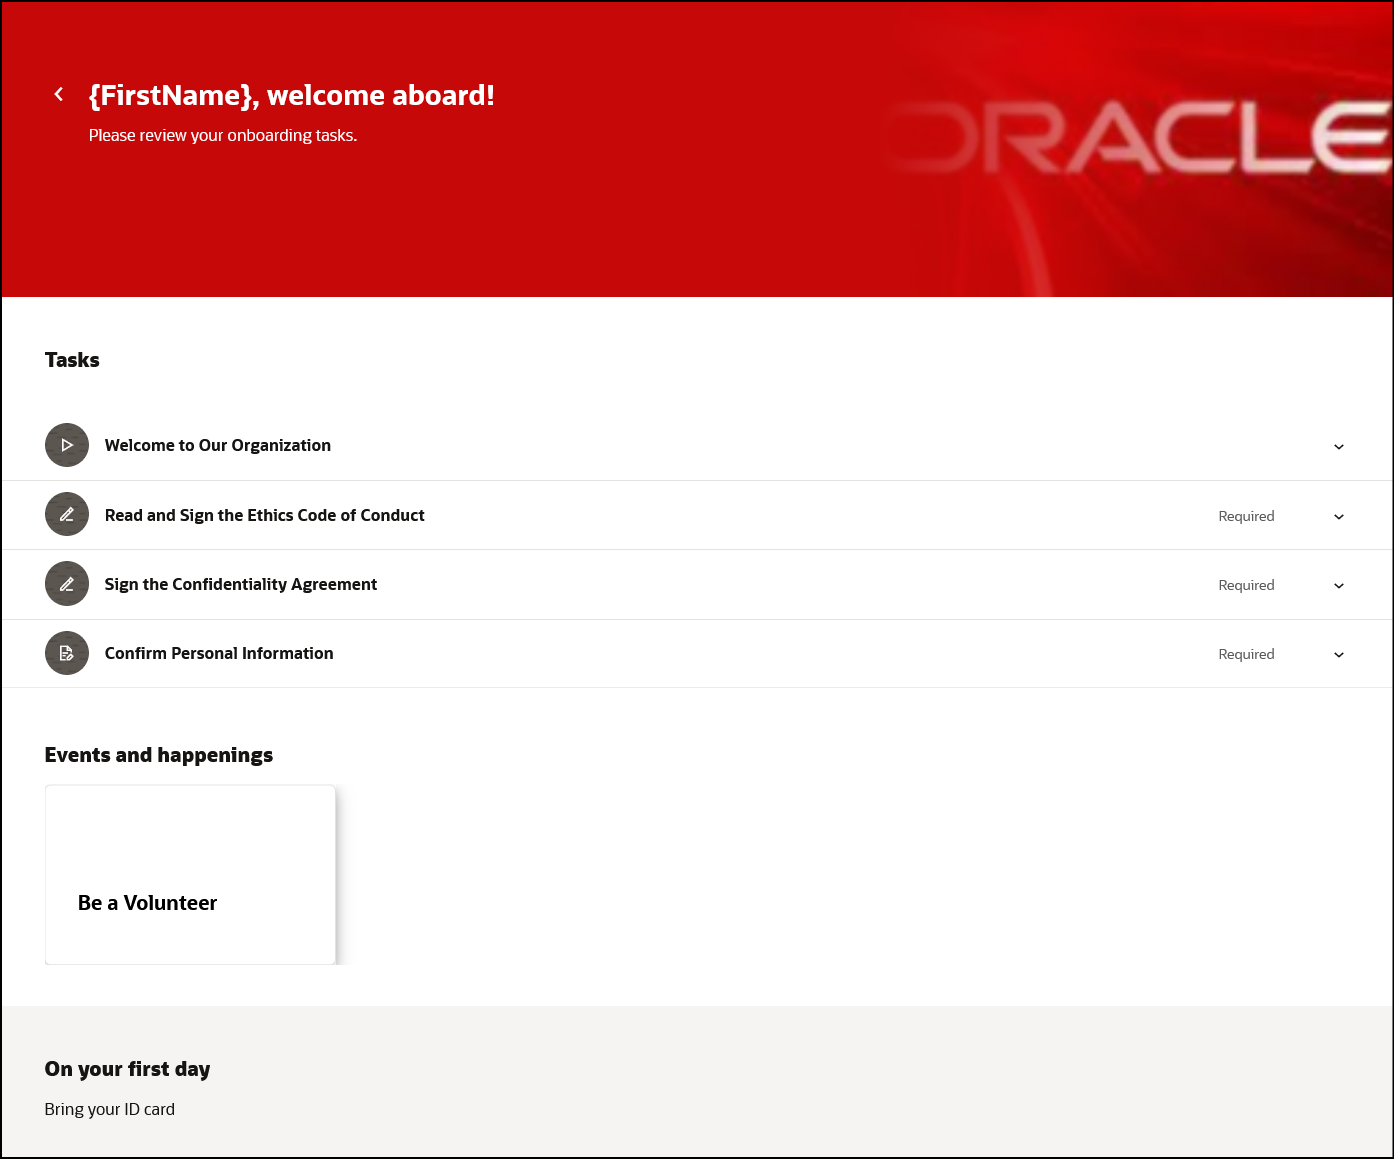
Preview Journey Page
The journey can be searched and assigned only when you set the status from Draft to Active.
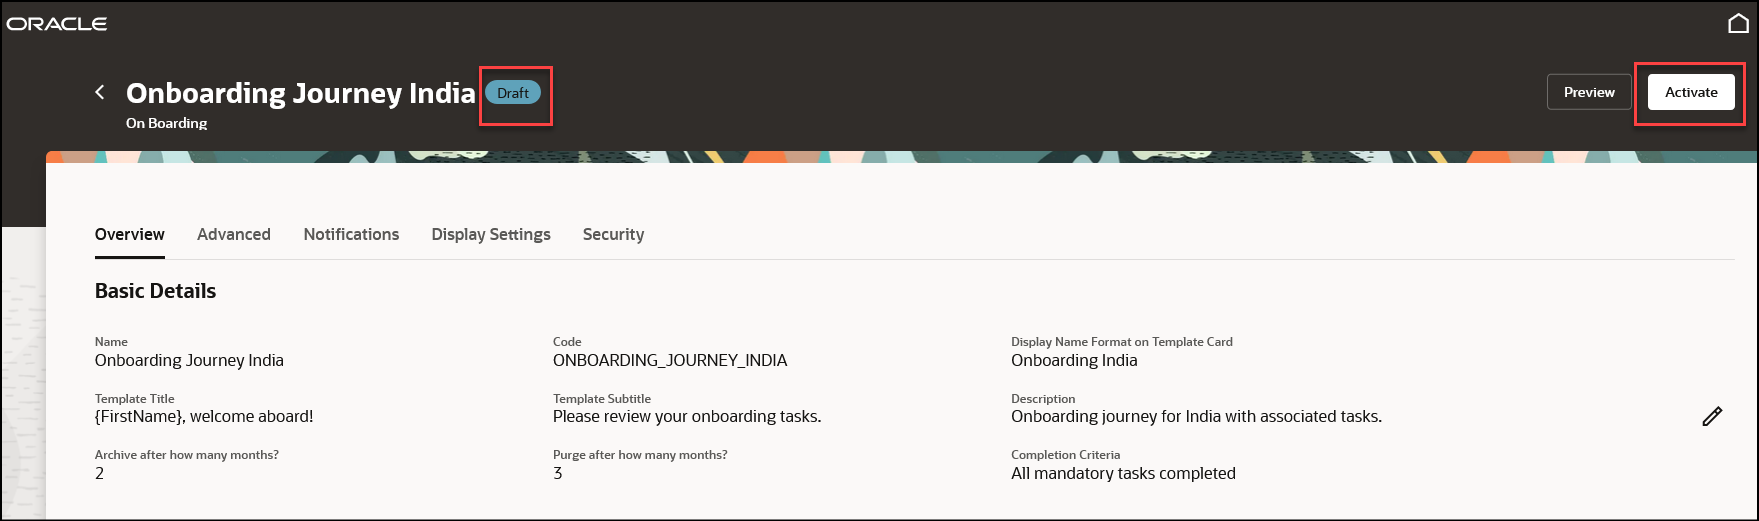
Activate the Journey
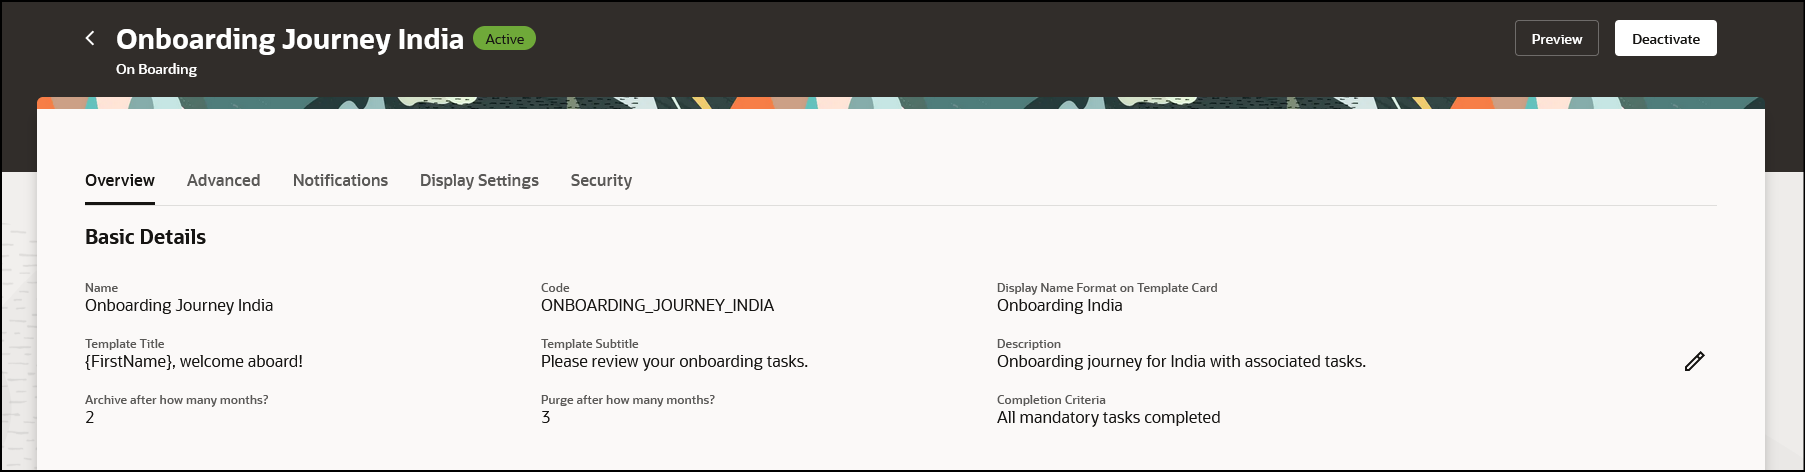
Journey Activated
In addition to the details configured in Overview tab, you can also configure details in the Advanced, Notifications, Display Settings, and Security tabs.
These sections under the Advanced tab contain a mix of fields that are taken from different tabs of the Checklist Templates UI:
-
Additional Details: The fields in this section are a combination from the General and Message tab. The Allocation Criteria field displays the default value which can be modified by clicking the Edit icon. The Action field displays the action added in the General tab of the Checklist Templates UI.
-
Configure Actions and Action Reasons: The fields in this section are from the Actions and Events tab.
-
Configure person events: The fields in this section are from the Actions and Events tab.
-
Configure Events: The fields in this section are from the Actions and Events tab.
The Configure person events and Configure Events sections are separate sections in the Redwood UI of Journey Templates.
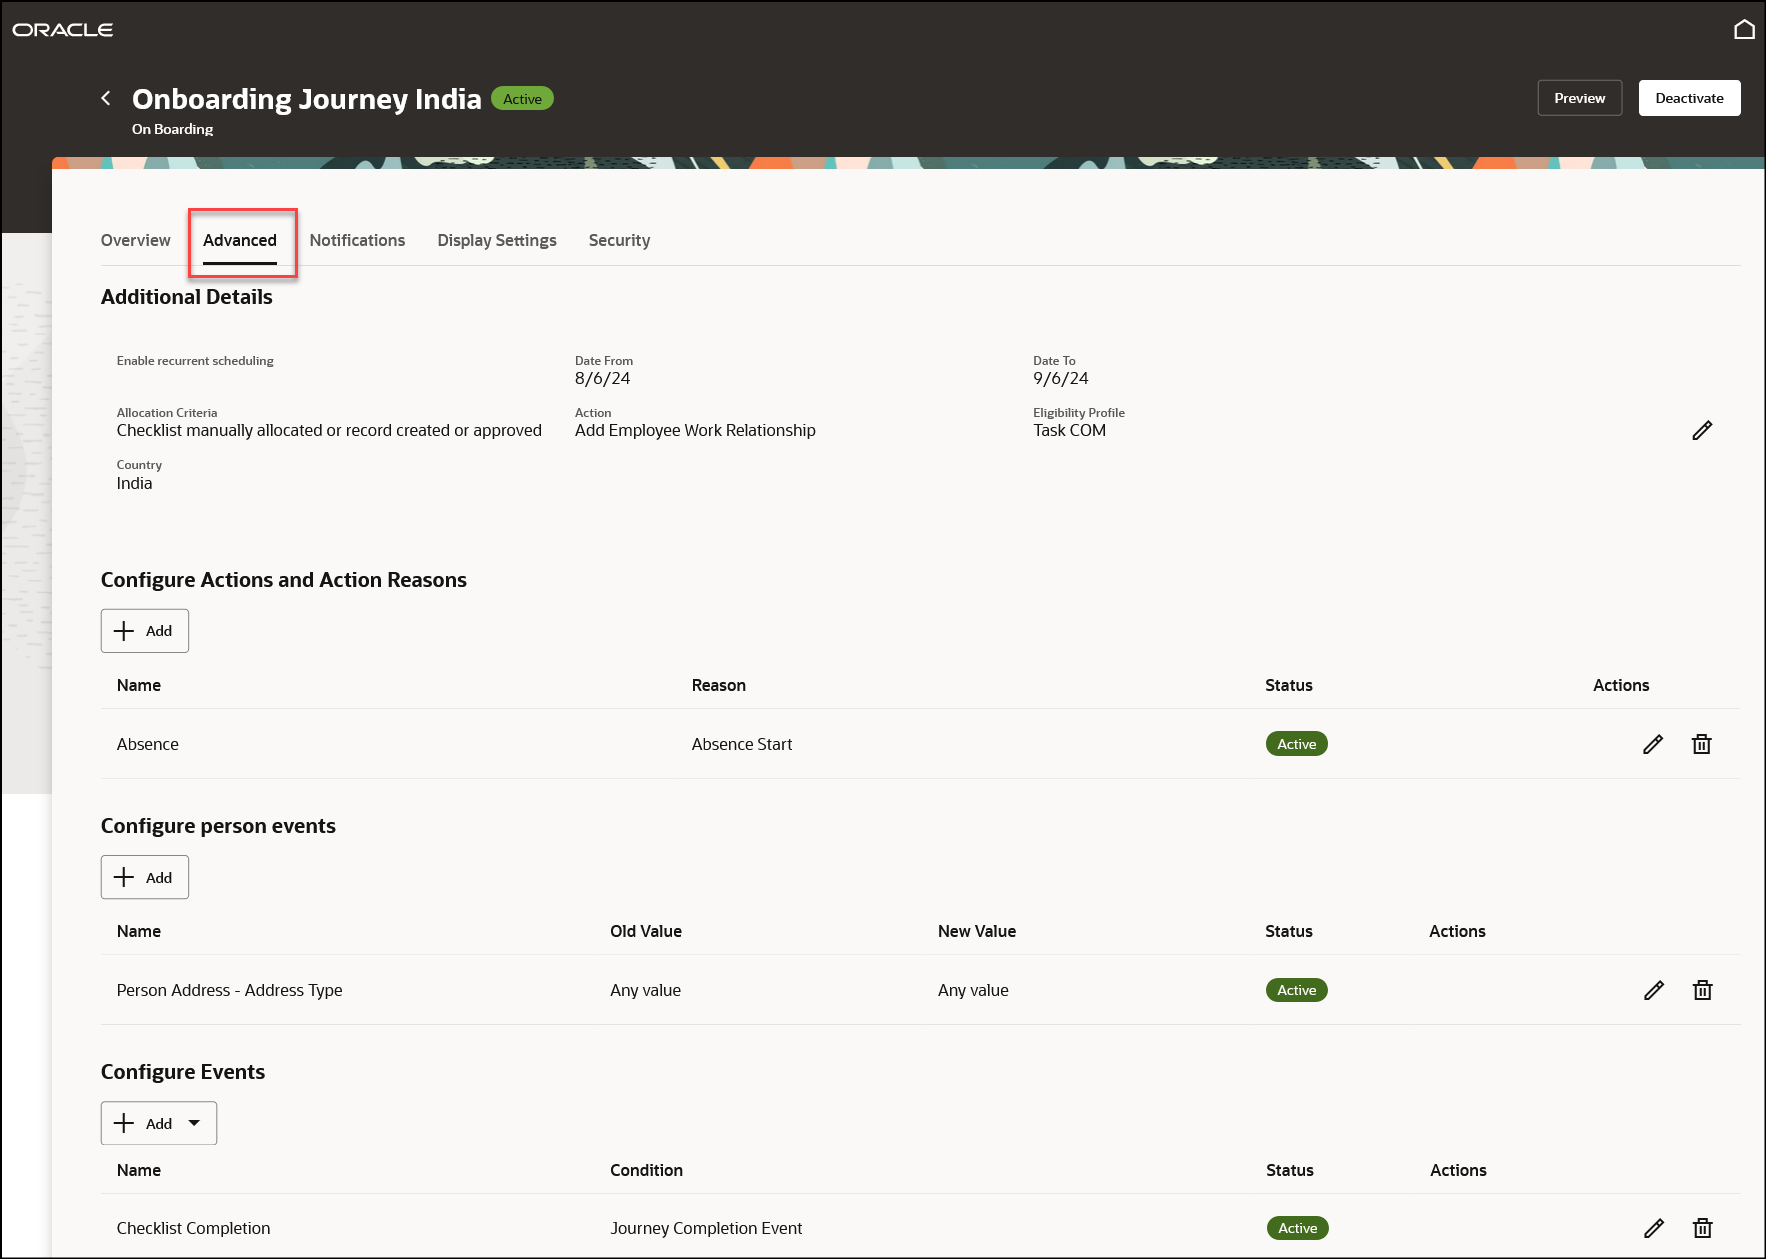
Enter Advanced Details for Journey
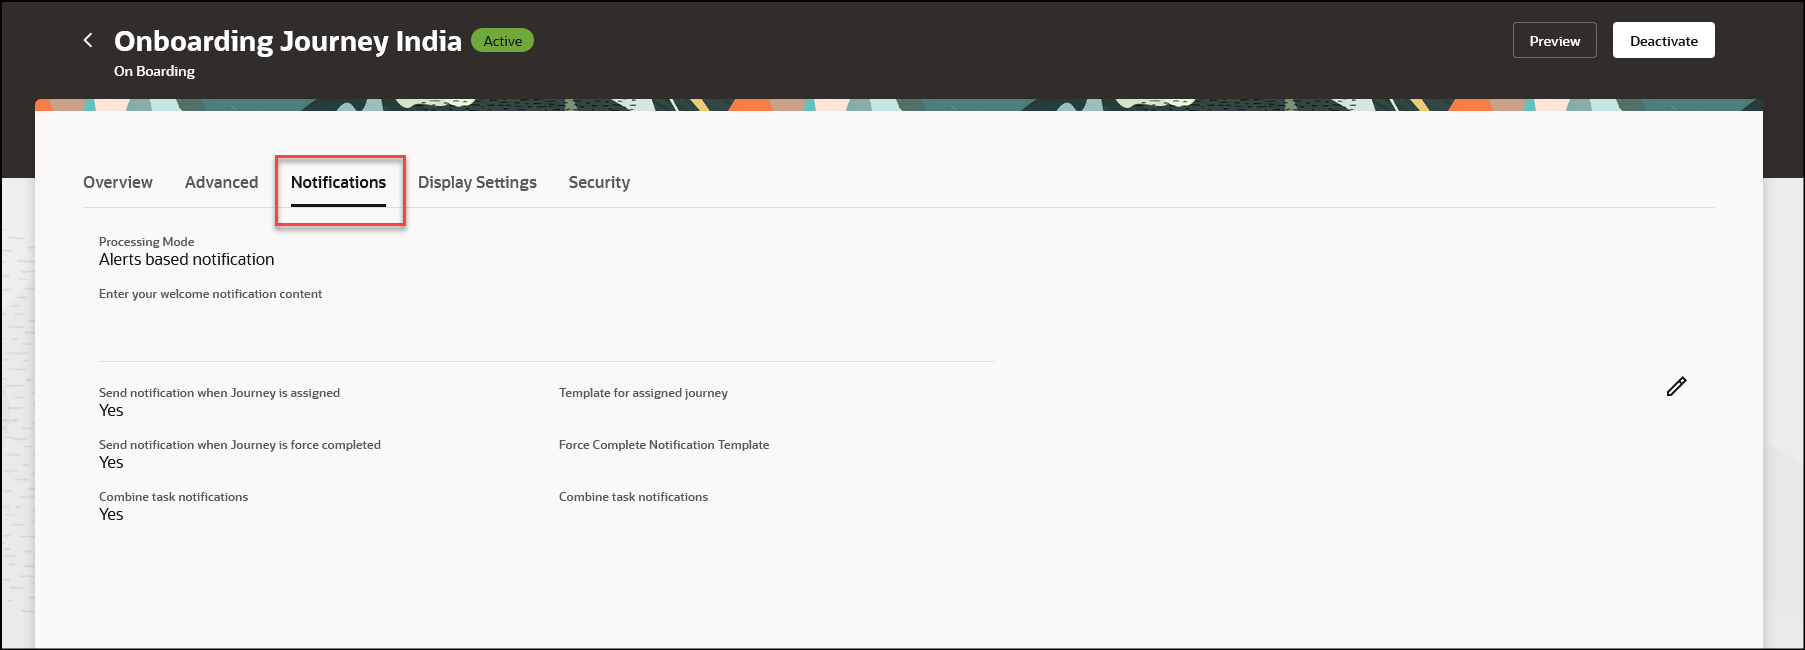
Enter Notifications Details for Journey
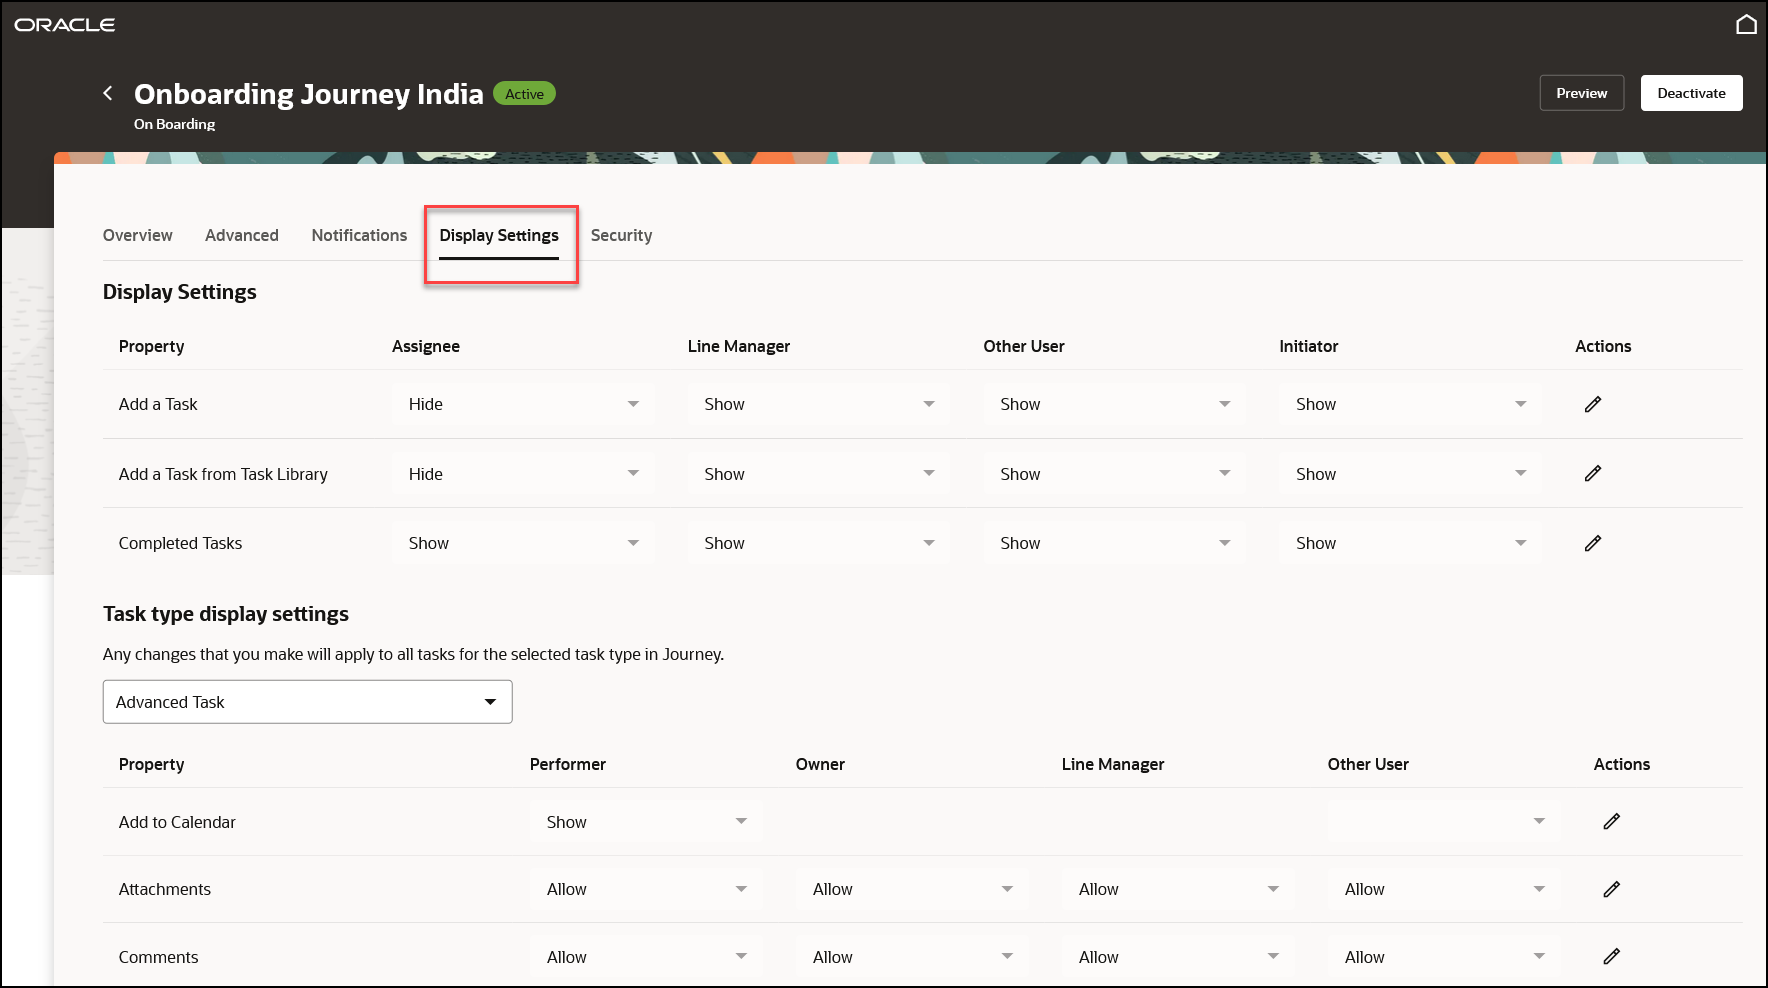
Enter Display Settings Details for Journey
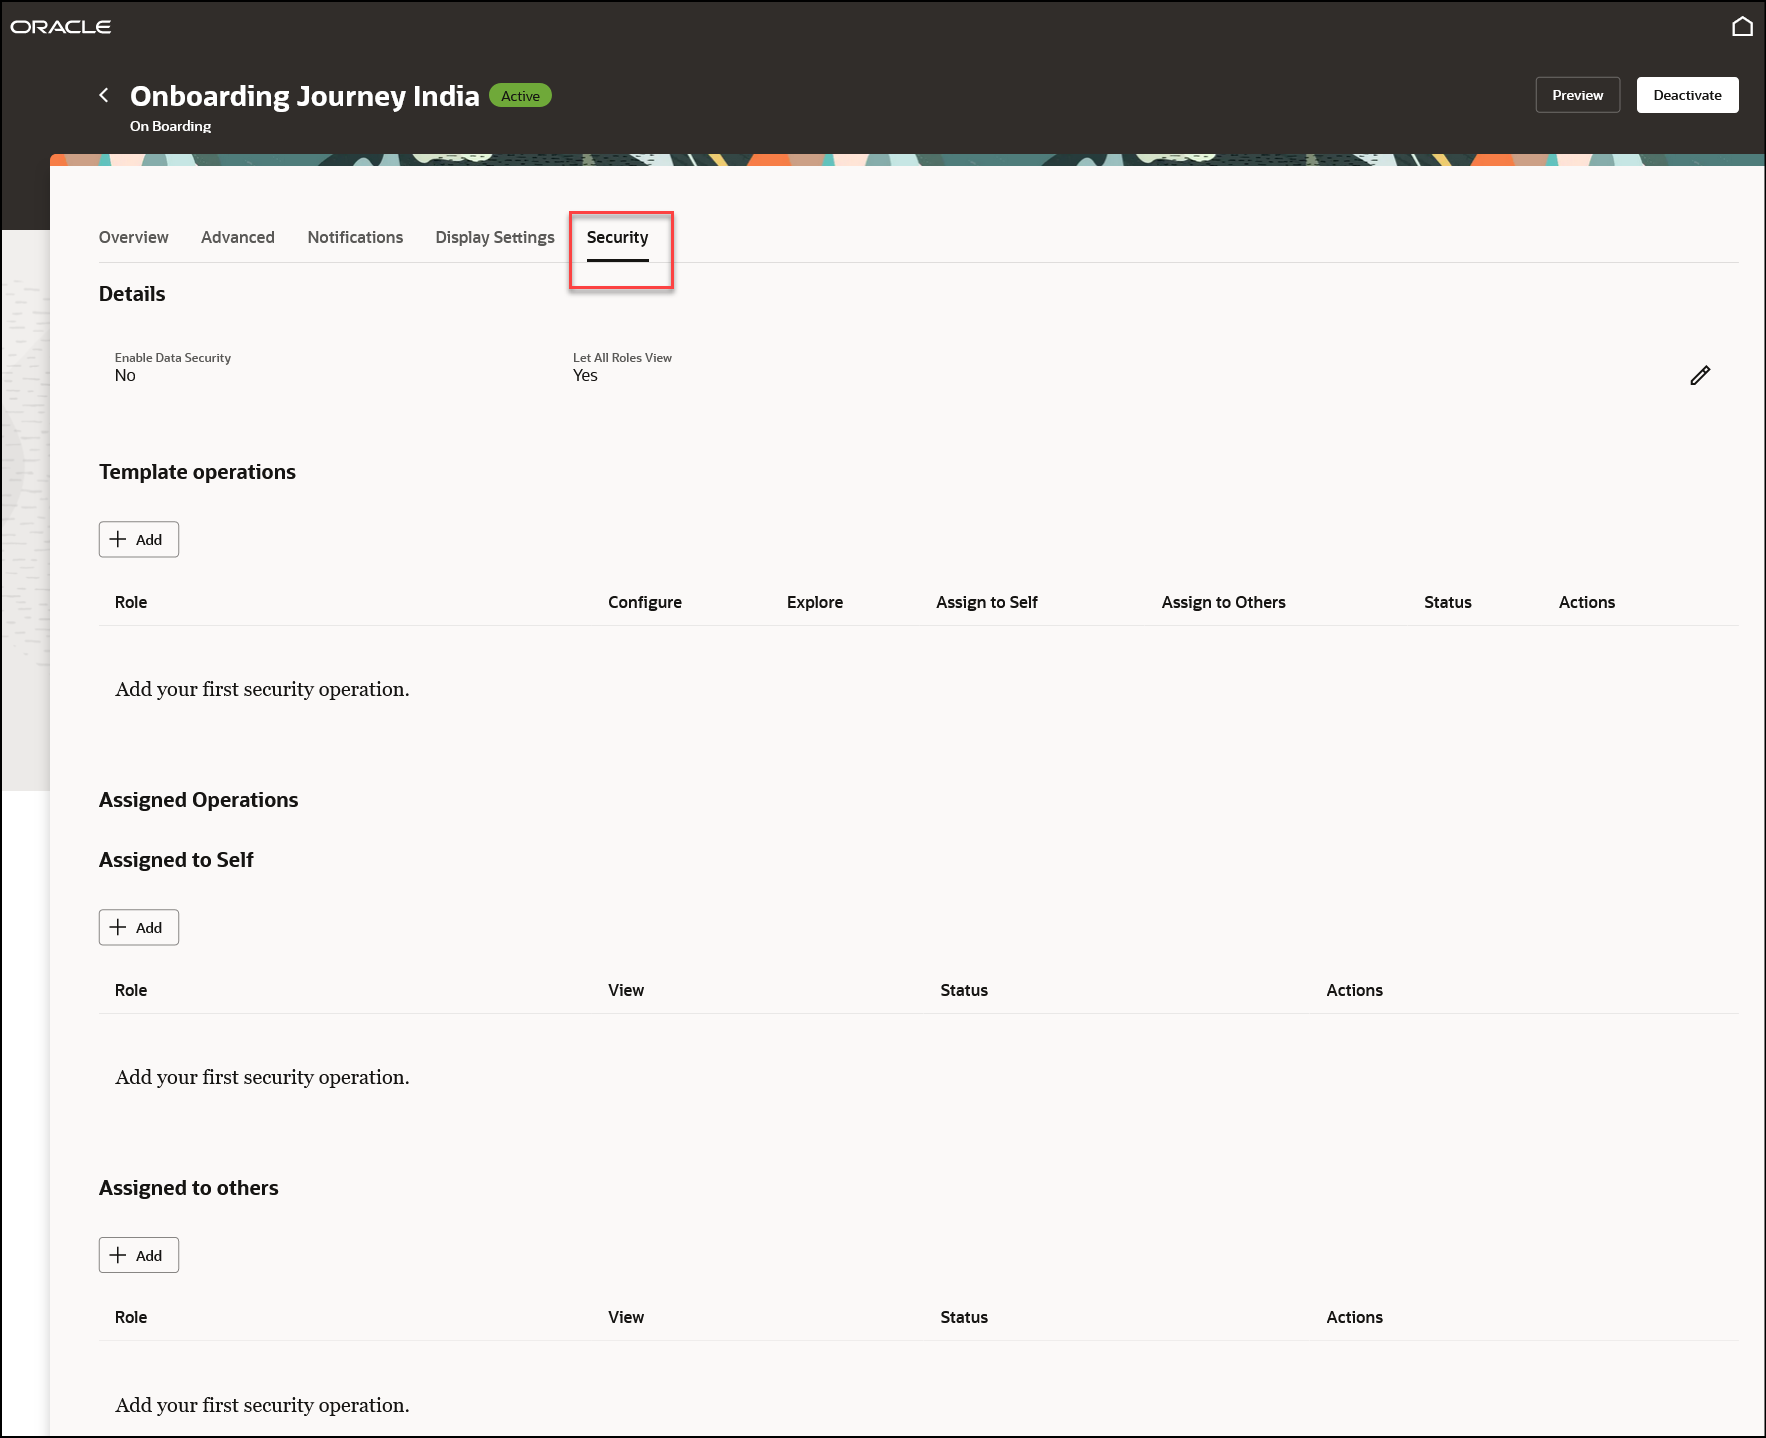
Enter Security Details for Journey
The new page offers a fewer number of clicks and better performance. You can take advantage of the cohesiveness through the application with the new page.
Steps to Enable
You need to enable the ORA_PER_JOURNEYS_SETUP_REDWOOD_ENABLED profile option to enable the Redwood journeys setup pages. By default, this profile option is set to N.
|
Profile Option Code |
Profile Display Name |
Default Profile Value |
|---|---|---|
|
ORA_PER_JOURNEYS_SETUP_REDWOOD_ENABLED |
Redwood Enabled for Journeys Setup Pages |
N |
To change the default profile option value and enable the feature, follow these steps:
-
Navigate to the Setup and Maintenance work area.
-
Search for and click the Manage Administrator Profile Values task.
-
Search for the ORA_PER_JOURNEYS_SETUP_REDWOOD_ENABLED profile option code and select the profile option in the search results.
-
In the ORA_PER_JOURNEYS_SETUP_REDWOOD_ENABLED: Profile Values area, enter Y in the Profile Value field.
-
Click Save and Close.
-
Click Done.
Tips And Considerations
The quick action for Checklist Templates won't be available if the Journeys Setup app is enabled.
Key Resources
For more information about journeys, refer to the Implementing and Using Journeys guide on Oracle Help Center.
Access Requirements
This table shows the predefined role that inherits the duty and aggregate privileges supporting this feature:
|
Job Role |
Duty Privilege |
Aggregate Privilege |
|---|---|---|
|
Human Resource Specialist |
ORA_PER_JOURNEY_BUILDER_DUTY Journey Builder |
ORA_PER_MANAGE_JOURNEY_TEMPLATE Manage Journey |
|
Human Capital Management Application Administrator |
If you are using the predefined roles, no action is necessary. However, if you are using custom versions of these roles, you must add these aggregate privileges to your custom roles to use this feature. See the Release 13 Oracle Human Capital Management Cloud Security Upgrade Guide on My Oracle Support (Document ID 2023523.1) for instructions about implementing new functions in existing roles.
For information about existing security privileges, refer to the Security Reference for Common Features guide on the Oracle Help Center.