Redwood Time Events Page
Here’s how you can search, filter, and manage your worker's time events efficiently on the new Redwood Time Events page. To open the page, go to either My Client Groups > Time Management > Time Transactions or My Client Groups > Show More > Time.
Basic Filters
-
Person search: Find records by entering a person’s name or person number.
-
Groups: Use HCM groups to streamline your search.
-
Status: Filter by event progress, such as New, Processing, Completed, Corrected, or Failed.
-
Date Range: Narrow results to events in specific start and end dates.
-
Relative Range: Filter by rolling time periods, if enabled during setup.
-
Device ID: Filter by specific device.
You can also filter by time device event, time device identifier, job, location, department, and creation date.
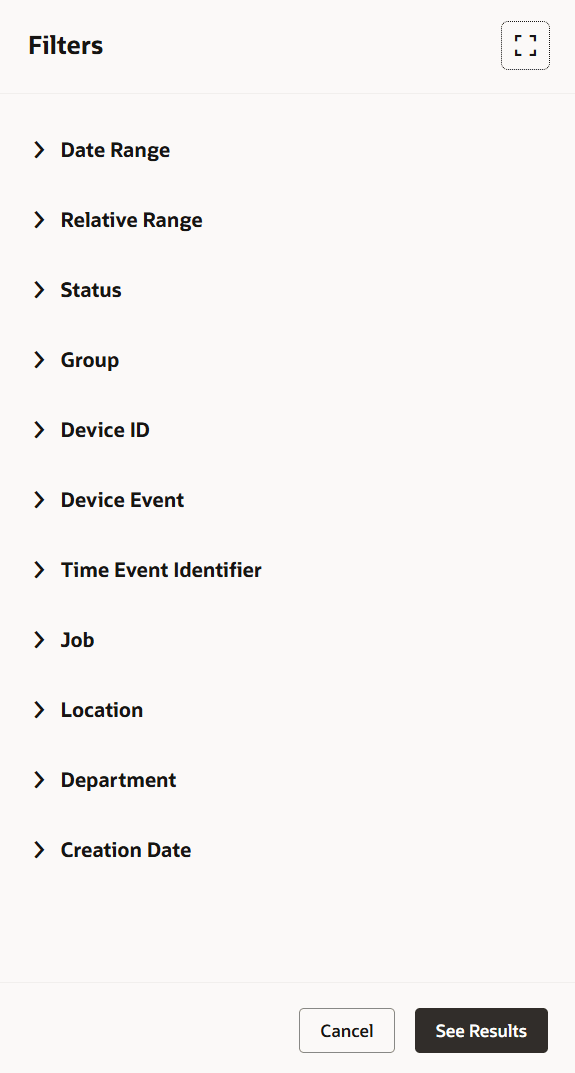
Filters for the Redwood Time Events Page
Default Filter Settings
- Status: Set to Failed.
- Date Range: Start and end dates default to the device date.
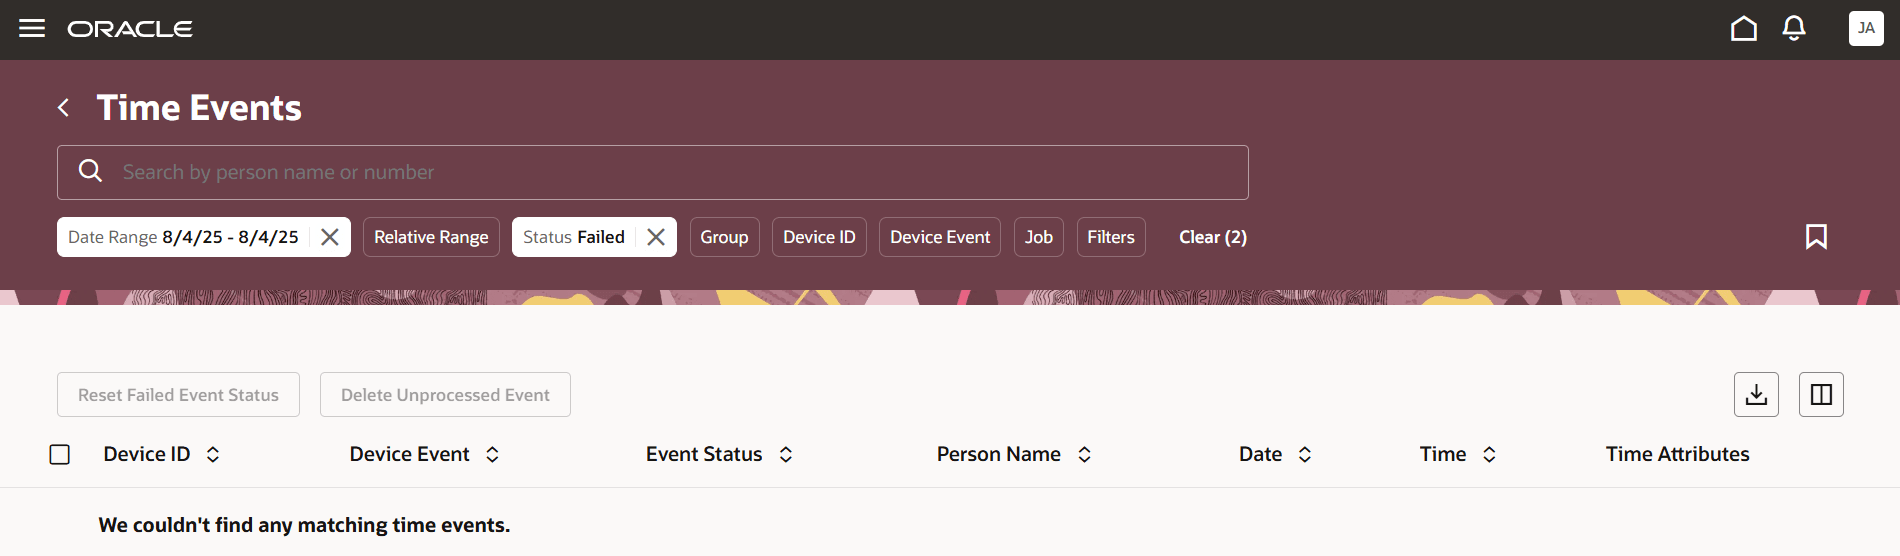
Default Filter Settings for the Redwood Time Events Page
Columns
You see these columns by default:
- Device ID
- Person Name
- Event Status
- Date
- Time
- Time Device Event
- Time Attributes
And you can show these columns, which are hidden by default:
- Time Event Identifier
- Identifier Type
- Person Number
- Creation Date
Sorting
Events display in order from most recent to oldest date, and then alphabetically by worker’s name.
Page Actions
-
Reset Failed Event Status: Change failed event statuses back to New so they can be reprocessed after an error is fixed.
Note: This button activates only if you select events with the Failed status. The page refreshes automatically. -
Delete Unprocessed Events: Remove events with status New, for example, events imported twice or by mistake.
Note: This button activates only for events with the New status. Rows are removed right away. -
Export to Excel: Download your list for easy reporting or sharing.
Event Details Drawer
At the event level, click the details icon to view extra attributes--such as payroll time type, location, and department--in a handy side drawer.
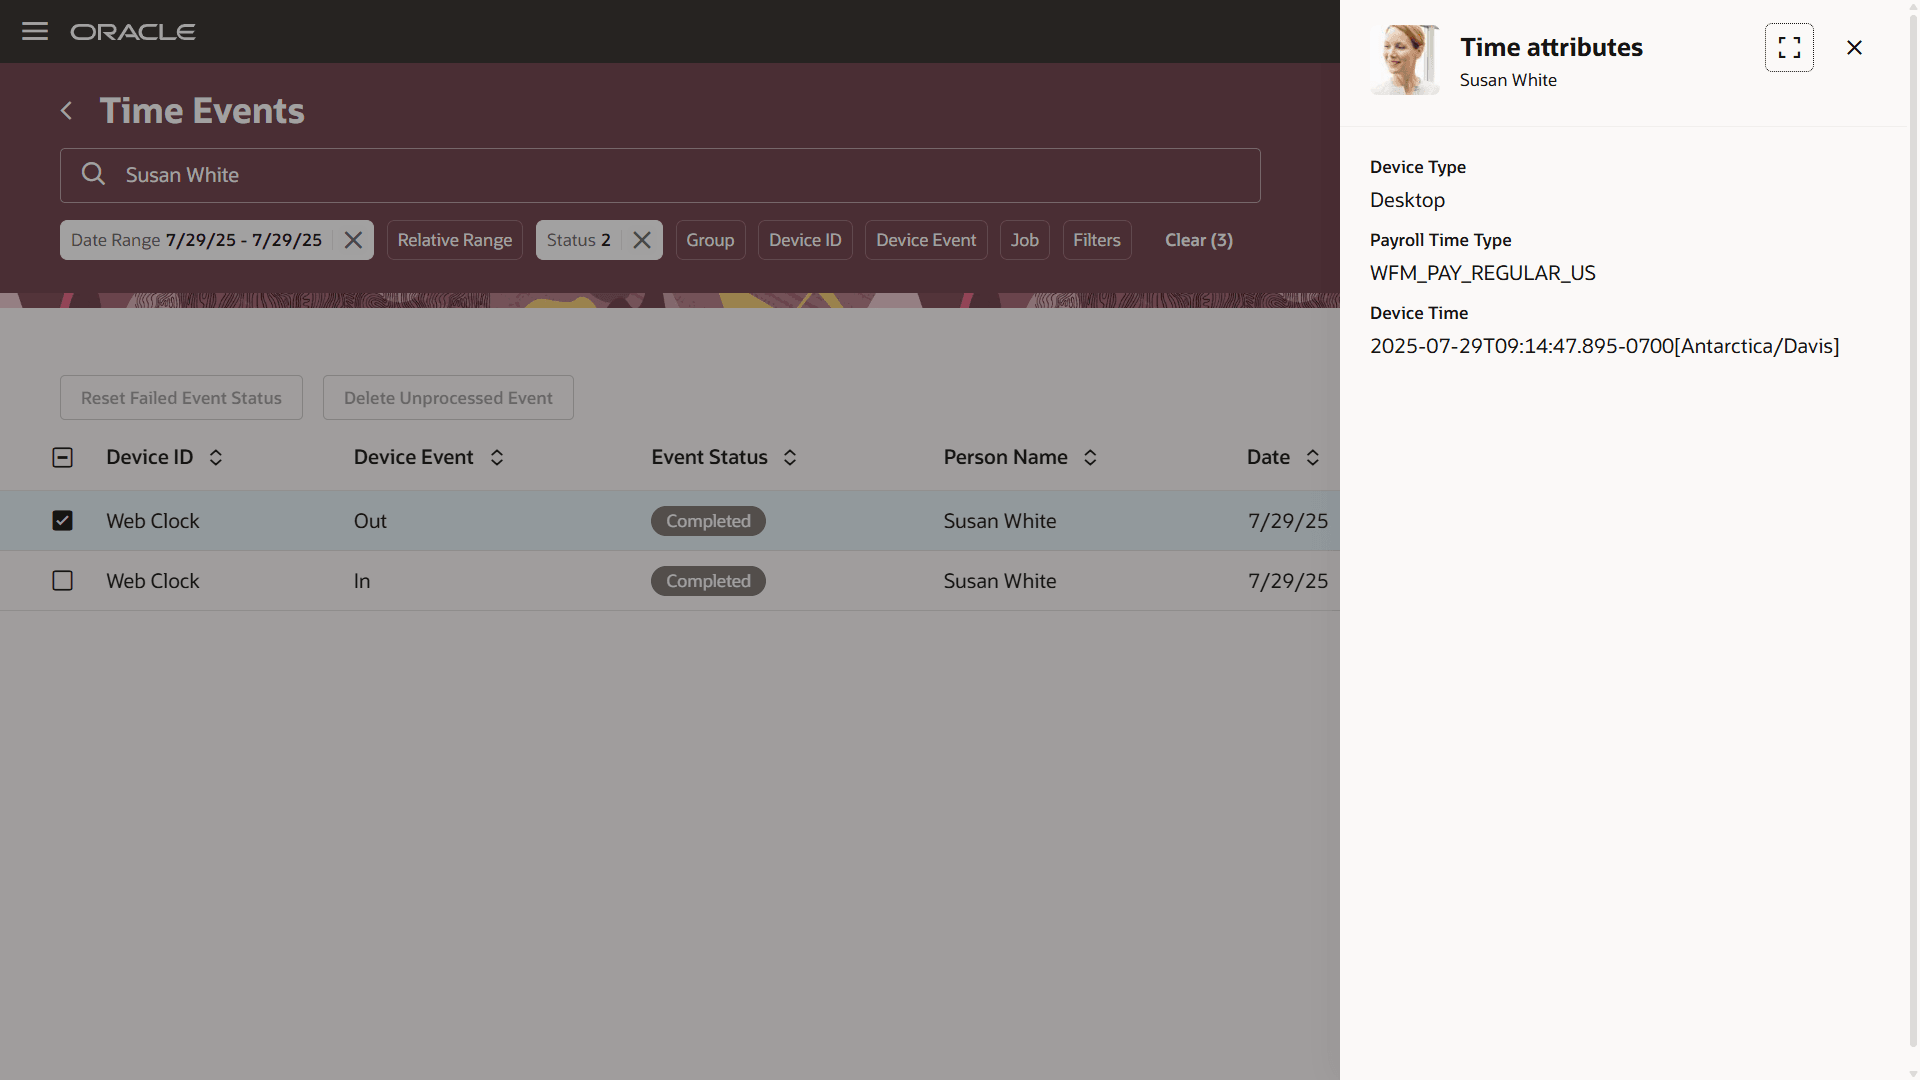
Time Attributes Drawer Opened from the Redwood Time Events Page
With these tools, you can quickly find, review, and manage your time events, keeping everything clear and organized.
Steps to Enable and Configure
Set the site-level profile value to Yes for the ORA_HWM_TIME_EVENTS_REDWOOD_MGR_PAGE_ENABLED profile option. Go to Setup and Maintenance > Tasks panel > Search > Manage Administrator Profile Values.
Tips And Considerations
You can now access the Generate Time Events page by going to either My Client Groups > Time Management > Time Transactions or My Client Groups > Show More > Time.