AI Agent: Permit Health Monitor
The Permit Health Monitor is an AI agent that helps agency staff monitor permit activity and identify potential operational issues without manually reviewing the Permits OTBI dashboard. The agent is delivered for permits only in the 26C release and is intended for agency business users, supervisors, building officials, administrators, and other decision-makers who need visibility into permit workload trends.
The agent reviews permit health data, evaluates whether current permit activity differs meaningfully from historical patterns, and sends an email notification when it detects activity that falls outside the configured threshold. For example, the agent can help surface an unusual decrease in permit volume for a specific permit type, allowing agency staff to investigate changes in workload, processing patterns, or operational performance.
The Permit Health Monitor uses Oracle Transactional Business Intelligence (OTBI) as its data source. It analyzes data from the delivered Permit Health Metrics dashboard, which includes permit-related measures such as submitted permits, issued applications, rejected applications, aging metrics, and completion-related activity. When the agent runs, it retrieves selected permit metrics from OTBI and compares recent activity against a historical baseline. You configure key runtime values, including the variance threshold, whether the agent should always send an email, and the look-back period for the analysis. The agent then evaluates the data and determines whether any metric should be flagged for review. The agent will only flag negative trends like reduction in applications submitted, completed, or issued; or increases in applications rejected or the increase in the transition time between statuses.
If the agent identifies a notable variance, it sends an email summary. The email identifies the affected metric or permit type and includes a link to the OTBI Permit Health dashboard so that agency staff can review the supporting data. The link opens the dashboard, but it does not deep link to a specific metric, permit type, or reporting period. The email recipients must review the dashboard and compare it with the information in the email.
You configure the Permit Health Monitor in AI Agent Studio, using the template to create your own instance of the agent. After setup, the agent does not have a separate user interface. Its primary output is the email notification. The agent can be scheduled to run on a recurring basis from AI Agent Studio. The expected usage is periodic monitoring, a weekly review at the end of the week is advised, rather than frequent real-time execution.
The Permit Health Monitor also includes RAG-based configuration support. You can upload a reference document that provides agency-specific threshold or SLA guidance. For example, an agency might define different acceptable variance thresholds for different permit types. Because these rules depend on the agency’s business processes and data, the RAG document is agency-specific.
Note. All evaluated metrics are averaged on a weekly basis. Therefore, the SLA metrics should be reported at the weekly level.
To use the agent, you need access to AI Agent Studio and must have OTBI Permit Health dashboard configured. You must also configure email recipients and ensure that the OTBI dashboard is available in the environment.
Business Benefit: The Permit Health Monitor helps agencies move from manual dashboard review to proactive operational monitoring. Instead of requiring users to regularly inspect permit analytics, the agent reviews the data on a schedule and notifies users when trends may require attention.
Steps to enable and configure
The Permit Health Monitor agent is enabled in the AI Agent Studio.
Note. You must ensure you have set up the correct security for AI Agents as outlined in How do I use AI Agent Studio?, "Access Requirements for AI Agent Studio", Provide Access to AI Agent Studio on the Oracle Help Center.
To enable the AI Agent:
- Confirm that OTBI is set up and that the Permit Health Metrics dashboard is active for your agency. See Implementing Your Agency, "Setting up Analytics", Permitting and Licensing Analytics and Setting up Dashboards.
- Open AI Agent Studio. Use the search filters of Family = PSC and Product = Permits to find Permit Health Monitor.
- Locate the Permit Health Monitor agent and choose Use Template. The agent is delivered as a template, so agencies create their own configured instance from the delivered template.
- Create a name that identifies the agency instance.
- Review the generated workflow. After the template is used, AI Agent Studio creates the agent workflow. The workflow includes the trigger, data retrieval steps, analysis logic, RAG step, and email notification steps.
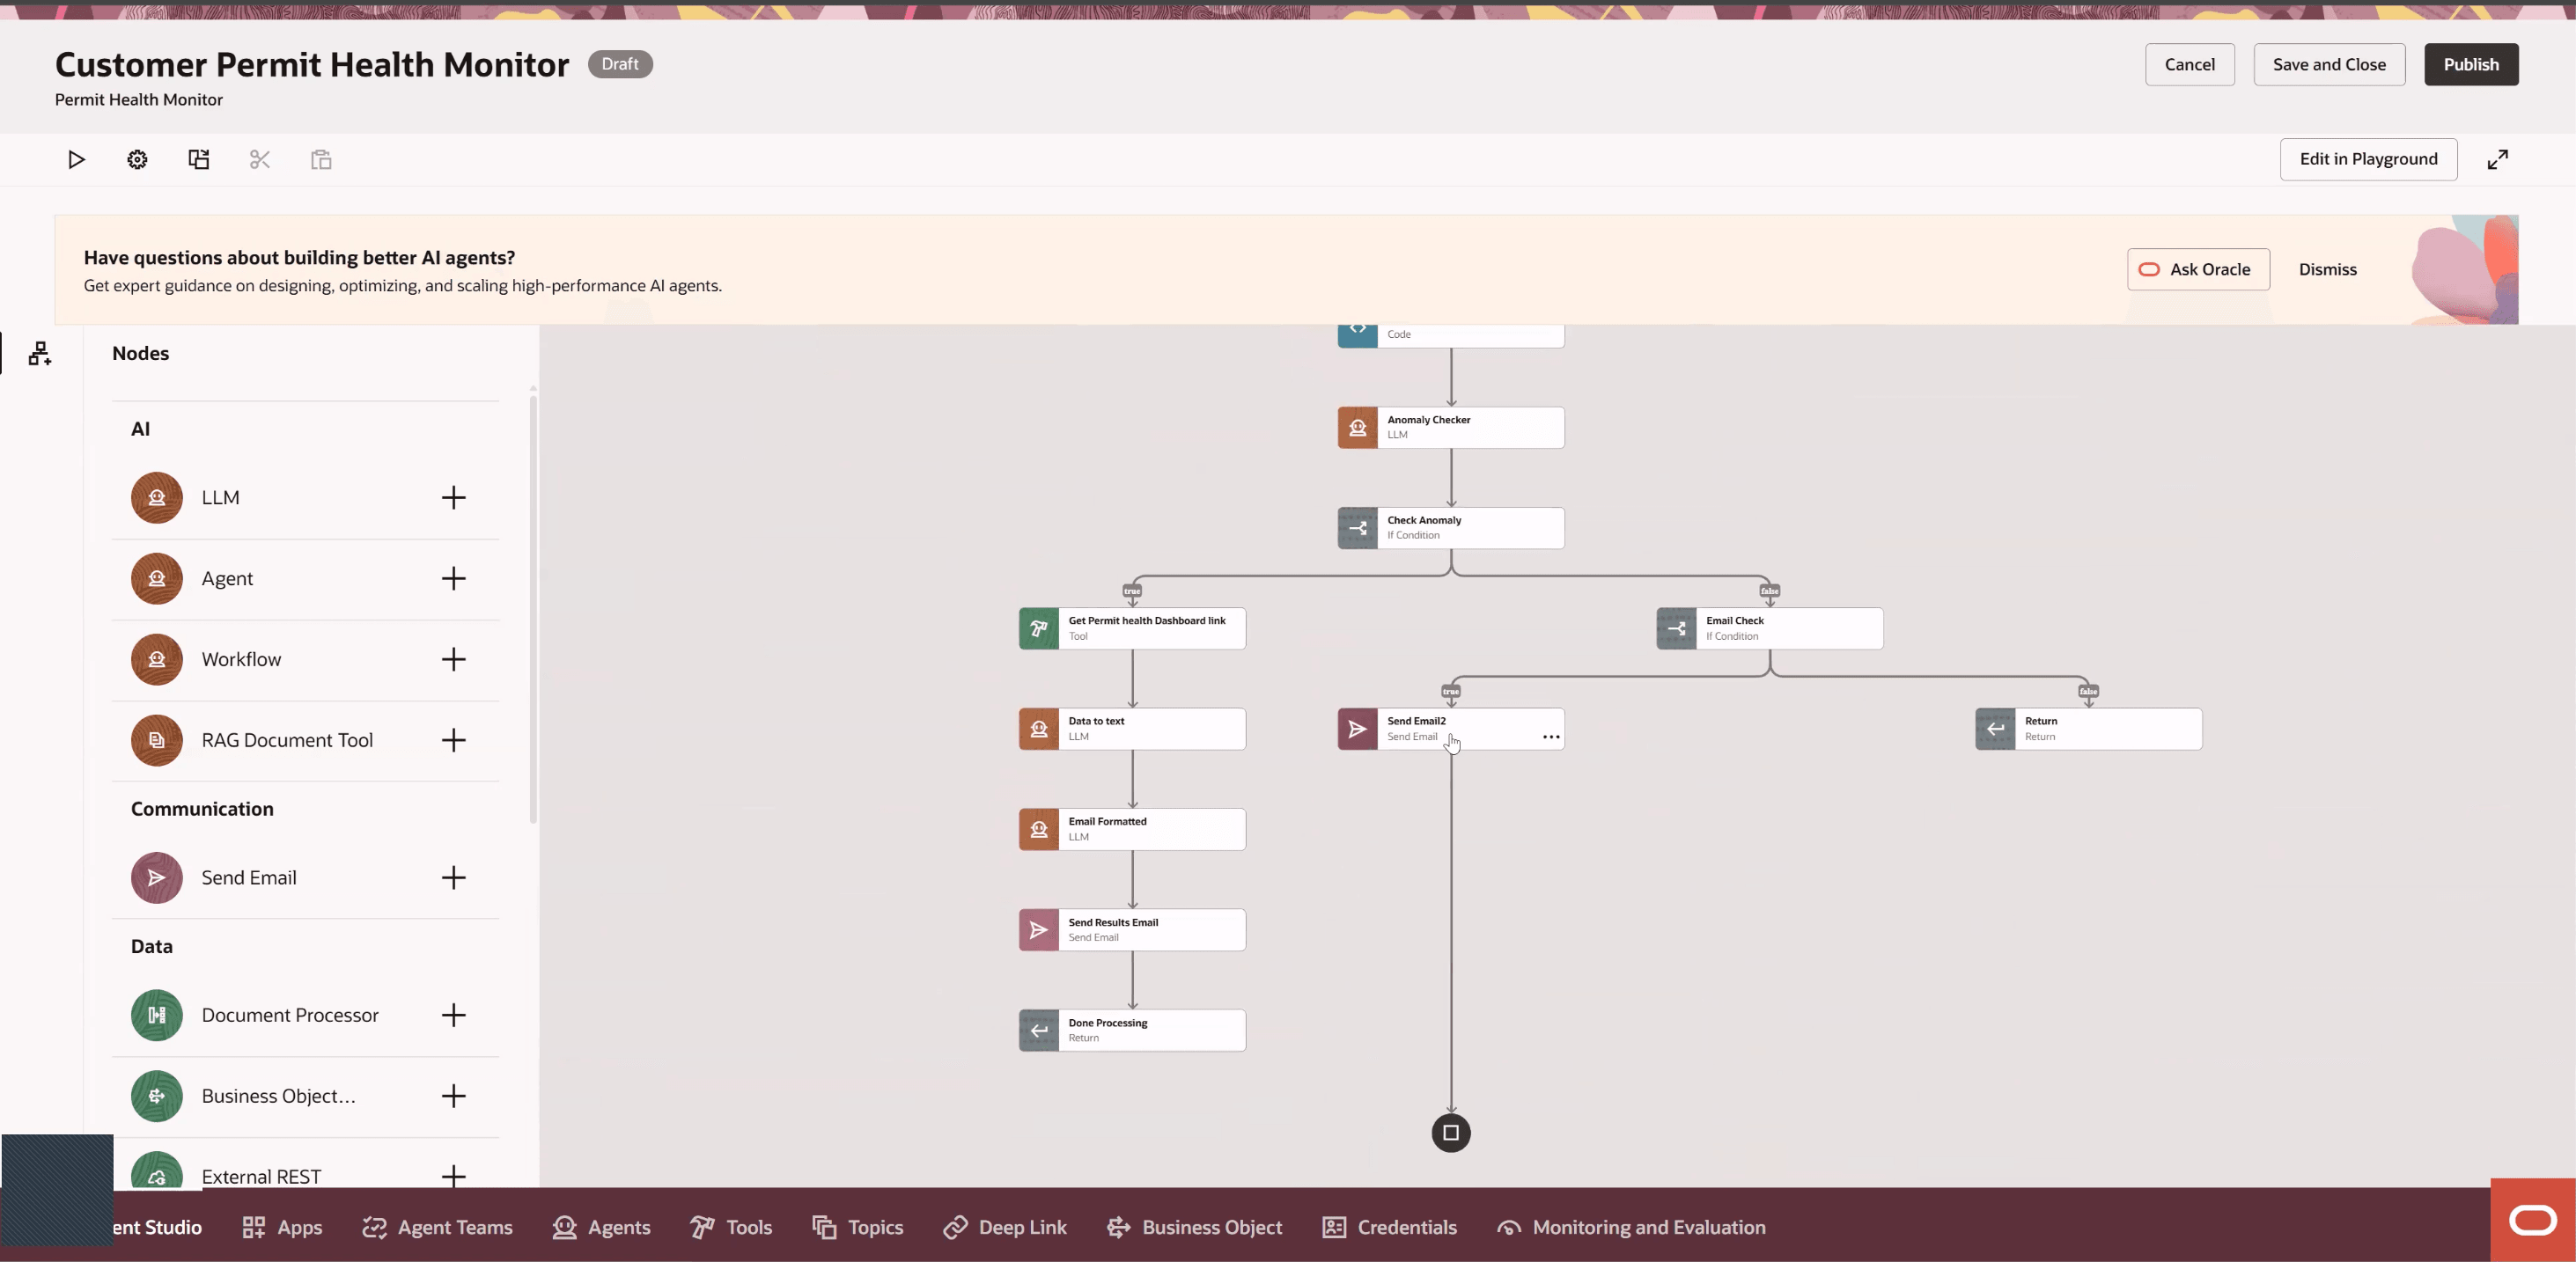
Generated Workflow
- Edit the email nodes in the workflow and replace the example recipient values with the appropriate customer email address or distribution list. You must set up both email nodes for the agent to send notifications. This email address should be for the recipients of the emails and should be the same.
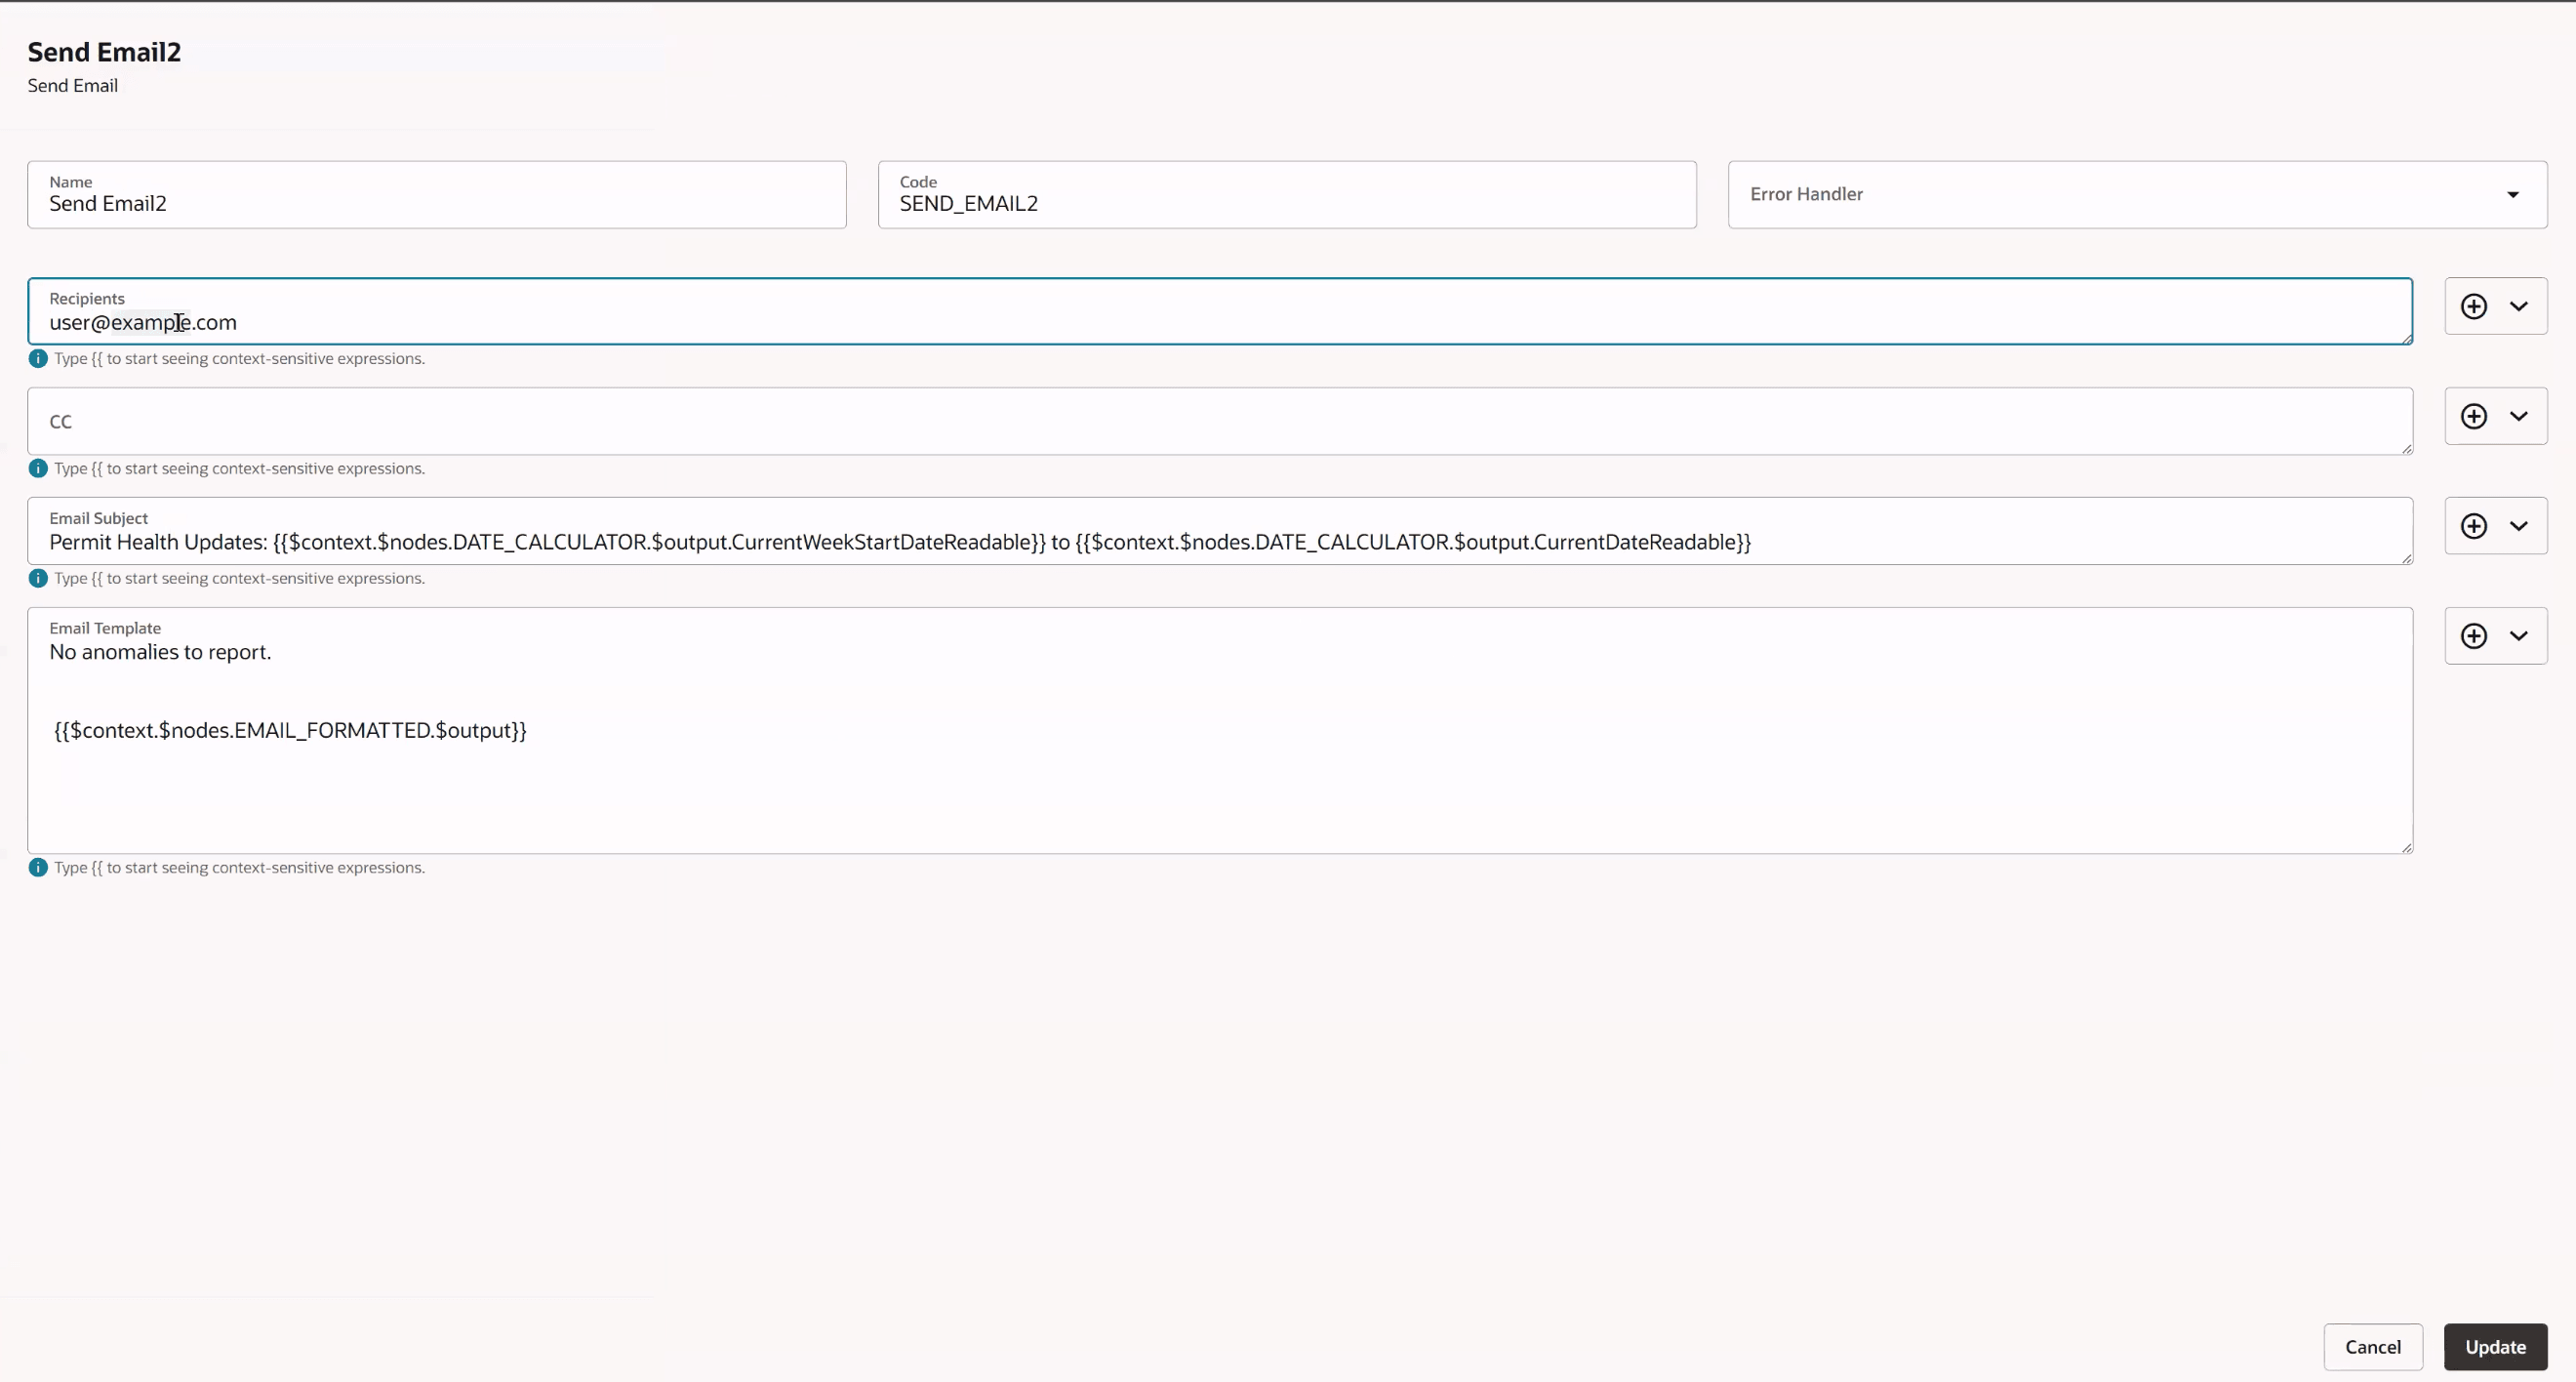
Send Email2 Node
- Click the Play icon to configure the REST trigger input values.
- Configure the REST trigger input values. The agent uses a REST trigger. Configure the required input values used when the agent runs:
- Threshold percentage, which defines the variance from the baseline that should be flagged.
- Always send email, which determines whether the agent sends an email even when no abnormal trend is detected.
- Look-back period, which defines how many days of data the agent reviews.
- Click the gear icon, to open the agent drawer. Click on the Triggers tab.
- Under Schedule, click Add. Configure the schedule for the workflow, such as a daily or weekly recurrence.
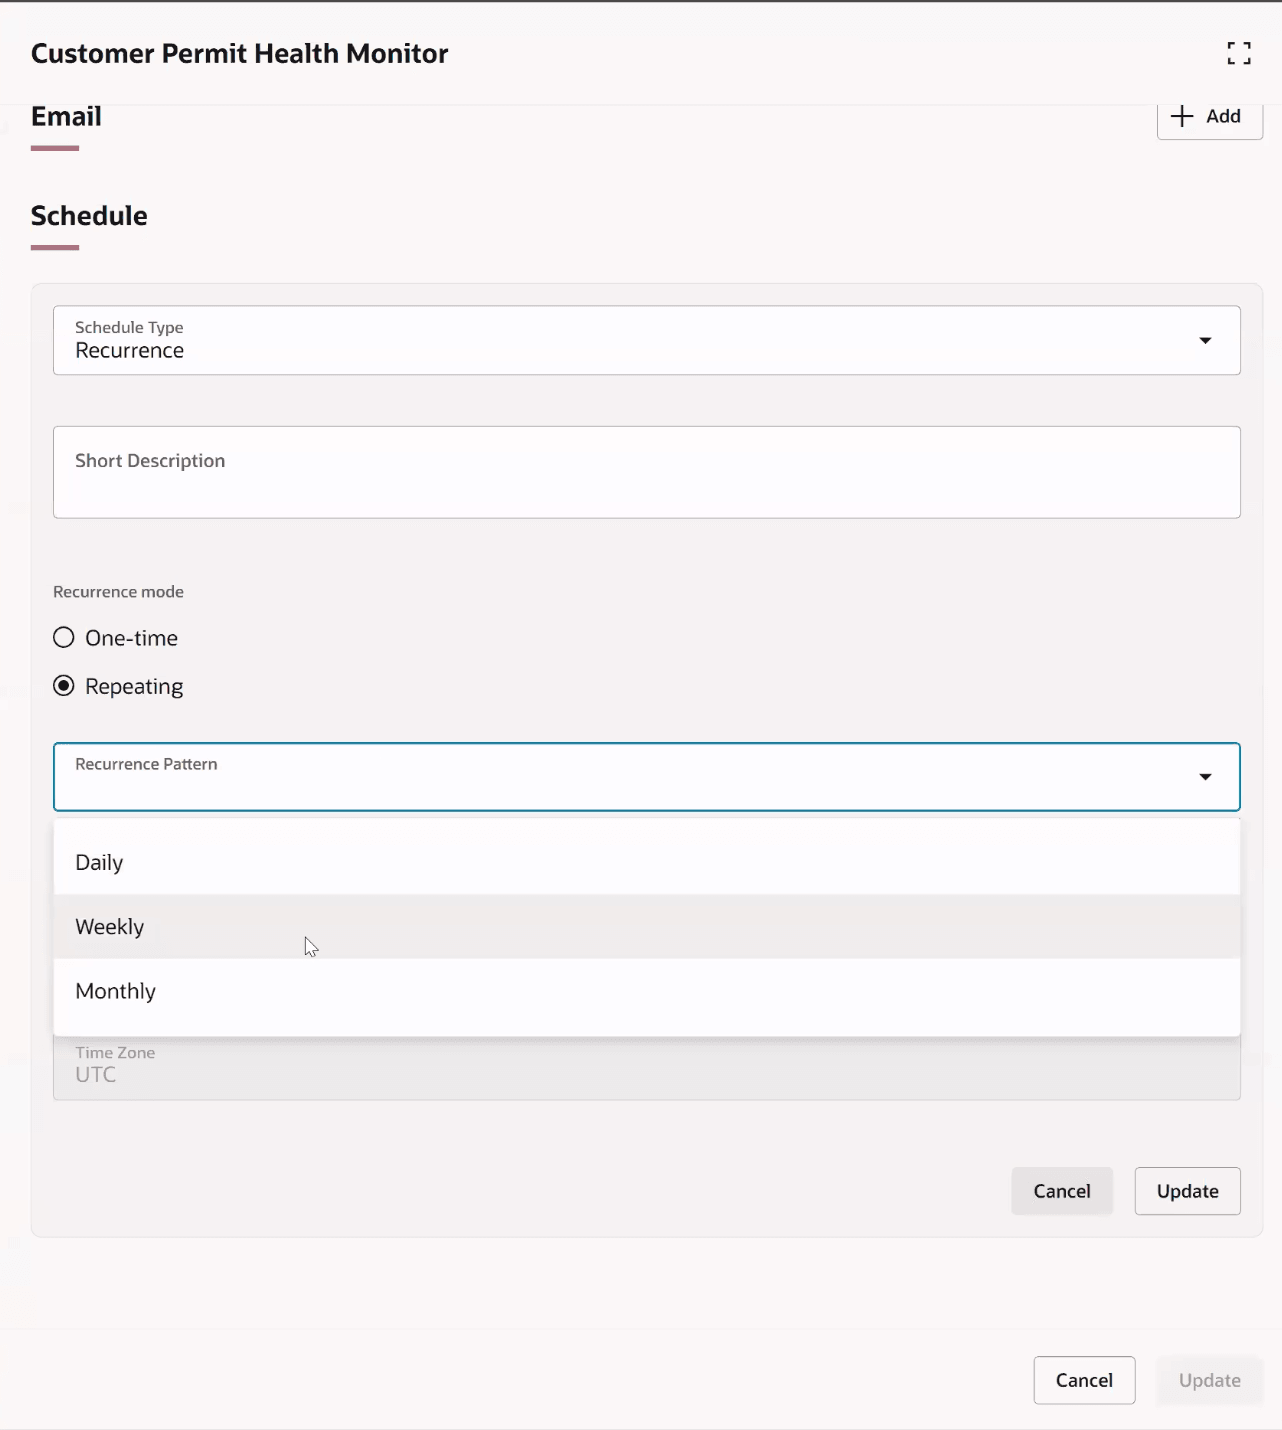
Agent drawer, Schedule
- Click Update.
- Click Publish to publish the agent. This publishes the configured agent instance in AI Agent Studio so it can run using the configured workflow, trigger values, email recipients, and schedule.
- Optionally, you can configure SLA documentation. You can mention your own expected specifications in the OTBI metrics:
- Select the Tools option on the bottom.
- Search for Permit Health SLA.
- Click the Add button to add a document.
- Set the status of the document as Ready to Publish.
- Ideally this should be a pdf type.
- Click the save button on the bottom.
- Click the save button on top.
- Click on the Ask Oracle button on the bottom right.
- Search for Scheduled Processes.
- Click the Schedule a New process button.
- Search for Process Agent Documents in the Name dropdown.
- Click Ok
- In the next popup that appears click the Submit Button.
- Wait a few minutes and then go back to the Permit Health SLA tool on AI Agent Studio. You should see the status as Published. Now the workflow will take your SLA document into account. See
- Go to Agent Teams, and search for your agent.
- Click the Play icon to run the agent.
- When the agent runs and finds the configured trigger values, an email should be sent to the recipients you identified.
Key resources
- See How do I use AI Agent Studio?, "Access Requirements for AI Agent Studio", Provide Access to AI Agent Studio on the Oracle Help Center.
- See Implementing Your Agency, "Setting up Analytics", Permitting and Licensing Analytics and Setting up Dashboards.