Support JSON Format for DocuSign Connect Messages
The Oracle CPQ DocuSign eSignature integration facilitates the interaction between the two applications to provide the most up-to-date eSignature information within Oracle CPQ. DocuSign will send a message to CPQ to notify when a workflow event is triggered, such as when an eSignature envelope is signed or declined by a recipient. DocuSign Connect is the webhook service Oracle CPQ uses to receive these event messages. DocuSign Connect event messages can be formatted as JSON or XML.
Prior to Oracle CPQ 24D, CPQ supported DocuSign Connect messages in XML format only. This feature adds Oracle CPQ support for JSON DocuSign Connect messages, including both JSON SIM and Aggregate modes. When a DocuSign Connect message is sent, it is parsed based on the content type header, JSON or XML, and validated using DocuSign HMAC security protocol. The Oracle CPQ DocuSign integration requires a DocuSign-generated secure Connect Key in order to authenticate JSON event messages.
Steps to Enable
To create a DocuSign eSignature integration type, administrators with permissions can complete the following steps:
- Click Integration Center in the Integration Platform section of the Admin Home page.
- Click Create Integration.
- Select eSignature from the Type drop-down.
- Select DocuSign from the Vendor drop-down. The DocuSign Integration field entries display.
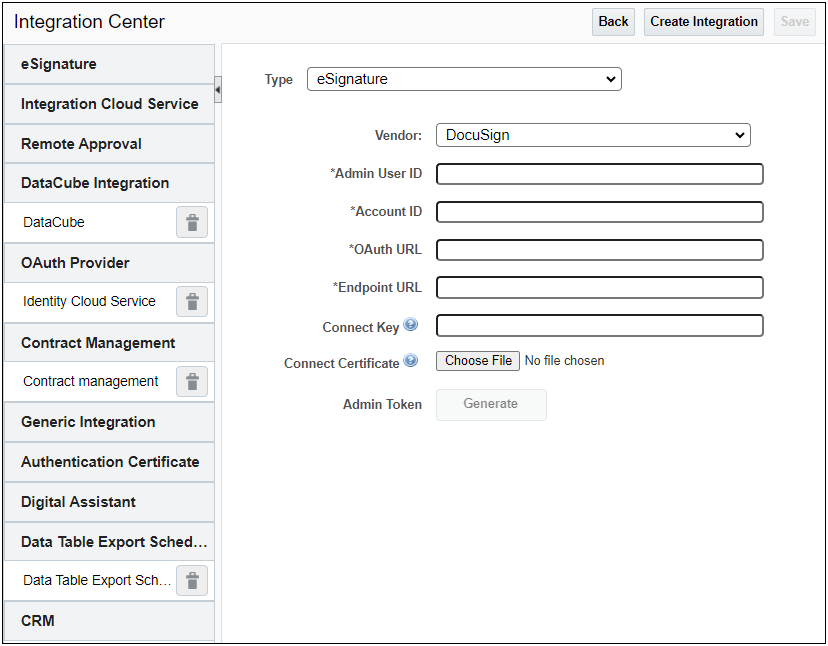
- Enter the Admin User ID. Refer to the procedure below for retrieving this information.
- Enter the Account ID. Refer to the procedure below for retrieving this information.
- Enter https://account.docusign.com for the OAuth URL.
- Enter the Endpoint URL. This includes the DocuSign Account Base URI with the restapi version information appended (for example, https://prodsite.docusign.net/restapi/v2). Refer to the procedure below for retrieving this information.
NOTE: This URL must be included in the allow list of approved domains.
- Enter the Connect Key if your DocuSign Connect is configured to send JSON formatted messages to Oracle CPQ. This the key used to authenticate the DocuSign Connect message and is generated from DocuSign and provided to Oracle CPQ. The Connect Key is validated with DocuSign event notification headers. Refer to the procedure below for retrieving this information.
NOTE: When the DocuSign eSignature integration is saved, the connect key is stored and the Last Modified date associated with the connect key is automatically populated.
- Upload the Connect Certificate if your DocuSign Connect is configured to send XML formatted messages to Oracle CPQ. To add the connect certificate, click Choose File and navigate to a valid certificate (for example, a.crt file) on your hard drive. This certificate must be the same as the one created in the DocuSign environment.
NOTE: It is essential that the certificate in DocuSign and Oracle CPQ match.
- Click Save to save the integration details along with the connection certificate.
NOTE: When the DocuSign eSignature integration is saved, the certificate is stored and available for download. Also the Last Modified date associated with the certificate is automatically populated.
- Select Generate to generate the Admin Token. If this is the first time you are setting up the OAuth-based integration, DocuSign consent must be verified. A warning displays indicating that consent from DocuSign is required.
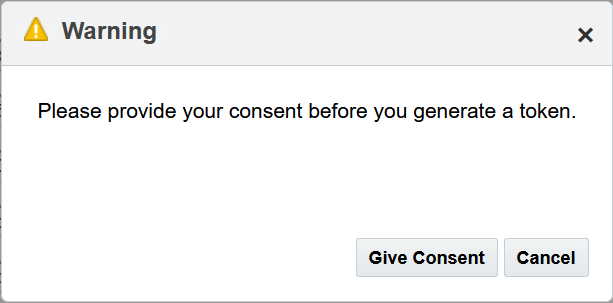
- Click Give Consent to close the Consent warning box. If required, you may need to log in to DocuSign.
A new DocuSign tab opens indicating Oracle CPQ is requesting access to DocuSign.
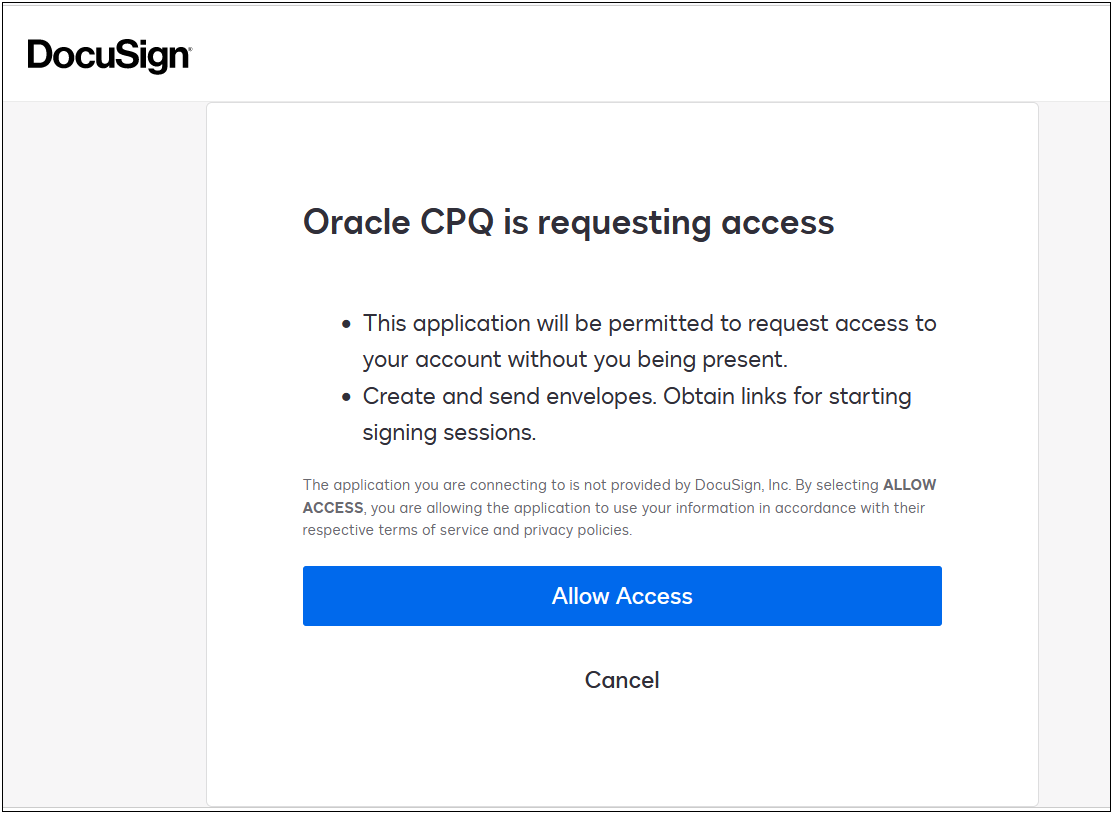
- Click Allow Access to allow Oracle CPQ access.

- Navigate to the Oracle CPQ DocuSign eSignature Integration Center page and click Generate.

The Oracle CPQ DocuSign eSignature Integration Center page displays the Revoke button for the Admin Token instead of a Generate button. This indicates the access was granted and the integration connection is established.
Retrieve DocuSign Field Values
To set up the Oracle CPQ DocuSign eSignature Integration, the administrator must retrieve necessary field data from DocuSign. The following provides an overview of the steps to locate the DocuSign fields and the corresponding DocuSign to Oracle CPQ field names.
- Log into DocuSign.
- Navigate to the Integration section within the Settings tab.
- Click Apps and Keys from within the Integration section. The Apps and Keys page displays.
- Within the My Account Information section, note the following field values. These values must be entered in the corresponding field for the Oracle CPQ DocuSign eSignature Integration.
| DocuSign App and Key Field | Oracle CPQ DocuSign Integration Field |
|---|---|
| User ID | Admin User ID |
| API Account ID | Account ID |
| Account Base URI |
Endpoint URL Enter the Account Base URI with the restapi version information appended (for example, https://prodsite.docusign.net/restapi/v2) |
- Click Connect from the Integration section. The Connect page displays.
- Within the Connect Key section, click Add Secret Key. This will create a secret key.
- Copy the secret key value using the copy icon.
- Paste the secret key value into the Connect Key field in the Oracle CPQ DocuSign Integration Center page.
- Click Save to save the secret key.
Configure DocuSign Properties
In order for the Oracle CPQ Receive action to run properly when a document status changes in DocuSign, Docusign should be configured by following the steps below:
- Login to DocuSign.
- Navigate to the Integration section within the Settings tab.
- Select Connect from the Integration section. The Connect page displays.
- Within the Configuration tab, click Add Configuration to create a custom configuration.
- Select Active Connection from the Status field of the Listener Settings.
- Enter the name for the configuration in the Name field.
- Enter the Oracle CPQ hostname you are integrating with in the URL to Publish field, as follows:
https://<cpqhost>/notification/receiver/
- Select the Enable Log and Require Acknowledgement checkboxes.
- Under Event Settings, select one of the following for Data Format:
- REST v2.1 for JSON message format. Proceed to Step 10.
- Legacy for XML message format. Skip to Step 11.
- For JSON message format, perform the following to complete the DocuSign configuration:
- Under Event Message Delivery Mode, select one of the following based on your business needs:
- Send Individual Message (SIM)
- Aggregate Message
- Under Trigger Events, expand the Envelopes & Recipients section and select the following:
- Envelope Signed/Completed
- Envelope Declined
- Envelope Voided
- Expand the Include Data section of Envelopes & Recipients and select the following:
- Document PDFs
- Document Fields
- Select Include HMAC Signature (Recommended) option under Integration and Security Settings section.
- Select Manage Keys to go to the Connect Key tab to create a secret key.
- Within the Connect Key section, click Add Secret Key. This will create a secret key.
- Copy the secret key value using the copy icon.
- Paste the secret key value into the Connect Key field in the Oracle CPQ DocuSign Integration Center page.
- Click Add Configuration to save the JSON message format DocuSign properties.
NOTE: You can learn more about HMAC Security with DocuSign Connect implementation and best practices from the DocuSign Developer Center. Oracle CPQ recommends rotating secret keys at a reasonable frequency as per your company-defined security policy.
- For XML message format, perform the following to complete the DocuSign configuration:
- Under Trigger Events, expand the Envelopes & Recipients section and select the following:
- Envelope Signed/Completed
- Envelope Declined
- Envelope Voided
- Expand the Include Data section of Envelopes & Recipients and select the following:
- Document PDFs
- Document Fields
- Select Use SOAP Interface (SOAP Method: DocuSignConnectUpdate).
- Enter the SOAP Namespace that will be used in the notification requests to your server. Ensure a full path namespace is specified instead of the default property envelope.
- Select Include XML Digital Signature in SOAP Header so that SOAP XML messages will be digitally signed.
- Click Add Configuration to save the XML message format DocuSign properties.
NOTE: If the DocuSign configuration settings are not set properly, administrators may see error messages in the error log.
Tips And Considerations
- Oracle CPQ 24D supports both JSON and XML. This is configured from the DocuSign configuration page.
- After 24D Upgrade, existing DocuSign connections are not impacted by this feature.
- When setting up the Oracle CPQ DocuSign Integration, the message format field requirements are as follows:
- Connect Key field is required for JSON-based message format
- Connect Certificate field is required for XML-based message format
- Connect Key and Connect Certificate fields are required if implementing both JSON and XML-based message format
NOTE: The The DocuSign connect key expires three years from the Last Modified date. Oracle CPQ sends the administrator weekly email notification reminders starting four weeks ahead of the connect key expiration date. If the connect key expires, the DocuSign envelope status will stop working.