Redwood: Create Receipt Returns Using a Redwood Page
Returning goods after you've received them is generally not the preferred outcome for your order lifecycle. However, when it happens, you need a single place where you can efficiently find the respective orders and quickly create your returns. Now you can create receipt returns for purchase order receipts, transfer order receipts, return material authorization (RMA) receipts, and unreferenced returns from a single Redwood page.
You can navigate to the new Returns Redwood page from the Receipts tasks in the Inventory Management work area. You can refine your search using a variety of filters including Status, Return Type, Receipt, Item, and Supplier. For example, you can filter your returns by status such as Canceled, Fulfilled, Incomplete, and Pending fulfillment. Once you've identified your return, you can perform various actions such as view, edit, and delete. You can create a new return by clicking the Create Return button.
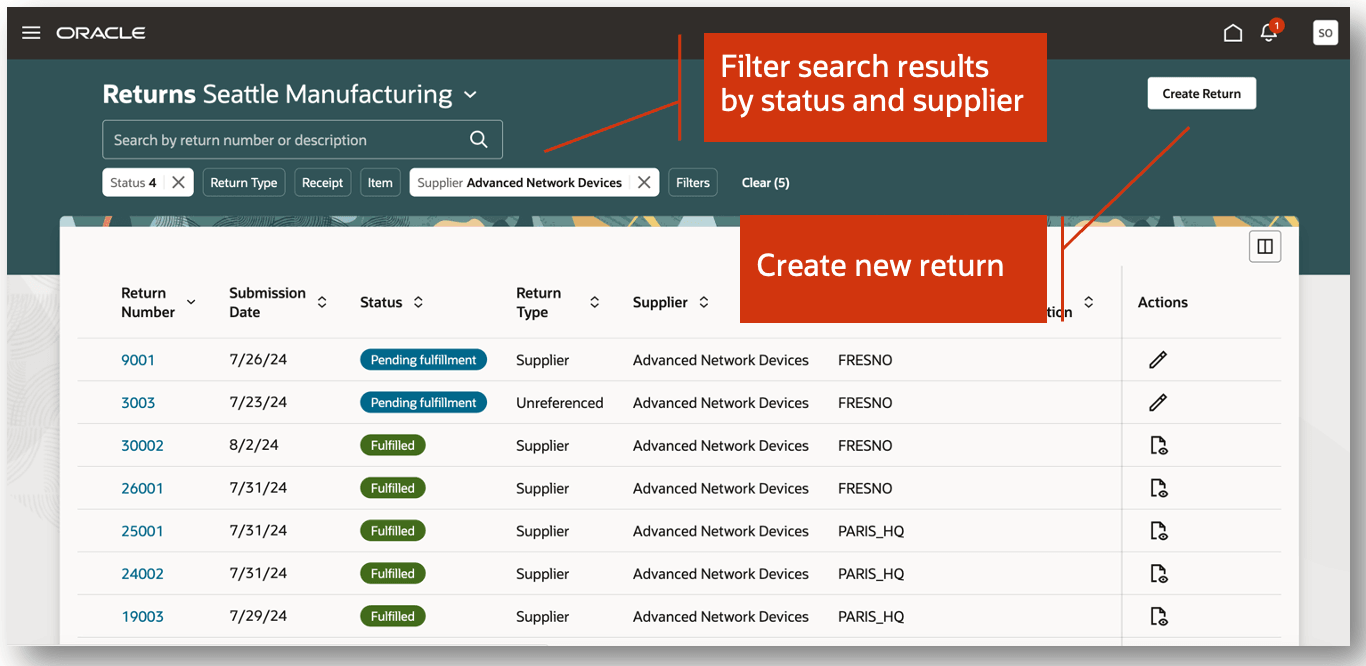
Receiving Returns
When creating a new return, you can specify a value for the Return Type such as Customer, Organization, Receiving, Supplier, and Unreferenced. Additionally, you can enter other attributes such as Supplier, Customer, Source Organization, and Customer. Once you've defined the return details, you can add one of more return lines by clicking the Add button.
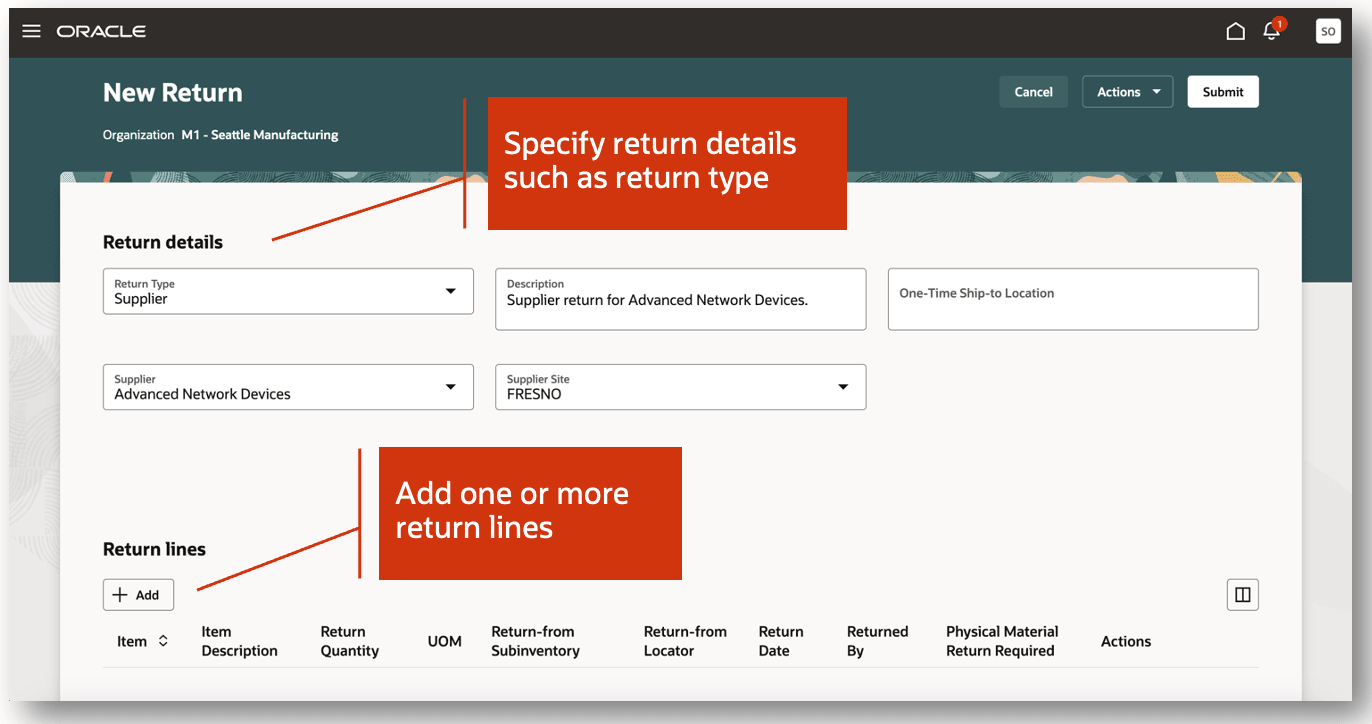
New Return
To select the lines to return, you can search by item, purchase order, ASN, receipt, and line status. Once you've selected the lines to return, click the Add button to add the lines to the return.
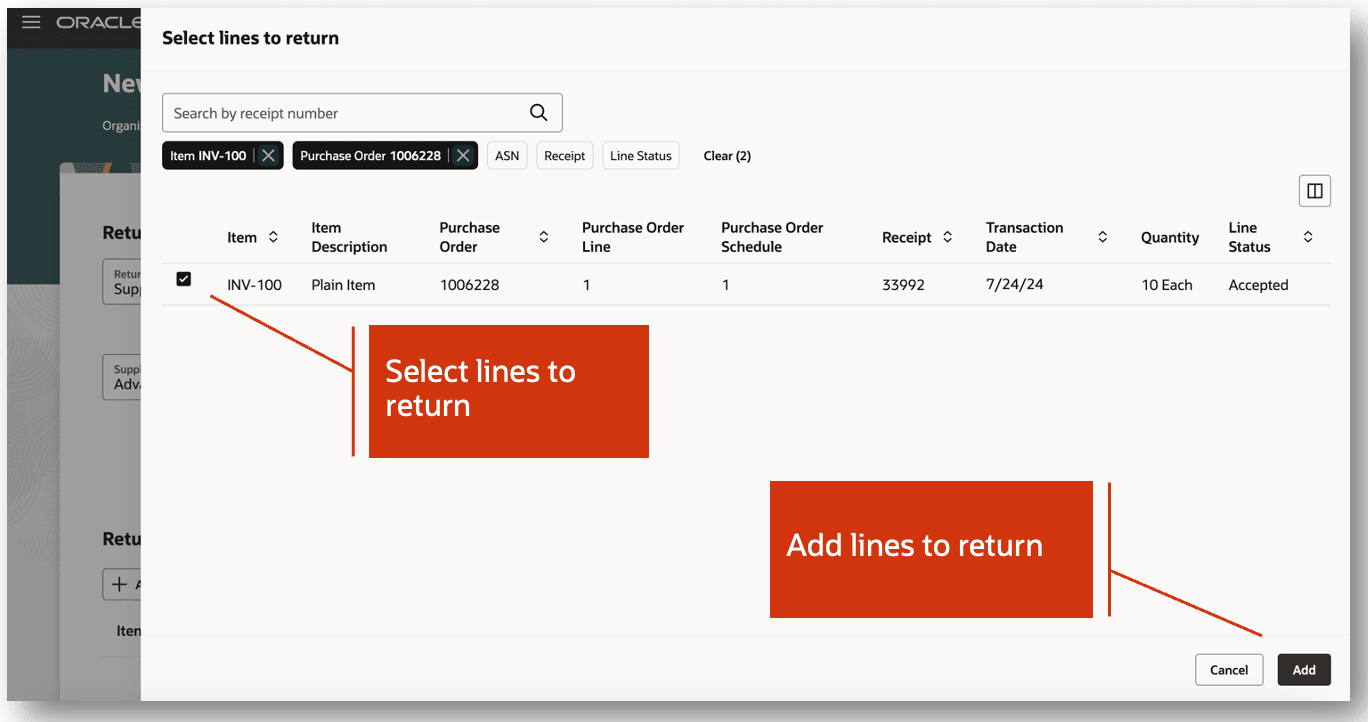
Select Lines to Return
In the Return line drawer, you can update details such as the Quantity, Return Date, Returned By, and Reason. In the event the item is lot controlled, serial number controlled, or both, you can record the associated lots and serial numbers. You can indicate if physical material return is required. Selecting this checkbox indicates that a corresponding outbound shipment will be created to return the material to the original source. Lastly, you can indicate whether or not to create a debit memo for the return line.
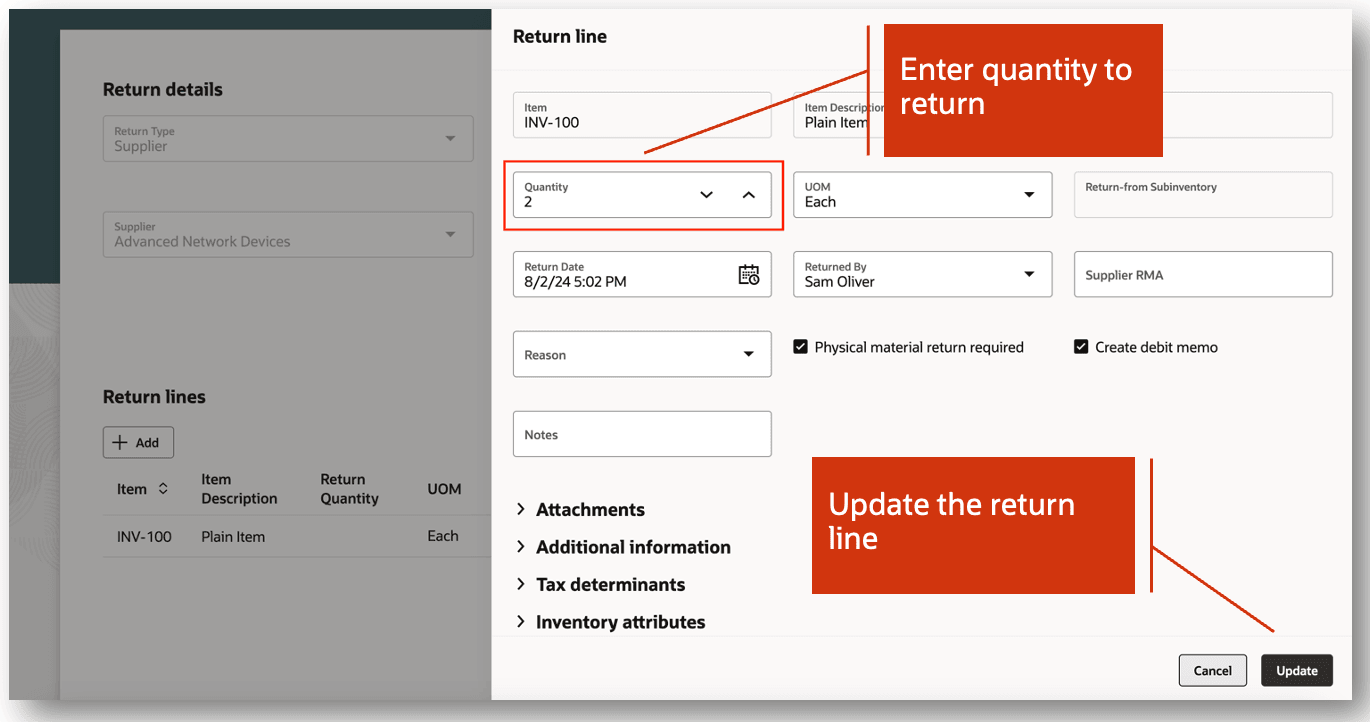
Update Return Line
Once you have entered the return line details, you can create the return by clicking the Submit button. This creates the return, and you'll receive a message indicating that the return has been submitted. Optionally, you can click the Save or Save and Close buttons to save the return for processing later.
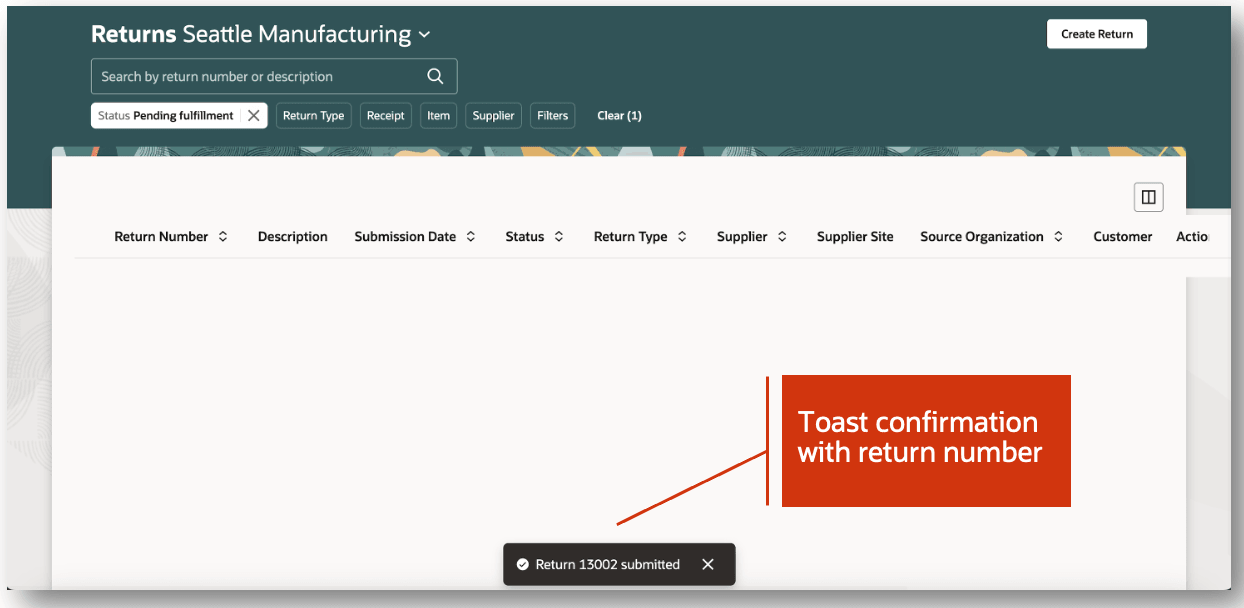
Confirmation Toast Message
This feature provides you a the ability to efficiently create receipt returns using an improved user experience.
Here's the demo of these capabilities:
Steps to Enable
Follow these steps to enable or disable this feature:
- In the Setup and Maintenance work area, search for and select the Manage Receiving Profile Options task.
- On the Manage Receiving Profile Options page, search for and select the ORA_RCV_RECEIVING_RETURNS_REDWOOD_ENABLED profile option code.
- In the Profile Values section, set the Site level to Yes or No. The default value is No.
- Yes = enables the feature
- No = disables the feature
- Click Save and Close. Changes in the profile value will affect users the next time they sign in.
Tips And Considerations
Supported return types include customer, organization, receiving, supplier, and unreferenced.
Key Resources
- Oracle Fusion Cloud SCM: Using Receiving guide, available on the Oracle Help Center.
- Oracle Fusion Cloud SCM: Implementing Manufacturing and Supply Chain Materials Management guide, available on the Oracle Help Center.
Access Requirements
Users who are assigned a configured job role that contains this duty role can access this feature:
- Receiving Transaction Maintenance Duty (ORA_RCV_RECEIVING_TRANSACTION_MAINTENANCE_DUTY)
This duty role was available prior to this update.