Redwood: Create Replenishment Plans and Edit Replenishment Plan Options Using a New User Experience
You can now use the Redwood guided process to create a new replenishment plan. The plan creation process is significantly streamlined to guide you at every step, helping you make informed choices as you configure the plan to fit your enterprise’s requirements. Additionally, you can also view and edit plan options for an existing Replenishment plan.
The number of steps in the guided process to create a new plan varies based on the planning processes selected.
To create a replenishment plan from the Redwood Supply Chain Planning work area:
- In the Supply Chain Planning work area, navigate to More Actions > Plans.
The Plans page opens on a new web browser tab and displays a list of plans that you own or have permission to access. Multiple plan actions are available for each plan based on the plan type.
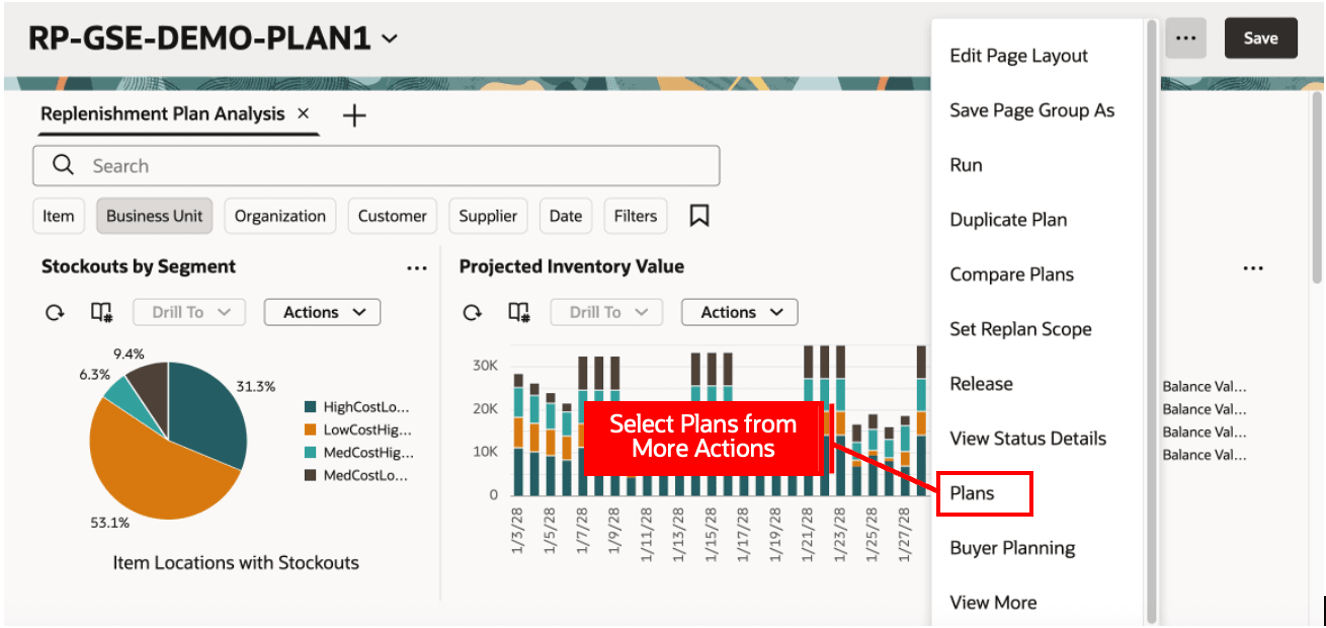
Select Plans in the Redwood Supply Chain Planning Work Area
- Click Create Plan.
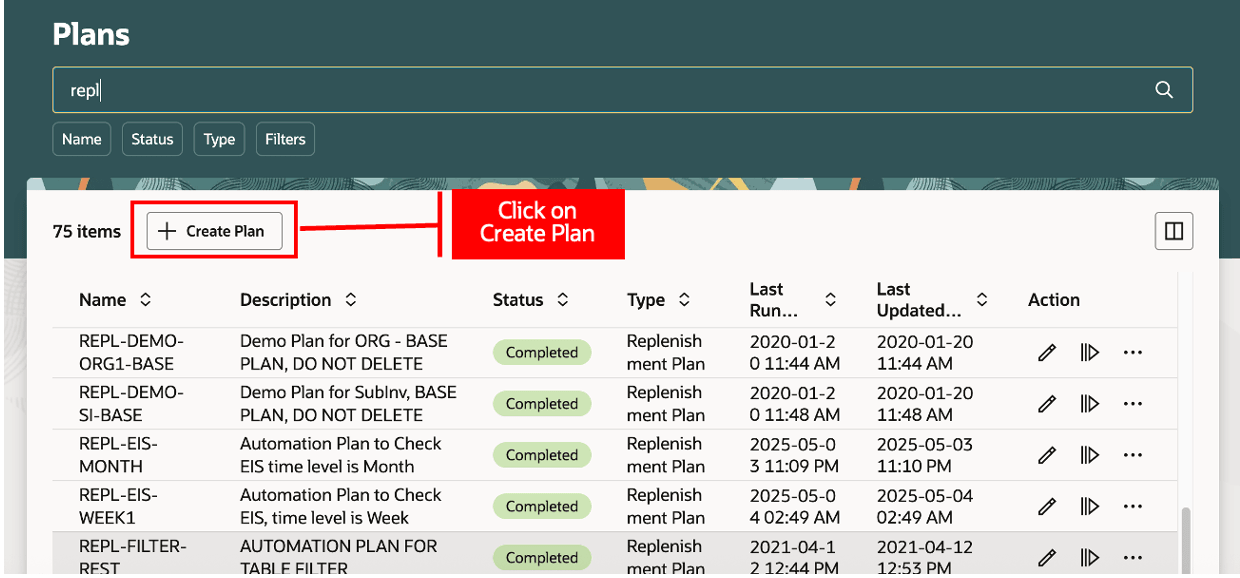
Create a Plan from the Plans Page
A guided process opens in a new browser tab, displaying Name, Type, and Description.
- Enter Name and Description and select Type as Replenishment Plan.
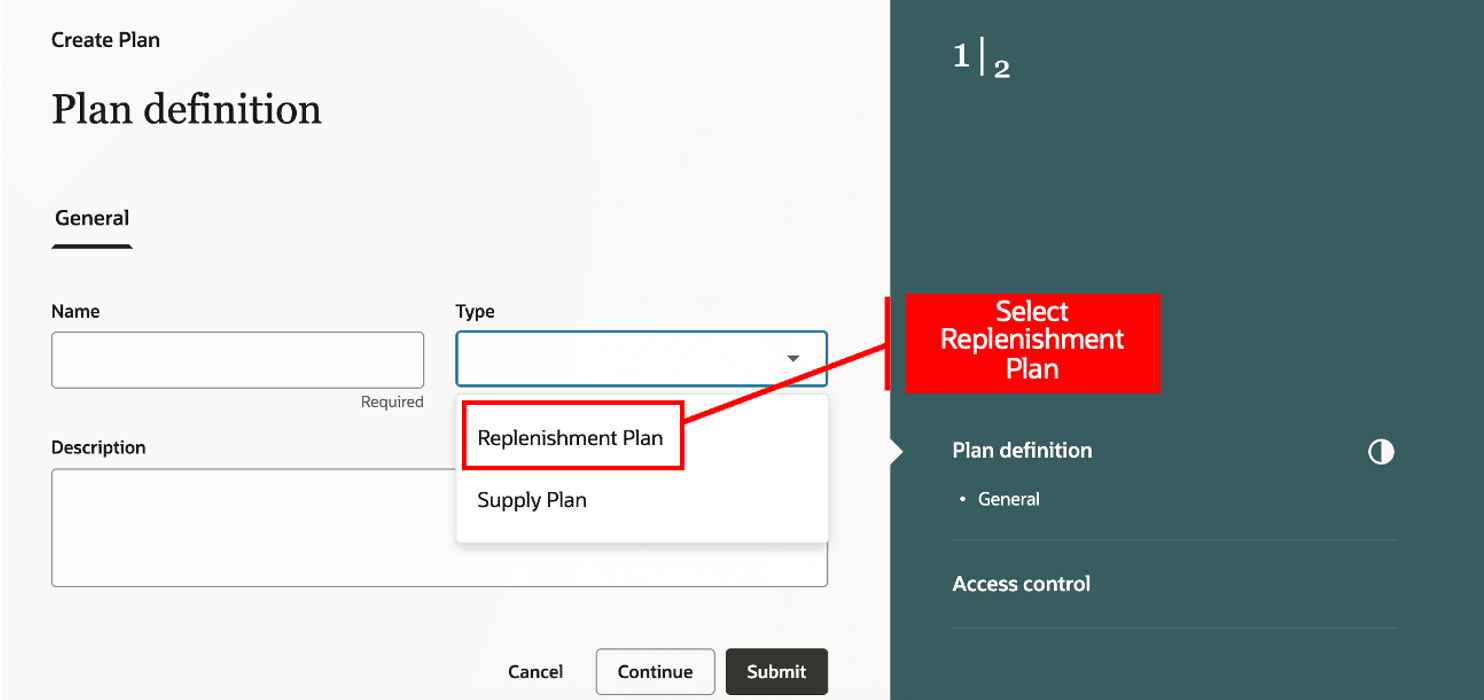
Create a Replenishment Plan in the Guided Process
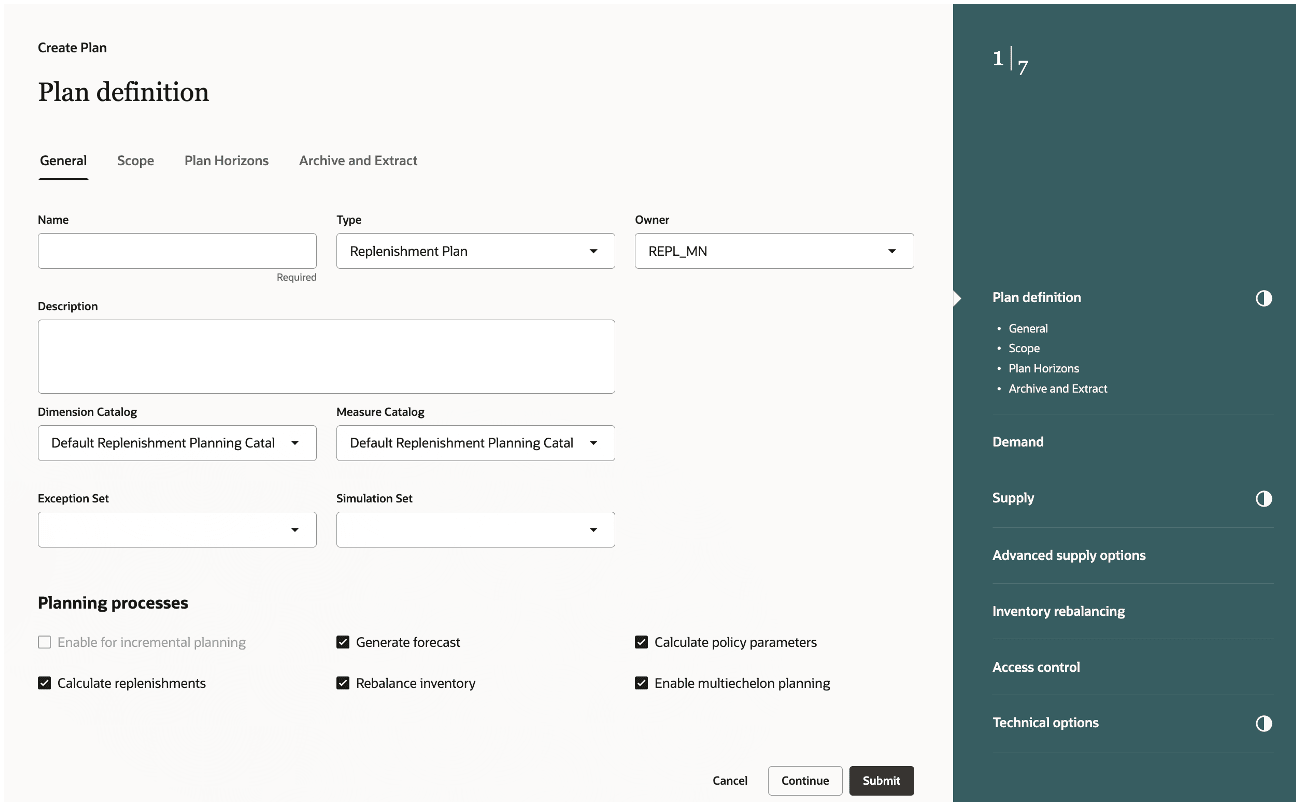
The expanded guided process displays default plan options applicable to a replenishment plan. There are following steps in the process:
- Plan definition
- Demand
- Supply
- Advanced supply options
- Inventory Rebalancing
- Access control
- Technical options
- On the General tab, modify the Dimension Catalog, Measure Catalog, Exception Set, and Simulation Set options as needed. Enable planning processes check boxes based on your business requirement.
Provide General Details in the Plan Definition Step
Click the Scope tab to continue.
- On the Scope tab, select Source System and Level Members for plan locations. Then, select Segment Group and Segments for plan items. For a plan with only Calculate policy parameters enabled, you can decide to select the Enable for policy comparison checkbox. Select Policy Assignment Set.
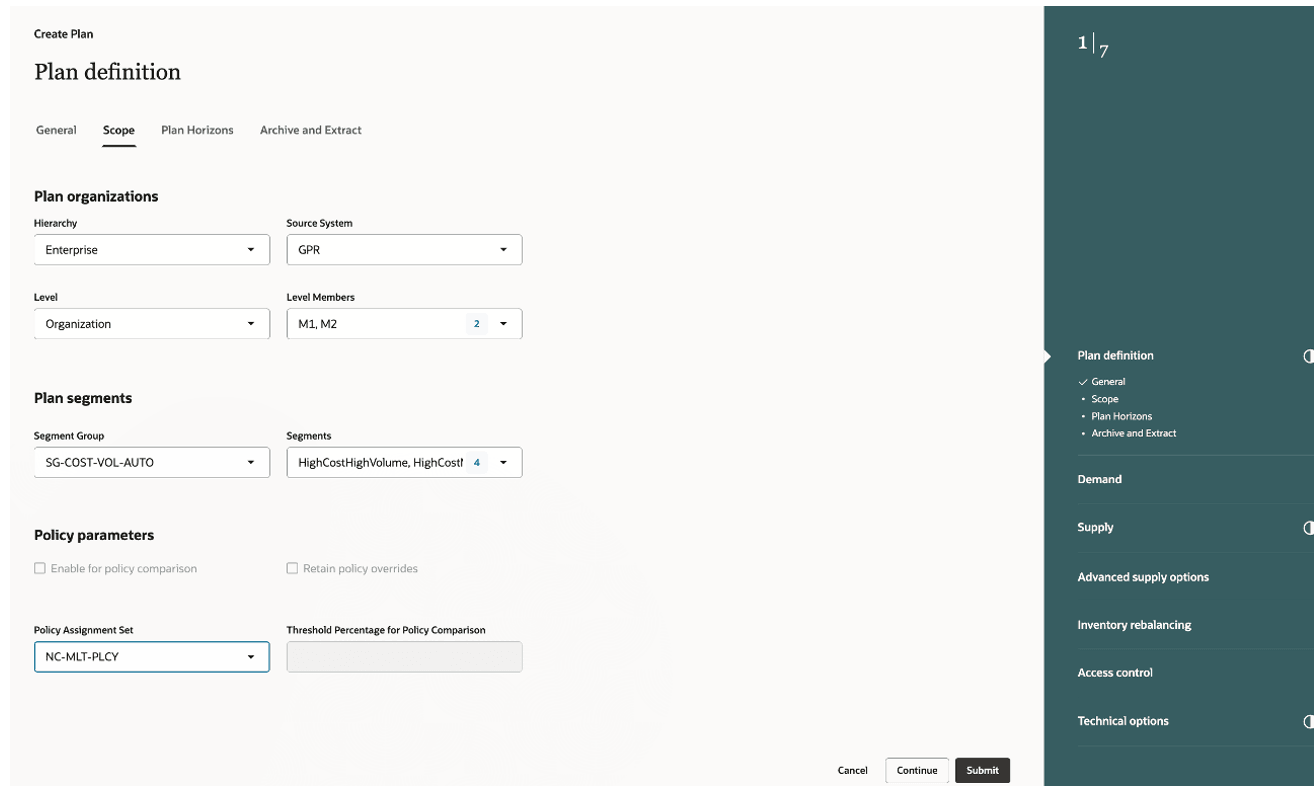
Provide Scope Details in the Plan Definition Step
Click the Plan Horizons tab to continue.
- On the Plan Horizons tab, select Planning Calendar and Planning Time Level, then specify Number of Buckets. Use Demand History Display Days to define the time horizon for displaying historical measure data.
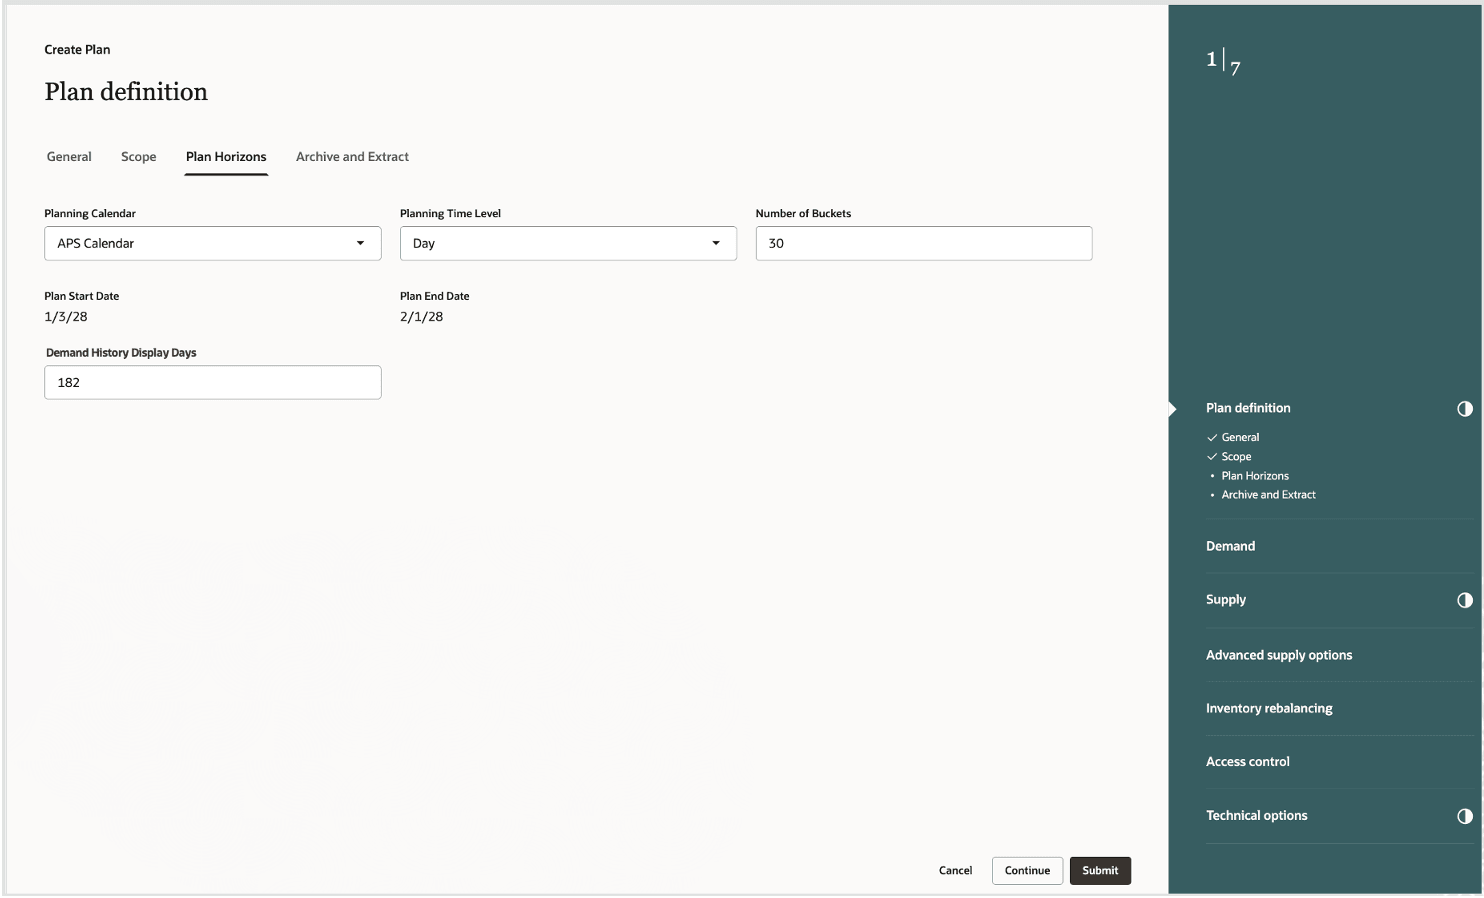
Provide Plan Horizon Details in the Plan Definition Step
Click the Archive and Extract tab to continue.
- On the Archive and Extract tab, select the archive and extract options. For example, enable archiving for the plan and modify the measure catalog for archiving.
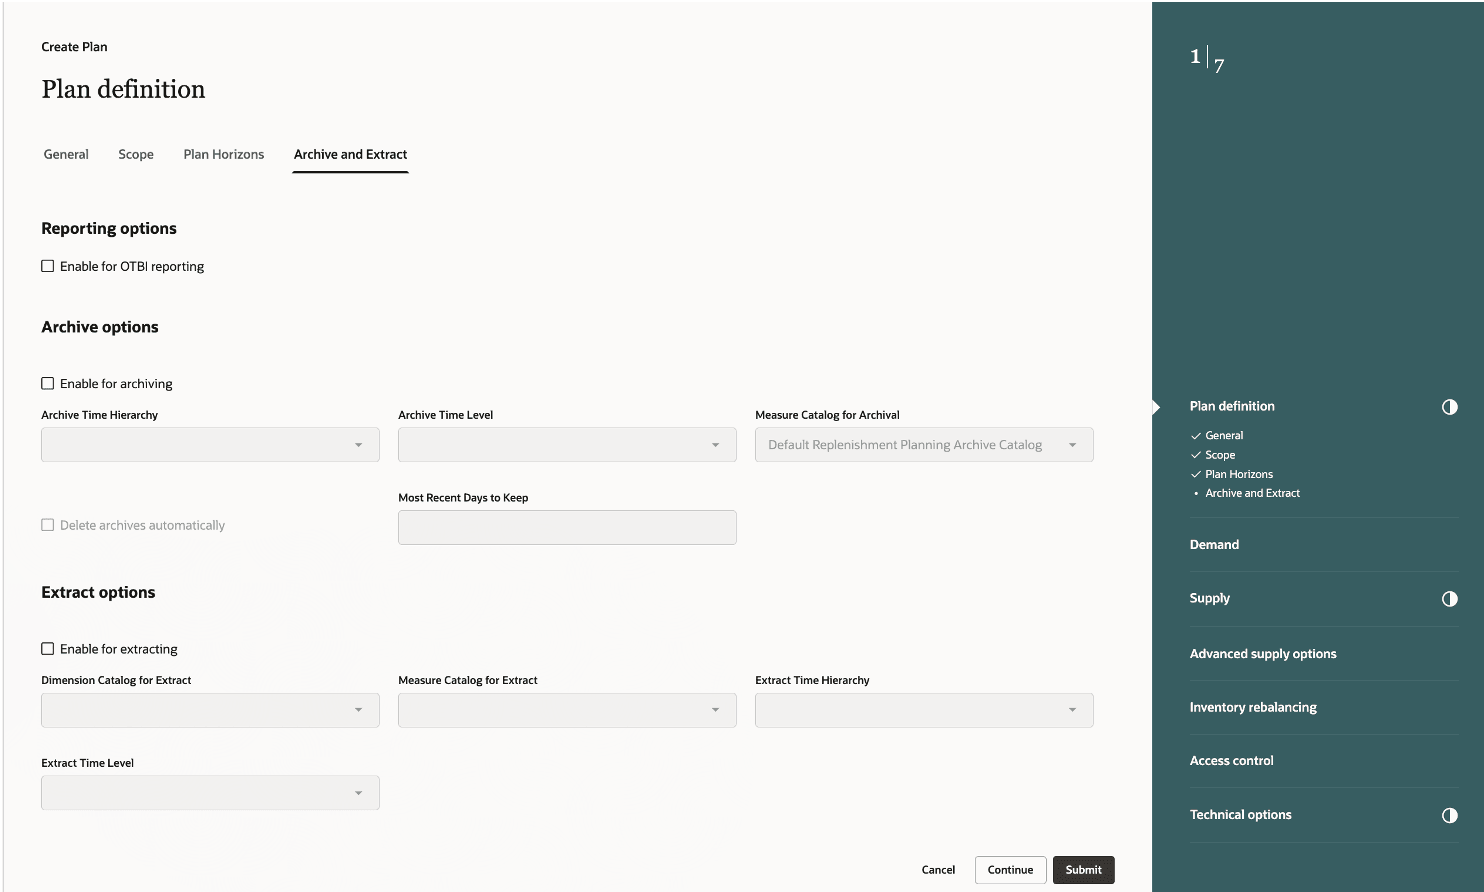
Provide Archive and Extract Details in the Plan Definition Step
Click Continue to go to the Demand step.
- In the Demand step, select a Forecasting Profile.
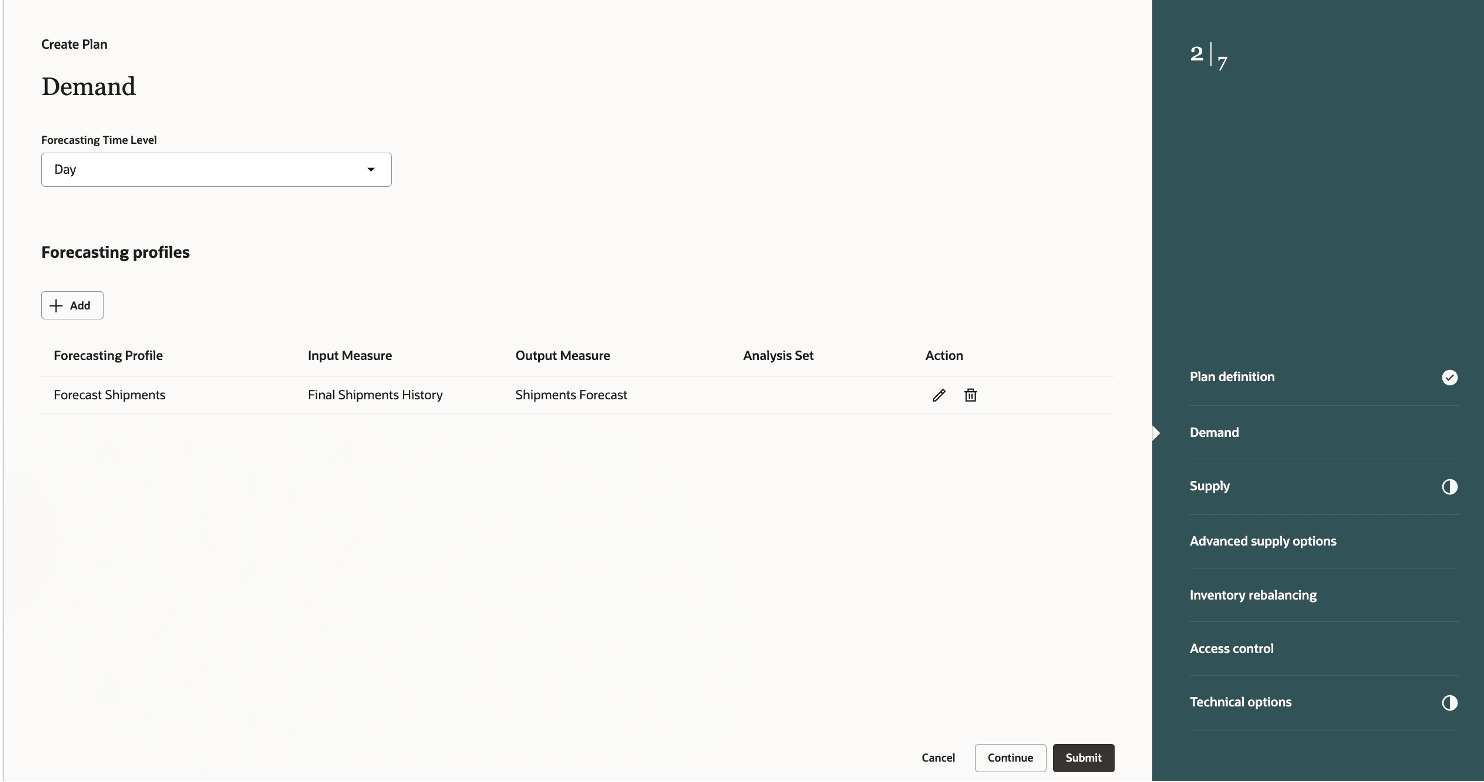
Provide Details in the Demand Step
Click Continue to go to the Supply step.
- In the Supply step, select an Assignment Set and other options in the General tab. You can also select options for Automatic release parameters and Item relationships for substitution and supersession.
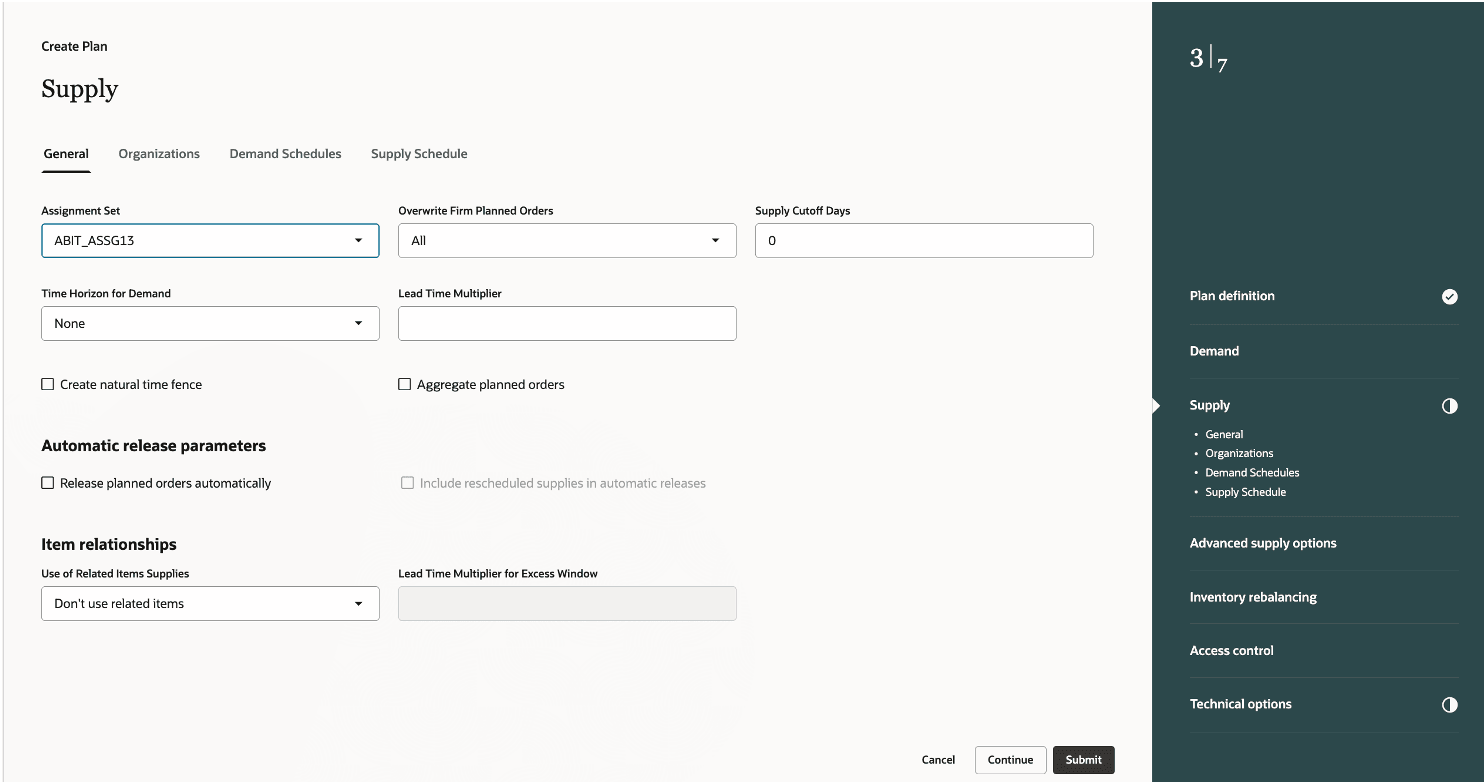
Provide General Details in the Supply Step
Click the Organizations tab to continue.
- On the Organizations tab, click the Edit icon to enable the nettable status of subinventories for an organization. A drawer opens displaying the list of subinventories for that organization.
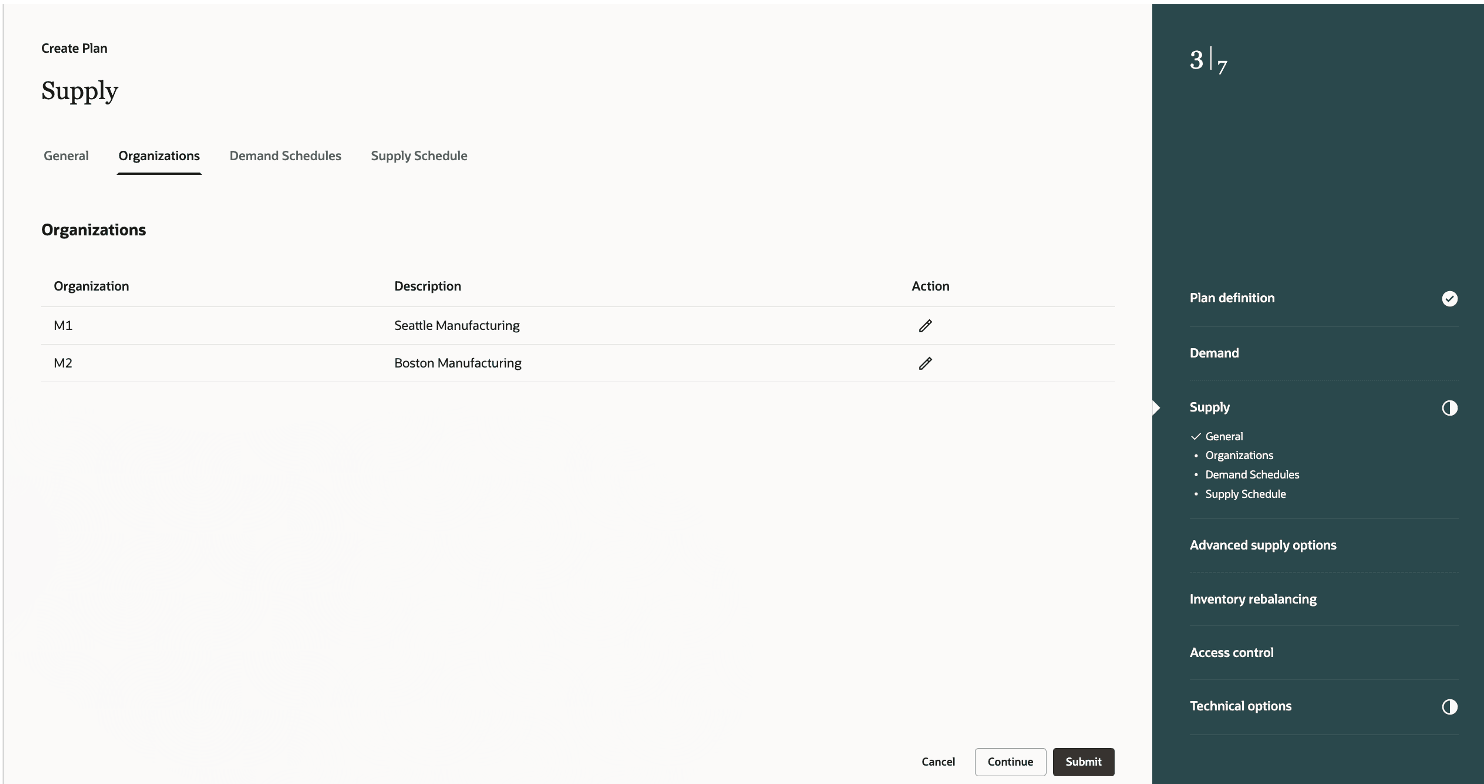
Provide Organization Details in the Supply Step
Click the Demand Schedules tab to continue.
- On the Demand Schedules tab, click Add to add a demand plan or replenishment plan to feed a demand schedule or policy parameters to this plan. Select the End Item Demand, Independent Demand, and Forecast accuracy measures.
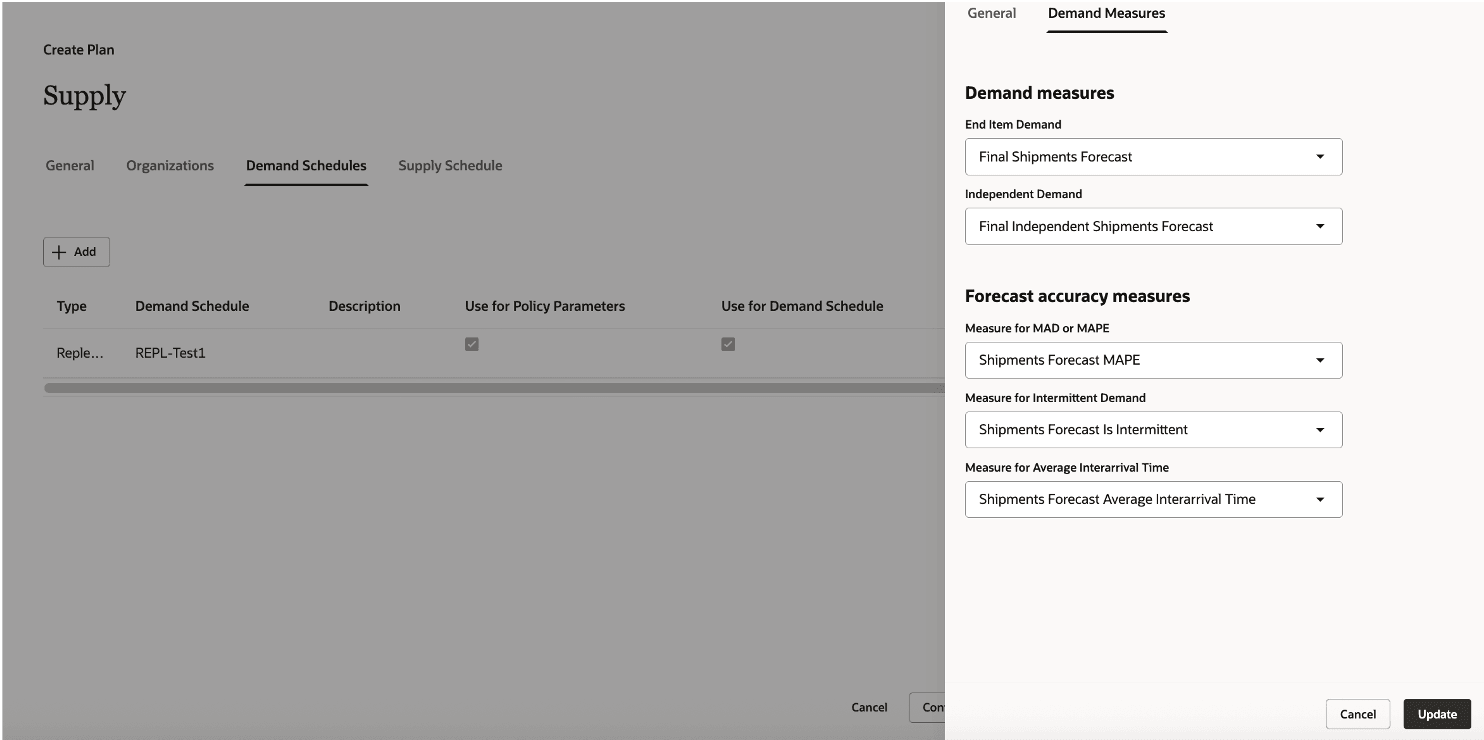
Provide Demand Schedule Details in the Supply Step
Click the Supply Schedule tab to continue.
- On the Supply Schedule tab, you can specify a supply plan as a Supply Schedule to drive replenishment plan using supplies from the supply plan. This option is available only if multi-echelon planning is enabled.
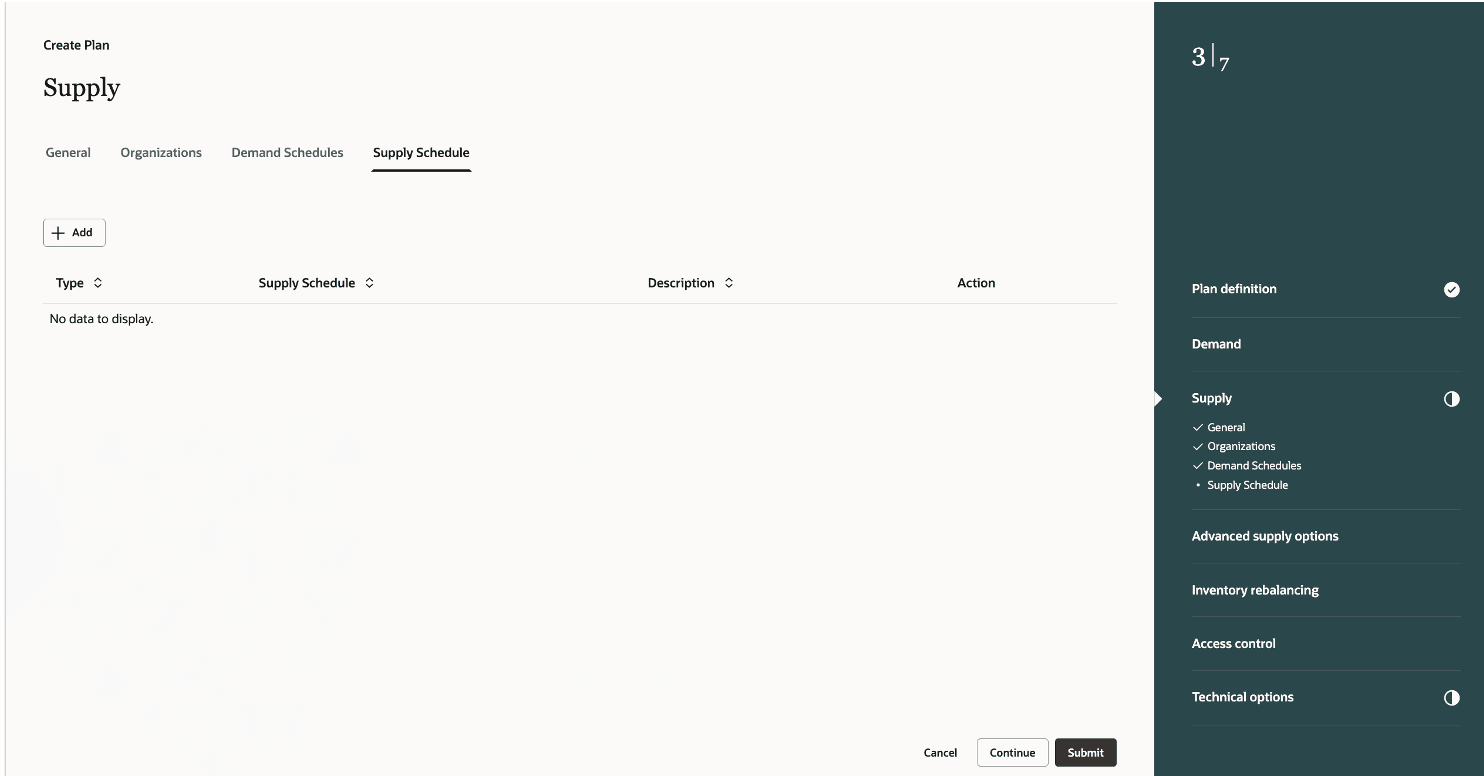
Provide Supply Schedule in the Supply Step
Click Continue to go to the Advanced supply options step.
- In the Advanced supply options step, select Release recommendations parameters for your replenishment plan.
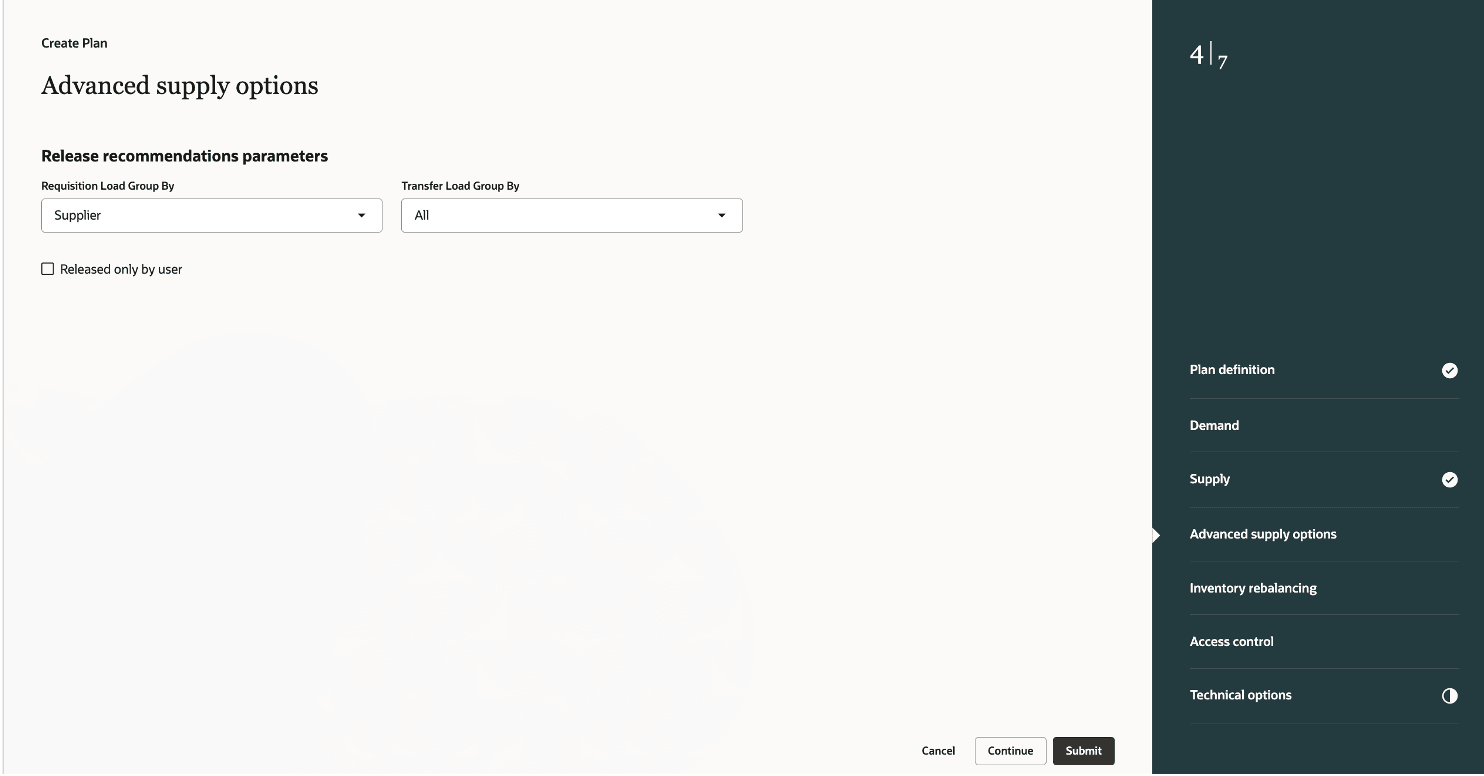
Provide Details in the Advanced Supply Options Step
Click Continue to go to the Inventory Rebalancing step.
- In the Inventory Rebalancing step, specify the details required for inventory rebalancing process. You can specify Clusters, Inventory rebalancing rules, supply and demands types for calculating excess and shortages.
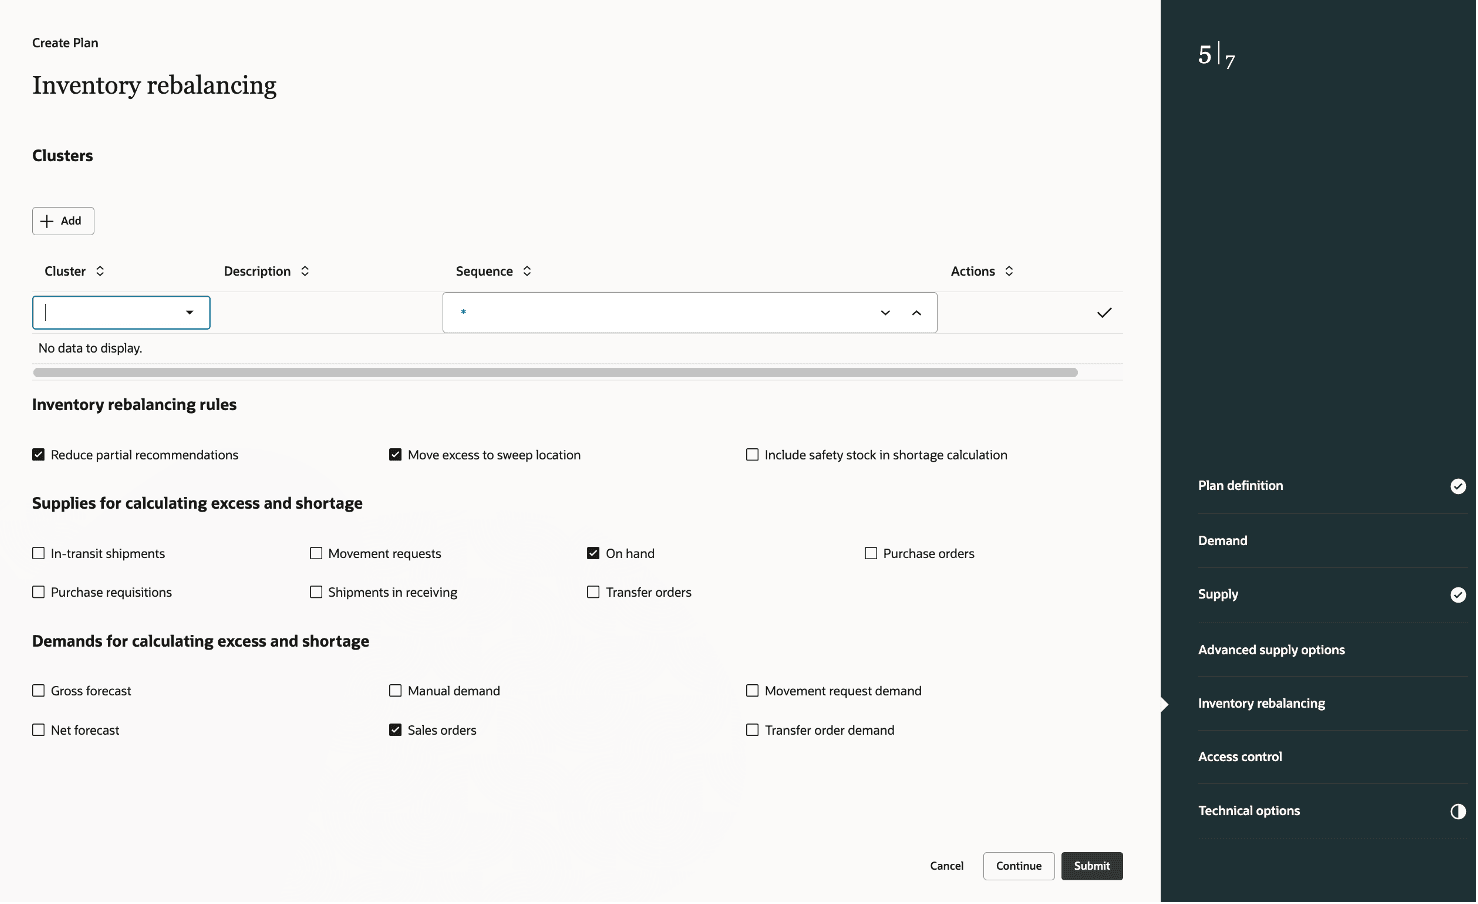
Provide Inventory Rebalancing Details
Click Continue to go to the Access control step.
- In the Access control step, you can manage user access to the plan. By default, access is set to Public. To restrict access, you can configure the plan as Private and grant access only to specific users.
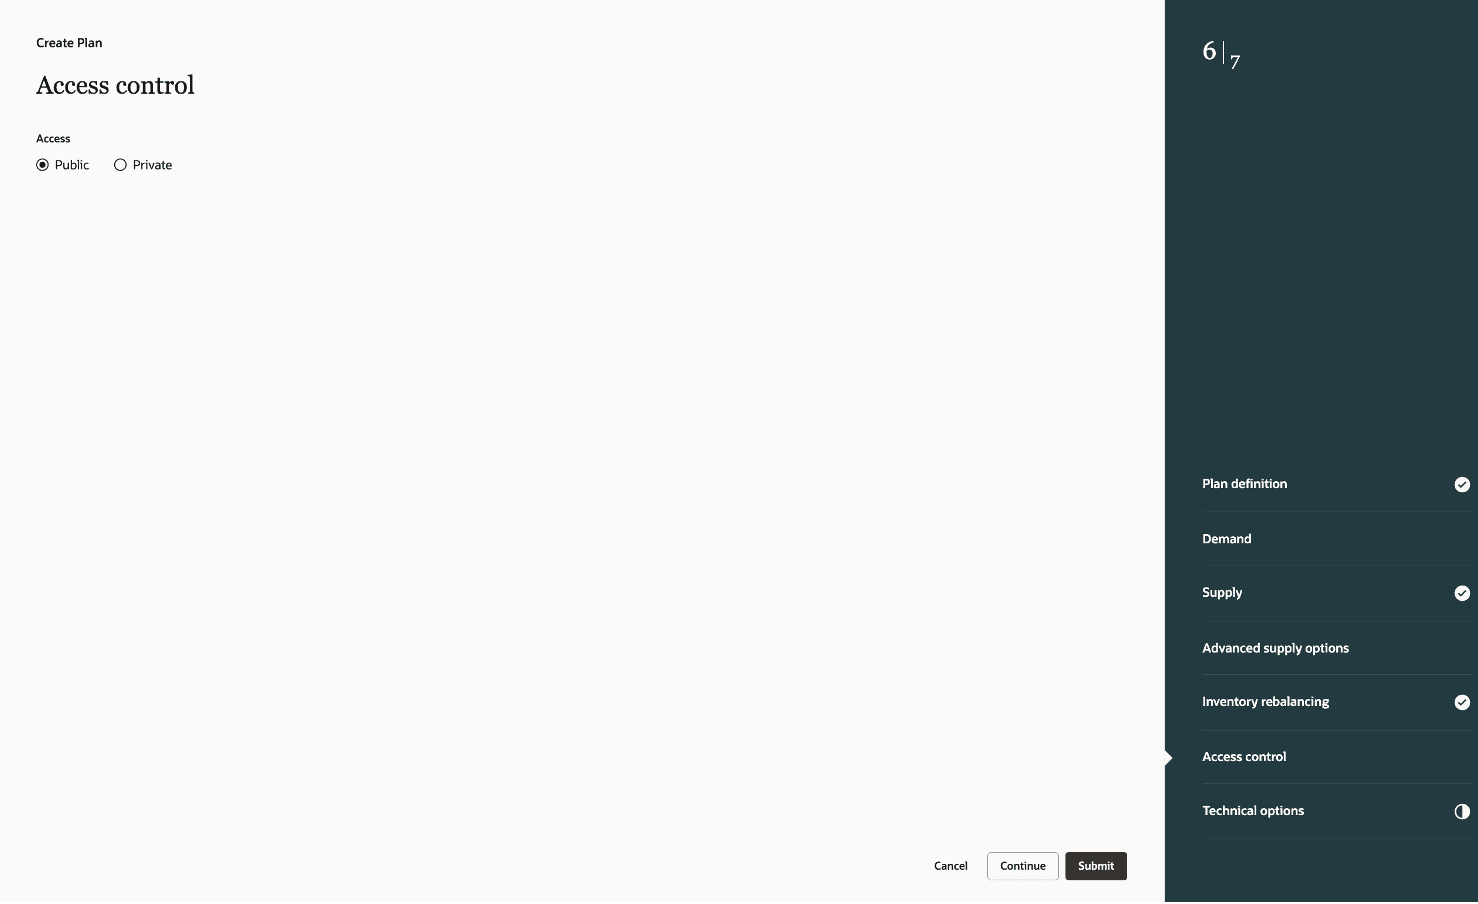
Provide Details in the Access Control Step
Click Continue to go to the Technical options step.
- In the Technical options step, you can set demand control and supply control parameters.
Click Submit to create the replenishment plan.
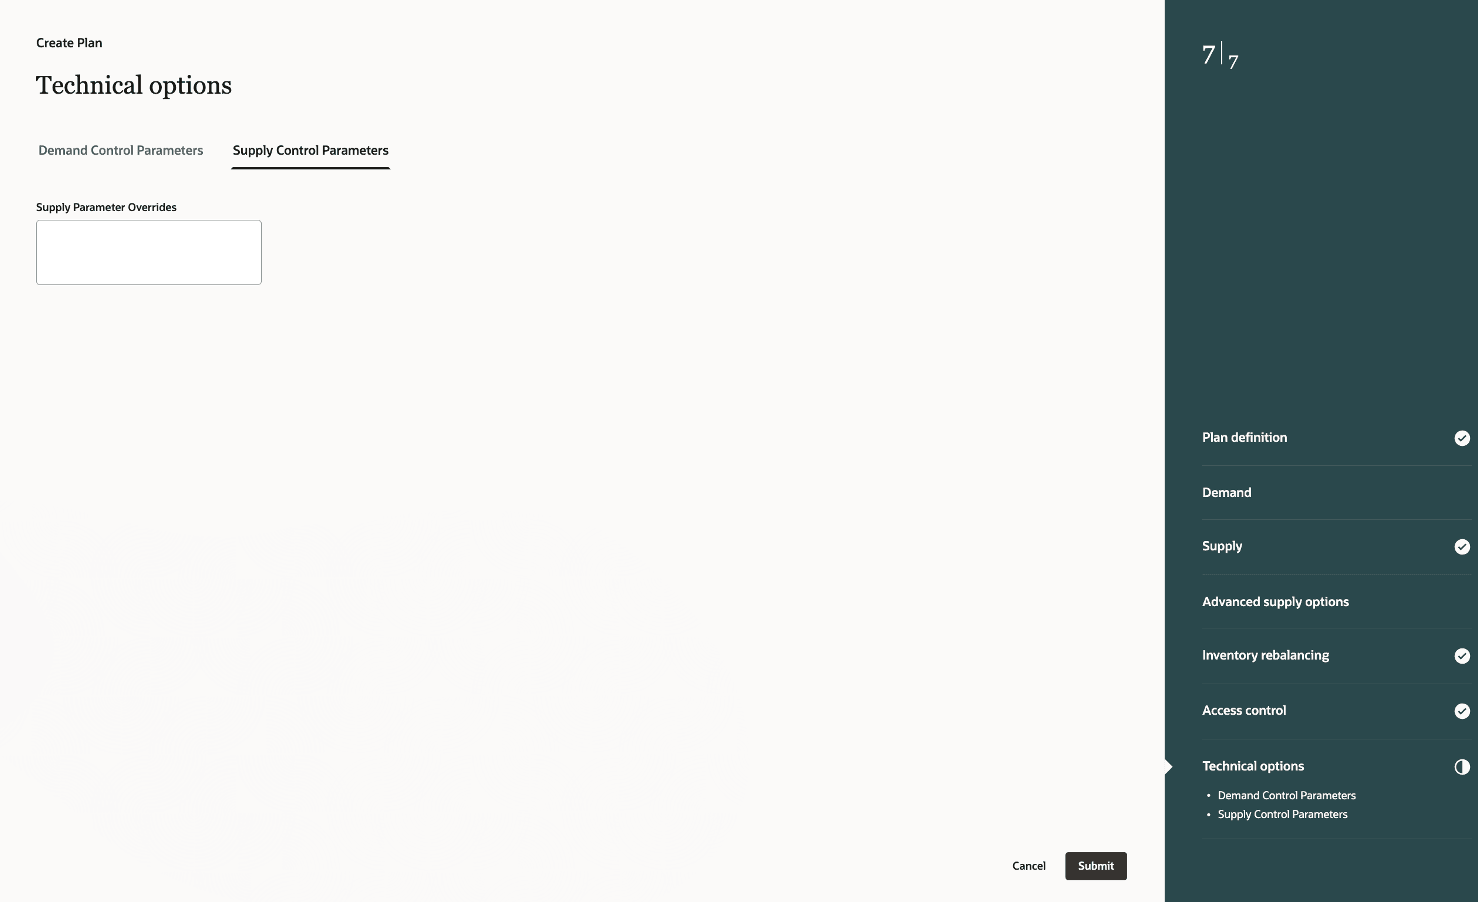
Provide Details in the Technical Options Step
A message is displayed upon successful plan creation. Afterward, you can close the browser tab.
- Run the replenishment plan from the Plans page.
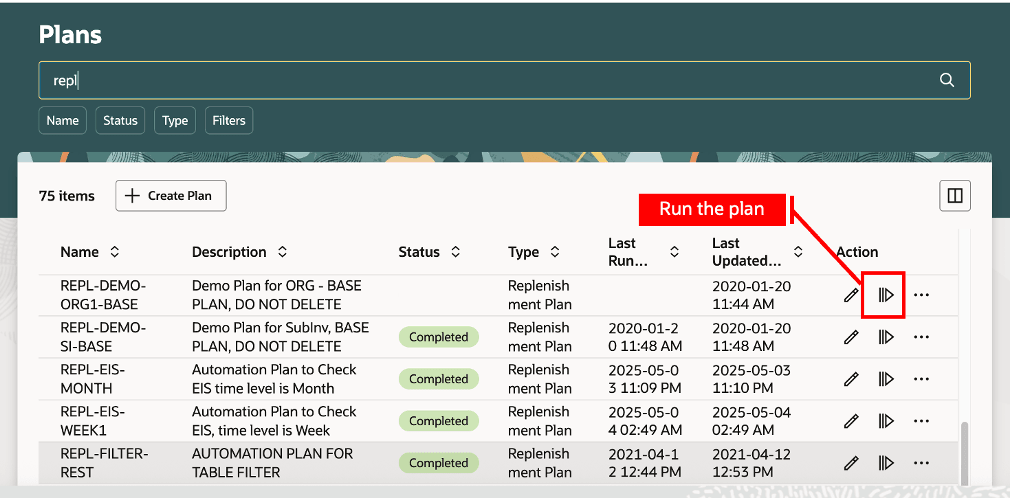
Run the Replenishment Plan
- Once the plan run is complete, select the Open Plan action in the Plans page to open the replenishment plan in the Supply Chain Planning work area.
To edit plan options for a replenishment plan in the Redwood Supply Chain Planning work area:
- In the Supply Chain Planning work area, navigate to More Actions > View More.
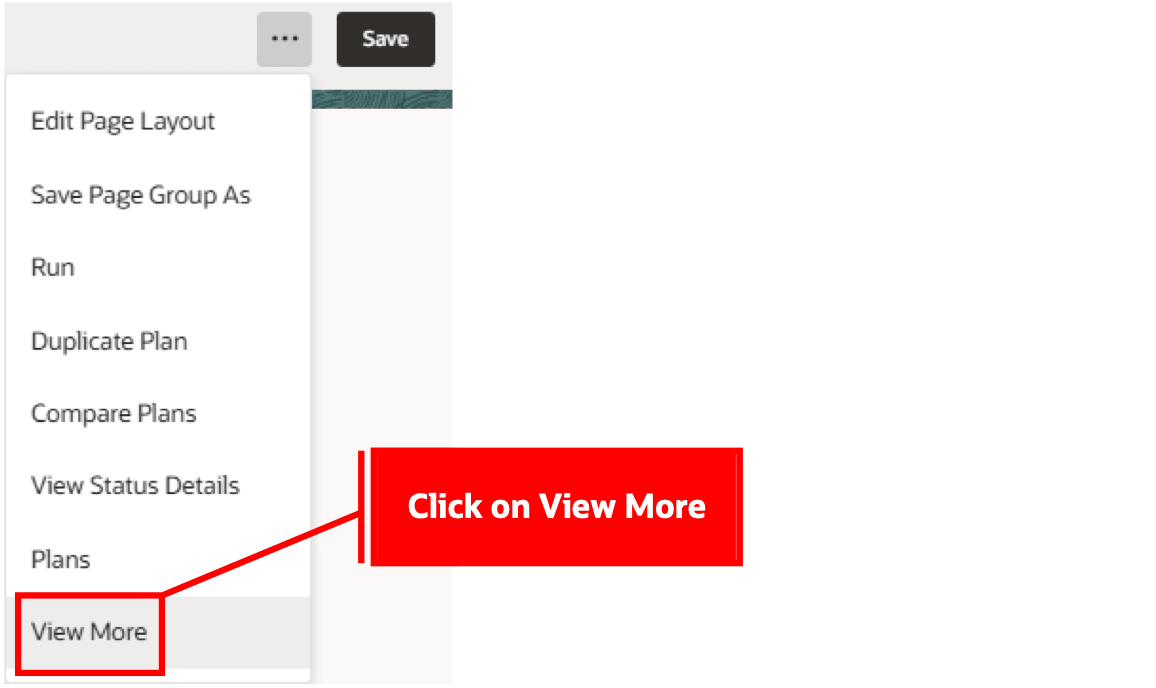
Select View More in the Redwood Supply Chain Planning Work Area
- In the Actions drawer, click Edit Plan Options.

Click Edit Plan Options Action
- Click on the step you want to edit in the guided process panel.
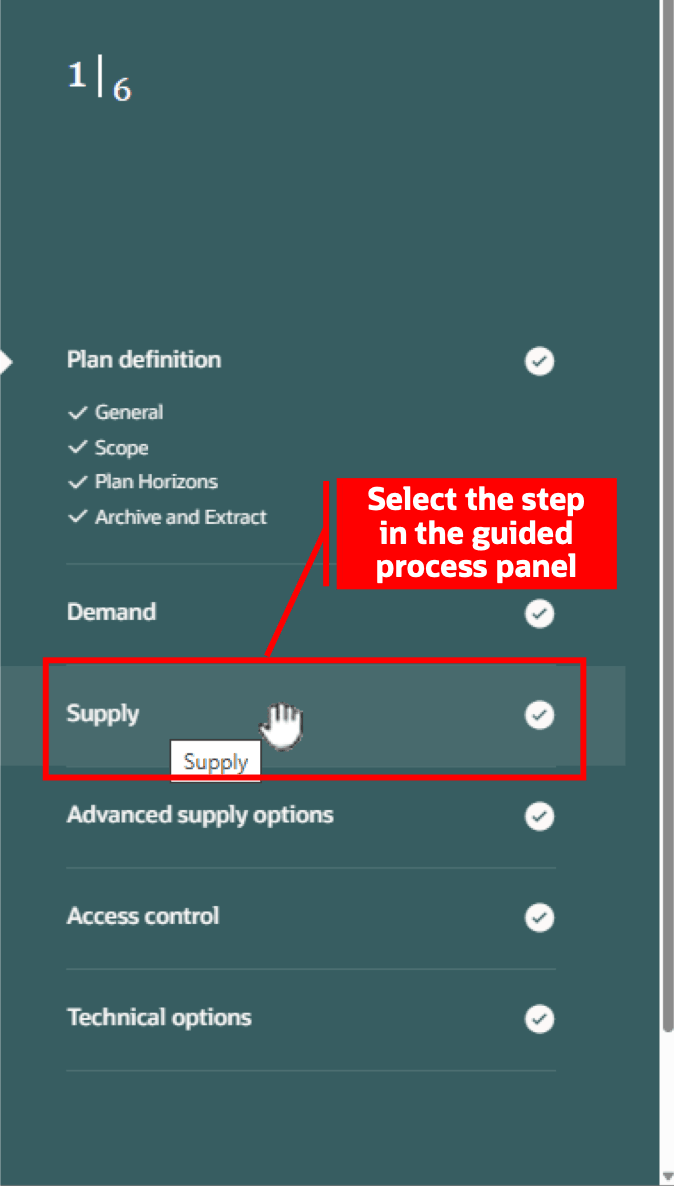
Select a Step in the Guided Process Panel
- Click a tab (for example, Organizations), then edit.
- Click Submit to finish editing the plan options.
A message is displayed to confirm the updates. After editing plan options, close the browser tab.
You can also edit plan options for a replenishment plan in the Plans page. New plans that haven’t run are available only in the Plans page.
Steps to Enable
Use the Opt In UI to enable this feature. For instructions, refer to the Optional Uptake of New Features section of this document.
Offering: Supply Chain Planning
Tips And Considerations
If you want to use the Redwood: Create Replenishment Plans and Edit Replenishment Plan Options Using a New User Experience feature, then you must opt in to its parent feature: Replenishment Planning. If you’ve already opted in to this parent feature, then you don’t have to opt in again.
Follow these steps to enable or disable this feature:
- In the Setup and Maintenance work area, search for and select the Manage Administrator Profile Values task.
- On the Manage Administrator Profile Values page, search for and select the ORA_MSC_REPLENISHMENT_PLANNING_REDWOOD_ENABLED profile option code.
- In the Profile Values section, set the Site level to Yes or No. The default value is Yes.
- Yes = enables the feature
- No = disables the feature
- Click Save and Close.
Changes in the profile value will affect users the next time they sign in.
Key Resources
- Visit https://redwood.oracle.com/ for more information about the Redwood experience.
Access Requirements
Users who are assigned a configured job role that contains these privileges can access this feature:
- Monitor Replenishment Planning Work Area (MSC_MONITOR_REPLENISHMENT_PLANNING_WORK_AREA_PRIV)
- Manage Segments (MSC_MANAGE_SEGMENTS_PRIV)
These privileges were available prior to this update.