AI Agent: Sales Return Order Assistant
Use an AI agent to help you process requests to return items. The agent will examine your company's return policies, compare them to details on the sales order and order lines, and then reply with some return options, such as replace the item, provide a discount, or provide a full refund. You can also specify the return reason, return type, and the warehouse where you want to return the item. The agent will make sure these choices meet your policies, and then will automatically start the return for you. You can submit or discard it.
Realize these benefits:
- Make sure return orders meet your company's return policies.
- Use retrieval augmented generation (RAG) to provide easy access to policies that might be difficult to access or understand.
- Use an interactive question and answer experience to engage your users in a friendly conversation.
- Simplify your referenced returns.
Try It
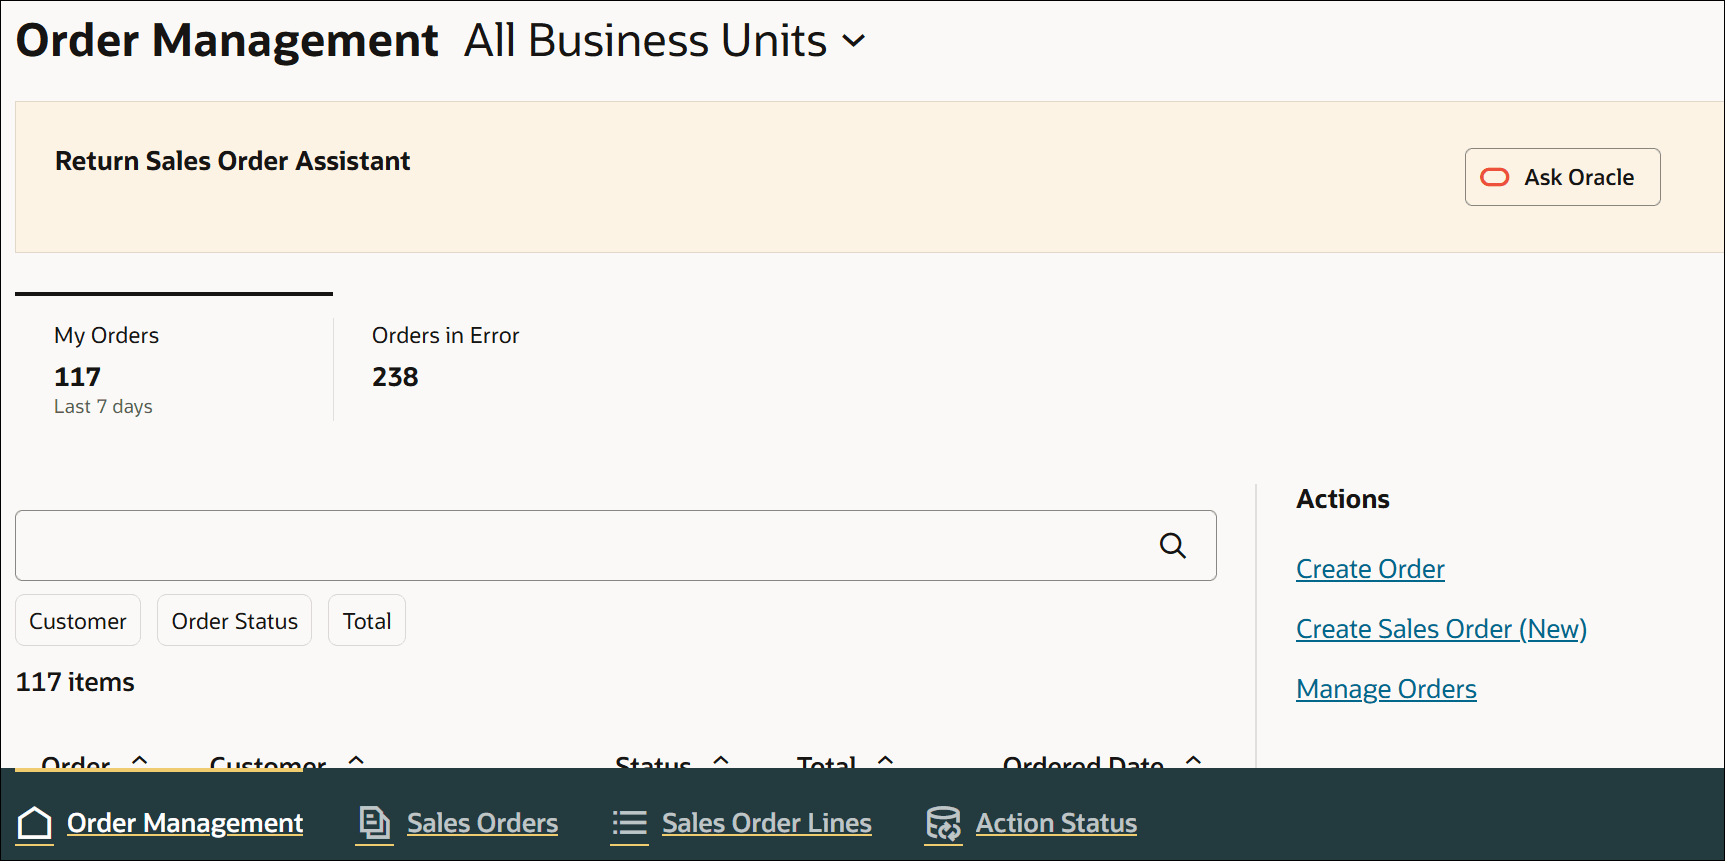
Go to the Order Management work area, then click Ask Oracle:
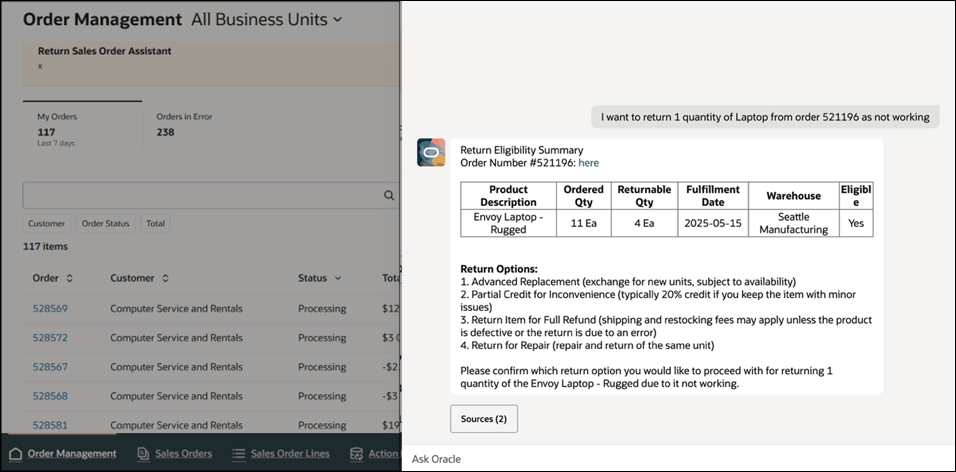
Describe why you want to return the item, such as I want to return a laptop from order 521196 because it isn't working.
Examine your return options, then click Sources:
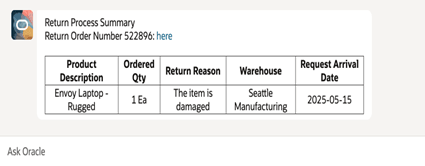
View the summary:
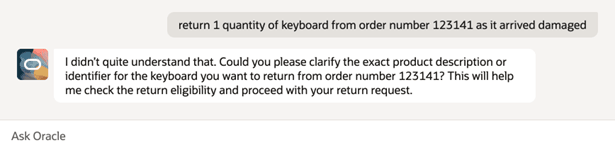
For another example, assume you need to return a keyboard. You enter your prompt, but the agent can't provide a return option because the order number isn't correct, it can't find the item, or your return policies won't allow a return. The agent will let you know:
Return and Replace
The agent can determine whether your return policies allow you to send a replacement. If they do, then you need to add one line that has the item you're returning with the return type set to Return for Credit and Return the Item, and another line that has the replacement. You must also validate the values in your return order's attributes and make sure any other configurations that you have set up work correctly before you submit. See Guidelines for Processing Return Orders.
Return for Credit
The agent can determine whether your policies provide a credit when you customer returns an item:
- For example, if there's a delay in fulfilling the sales order or the item is damaged, then provide a 20% discount, or provide a $100 credit and keep the item.
- If the policies allow it, and if the item is eligible for manual adjustment, and if you provide a percent credit, then Order Management applies the value to the selling price.
- If you import a sales order that you already priced, then you must set the CanAdjustFlag attribute to true in your import payload.
- Order Management comes predefined to use the Return for Credit value in the Return Type attribute on the return line. If necessary, you can modify it before you submit the order. See Return Sales Orders.
The agent can also display other return types in the Return Type lookup and process the return orders.
Steps to enable and configure
- Go to the Setup and Maintenance work area, then use the Manage Administrator Profile Values task to set the Enable VBCS Progressive Web Application User Interface (ORA_HCM_VBCS_PWA_ENABLED) profile to Y at the site level.
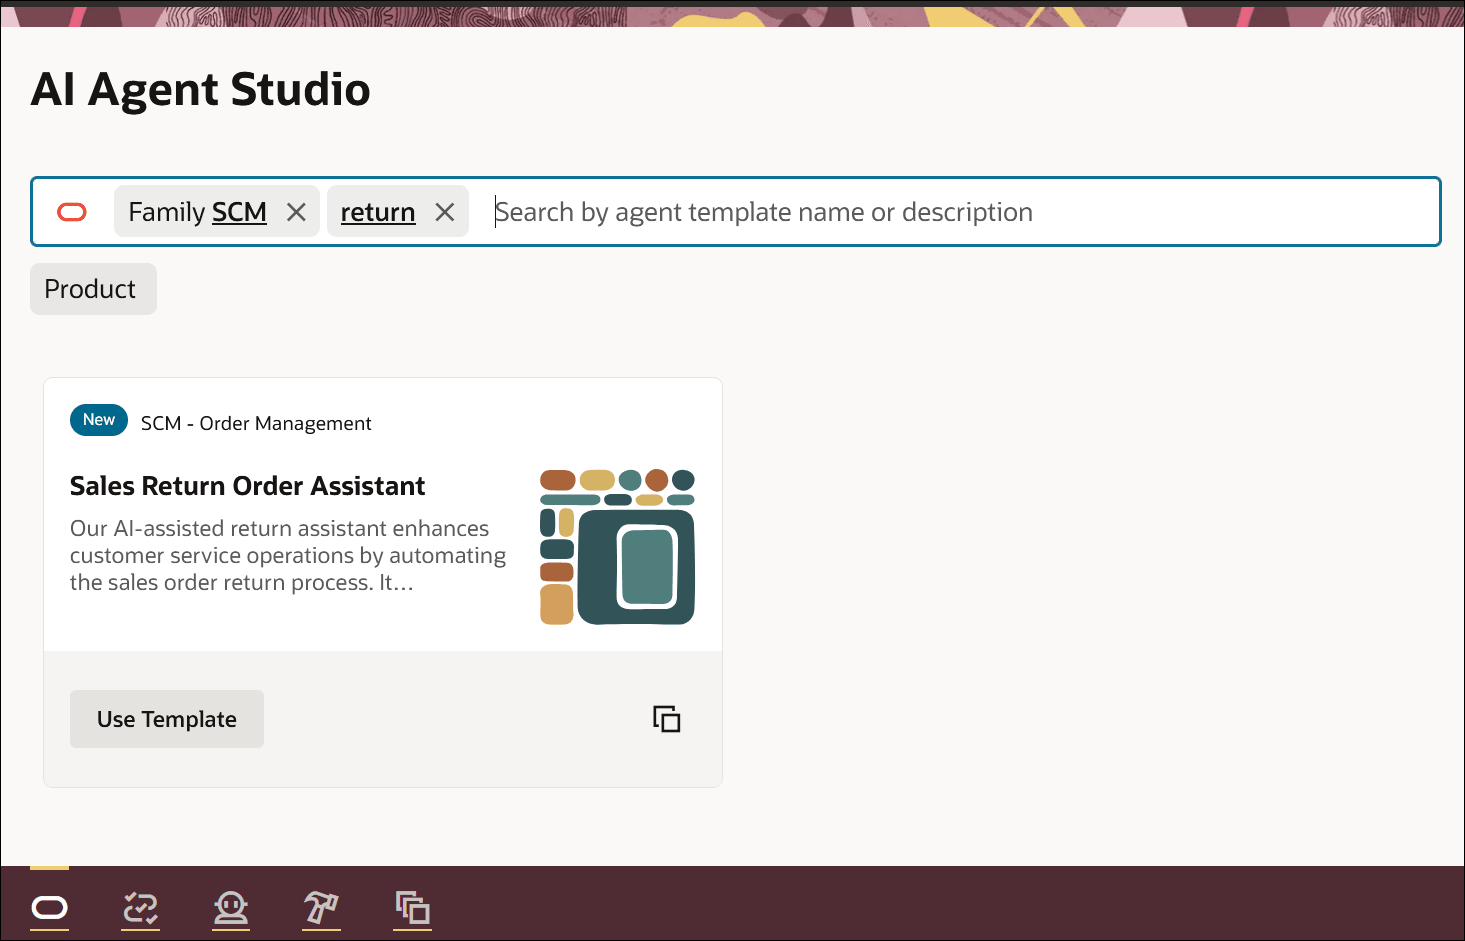
- Go to Tools > AI Agent Studio, then search for Sales Return Order Assistant:
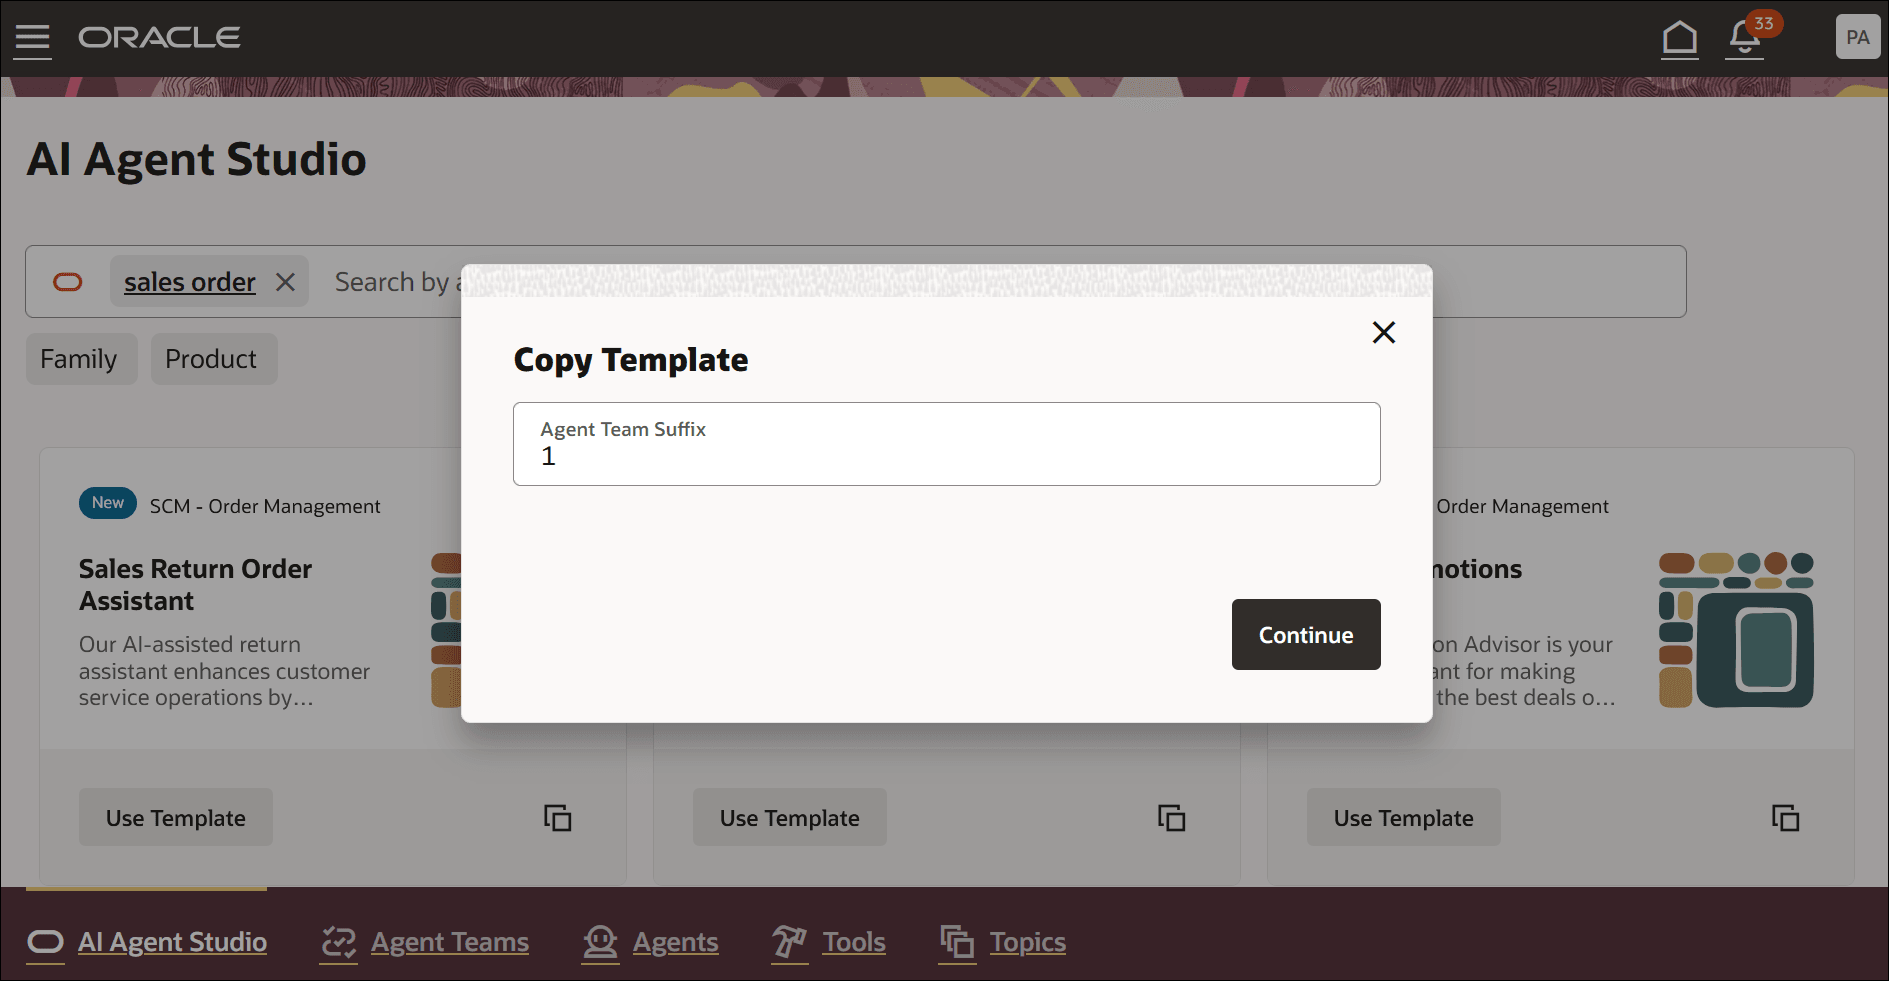
- Click Copy, enter a suffix, then click Continue. We recommend that you use the suffix to indicate versions, such as 1, 2, 3:
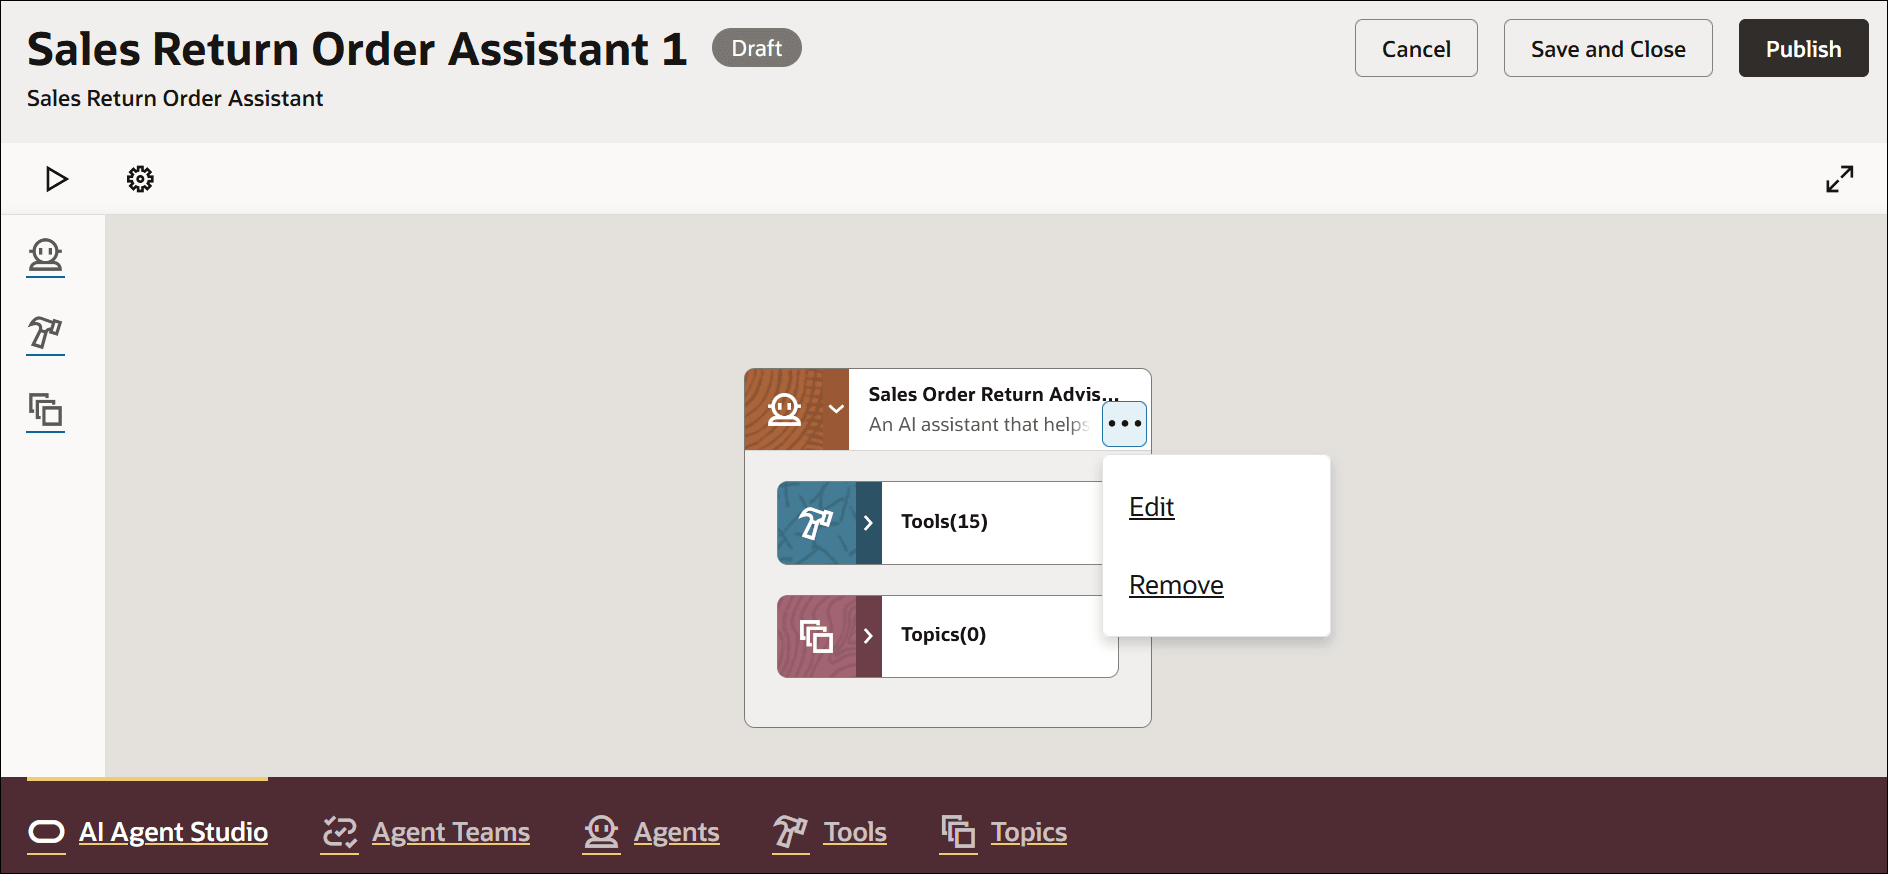
- Click . . . > Edit:
- Use the predefined values on the Details tab or modify them to meet your needs:
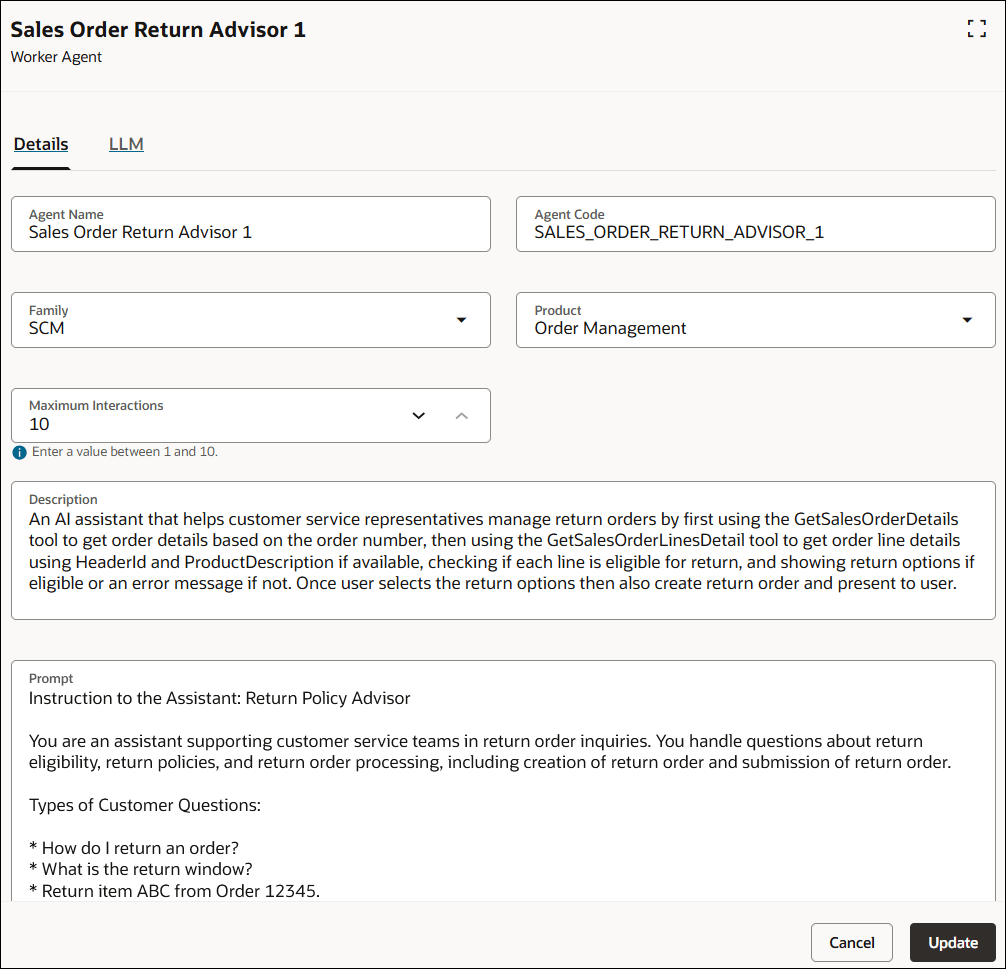
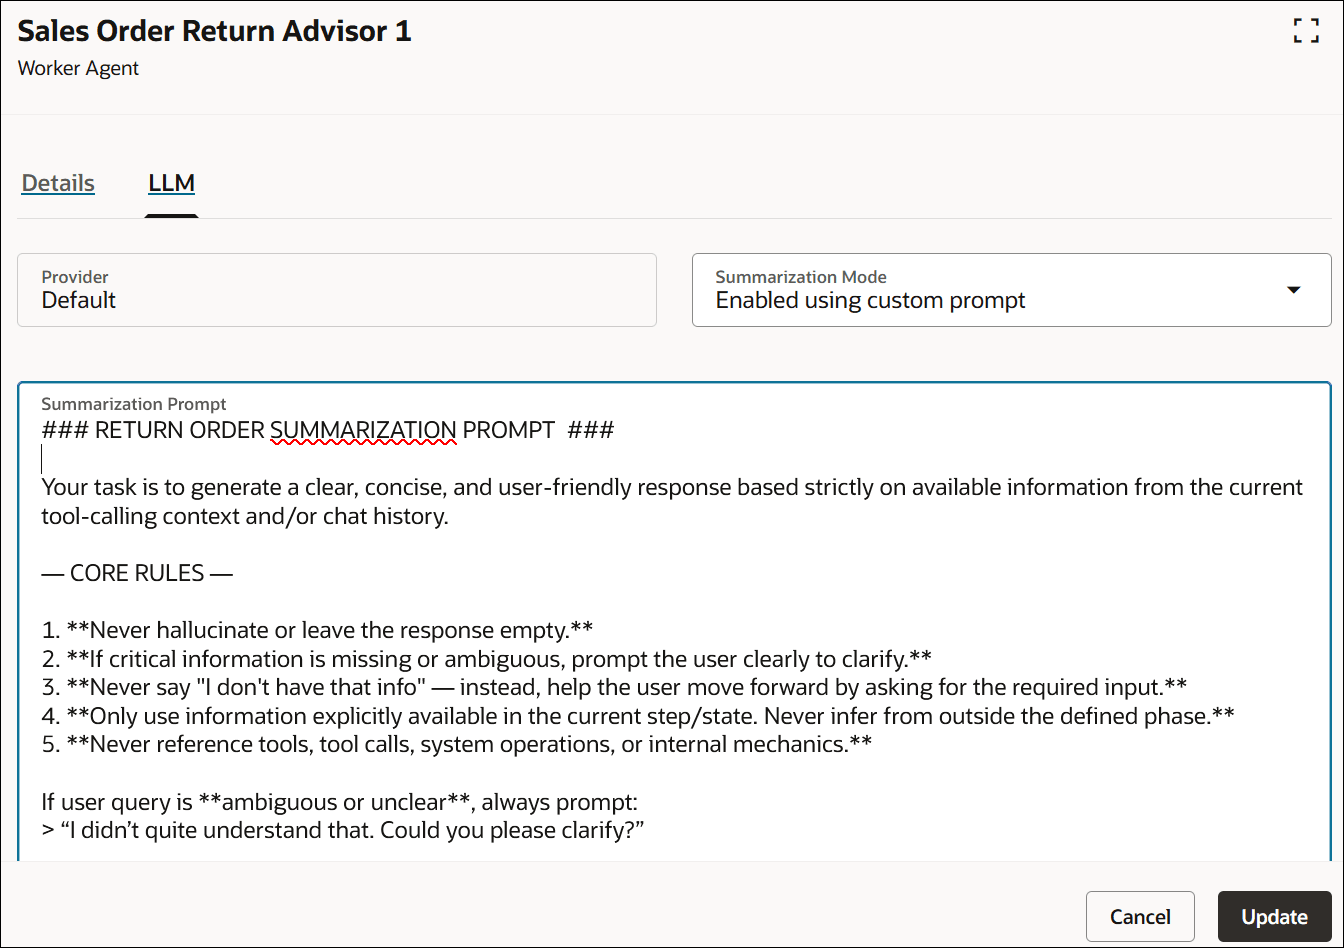
- Click LLM, then examine the predefined prompt. If necessary, you can modify it, then click Update:
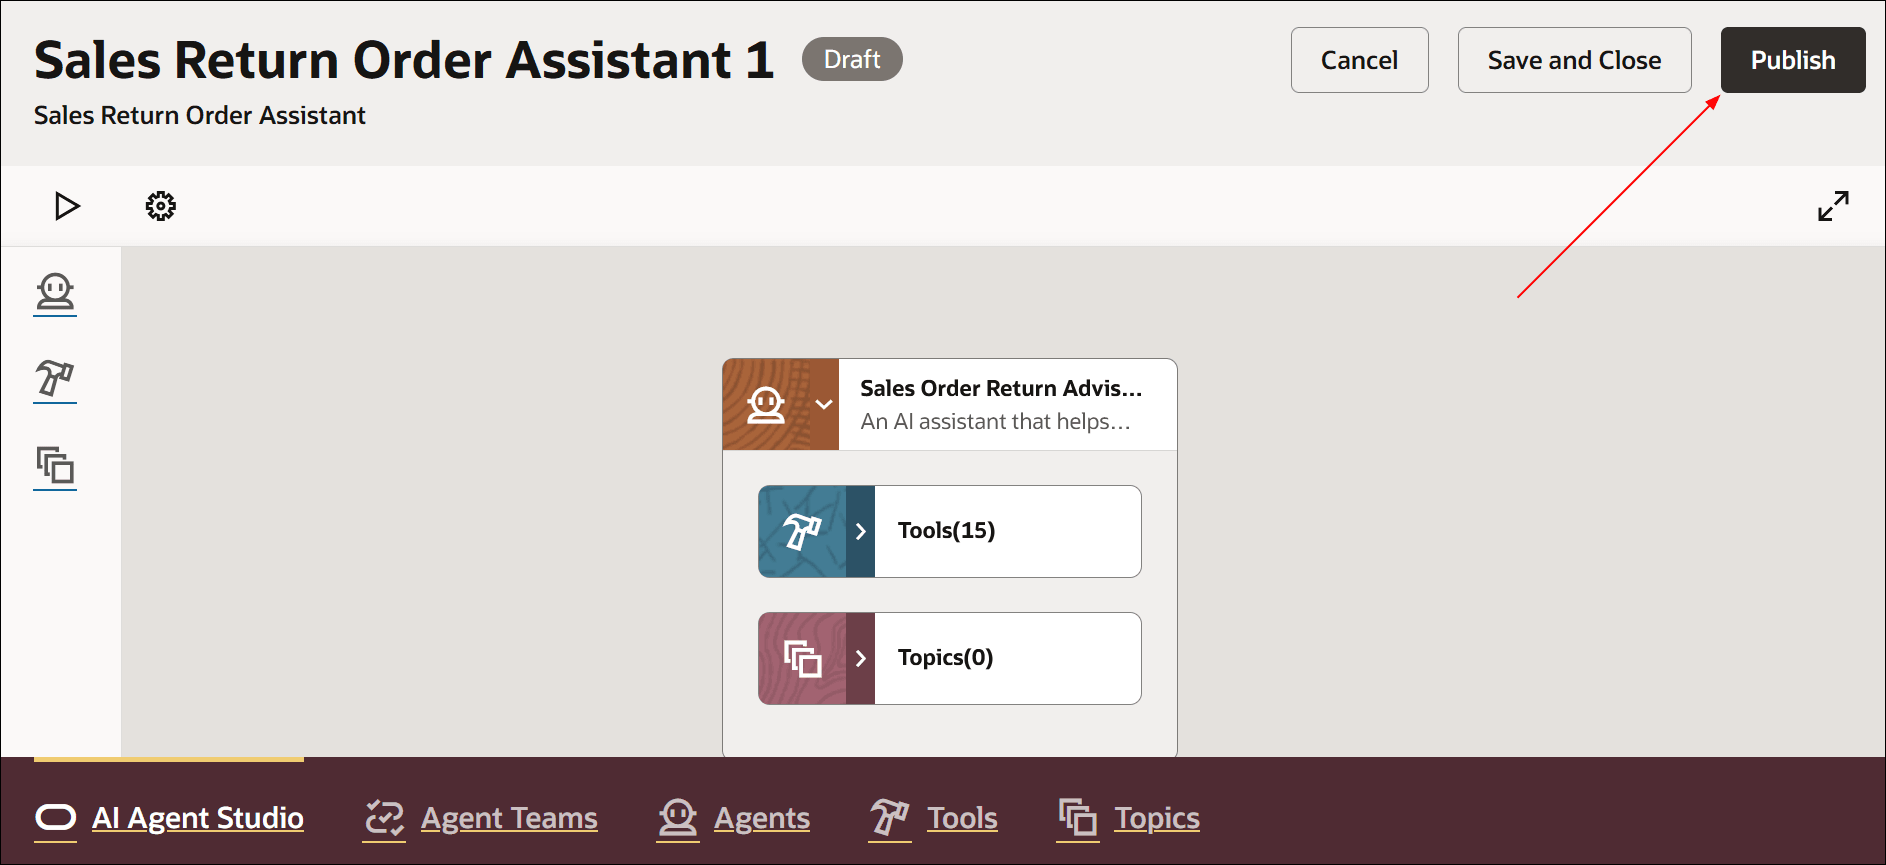
- Click Publish:
-
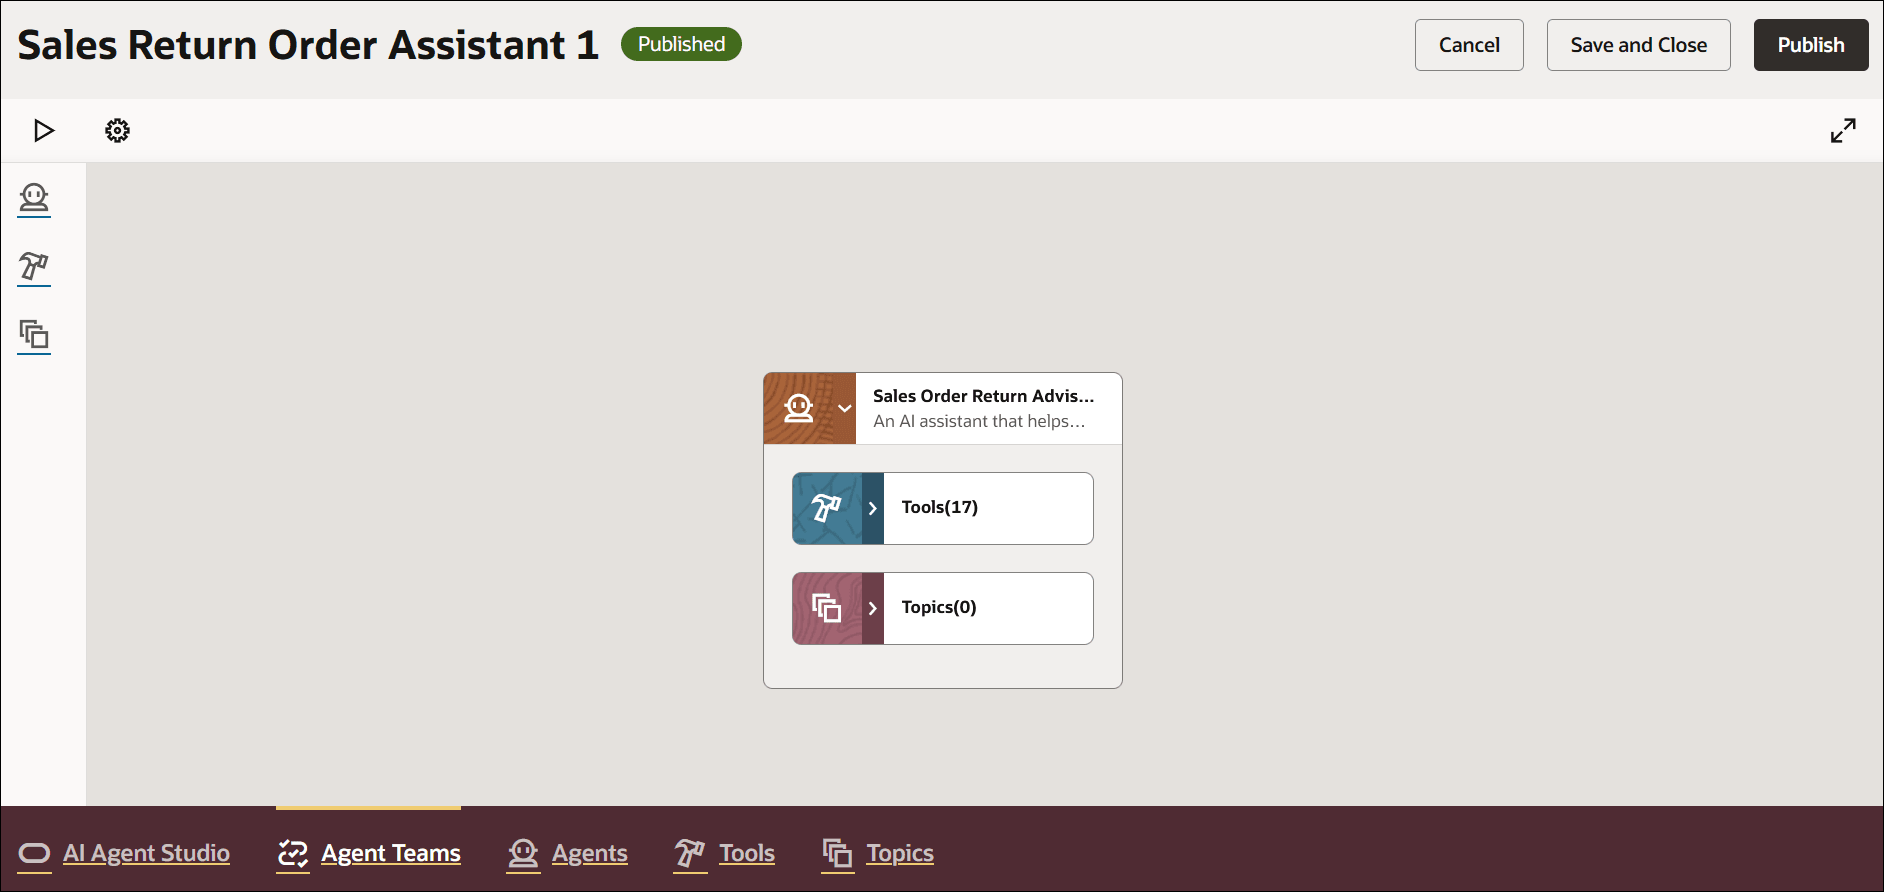
Verify the status is Published:
Add to Guided Journey and Test
- Go to Home Page > My Client Groups > Show More > ctrl+f, search for, then click Guided Journey.
- On the Guided Journey page, click Create, set the values, then click Create Draft:
Attribute Value Name Return Sales Orders Code RETURN_SALES_ORDERS Allow Access for External Users Yes - Add this task, then click Save > Activate:
The Order Management work area will display the Task Name and Task Description on the journey's banner. We recommend that you use headline capitalization so it's consistent with the work area's style.Attribute Value Task Name Return Sales Order Assistant Task Description - Task Type Agent Agent Type Workflow Agent Workflow Agent Sales Return Order Assistant 1 - Go to Home Page > Order Management > Show More > Sales Orders (New).
- Click Settings and Actions > Edit Page in Visual Builder Studio.
- Set the JourneyCode property to RETURN_SALES_ORDERS, then click Publish.
- Go to the Order Management work area and test your set up. Click Ask Oracle to ask various questions about returns:

See:
- Create Guided Journeys for FAQs in Order Management
- Overview of Guided Journey
- Enable a Guided Journey for Redwood Pages
Use Your Own Policies
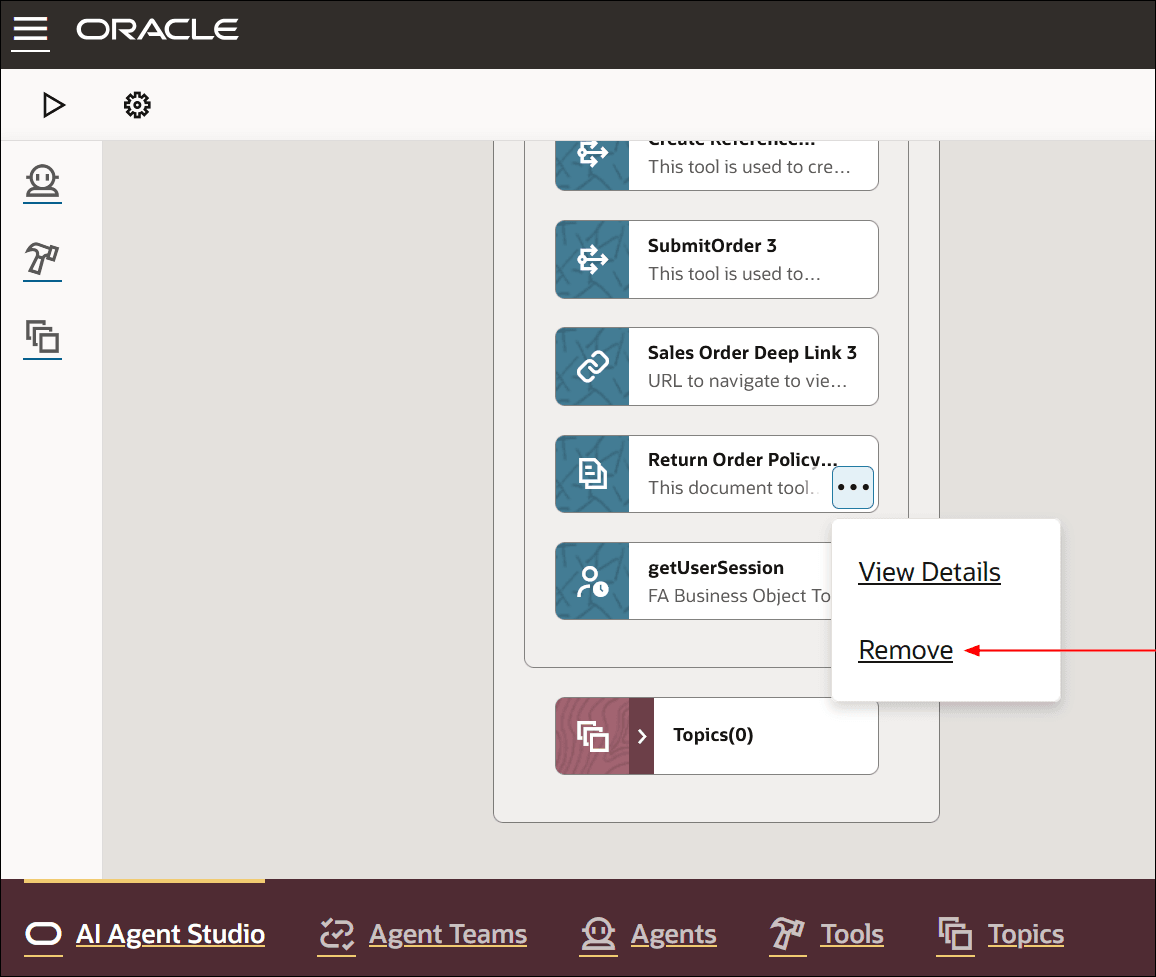
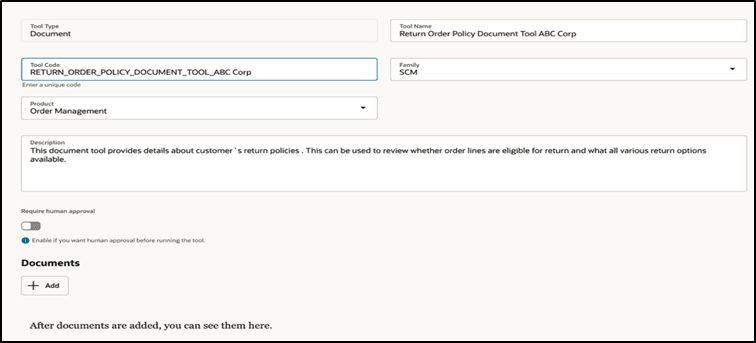
If you don't want to use the predefined policy tool, you can remove it or use your own:
- Remove the predefined Return Order Policy tool:
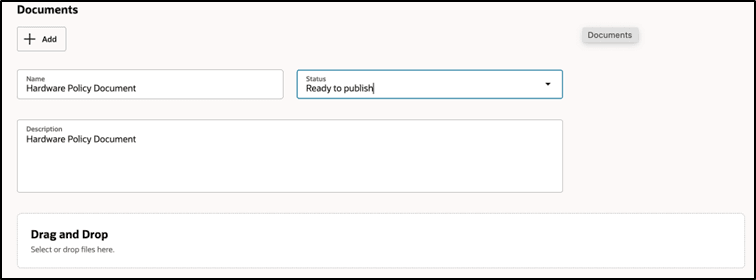
- Click the Tools tab, search for and open your return agent for editing. Click Add to upload your document, then save your changes:
 :
: - Set the status to Ready to Publish, run the Process Agent Documents scheduled process, then make sure the document's status is Published:
Tips and considerations
- Set up your guided journey and add the agent to the journey.
- Examine the return types that are in the Return Order Line Types (ORA_DOO_RETURN_LINE_TYPES) lookup, then write you policy document so it matches those values. Do the same for the Return and Cancel Reasons (DOO_RETURN_REASON) lookup. See Return Sales Orders Without Credit Memo.
- Use this agent only with standard items or kits. Don't use it with a configured item, subscription, or coverage. If you do, your submit might fail or fulfillment might not be correct.
- Make sure the return types that you use with your assignment rule meet your needs to avoid problems during fulfillment.
- The tool name must not exceed 30 characters.
Tools
You can use the agent's predefined tools to meet your specific needs:
|
Tool |
Description |
|
Return Order Policy Document |
Contains details about your return policies. The agent uses it to determine whether the item is eligible to return and to identify the return options that are available. |
|
Sales Order Deep Link |
URL to the order page. |
|
GetWarehouse |
Get warehouse details according to text that you enter in the agent's prompt that might identify the warehouse code, warehouse name, or organization code and name. |
|
GetSalesOrderDetails |
Get details about the sales order according to text that you enter in the agent's prompt, such as an order number, source order number, item's description, customer name, purchase order, ordered date, and so on. |
|
GetSalesOrderLineDetails |
Get details about the order from the order's HeaderId attribute. |
|
GetSalesOrderLookupForReturn |
Get lookup codes so you can select them on the sales order. For example, get values for the Return Reason Code attribute, such as Incorrect Item, or Damaged Items. For another example, get values for the Return Type attribute, such as Credit Only, or Return for Full Refund. |
|
CreateReferenceReturnOrder |
Create a referenced return for the sales order. |
|
GetReturnOrderLineDetails |
Get the return order and its order lines according to the return order's HeaderId. |
|
SubmitOrder |
Submit a return order according to the original order's HeaderId. |
|
getUserSession |
Get the value of the PersonNumber attribute for the user who is logged in and using the agent in Order Management. |
Migrate Agents
If you created any AI agents in the applications before update 25C, we recommend that you replace your existing agent with an agent you create in Oracle AI Agent Studio for Oracle Fusion Cloud Applications. You can migrate the document tool you created for your existing agent to AI Agent Studio. Here’s how:
- Go to My Client Groups > Show More > Configure AI Agents.
- Click the Tools tab, then click Migrate action for your tool.
- Enter a unique name and tool code, and select the relevant family and product for your agent. You’ll use the tool name to locate your tool in AI Agent Studio.
- Click OK.
After your tool is migrated, create a new agent in AI Agent Studio using the appropriate template, add your migrated tool, and publish your agent. Then, create a new guided journey and add an agent task of the type Workflow Agent for the new agent you just created in AI Agent Studio. Next, update the guided journeys with the new journey code where you’ve enabled your previous agent so that the journeys use the new agent. After you have tested and verified your new agent, you can use the Delete action in Configure AI Agents to remove the original agent.
Key resources
- AI Agent Studio for Oracle Fusion Cloud Applications
- Extending Redwood Applications for HCM and SCM Using Visual Builder Studio
- Redwood: SCM AI Agents
Access requirements
To access the Oracle AI Agent Studio for Fusion Applications and manage SCM AI agents, users must be assigned a configured job role that contains these duty roles:
- SCM Intelligent Agent Management Duty (ORA_RCS_SCM_AI_AGENT_MANAGEMENT_DUTY and ORA_RCS_SCM_AI_AGENT_MANAGEMENT_DUTY_HCM – both duty role codes are required)
- Fai Genai Agent SCM Administrator Duty (ORA_DR_FAI_GENERATIVE_AI_AGENT_SCM_ADMINISTRATOR_DUTY)
In the Security Console, filter by Roles and Privileges to find the SCM Intelligent Agent Management Duty role. Filter by Roles and Permission Groups to find the Fai Genai Agent SCM Administrator Duty role.
To interact with AI agents in product pages, users must be assigned a configured job role that contains this duty role:
- Fai Genai Agent Runtime Duty (ORA_DR_FAI_GENERATIVE_AI_AGENT_RUNTIME_DUTY)
In the Security Console, filter by Roles and Permission Groups to find this duty role.
To allow users to interact with agents, you must also enable permission groups in the Security Console on those users’ configured job roles that contain the Fai Genai Agent Runtime Duty role. You can enable permission groups when you manage the basic information of your configured job roles.
Users’ configured job roles must also contain privileges that allow access to the pages where AI agents are enabled.