Redwood: Manage Work Definitions Using a New User Experience
You can now use the Redwood user experience to view and make changes to a manufacturing work definition. You can edit the work definition within the context of a plan or a simulation set.
Work definition operations can be managed in the Redwood user experience using the Operations visualization. You can access it from the Supply Chain Planning work area by opening the Operations visualization from a supply plan or a demand and supply plan, a simulation set, or plan inputs.
You can also open the Operations visualization by drilling to it from various visualizations, including Supplies and Demands, Item Structures, and more.
On the Operations table, you can search for, view, copy, and edit operation attributes of a work definition. Operations are read-only when viewed from plan inputs.
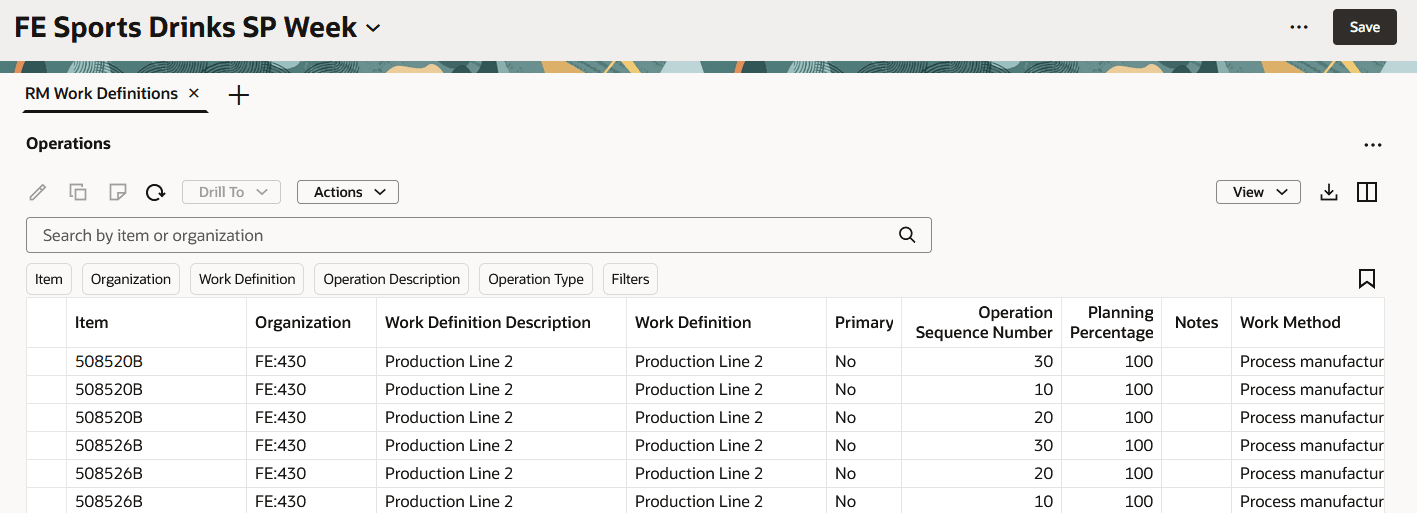
Operations Table
The following sections describe the capabilities of the Operations table.
Operations Toolbar
The toolbar section contains some common supply chain planning table functionality, along with operation-specific features.

Operations Toolbar
The actions on the Operations toolbar are as follows:
- Edit. When you have one or more operations rows selected, clicking this icon opens a drawer from which you can modify the operation yield, effective start date, and effective end date attributes and apply those changes to all the selected rows.
- Copy. Copies the selected item, organization, and work definition operation using a Copy operation drawer where you can specify a new operation sequence number and effective start date.
- Manage Notes. Add, edit, or delete notes for the selected row.
- Refresh. The Refresh action does the following:
- Notifies you if there are unsaved changes. If you proceed with the refresh, any unsaved changes you made to the Operations table are discarded.
- Removes any column filters or column sorting that you’ve applied. See the Applying Column Filters and Sorting section for more information.
- Queries the data again using existing filters, such as drill-to context or selected filter chips.
- Drill To. You can pass context to another table by selecting one operation row and then selecting a table or graph from the Drill To menu. This will open the target table in a temporary page. To add more drill-to actions, you can select Manage Links from the More Actions (…) menu in the upper-right corner of any page.
- Actions. Use this menu to save, restore, or delete views. Views are the counterpart to what were called Layouts in the classic (non-Redwood) version of Routings (now called Operations).
- View. Controls which columns are visible in the table, their widths, and the order in which the columns appear. You can quickly switch between views to display the columns appropriate for the task you want to perform. See the Working with Views section for more information on views.
- Export. Exports the records that meet the current filter criteria. The columns are exported based on the current view, meaning that the exported spreadsheet contains only the columns that are in the current view and in the order in which they appear in the table.
- Columns. Allows you to select the columns you want to be visible in the Operations table. You can reorder the columns in one of two ways:
- Within the Columns drawer you can grab the handle, which looks like an equal sign (=), and move the column up or down.
- Within the Operations table you can drag and drop columns to rearrange the order of the columns.
Searching and Filtering for Operations
Supply Chain Planning uses a common Redwood component to ensure consistent search behavior across all Supply Chain Planning applications. The following is an image of the search component.

Operations Search Component
- Keyword Search. The keyword search field is used to search across multiple columns with the text you enter in the keyword search field. The keyword search for operations searches over only the Item and Organization columns using the contains operator. For example, if you type the text “mon” into the keyword search and press Enter or click the magnifying glass icon, you see any operations for items that contain “mon,” such as “MK-ENG-Monitor.” Keyword search is case insensitive, making it easy to find operations for the items or organizations you’re interested in.
- Filter Chips. You use filter chips to add column-specific filter criteria. For example, you can filter operations by selecting multiple items from the Item filter chip, as well as one or more organizations from the Organization filter chip. When you press Enter or click outside of the filter chip, the table is updated to show only the rows that meet the current criteria.
- Filters. The Filters button allows you to filter by additional columns, beyond the default filter chips.
- Saved Searches. The Saved Searches icon allows you to save the current keyword search and filter chip values under a named, saved search. This allows you to reuse a set of search criteria.
Filters Drawer
You can filter using any one of the columns in the Operations table by clicking on the Filters button, which opens the Filters drawer.
The type of filter criteria you can specify is based on the column’s data type.
- Numeric columns. When filtering on a column that’s numeric, you can specify both the operator and value. When using the between operator, you can specify both a from and a to value.
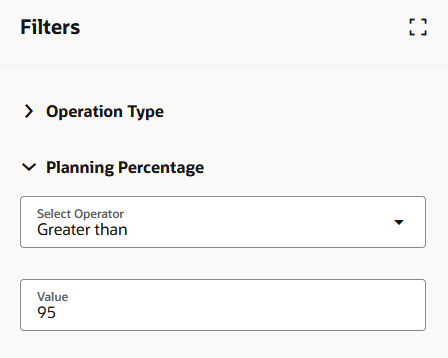
Numeric Filter
- Date columns. When applying filter criteria to a date column, you can specify either from date, to date, or both.
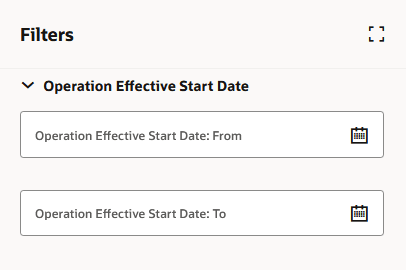
Date Filter
- List of values columns (multiselect and single-select). When filtering on a column that’s associated with a list of values, you can usually select multiple values (as shown in the following image). There are use cases where multiselect doesn’t make sense, such as columns that only have a Yes or No value. In such cases, you’re restricted to a single selection.

List of Values Filter
- Free-text columns. In cases where the column is alphanumeric and there’s no associated list of values, you can enter free-form text. In the following example, the Operations table will be filtered to select only those records with operation descriptions that contain “Mix.”
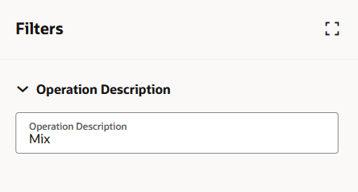
Free-Text Filter
When you click the See Results button at the bottom of the Filters drawer, filter chips are added to the Operations table and the data is queried again.
Applying Column Filters and Sorting
Column filters are ad-hoc filters that are appended to the keyword search and filter chips, allowing you to further refine your results. To access column filters, hover over the column header and click on the Filter icon, as shown in the following image.
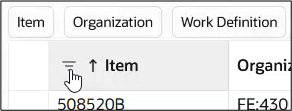
Invoking Column Filters
A dialog box opens where you can pick an operator and enter the applicable criteria.
In some columns, such as Item, you can paste a list of values from an external source, such as an email or spreadsheet, into the column filters. This quick method eliminates having to individually select the items or organizations of interest.
The following image shows the Item column filter prior to pasting a list of items.
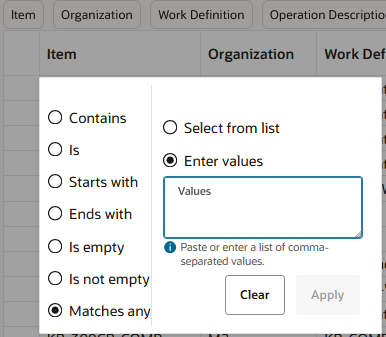
Column Filters Before Pasting a List of Items
And here’s the Item column filter after pasting in a list of items.

Column Filters After Pasting a List of Items
After you click the Apply button, the Operations table in this example is filtered to show only the items specified in the column filter.
Here’s some additional information about column filters:
- The operators available vary by data type. Date fields and numeric fields have different operators than alphanumeric fields.
- You can remove a column filter by clicking the Clear button on the column filters dialog box.
- Column filters are retained when keyword search or filter chips are changed.
- Column filters can be used in combination with drill-to context.
- All column filters are cleared when the Refresh icon is clicked.
- Column filters are separate from the Redwood search component that’s responsible for saved searches. Consequently, column filters aren’t included in saved searches.
In addition to column filtering, you can change how operations are sorted. Hovering over a column heading gives you access to the Sort icon. This icon, when selected, toggles between sort ascending and sort descending.
- Sorting is applied only to one column. If you select a different column to sort by, sorting is removed from the prior column.
- Column sorting is removed when the Refresh action is selected.
Working with Views
Views allow you to control which columns are visible and the order in which the columns appear. They’re equivalent to Layouts in the classic version of Operations (formerly Routings).
To create views, first arrange the table as you want it to appear, specifying which columns are visible and the order in which the columns appear. Once you’re happy with the appearance of the table, you can then save the view. After the view is saved, you can easily switch between views to see a different set of columns based on the task you want to perform.
To manage columns within the Operations table, select the Columns icon, which appears on the far right of the Operations toolbar. This opens the Columns drawer.
For example, in the following image the Operation Effective End Date column is currently hidden. To make the column visible, first select the checkbox in front of the column name and then click Show. To rearrange the order of the columns, select the columns to rearrange and drag the columns up or down.
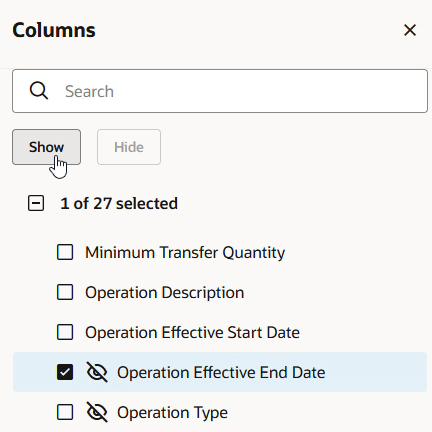
Columns Drawer
Another way to rearrange columns is to drag and drop columns in the Operations table. First, click on the column heading text to select the column. The column will turn blue. While keeping the column heading selected, drag and drop the column to the desired location.
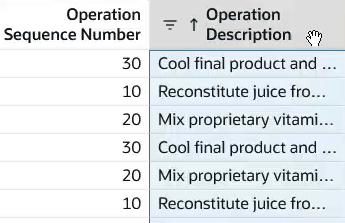
Selecting a Column for Drag and Drop
To save the changes you’ve made, select Save View from the Actions menu.
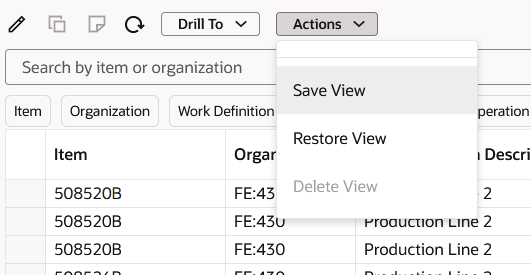
Save View Action
The View drawer opens. From here, you can either update the current view by selecting the Save as existing option, or you can create a new view by selecting the Save as new option.
If you aren’t the owner of the view, the Save as new option is automatically selected for you. You aren’t allowed to save changes to a view that was created by another user.
In addition to the Save View action, the Actions menu contains two other, view-related actions:
- Restore View. If you start rearranging columns or hiding/showing columns and decide that you want to discard those changes, you can select the Restore View action. This refreshes the table based on the view as it was last saved. Any unsaved view changes are discarded.
- Delete View. This deletes the current view. You’ll be asked to confirm your action. You can delete a view only if you’re the owner of it.
Editing Operations
In plan mode and simulation set mode, you can perform inline edits in the Operations table. The fields that can be edited in the Redwood version of the Operations table are the same as the fields that can be edited in the classic version of the Routings table: Operation Yield, Operation Effective Start Date, and Operation Effective End Date. Simply double click on the field to enter edit mode, make your change, and exit the cell (using Tab, Enter, or the mouse).
You can also edit multiple operations rows at the same time. Select the rows you want to modify and click the Edit icon. A drawer opens and displays the editable fields. Valid attribute changes are made to the selected rows after clicking the Apply button.
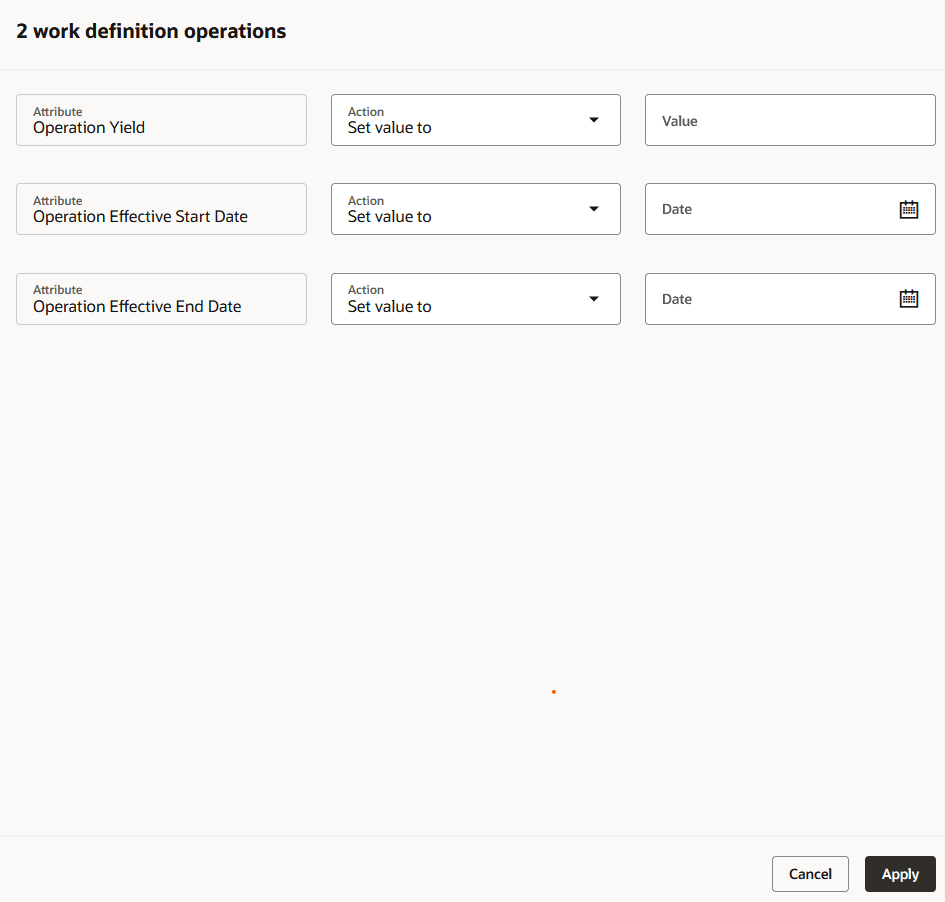
Editing Multiple Operations
Copying an Operation
In plan mode and simulation set mode, you can copy an operation row by selecting the row and clicking the Copy icon. This opens the Copy operation drawer from which you can specify a new operation sequence number and operation effective start date for the copied operation. You can’t copy an operation if the combination of the operation sequence number and operation effective start date already exist for that item, organization, and work definition.
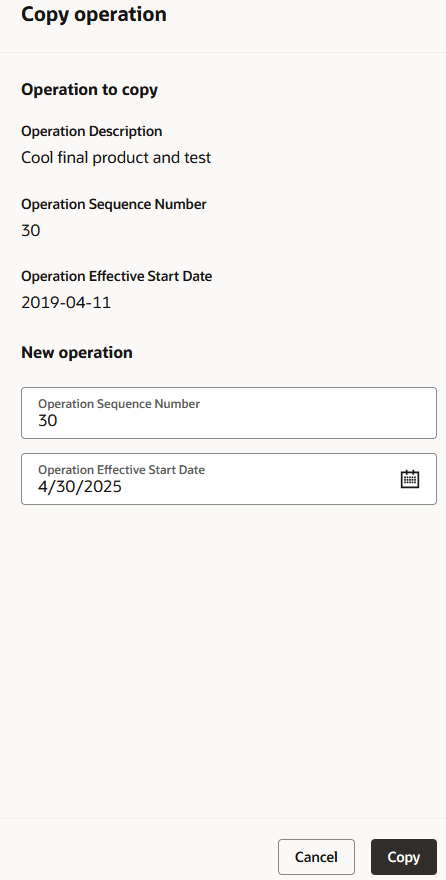
Copying an Operation
Changes made to the Operations table must be saved using the page-level Save button. If you close the page or click the Refresh icon, you’ll be asked whether you want to save your changes. For example, if you have pending changes when you click the Refresh icon, the following message appears:
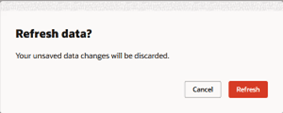
Unsaved Changes Message Displayed When Refresh Action Is Taken
Notes
To manage the notes for an operation, select a row and click the Notes icon in the toolbar. This opens the Notes drawer from which you can add, edit, or delete notes for that operation.
Operations that have associated notes will show a clickable blue note icon in the Notes column, while hovering over an empty cell will show a clickable plus icon. Clicking either icon will open the Notes drawer.
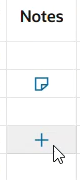
Notes Column Showing a Row with Existing Notes and the Add Note Icon
Changes to Notes (adds, edits, and deletes) are saved immediately. You don’t need to click the page-level Save button to save changes to notes.
Drilling to Operation Resources
To see an operation’s resources, select an operation row, click the Drill To menu, and select Operation Resources. This will open the Operation Resources table.
Operation Resources
The Operation Resources table lists the resource requirements for an operation. The pool of resources available comes from the work center assigned to the operation. A resource represents either labor or equipment that adds value to the manufacturing process.
In the Operation Resources table, you can view, copy, and edit operations resource attributes. Changes to operation resources aren’t available when viewed from plan inputs.

Operation Resources Table
The following sections describe the capabilities of the Operation Resources table.
Operation Resources Toolbar
The toolbar section contains some common supply chain planning table functionality, along with operation-resource specific features.

Operation Resources Toolbar
The actions on the Operation Resources toolbar are as follows:
- Edit. When you have one or more operation resource rows selected, clicking this icon opens a drawer from which you can modify the operation resource usage, assigned units, and basis attributes and apply those changes to all the selected rows.
- Copy. Copies the selected resource and opens a Copy operation resource drawer where you can specify a new resource, resource sequence, primary resource value, and priority.
- Refresh. The Refresh action does the following:
- Notifies you if there are unsaved changes. If you proceed with the refresh, any unsaved changes you made to the Operation Resources table are discarded.
- Removes any column filters or column sorting that you’ve applied. See the Applying Column Filters and Sorting section for more information.
- Queries the data again using existing filters, such as drill-to context or selected filter chips.
- Drill To. You can pass context to another table by selecting one operation resources row and then selecting a table or graph from the Drill To menu. This will open the target table in a temporary page. To add more drill-to actions, you can select Manage Links from the More Actions (…) menu in the upper-right corner of any page.
- Actions. Use this menu to save, restore, or delete views. Views are the counterpart to what were called Layouts in the classic version of Routings.
- View. Controls which columns are visible in the table, their widths, and the order in which the columns appear. You can quickly switch between views to display the columns appropriate for the task you want to perform. See the Working with Views section for more information on views.
- Export. Exports the records that meet the current filter criteria. The columns are exported based on the current view, meaning that the exported spreadsheet contains only the columns that are in the current view and in the order in which they appear in the table.
- Columns. Allows you to select the columns you want to be visible in the Operation Resources table. You can reorder the columns in one of two ways:
- Within the Columns drawer you can grab the handle, which looks like an equal sign (=), and move the column up or down.
- Within the Operation Resources table you can drag and drop columns to rearrange their order.
Editing Operation Resources
In plan mode and simulation set mode, you can perform inline edits in the Operation Resources table. The fields that can be edited in the Redwood version of the Operation Resources table are the same as the fields that can be edited in the classic version of the Routing Resources table: Usage, Assigned Units, and Basis. Simply double click on the field to enter edit mode, make your change, and exit the cell (using tab, Enter, or the mouse).
You can also edit multiple operation resource rows at the same time. Select the rows you want to modify and click the Edit icon. A drawer opens and displays the editable fields. Valid attribute changes are made to the selected rows after clicking the Apply button.
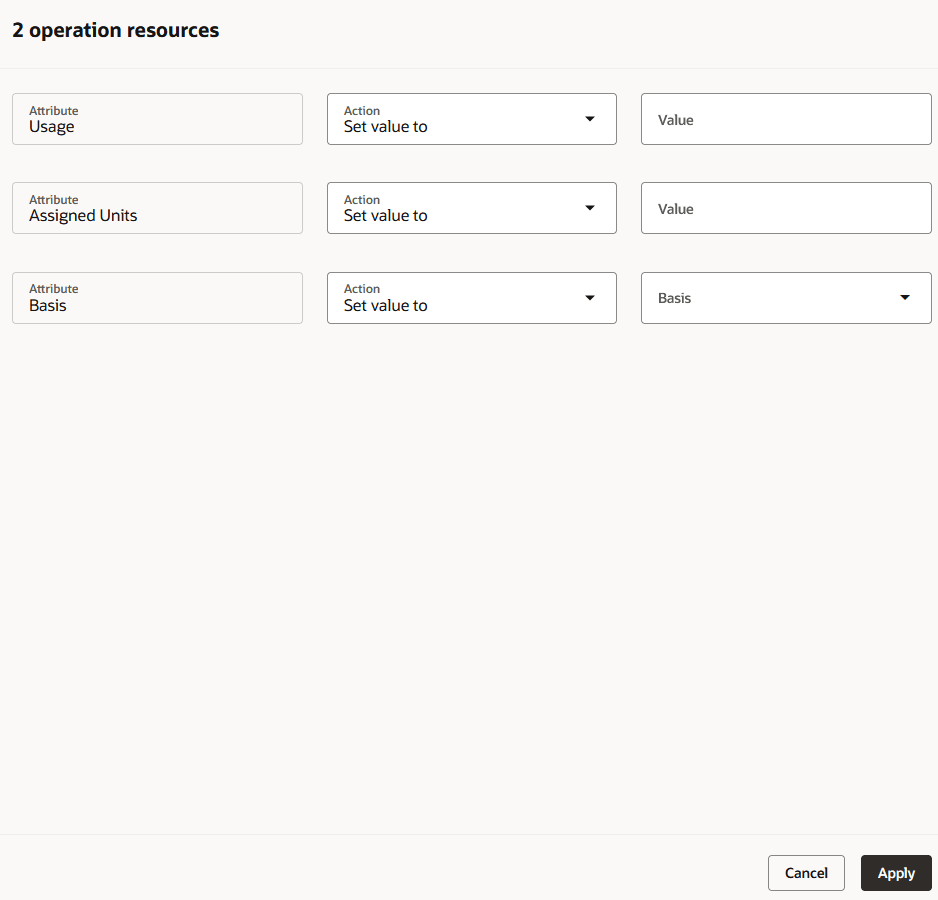
Editing Multiple Operation Resources
Copying an Operation Resource
In plan mode and simulation set mode, you can copy an operation resource row by selecting the row and clicking the Copy icon. This opens the Copy operation resource drawer from which you can select a resource, resource sequence, an optional primary resource, and specify a priority. You can’t copy an operation resource if the combination of the resource, resource sequence, and primary resource already exist for that operation.
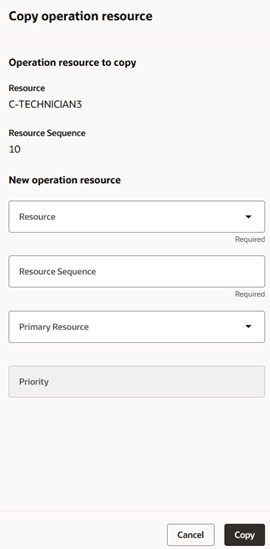
Copying an Operation Resource
Changes made to the Operation Resources table must be saved using the page-level Save button. If you close the page or click the Refresh icon, you’ll be asked whether you want to save your changes.
Steps to Enable
You don't need to do anything to enable this feature.
Tips And Considerations
Tips When Searching and Filtering
- Entering a value into the keyword search or selecting values from a filter chip will override any existing drill-to context.
Tips on Views
- Views specify which columns are visible, the order in which the columns appear, and the width of each column.
- Views don’t contain any filtering or sorting information. For example, if you’ve applied a column filter and you save the view, the column filter isn’t included in the view.
- Vertical blue bars between column headings indicate hidden columns. You can reduce the number of blue bars by grouping hidden columns together.
Other Tips
- If you’ve created a page that contains only the Operations table, you should consider hiding the page-level search bar. This makes more space available to display operations and avoids having duplicate search bars. To hide the search bar, select the Planning Pages task from the plan-level Actions menu. From that page you can edit any of your pages and hide the search bar.
- Use the Refresh action to cancel pending operations or operation resource changes that you don’t want to save.
- Unlike the classic version, there isn’t a plan-level cancel action that discards all pending changes for the plan.
- The Refresh action gives you the flexibility to discard just the changes made to the current table, while retaining pending changes made in other tables.
Migration Considerations
- Saved searches created in the classic version of Routings don’t show up in Redwood. You’ll need to create new saved searches in Redwood.
- Layouts created in the classic version of Routings don’t show up in Redwood. You’ll need to create new views in Redwood.
Access Requirements
Users who are assigned a configured job role that contains these privileges can access this feature:
- View Planning Routings (MSC_VIEW_PLANNING_ROUTINGS_PRIV)
- Edit Planning Routings (MSC_EDIT_PLANNING_ROUTINGS_PRIV)
- View Planning Objects Using REST Service (MSC_VIEW_PLANNING_OBJECTS_REST_SERVICE_PRIV)
View Planning Routings and Edit Planning Routings privileges were available prior to this update. View Planning Objects Using REST Service is a new privilege.