Redwood: Manage Items in Replenishment Planning Using a New User Experience
You can now use the Redwood user experience to view or modify items. Additionally, you can edit item attributes, such as order modifiers, in a replenishment plan or a simulation set, or add items to a simulation set for planning analysis.
You can select the Items table on the Visualizations tab in the Pages drawer for a replenishment plan, the plan inputs, or a simulation set.
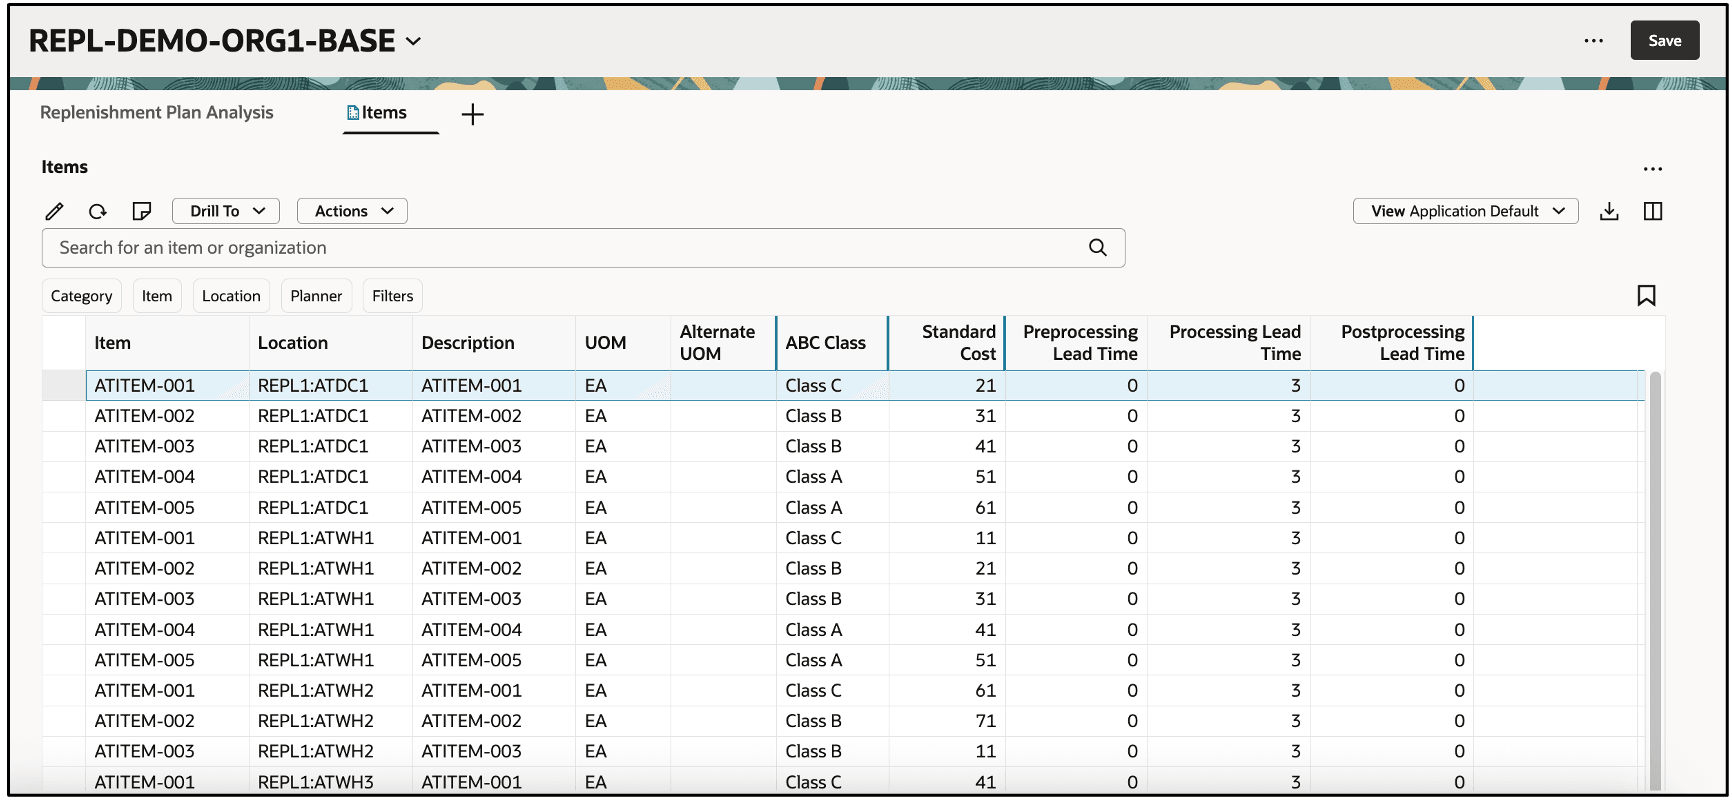
Items Table in Replenishment Plan
Toolbar

Toolbar in Items Table
These are the available icons and lists on the toolbar:
- Edit: You can click this icon to modify attributes for selected items.
-
Refresh: When you refresh the table, the following happen:
- You’re notified if there are unsaved changes. If you proceed with the refresh, unsaved changes are discarded.
- Any filtering of columns is removed.
- The data is queried again according to the applied filters.
- Notes: You can add notes to your items.
- Drill To: You can select one or more items and then select a table or graph from the Drill To list. The selected table or graph will be opened on a temporary page with the context of the selected items. To add more choices to the Drill To list, you can select Manage Links from the Actions menu.
- Actions: You can use this list to save, restore, or delete views. Views are equivalent of layouts in the classic version of the Items table. You can copy selected rows or all changed rows to an existing or a new simulation set.
- View: You can use this list to control which columns are visible in the table as well as the order in which they appear. You can quickly switch between views to show the information most relevant to your task. A default view is provided.
- Export: You can export the rows that meet the current filter criteria to a Microsoft Excel XML workbook file (.xlsx). The exported file contains only the columns in the current view and in the order in which they appear in the table.
- Columns: You can select the columns you want to be visible in the Items table. You can reorder the columns in one of two ways.
- In the Columns drawer, you can drag and drop the columns.
- In the Items table, you can drag and drop the columns.
Searching and Filtering Items

Search Components
You can search for items using these search components:
- Search Bar: Enter text to search across the Item and Location columns using the Contains operator. For example, enter
ITE, and press Enter or click the search icon in the search bar to display rows with items that contain "ITE" in their names, such as ITEMS1. The search isn’t case sensitive. - Suggested Filters: Make multiple selections in the suggested filters, and click outside them to filter the rows by your selections.
- Filters: Click the Filters button to open the Filters drawer, from which you can add columns as applied filters.
- Saved Searches: You can preserve the current keyword search and applied filters as a saved search. Thus, you can reuse a set of search criteria.
Filters Drawer
By clicking the Filters button, you can open the Filters drawer, in which you can select columns of the Items table for use as applied filters.
The type of filter criteria you can specify is based on the column data type.
- Numeric Columns: For filtering a numeric column, you can specify both an operator, such as Equals, Greater Than, or Less Than, and a value. If you select the Between operator, enter the values to define a range.
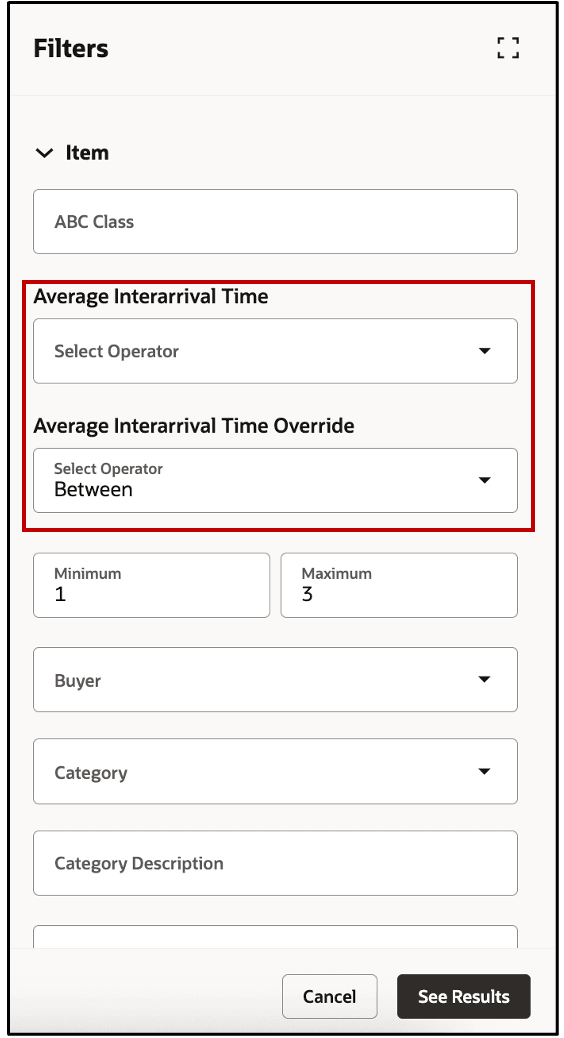
Filters Drawer Showing Numeric Column (Average Interarrival Time)
- LOV Columns: You can select a single value or multiple values from a column that has a list of values (LOV).
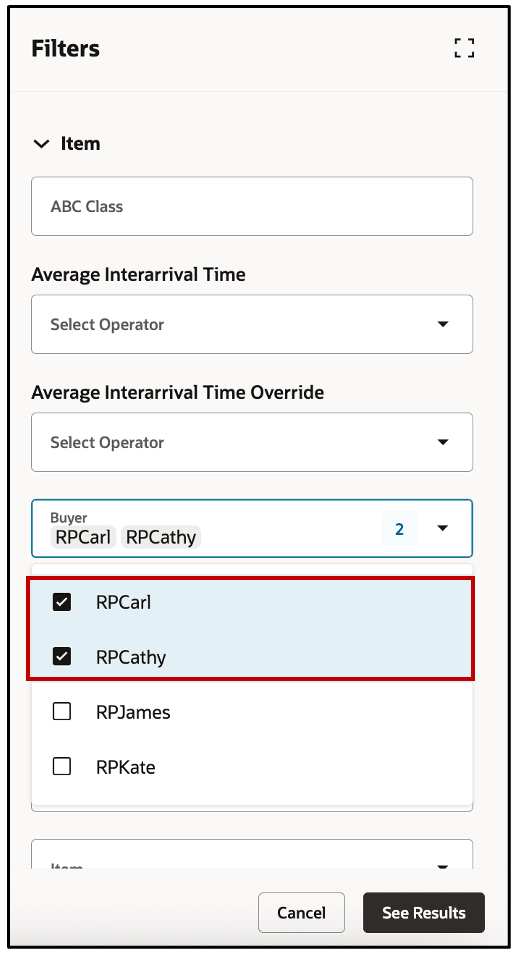
Filters Drawer Showing LOV Column (Buyer)
- Free-Text Columns: You can filter the items by entering alphanumeric text in columns that don’t have predefined values. For example, you can display only those items that contain the words "high moving" in the ABC Class column.
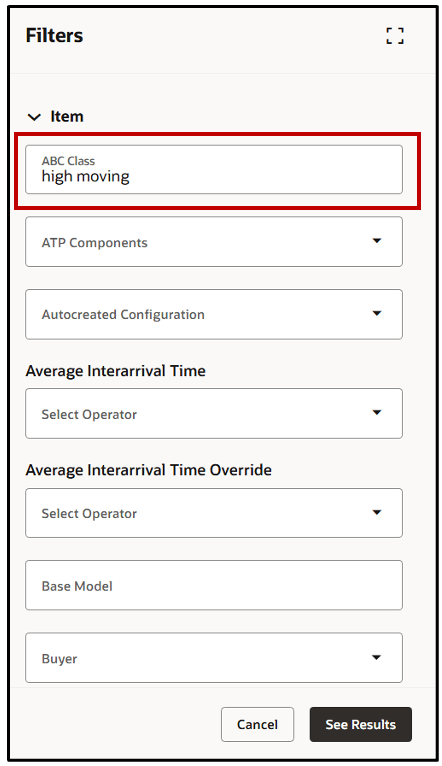
Filters Drawer Showing Free-Text Column (ABC Class)
When you click the See Results button, the applied filters are added to the Items table, and the data is queried again.
Drill-From and Drill-to Links
You can seamlessly navigate between related tables using drill-from and drill-to links while maintaining the context based on filtering criteria.
In this example, the Items table is opened through a drill-to link from the Supplies and Demands table. The filtered-by value in the Items table displays the active columns applied during the drill-to action.

Filtering Using Drill-to Link
Column Filters and Sorting
You can append column filters to the keyword search and applied filters to further refine your results. To see column filters, hover over the column header, and click the Filter icon as shown in the following screenshot.

Column Filter
When you click the Filter icon, a dialog box opens. Select an operator, and enter the applicable criteria.
In certain columns, such as Item and Location, you can paste values from an external source, such as an email or a spreadsheet, into the column filter.
The following image shows the Item column filter.
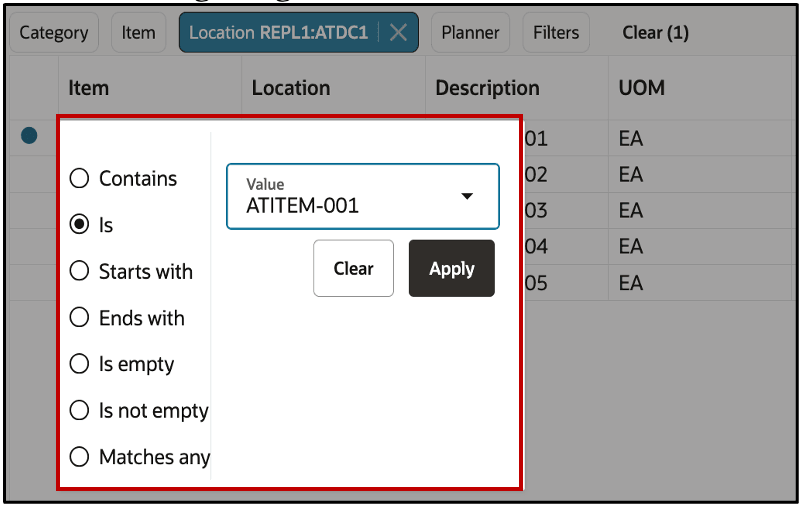
Item Column Filter
After you click Apply, the Items table in this example displays only the item specified in the Item column filter.

Items Table After Filter Is Applied
Here’s some additional information about column filters:
- The operators available vary by data type. Date fields and numeric fields have different operators than alphanumeric fields.
- You can remove a column filter by clicking the Clear button in the dialog box.
- Column filters are retained when the keyword search or applied filters are changed.
- Column filters can be used in combination with drill-to links from the Items table.
- All column filters are cleared when you click the Refresh icon.
- Column filters aren’t included in saved searches.
In addition to filtering, you can also modify the order in which items are displayed by applying column sorting. To sort a column, hover over the heading to see the Sort Ascending or Sort Descending icon. Click the icon to sort the rows in the ascending or descending order.
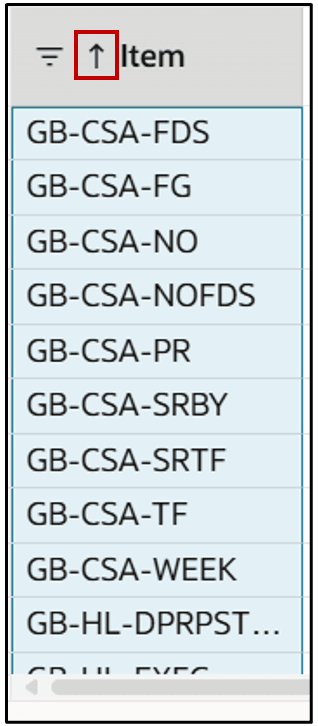
Icon for Column Sorting
Here’s some additional information about column sorting:
- You can only sort one column at a time. If you sort by another column, the sorting applied to the previously sorted column is automatically removed.
- Column sorting is removed if you click the Refresh icon.
Viewing and Arranging Columns
You can view the columns relevant to your plans and reorder them.
Click the Columns icon to open the Columns drawer that displays all the available columns. Select all those columns that you want to be displayed. Reorder the columns by dragging and dropping them.
For example, in the following screenshot, the Currency column is hidden. To make the column visible, select the column, and then click Show.
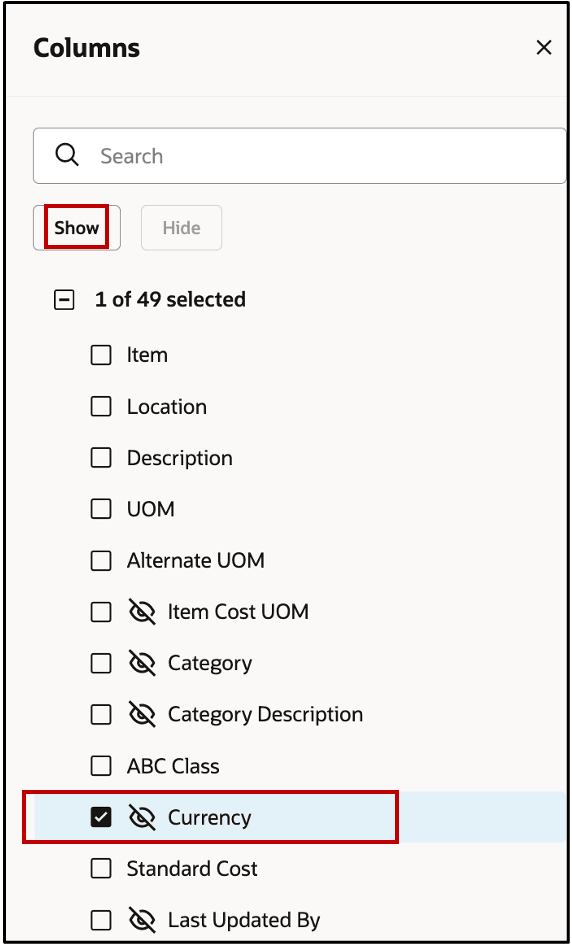
Columns Drawer
You can also rearrange the columns by dragging and dropping them in the Items table. First, click the column heading to select the column. The column will be highlighted in blue, as shown in the following screenshot. While keeping the column selected, drag it to the required position, and drop the column.
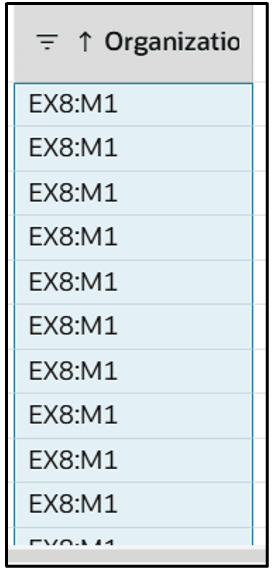
Selected Column for Dragging and Dropping
Saving and Managing Views
Views help you to control which columns are visible, the order in which they appear, and their width. Views are equivalent to layouts in the classic version of the Items table.
Views don’t contain any filtering or sorting information. For example, if you’ve applied a column filter, and you save the view, the column filter isn’t included in the view.
After you've arranged the columns, click Actions > Save View. The Save view drawer opens.

Save View Action
In the Save view drawer, you have two options:
- Save as existing: Updates the current view.
- Save as new: Creates a view.
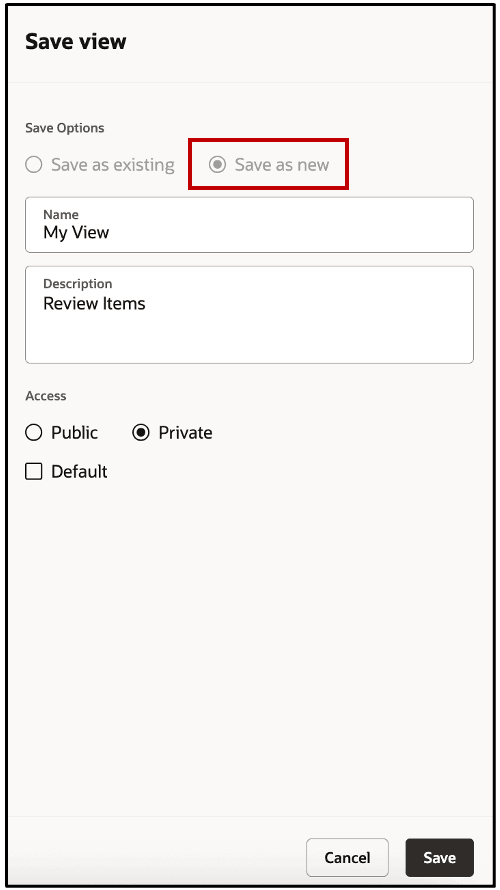
Save View Drawer
NOTE: If you're not the owner of the current view, Save as new is automatically selected and grayed out. You can't overwrite a view created by another user.
The Actions list contains two other, view-related actions:
- Restore View: If you make changes to the column order and appearance and decide that you want to discard those changes, you can select Restore View. The table reverts to the view as it was when last saved. Any unsaved view changes are discarded.
- Delete View: This selection deletes the current view. You’ll be asked to confirm your action. You can delete a view only if you own it.
Editing Items
You can make both inline and mass edits directly in the Items table. The editable columns in the Redwood version of the Items table are the same as those in the classic version.
To perform an inline edit in an editable column, double-click it to enter the edit mode.
To perform mass edits, select the rows that you want to update, and click the Edit icon to open the Item Attributes drawer. You can modify the editable attributes for the selected rows in the drawer.
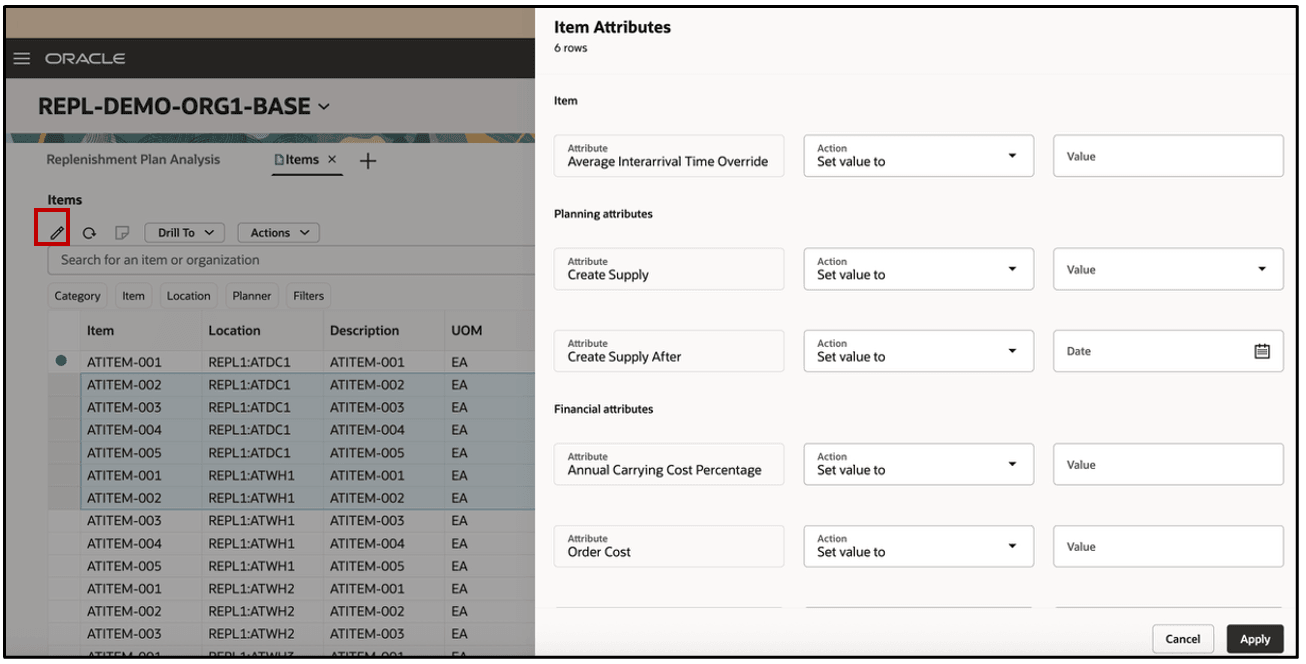
Item Attributes Drawer
Select Apply to close the drawer and view your changes in the Items table.
After making your inline or mass edits, click the Save button.
Copy Rows to Simulation Sets
If you've updated any data in the Items table in your replenishment plan, you can add the changes to a simulation set. You can also add changed or unchanged data in the Items table from a simulation set to another simulation set and unchanged data from the plan inputs to a simulation set.
After copying the data to a simulation set, you can open it and verify your changes. You can then include this simulation set in plan runs.
Follow these steps to copy changed rows in the Items table in your replenishment plan to a simulation set:
- Save your changes in the Items table.
- In Actions, select one of the following:
- Copy to simulation set: Copies data from the selected rows.
- Copy All Changes to Simulation Set: Copies all changed data.

Simulation Options
- In the drawer named Copy to simulation set, select an existing simulation set or create one.
- Select a simulation set from the Simulation Set field if you want to copy your changes to an existing simulation set.
- Click Copy.
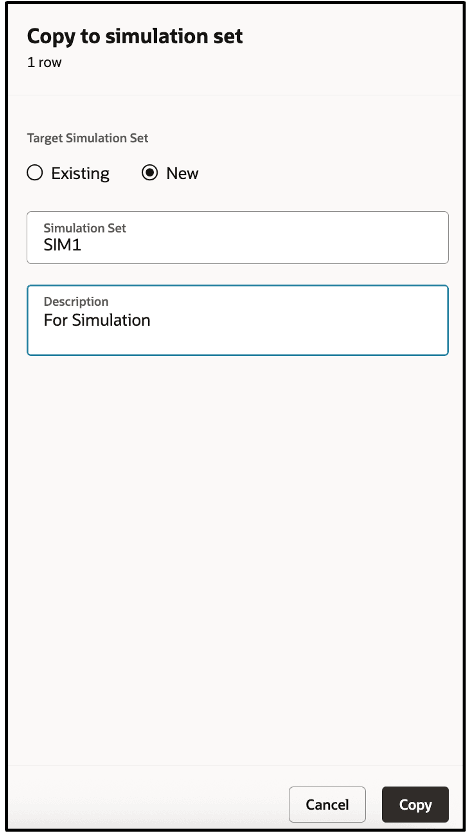
Copying Selected Rows to New Simulation Set
Steps to Enable and Configure
Use the Opt In UI to enable this feature. For instructions, refer to the Optional Uptake of New Features section of this document.
Offering: Supply Chain Planning
Tips And Considerations
If you want to use the Redwood: Manage Items in Replenishment Planning Using a New User Experience feature, then you must opt in to its parent feature: Replenishment Planning. If you’ve already opted in to this parent feature, then you don’t have to opt in again.
Follow these steps to enable or disable this feature:
- In the Setup and Maintenance work area, search for and select the Manage Administrator Profile Values task.
- On the Manage Administrator Profile Values page, search for and select the ORA_MSC_REPLENISHMENT_PLANNING_REDWOOD_ENABLED profile option code.
- In the Profile Values section, set the Site level to Yes or No. The default value is Yes.
- Yes = enables the feature
- No = disables the feature
- Click Save and Close.
Changes in the profile value will affect users the next time they sign in.
Key Resources
- Refer to the Cloud Applications Readiness content for the following 25C feature for Oracle Fusion Cloud Supply Chain Planning:
- Redwood: Manage Items Using a New User Experience
- Visit https://redwood.oracle.com/ for more information about the Redwood experience.
Access Requirements
Users who are assigned a configured job role that contains these privileges can access this feature:
- Manage Segments (MSC_MANAGE_SEGMENTS_PRIV)
- Monitor Replenishment Planning Work Area (MSC_MONITOR_REPLENISHMENT_PLANNING_WORK_AREA_PRIV)
These privileges were available prior to this update.