Redwood: Manage Cost Lists
Use Pricing Administration's redesigned Cost Lists page to search, edit, and create your cost lists more efficiently. You can also now get item costs from Oracle Cost Management in real time.
Realize these benefits:
- Get cost in real time, right when you need them.
- Modify your business strategy in response to real time changes in cost. Protect margins and profitability.
- Add more than one item to a cost list in a single action.
- Work more efficiently. Optimize your cost setup.
- Do mass actions.
Update 25D introduces a new integration between Oracle Pricing and Oracle Cost Management that brings item costs directly into the redesigned Cost Lists page in real time. The integration:
- Makes it easier for you to set up your cost plus pricing and accurately calculate your margins.
- Supports margin pricing, and that can help you control profits.
Let's get started. Go to Home > Order Management > Show More > Manage Cost Lists - New:
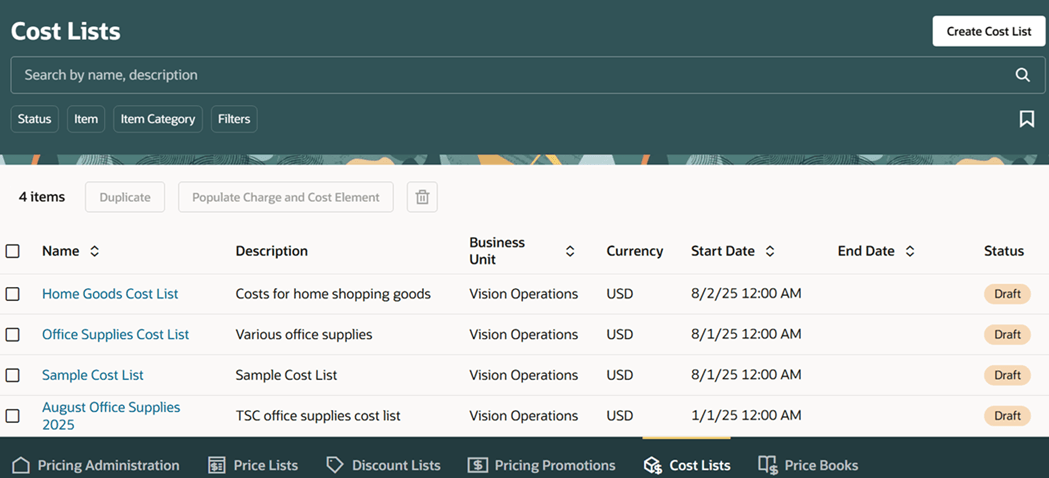
The new Cost Lists page has all the features that you're used to using with redesigned pages. Use keywords, filters, and attributes to search your cost lists, then use the column to sort the results.
Click Create Cost List, set your values, then click Create:
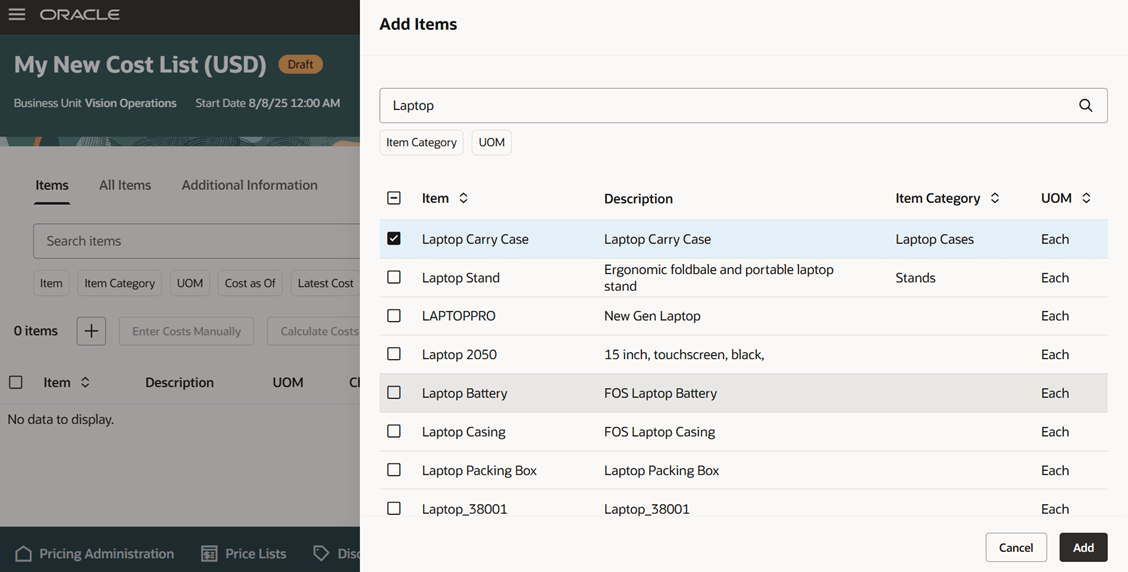
Click Add Items, search for your item, then click Add:
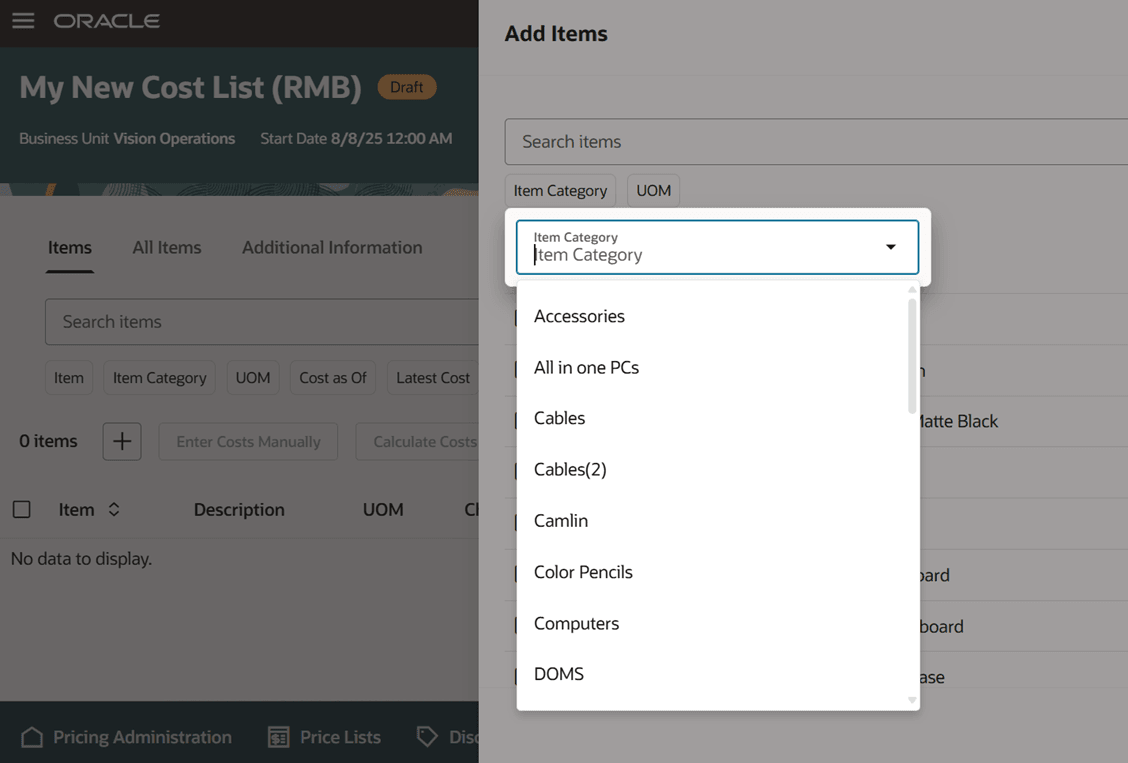
It's really that easy. If you have lots of items, you can filter the results according to item category or UOM:
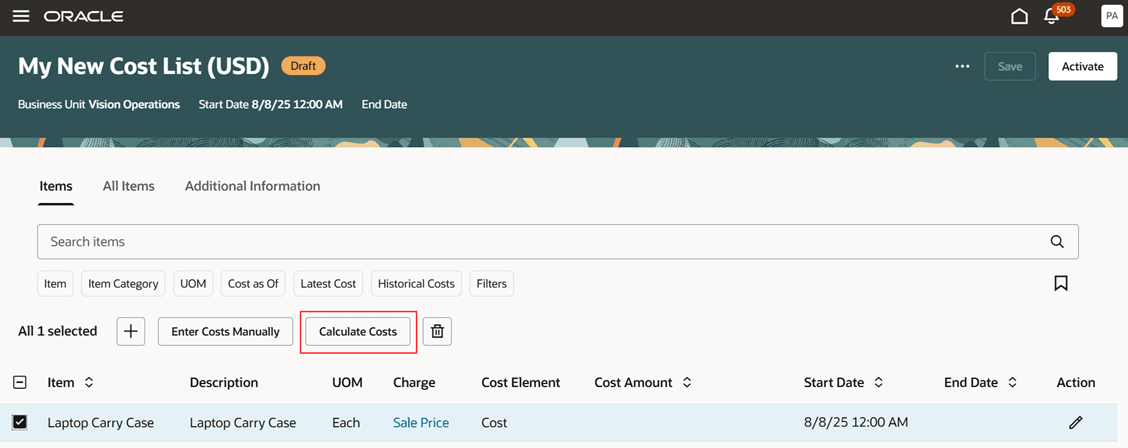
Select the item, then click Calculate Costs:
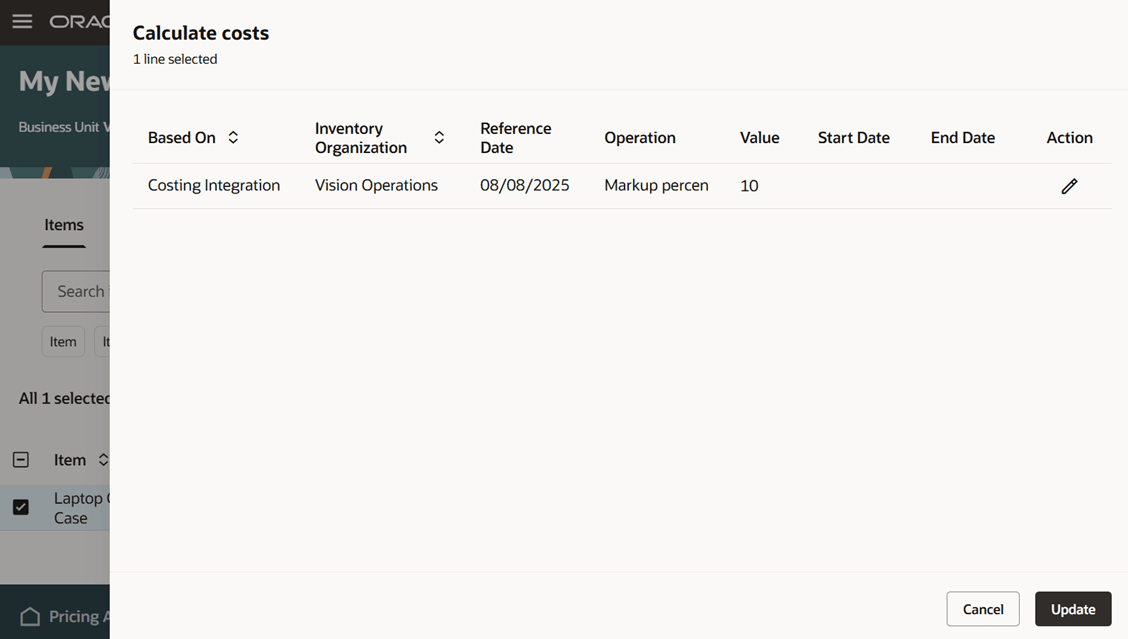
Use the Calculate Costs dialog to specify how you want to cost the item:
Cost rules in Cost Management determine the item’s cost and the cost method. These cost methods include Standard, Actual, Perpetual Average, and Periodic Average. You can get the item’s cost from Cost Management according to the inventory organization and a reference date. You can apply a markup or discount to the cost or use the original costs from Cost Management. For example, the cost for Item A is $100 from January 1 through March 31. The cost from April 1 through June 30 is $110:
|
Item |
Reference Date |
Cost from Cost Management |
Operation |
Value |
Calculated Cost |
|
A |
1/1 |
Markup Percent |
— | — | $100 |
|
A |
4/1 |
Markup Amount |
— | — | $110 |
|
A |
1/1 |
Discount Percent |
Markup Percent | 10% | $100 + 10% = $110 |
|
A |
4/1 |
Discount Amount |
Markup Amount | $15 | $110 + $15 = $125 |
For details about how to set up cost rules in Cost Management, see Overview of Cost Accounting.
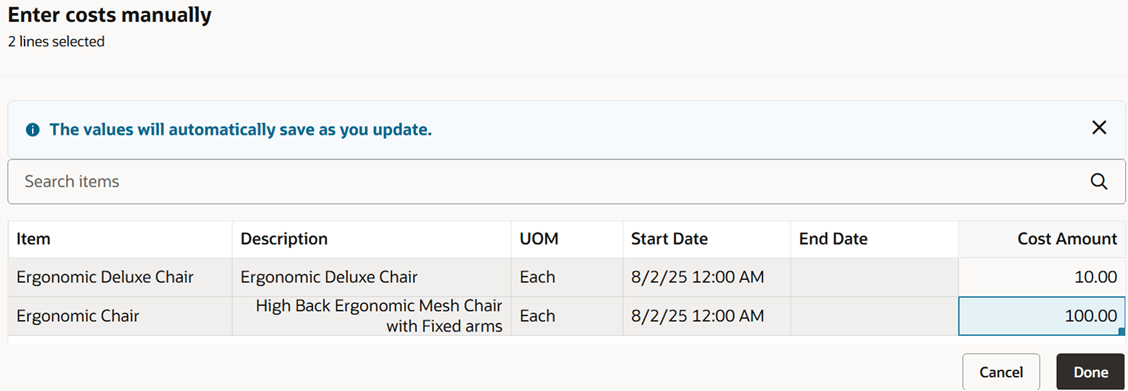
You can also manually enter cost. Click Enter Costs Manually, then set your values:
You can type in your values, click and drag values, or copy and paste them from your own spreadsheet application, such as Microsoft Excel. Sort data on the cost list page, and Enter Costs Manually will display them in the same sequence.
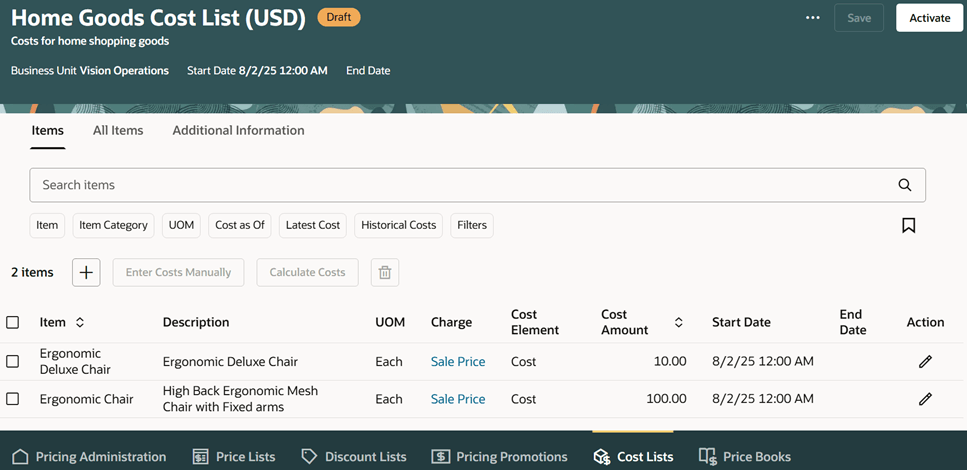
Use the Items tab to display a list of all items that are on the cost list. Review or update cost details on each item:

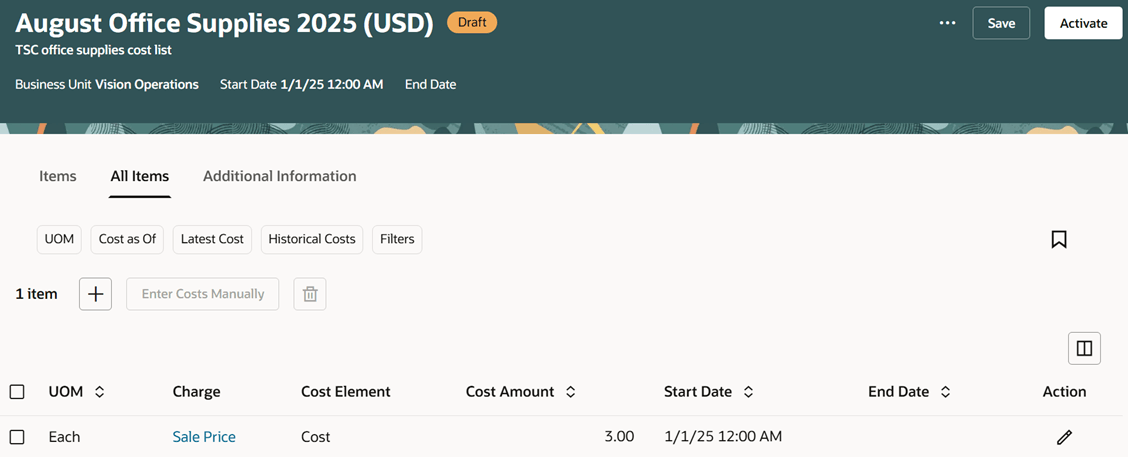
Click All Items to set up cost across all items in the cost list. Note that you can do only manual updates and you can't calculate cost:
Click Additional Information to specify an access set and optionally enter descriptive flexfields. Then, you can Activate the cost list.
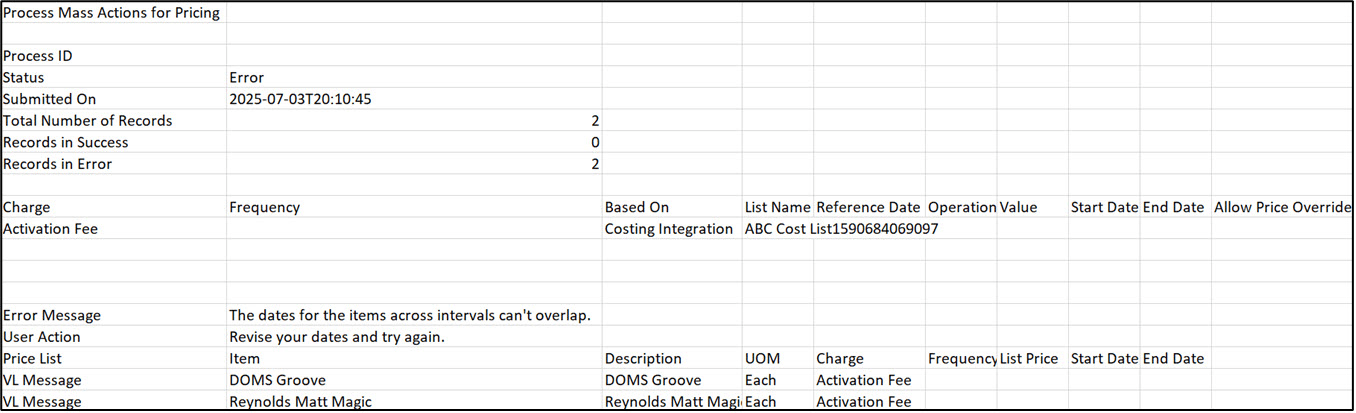
Error Reports
If a problem happens with calculating cost during a mass action, then Pricing creates an error report that you can download in a file. The file includes the total number of submitted records, successful submissions, failed records, and a message that you can use to troubleshoot. You might see errors like:
- Can't calculate cost because the item isn't enabled for costing.
- Encountered a problem when attempting to get cost from Cost Management.
- Can't calculate the item's cost because the cost would have a negative value.
- The end date can't be before the start date.
Here's an example report:
Steps to enable and configure
- Go to Home > My Enterprise > Setup and Maintenance > Search > Manage Administrator Profile Values, then enable the Redwood Page for Cost List Enabled profile option.
- Go to Home Page > Product Management > Product Information Management Tasks > Manage Items. Search for and open your item for editing, click Specifications, then set the Costing Enabled attribute to Yes.
Examine your pricing set ups. Modify them, as necessary:
- Use the Manage Price elements page to make sure you set up your cost elements. This feature includes a new predefined Costs cost element. See Manage Pricing Elements.
- You must assign a primary catalog so you can search for categories. See Manage Pricing Parameters.
- Manage your pricing charge definitions. See Manage Pricing Charge Definitions.
Tips and considerations
- The redesigned Cost Lists page includes cost lists that you create on the classic Cost Lists page. If you use the redesigned page to open a cost list that you created on the classic page, then you must click Populate Charge and Cost Element to automatically populate the charge definition and the cost element on the cost list's header. You might not see any values change, but clicking it will make sure you have the correct data on the redesigned page.
- You no longer need to enable the Cost Plus Pricing option when you add your item to the cost list. It now comes predefined as enabled, by default.
- Pricing rounds the costs that it brings in from Cost Management. If you don't want to round, you must manually enter the costs.
- You must specify an access set before you activate your cost list.
- The Mass Action Limit for Pricing Administration in Online Mode administrator profile sets the maximum number of records that Pricing will process for each mass action request. The default value is 250 records.
Key resources
Access requirements
Users who are assigned a configured job role that contains these privileges can access this feature:
- Approve Cost Lists (QP_APPROVE_COST_LISTS)
- Manage Cost Lists (QP_MANAGE_COST_LISTS)
- Manage In-Progress Cost Lists (QP_MANAGE_IN_PROGRESS_COST_LISTS)
- View Cost Lists (QP_VIEW_COST_LISTS)
These privileges were available before this update.