Redwood: Manage Item Relationships Using a New User Experience
You can use the Redwood user experience to define the relationship between items, which impacts how the planning system plans for and manages your inventory, production, and order fulfillment. This capability enables you to model repair to, substitution, and supersession item relationships. You can access this page from Plan Inputs and from the Supply Chain Planning work area.
Supply chains are dynamic, and efficient planning often relies on understanding how items relate to each other, whether as substitutes, superseded items, or products that can be repaired with others.
The item relationships are defined in the following modules, using the specified Relationship Type attributes:
- Oracle Constrained Supply Planning - Relationship Type: Substitute
- Oracle Replenishment Planning - Relationship Types: Substitute and Superseded
- Oracle Global Order Promising - Plan Inputs, Relationship Type: Substitute
The Item Relationships page provides a single destination where you can view, analyze, and manage item relationships.
Accessing Item Relationships
You can access the Item Relationships page by opening it directly from a plan or Plan Inputs, or by drilling to it from several other planning pages.
To open the Item Relationships page:
- Navigate to the Supply Chain Planning work area.
- From the context selector at the top of the page, select your plan or Plan Inputs.
- Click the + icon to add more pages.
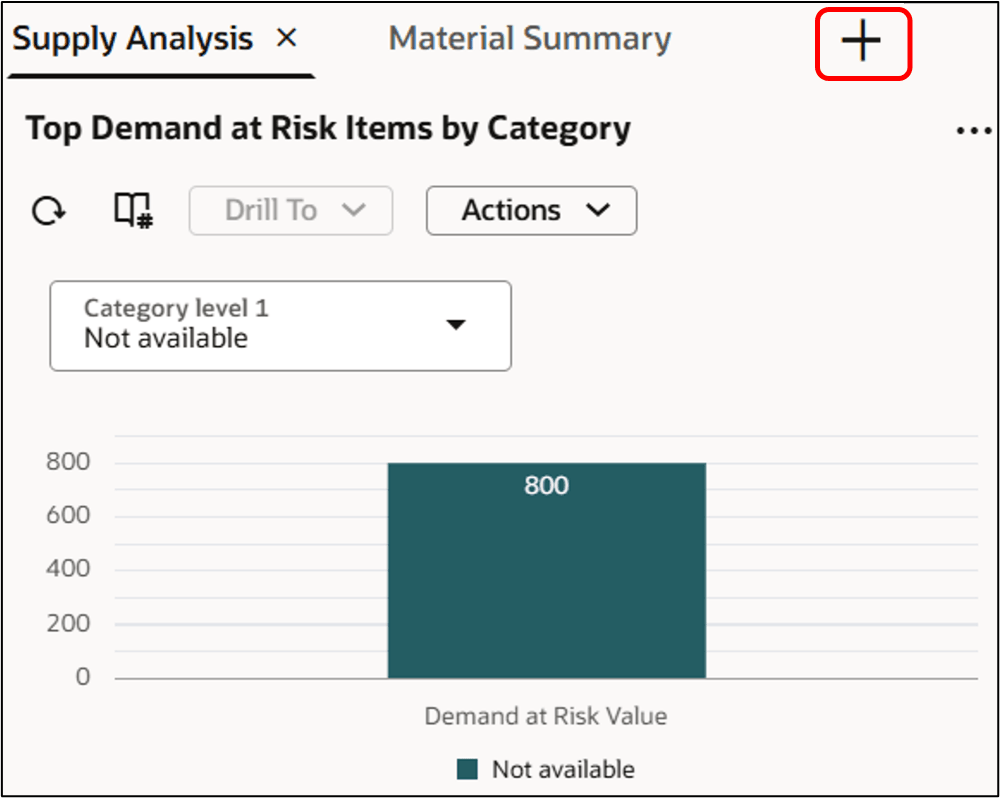
Click + to Add Pages
- Select the Visualizations tab.
- Search for and select Item Relationships.
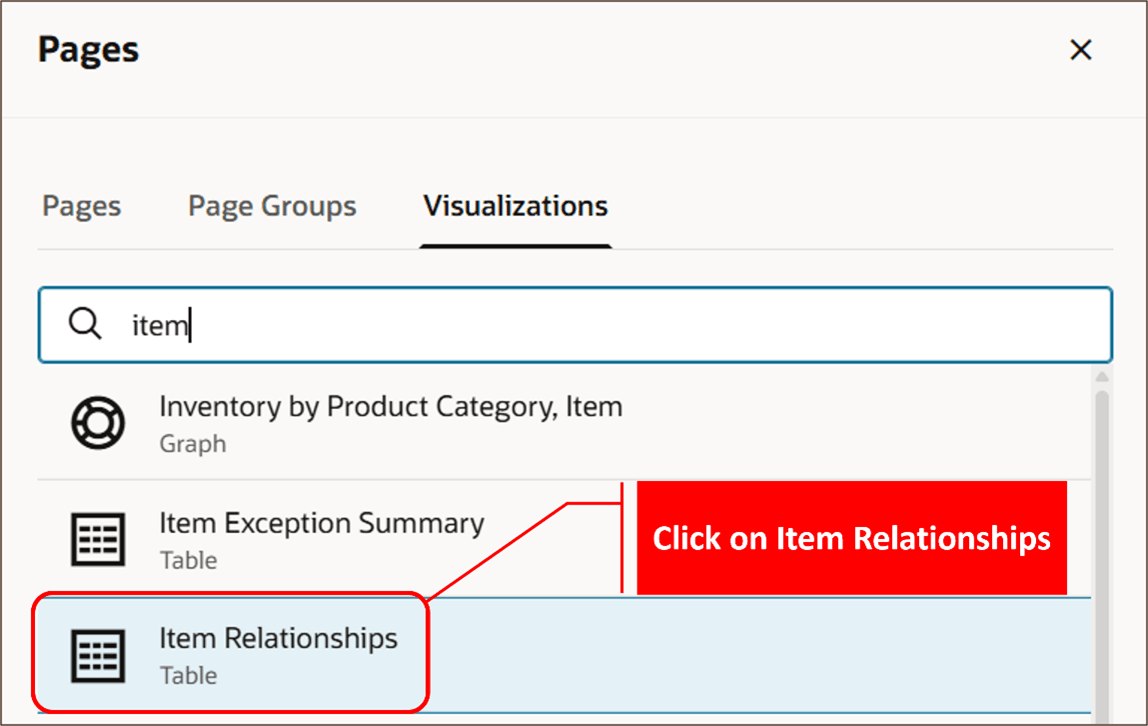
Search for and Select Item Relationships
The Item Relationships page opens.
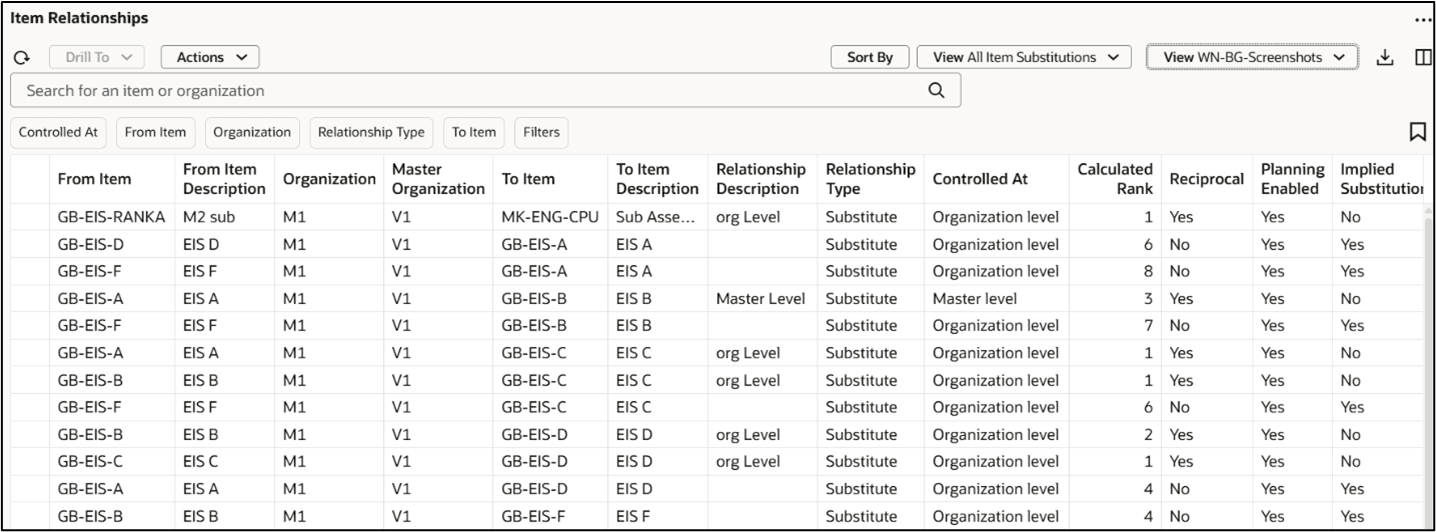
Item Relationships Page
Drilling To and From Item Relationships
You can drill to Item Relationships from the following pages:
- Exceptions
- Items
- Material Plan
- Supplies and Demands
And you can also drill out from the Item Relationships page to these same pages, maintaining context and filter states for continuity in analysis.
In each case, the system passes the selected From Item, To Item, and Organization as context to the page being drilled to.
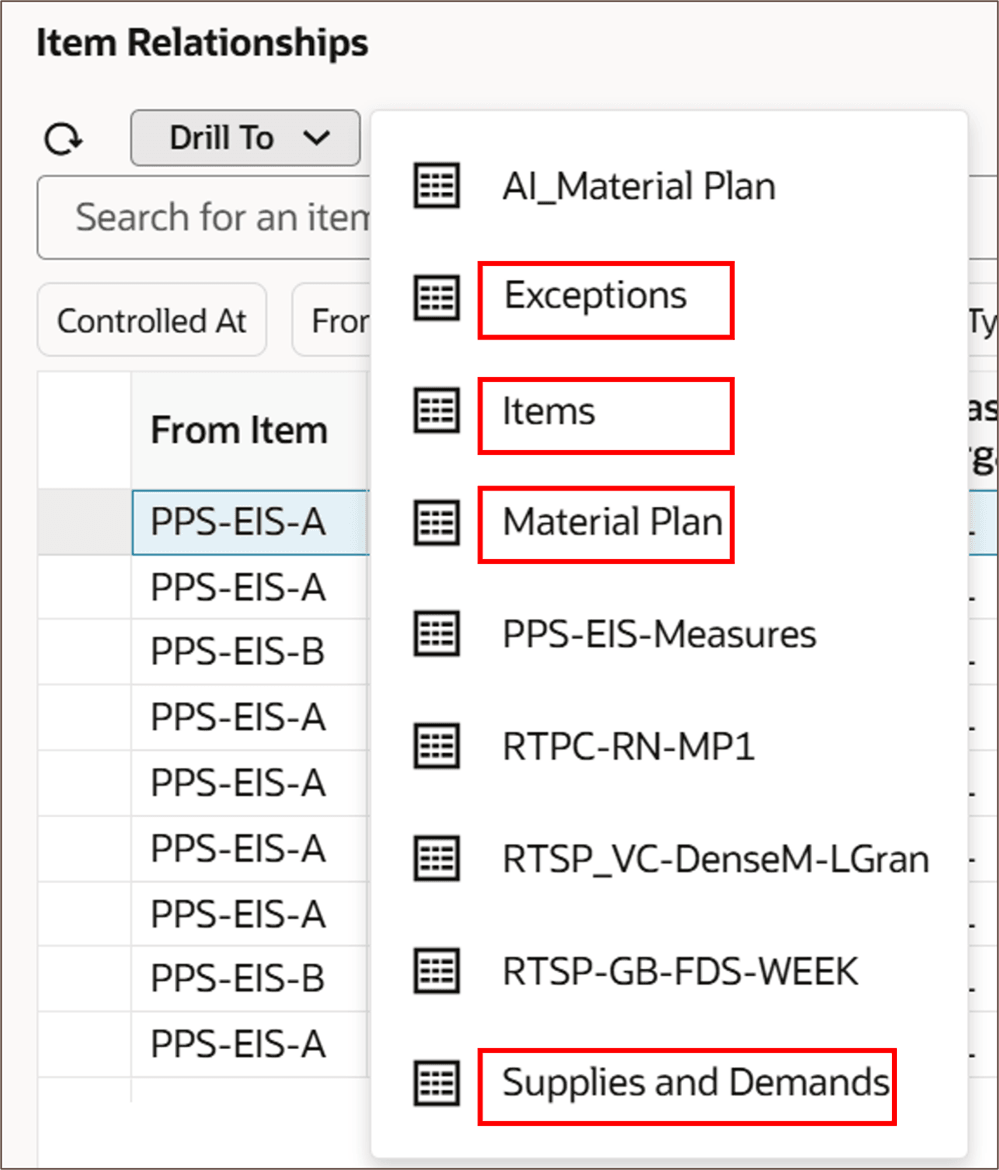
Drill To Other Pages
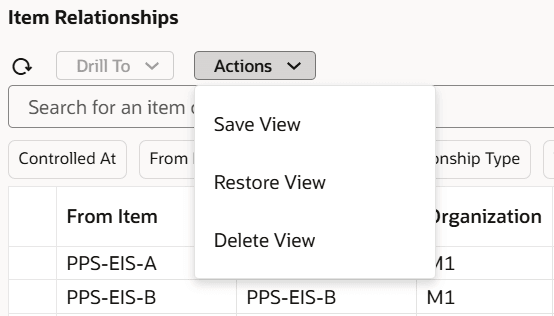
Actions
From the Actions menu at the top of the page, you can save, restore, or delete a view.
Save Page Layout by Using Save View
A view controls the page layout. You can change the page layout by adding, deleting, and reordering columns. You can save the revised layout with a name and description and specify if the layout is public or private. You can always restore to the Application Default layout. You can also delete your private layouts.
Sort by Specified Columns
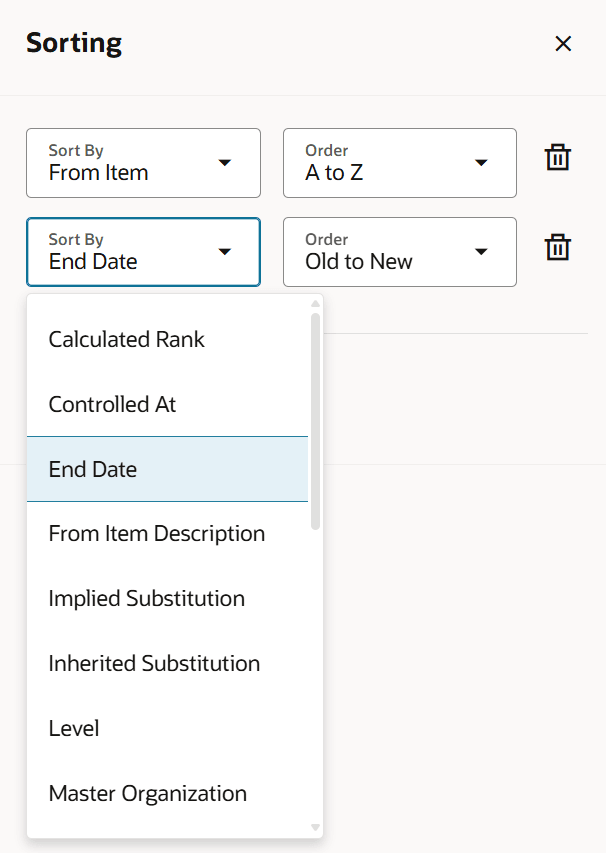
You can sort the table view for multiple columns at once by clicking the Sort By button.

Click on Sort By to Sort Item Relationships View
This opens a drawer, where you can select the sorting order, such as A to Z or Old to New, for specified columns in the table.
Sorting by Specified Columns
Options for Viewing Substitutions
The View menu at the top of the page displays two options for viewing substitutions in the table:
- All Item Substitutions
- Displays all item substitutions. This is the default value.
- Substitutions from Selected Item
- Displays selected item substitutions. This option shows direct substitutions for the selected item, but also implied substitutions.
For example: Item A has 2 substitutes: Item B and Item C. Item B has 1 substitute: Item D.
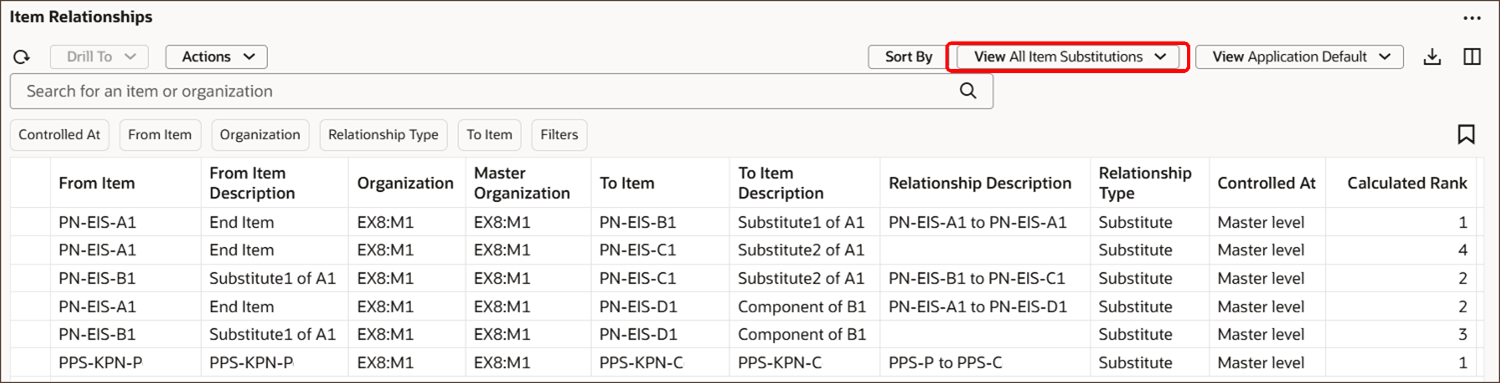
The All Item Substitutions option displays:
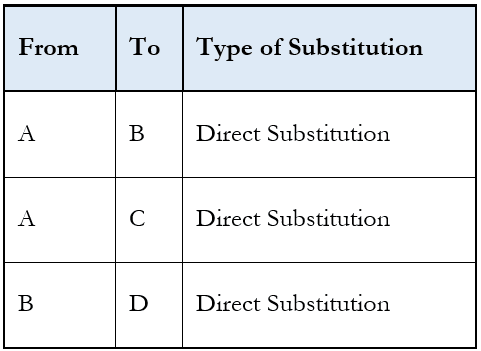
All Item Substitutions
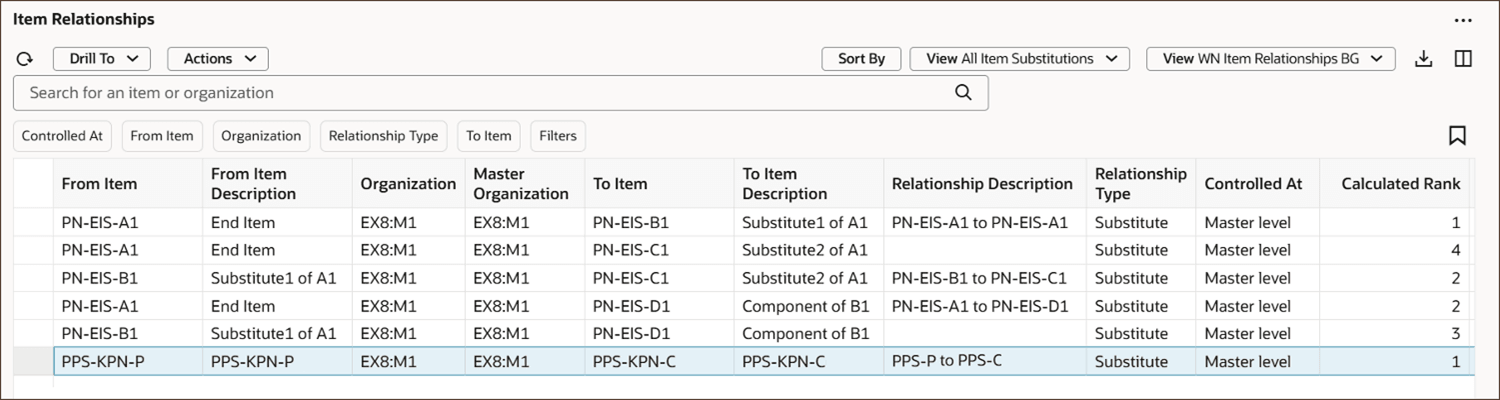
The Substitutions from Selected Item option displays:
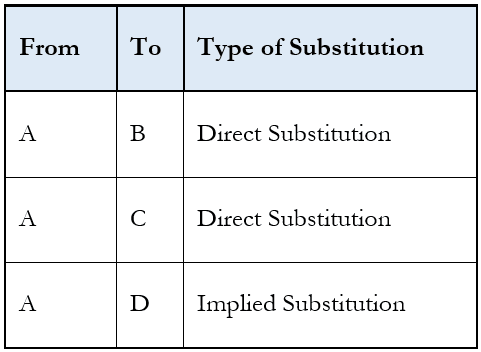
Substitutions from Selected Item
If you select All Item Substitutions from the View menu with no row selected, you’ll see results similar to the following:
View All Item Substitutions with No Row Selected
The following two images show the results when you select a row and then change the View option from All Item Substitutions to Substitutions from Selected Item.
Search Substitutions from Selected Item with One Row Selected

View Substitutions from Selected Item
Note: If you select multiple records in the preceding step, All Item Substitutions is displayed. This is the same as not selecting any row.
Filter Chips
The Item Relationships page includes the following five filter chips so that you can quickly filter the view of the table.
Controlled At Filter Chip: You can view item relationships by selecting Master Level, Organization Level, or both.
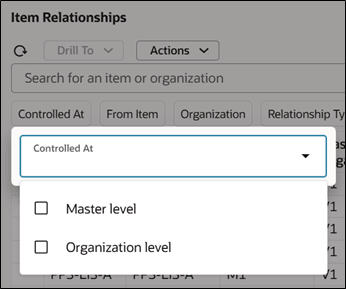
Select Master Level and/or Organization Level
From Item Filter Chip: You can view item relationships by selecting one or more items from the list of values.
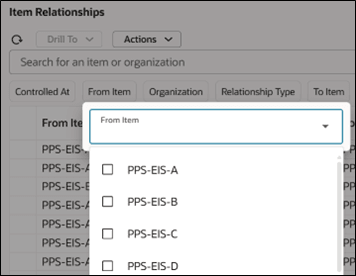
Select From Item from List
Organization Filter Chip: You can view item relationships by selecting one or more organizations from the list of values.
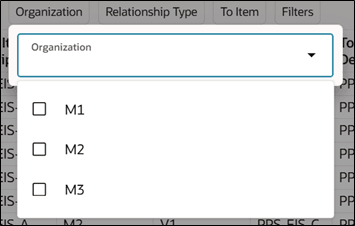
Select Organization from List
Relationship Type Filter Chip: You can view item relationships by selecting one or more relationship types from the list of values.
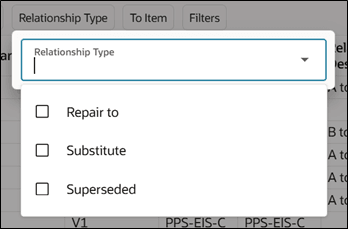
Select Relationship Type from List
To Item Filter Chip: You can view item relationships by selecting one or more items from the list of values.
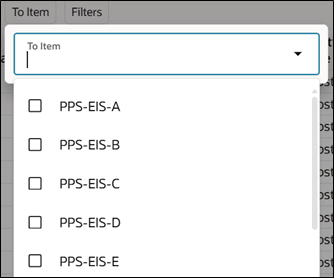
Select To Item from List
More Filters
To access even more complex filtering capabilities, click on the Filters chip, which opens the Filters drawer.
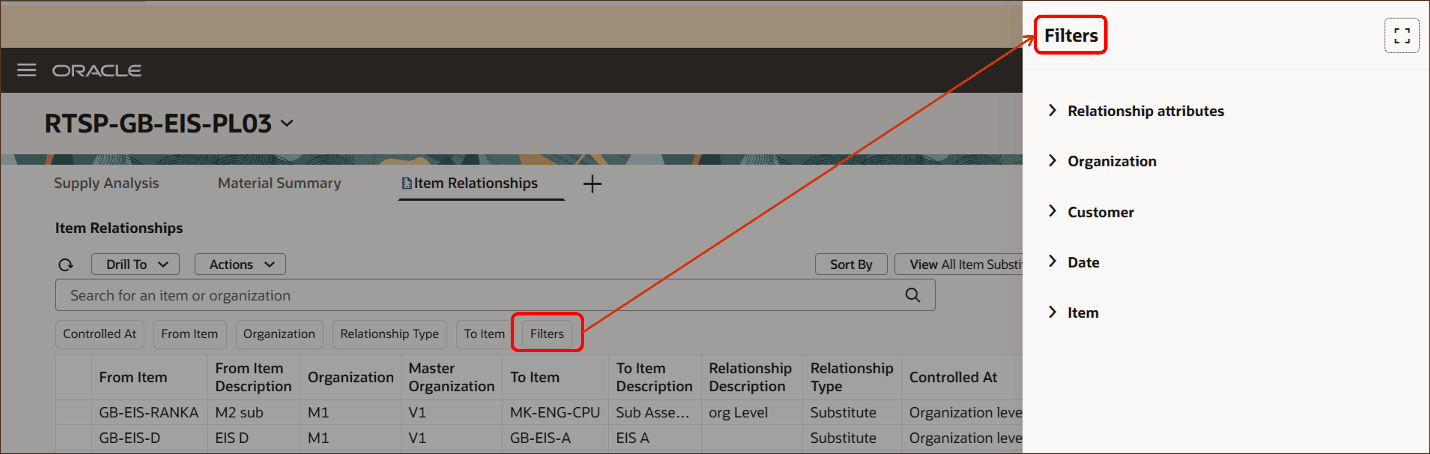
Opening the Filters Drawer
The Filters drawer includes the following five filter groups to further refine the view.
- Relationship attributes
- Organization
- Customer
- Date
- Item
Click the arrow next to each group name to expand the group and select values for the desired fields.
Relationship attributes: You can view item relationships by Calculated Rank and Level.
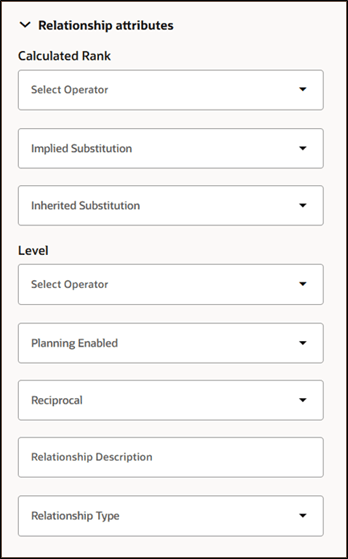
Relationship Attributes Used for Filtering Item Relationships
For more information about these attributes, see Respect Organization-Specific Item Substitution Rules.
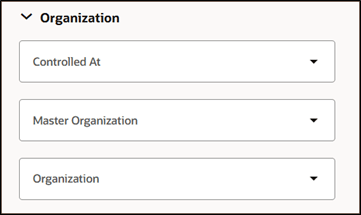
Organization: You can view item relationships by selecting whether the relationships are controlled at the Master level or the Organization level or both, and then select one or more organizations from the list of values.
Select Control At Master Organization, Organization Level, or Both
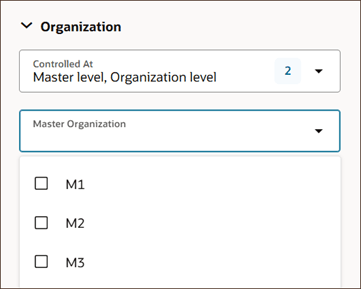
Select Organizations for Master Level or Organization Level
Customer: You can view item relationships by selecting one or more customers and their corresponding sites from the list of values.
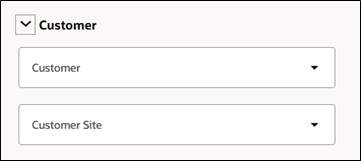
Select Customers and Customer Sites
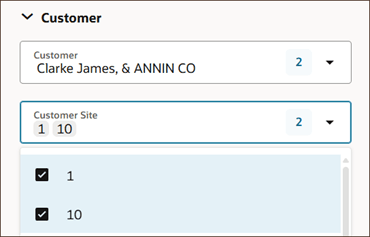
Select Customer Sites for the Specified Customer
Note: Customer and Customer Site columns are available in Plan Inputs by default. You can add these columns in the Plans mode by using the column icon, highlighted in the following image.

Select Columns Icon
Date: You can view item relationships by selecting End Date and Start Date ranges from the list of values.
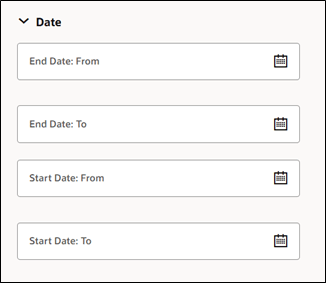
View Item Relationships by Date Ranges
Item: You can view item relationships by selecting From Item and To Item ranges from the list of values.
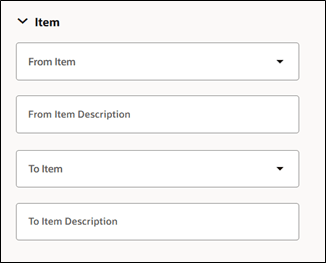
View Item Relationships by From Item and To Item Ranges
Steps to Enable and Configure
You don't need to do anything to enable this feature.
Tips And Considerations
Default Search Behavior: The default search in the toolbar applies to both From Item and To Item as well as Organization and Master Organization.

Search Toolbar
Key Resources
- For more information about the attributes on the Item Relationships page, see: Respect Organization-Specific Item Substitution Rules.
Access Requirements
Users who are assigned a configured job role that contains these privileges can access this feature:
- View Plan Options (MSC_VIEW_PLAN_OPTIONS_PRIV)
- Edit Plan Options (MSC_EDIT_PLAN_OPTIONS_PRIV)
These privileges were available prior to this update.