Redwood: Specify Lot and Serial Numbers on Return Order Lines
Provide lot and serial numbers of returned items for referenced and unreferenced return lines. Use this feature to select the lot or serial from the original order for referenced returns when you receive the returned item in the warehouse. You can also use it to select a lot or serial for an unreferenced return.
Realize these benefits:
- Speed up receiving. Use a constrained picklist so you can only select serials and lots that are valid. Remove the need to manually verify serials and lots. Improve accuracy in Oracle Inventory so you can trace an item's history and aging for lot controlled items.
- Improve accuracy. Capture the correct serial and lot when you create the return material authorization to prevent errors and mismatches. If you create more than one return authorization, then Order Management prevents you from selecting a serial that you already selected in earlier returns, and it also makes sure the total quantity returned for a lot doesn't exceed the quantity shipped on the original order.
- Strengthen warranty decisions. Match returned serials to the original sales order to confirm the warranty, and also to make sure it's eligible for the service contract.
Create Referenced Returns When Item is Serial and Lot Controlled
- Go to Home > Order Management > Order Management (New) > Sales Orders.
- Search for a sales order that contains an item where serials and lots control the item, and that you have shipped and billed.
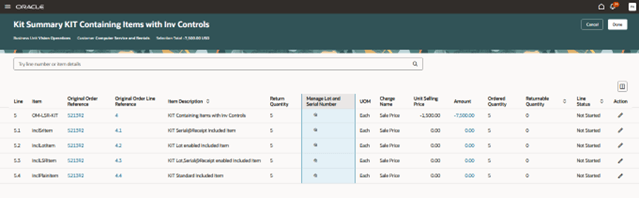
- Create a return for that order. Make sure you select the return warehouse:
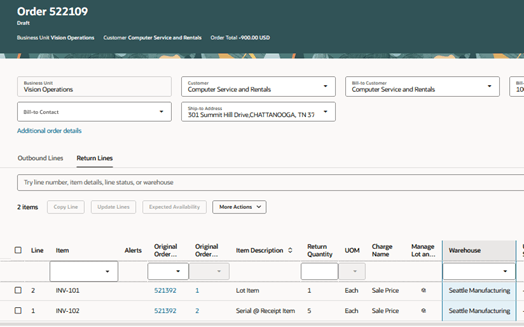
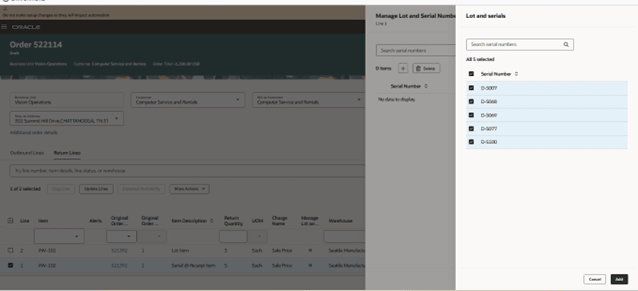
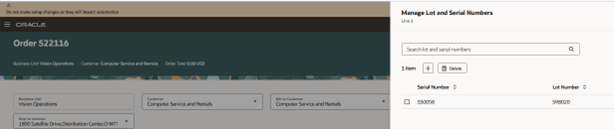
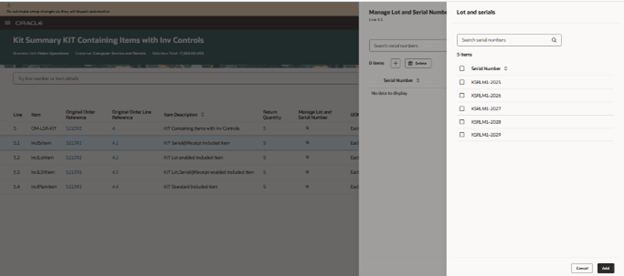
- Select the line that has your item that serials control, then click Manage Lot and Serial Numbers. The dialog displays the list of serial numbers that Order Management shipped for the original order. Select the serials, as needed:
- Select the line that has your item that’s lot controlled, then click Manage Lot and Serial Numbers. The dialog displays the list of lot numbers that Order Management shipped for the original order:
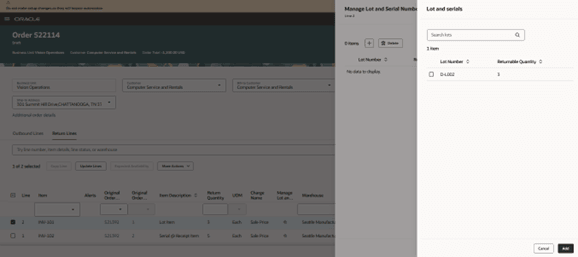
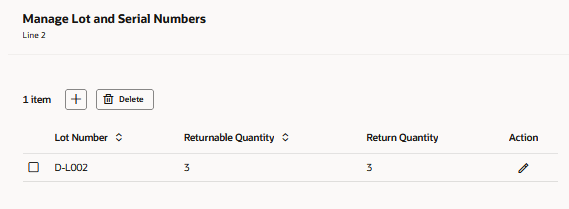
- Select the lots and specify the quantity to return for each lot, as needed:
- Submit the return order.
Create Unreferenced Returns When item is Serial and Lot Controlled
- Create an unreferenced return. Make sure you select the return warehouse.
- Use the Manage Lot and Serial Numbers dialog for the serial controlled item. The attribute displays the list of serials shipped:

- Select the lot and serials, as needed:
- Submit the return order.
Search for Lot Serials
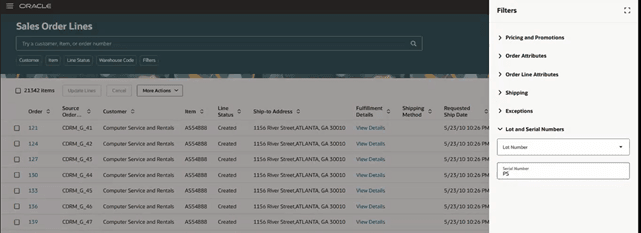
- Go to the Sales Order Line page, then use filters to search for lot and serial:
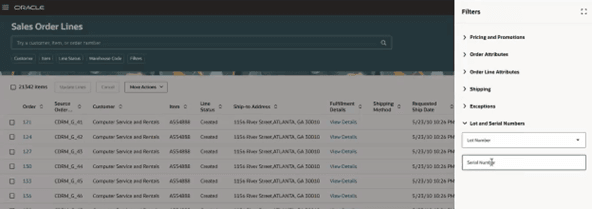
- Select lot number to search:
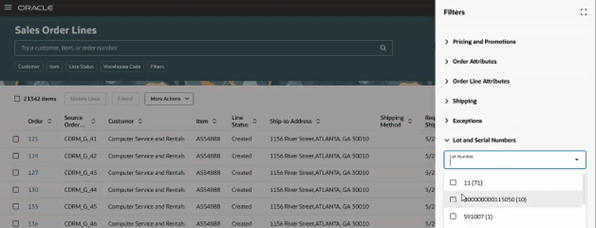
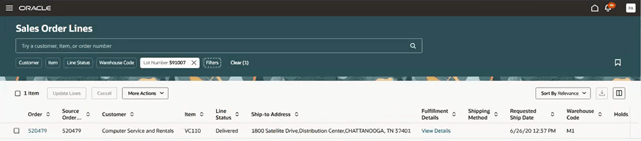
- Examine the results:
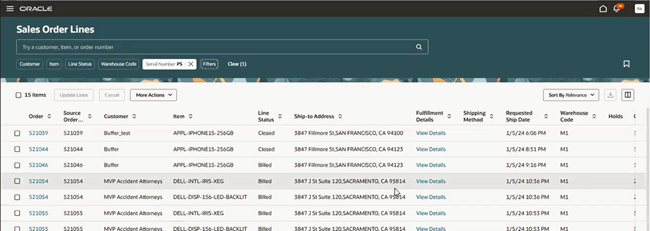
- Search for serial number:
- Examine the results:
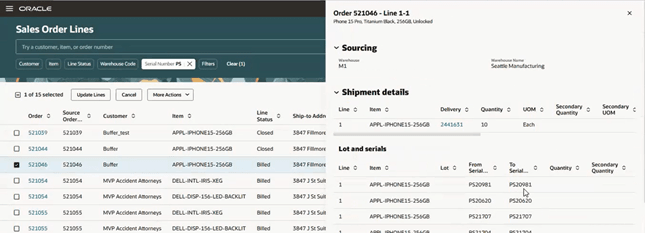
- Examine the fulfillment details for lots and serials:
Create Returns for Configured Items and Kits
- Create a referenced return that has a configured item or kit, and where lots and serials control the components in the item or kit.
- Click the icon in the Structure attribute:
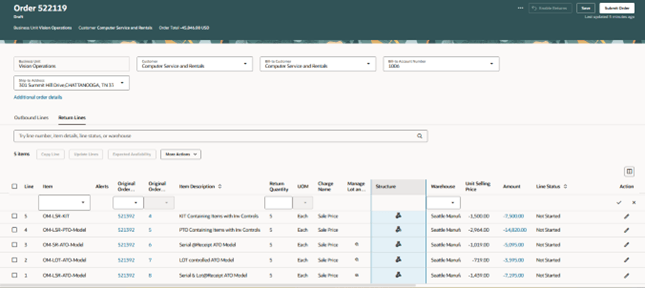
- Select the lots and serials and create the return:
Use REST API to Create Returns
Use the salesOrdersForOrderHub REST API to create a referenced or unrefenced return. Make sure the lotSerials entity has the quantity. If the return quantity is more than 1, then make sure the ItemSerialNumberFrom attribute and the ItemSerialNumberTo attribute each contain the same value:
 "OrderedQuantity": 2,
            "OrderedUOM": "Each",
            "lotSerials":[
            {
               "SourceLotSerialId":"1",
                "Quantity": 1,
               "ItemSerialNumberFrom":"SS0031",
               "ItemSerialNumberTo":"SS0031",
                 "LotNumber":"S98021"
            },
              {
               "SourceLotSerialId":"2",
                "Quantity": 1,
               "ItemSerialNumberFrom":"SS0058",
               "ItemSerialNumberTo":"SS0058",
                 "LotNumber":"S98020"
            }
Steps to enable and configure
- Go to Home > My Enterprise > Setup and Maintenance.
- If you haven't already created the Specify Quantity for Lots and Lot Serials in Return Orders profile, then search for and open the Manage Profile Options task, click Actions > New, set the values, then click Save and Close:
Attribute
Value
Profile Option Code
FOM_SPECIFY_LOT_SERIALS_QUANTITY_FOR_RETURNS
Profile Display Name
Specify Quantity for Lots and Lot Serials in Return Orders
Application
Order Management
Module
Manage Orders
Description
If you enable this profile option, then you must specify the quantity for lots or lots and serials even if they're in sequence when you return a sales order.
- Search for and open the Manage Administrator Profile Values task, then set these values:
Attribute
Value
Profile Option Code
FOM_SPECIFY_LOT_SERIAL_QUANTITY_FOR_RETURNS
Application
Order Management
Module
Manage Orders
Profile Level
Site
Profile Value
Y
- Use the Manage Order Management Parameters task to enable the Validate Lots and Serials for Return Orders parameter for your business unit.
- Set up security at the user or group level so your users can view lots and serials in the receiving warehouse on a return order. For details about how, see step 3 in Search According to Your Most Useful Attributes.
- Go to Home > Order Management > Show More > Index Management for Sales Orders > Sales Order Line > Add, add the Serial Number attribute and the Lot Number attribute, then click More Actions > Rebuild.
- Go to Home > Order Management > Show More > Search Views for Sales Orders > Sales Order Lines Search View > Filters, then:
- Enable the Lot Number attribute and set its Filter Type to Dynamic Facet.
- Enable the Serial Number attribute and set its Filter Type to Text Input.
Tips and considerations
- You can use the lot and serial dialog to select and add lot and serials only if you set the Validate Lots and Serials for Return Orders order management parameter to Yes for the business unit, and if the item is lot, serial, or lot-serial controlled, and if you specify the return warehouse on the order line.
- If you create a referenced return, then Order Management doesn't automatically copy the lot and serials from the original order to the return order. You must explicitly add the lot and serials for each return line. You can use the select all option to copy all lot and serials from the original order.
- Order Management makes sure the number of lot serials that you select are the same as the return quantity on the return line. You don't have to specify lot serials for a return item even if you enable the parameter.
- You can use the lot serial dialog for standard items and assemble-to-order configured items. You can click the Structure icon for pick-to-order configured items and kits.
- Assume you select serial A on a return order but you actually receive serial B in receiving. If you create another return for the same item, then the Lot and Serials dialog will display B but not A on that return. As an option, you don't have to specify A on the return but instead receive A directly in the return warehouse.
- If you create a return order, select a lot or serial, and select the Return for Credit return type on the return line, then you must also select the warehouse to make sure Order Management verifies that the lot and serial are valid in the warehouse.
REST API and FBDI
If you use REST API or FBDI (file-based data import) to create a return, then you must not specify a range for the lot or serial. The ItemSerialNumberFrom and ItemSerialNumberTo must not exceed a quantity that's greater than 1. If the total return quantity is more than 1, then your payload must contain two lotSerials entities with a quantity of 1 for each of those entities. For example:
  "lotSerials":[
            { "SourceLotSerialId":"1",
                "Quantity": 1,
               "ItemSerialNumberFrom":"SS0031",
               "ItemSerialNumberTo":"SS0031",
                 "LotNumber":"S98021"
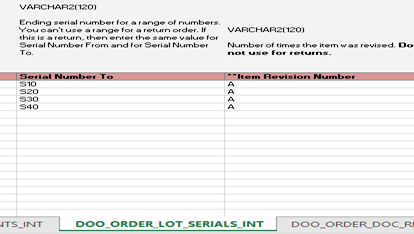
In FBDI, the Serial Number From attribute and the Serial Number To attribute on the DOO_ORDER_LOT_SERIALS_INT worksheet must not contain a range:
Key resources
Access requirements
No new privileges were added for this feature.