Redwood: Create and Manage Products and Product Variants
You can use the new Redwood UI to create and manage product variants. When you create an item, the Style Item option is available as shown in the following screenshot for item classes that have the variant attribute group set up. Enabling this option indicates the item is a style item.
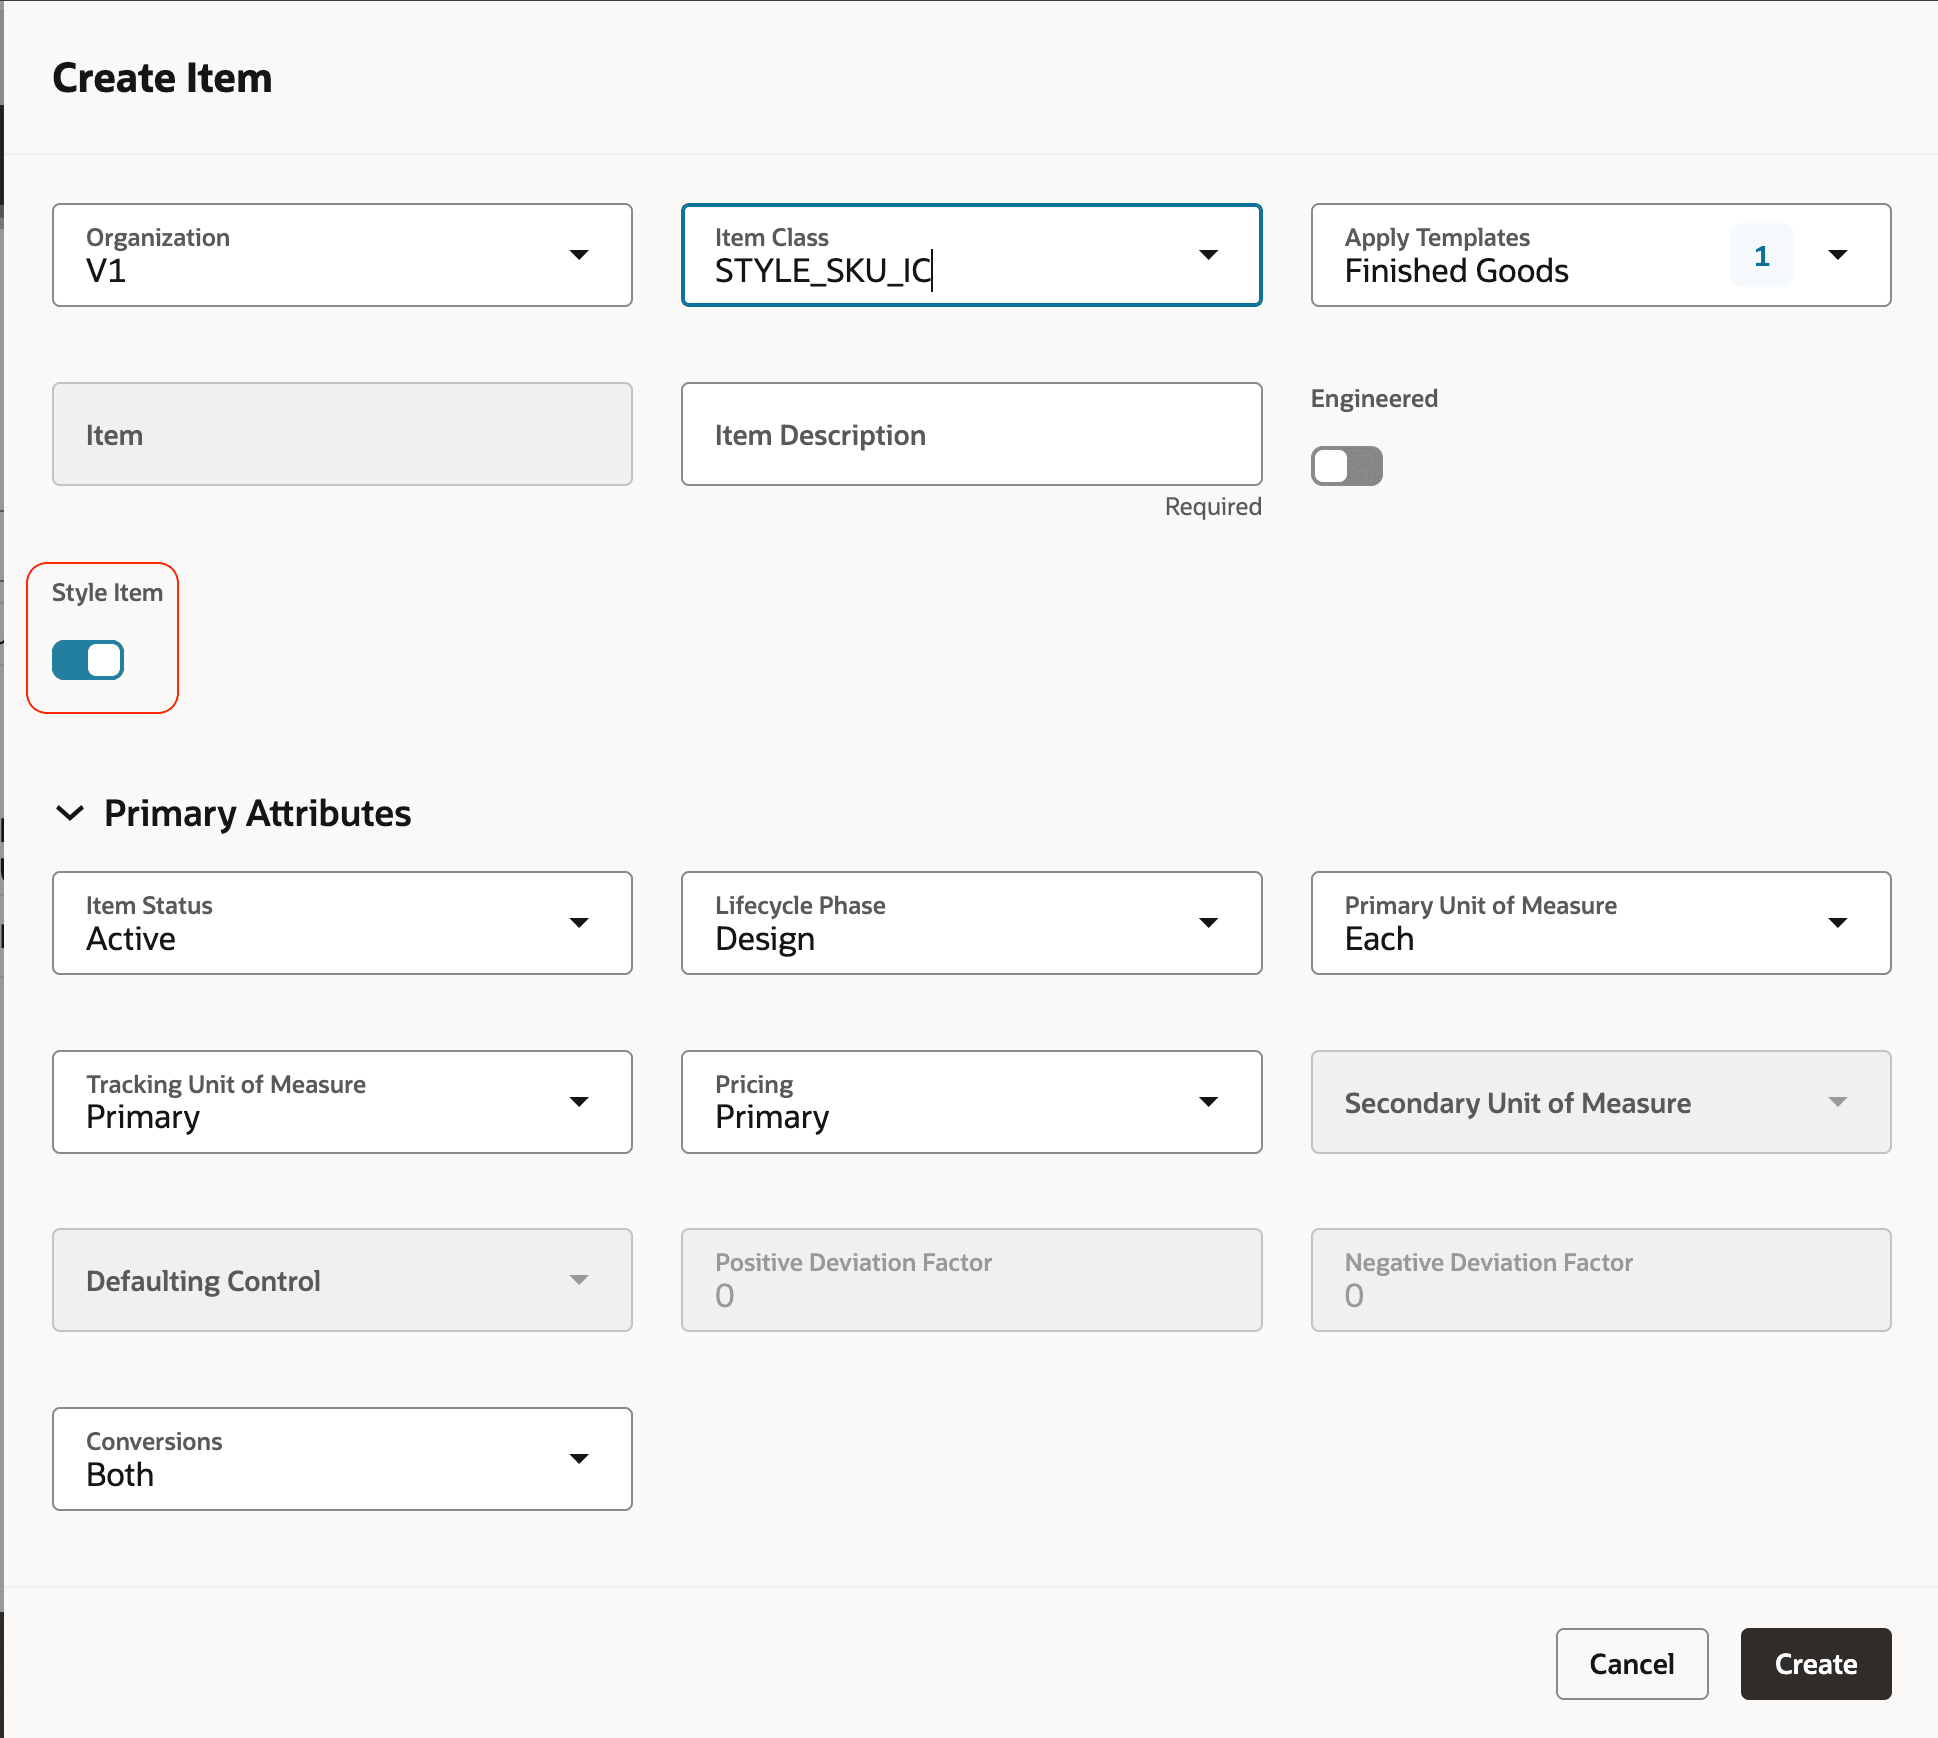
Style Item in Create Item Drawer
On the item page, the Style Item attribute is available in the Main section for a style item.
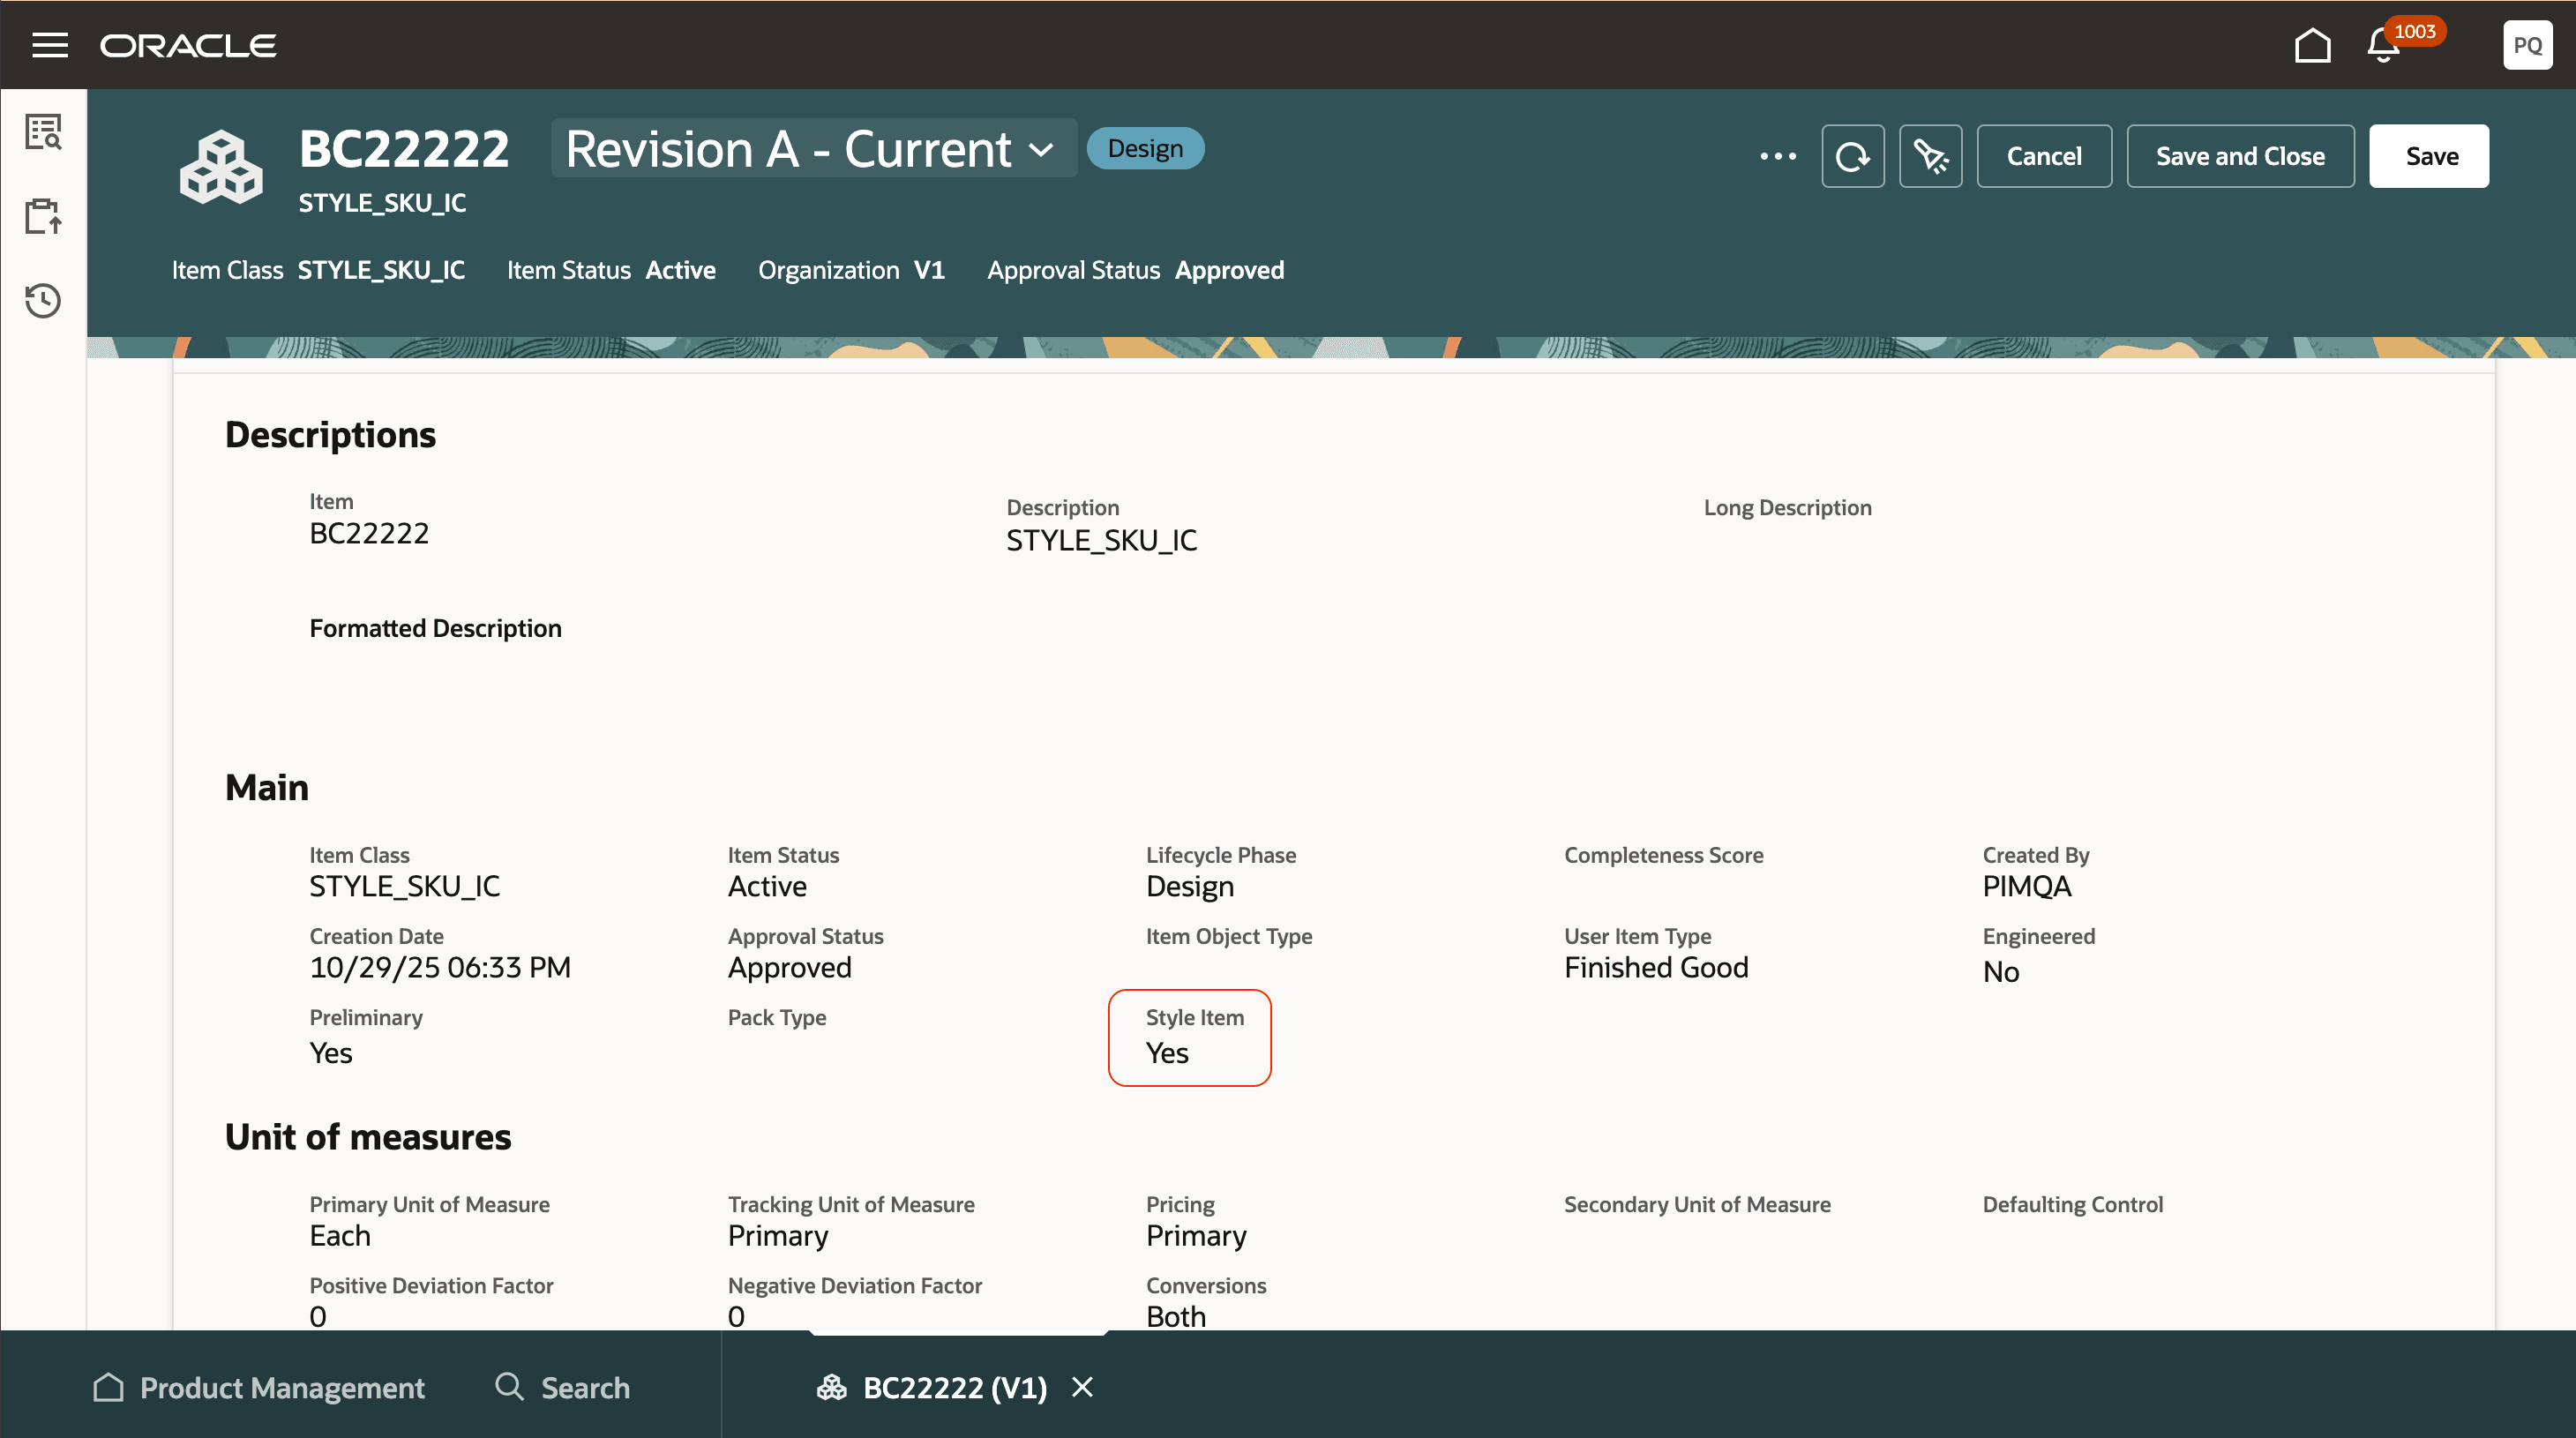
Style Item Attribute
When the item has the Style Item option enabled, a new tab called Variants is available for style items as shown in the following screenshot. On this tab, you can manage the variants for the style item. Also, you can perform the following:
- Select Views to see additional attributes for product variants. Views defined in the Product Management work area and Product Search task flow are available for selection.
- Filter the product variants using the search and the suggested filters. Variant attribute suggested filters are available along with the suggested filters defined for the views.
- Freeze and unfreeze columns on the variant grid.
- Export the displayed results from the grid to an Excel file and save it to your system.
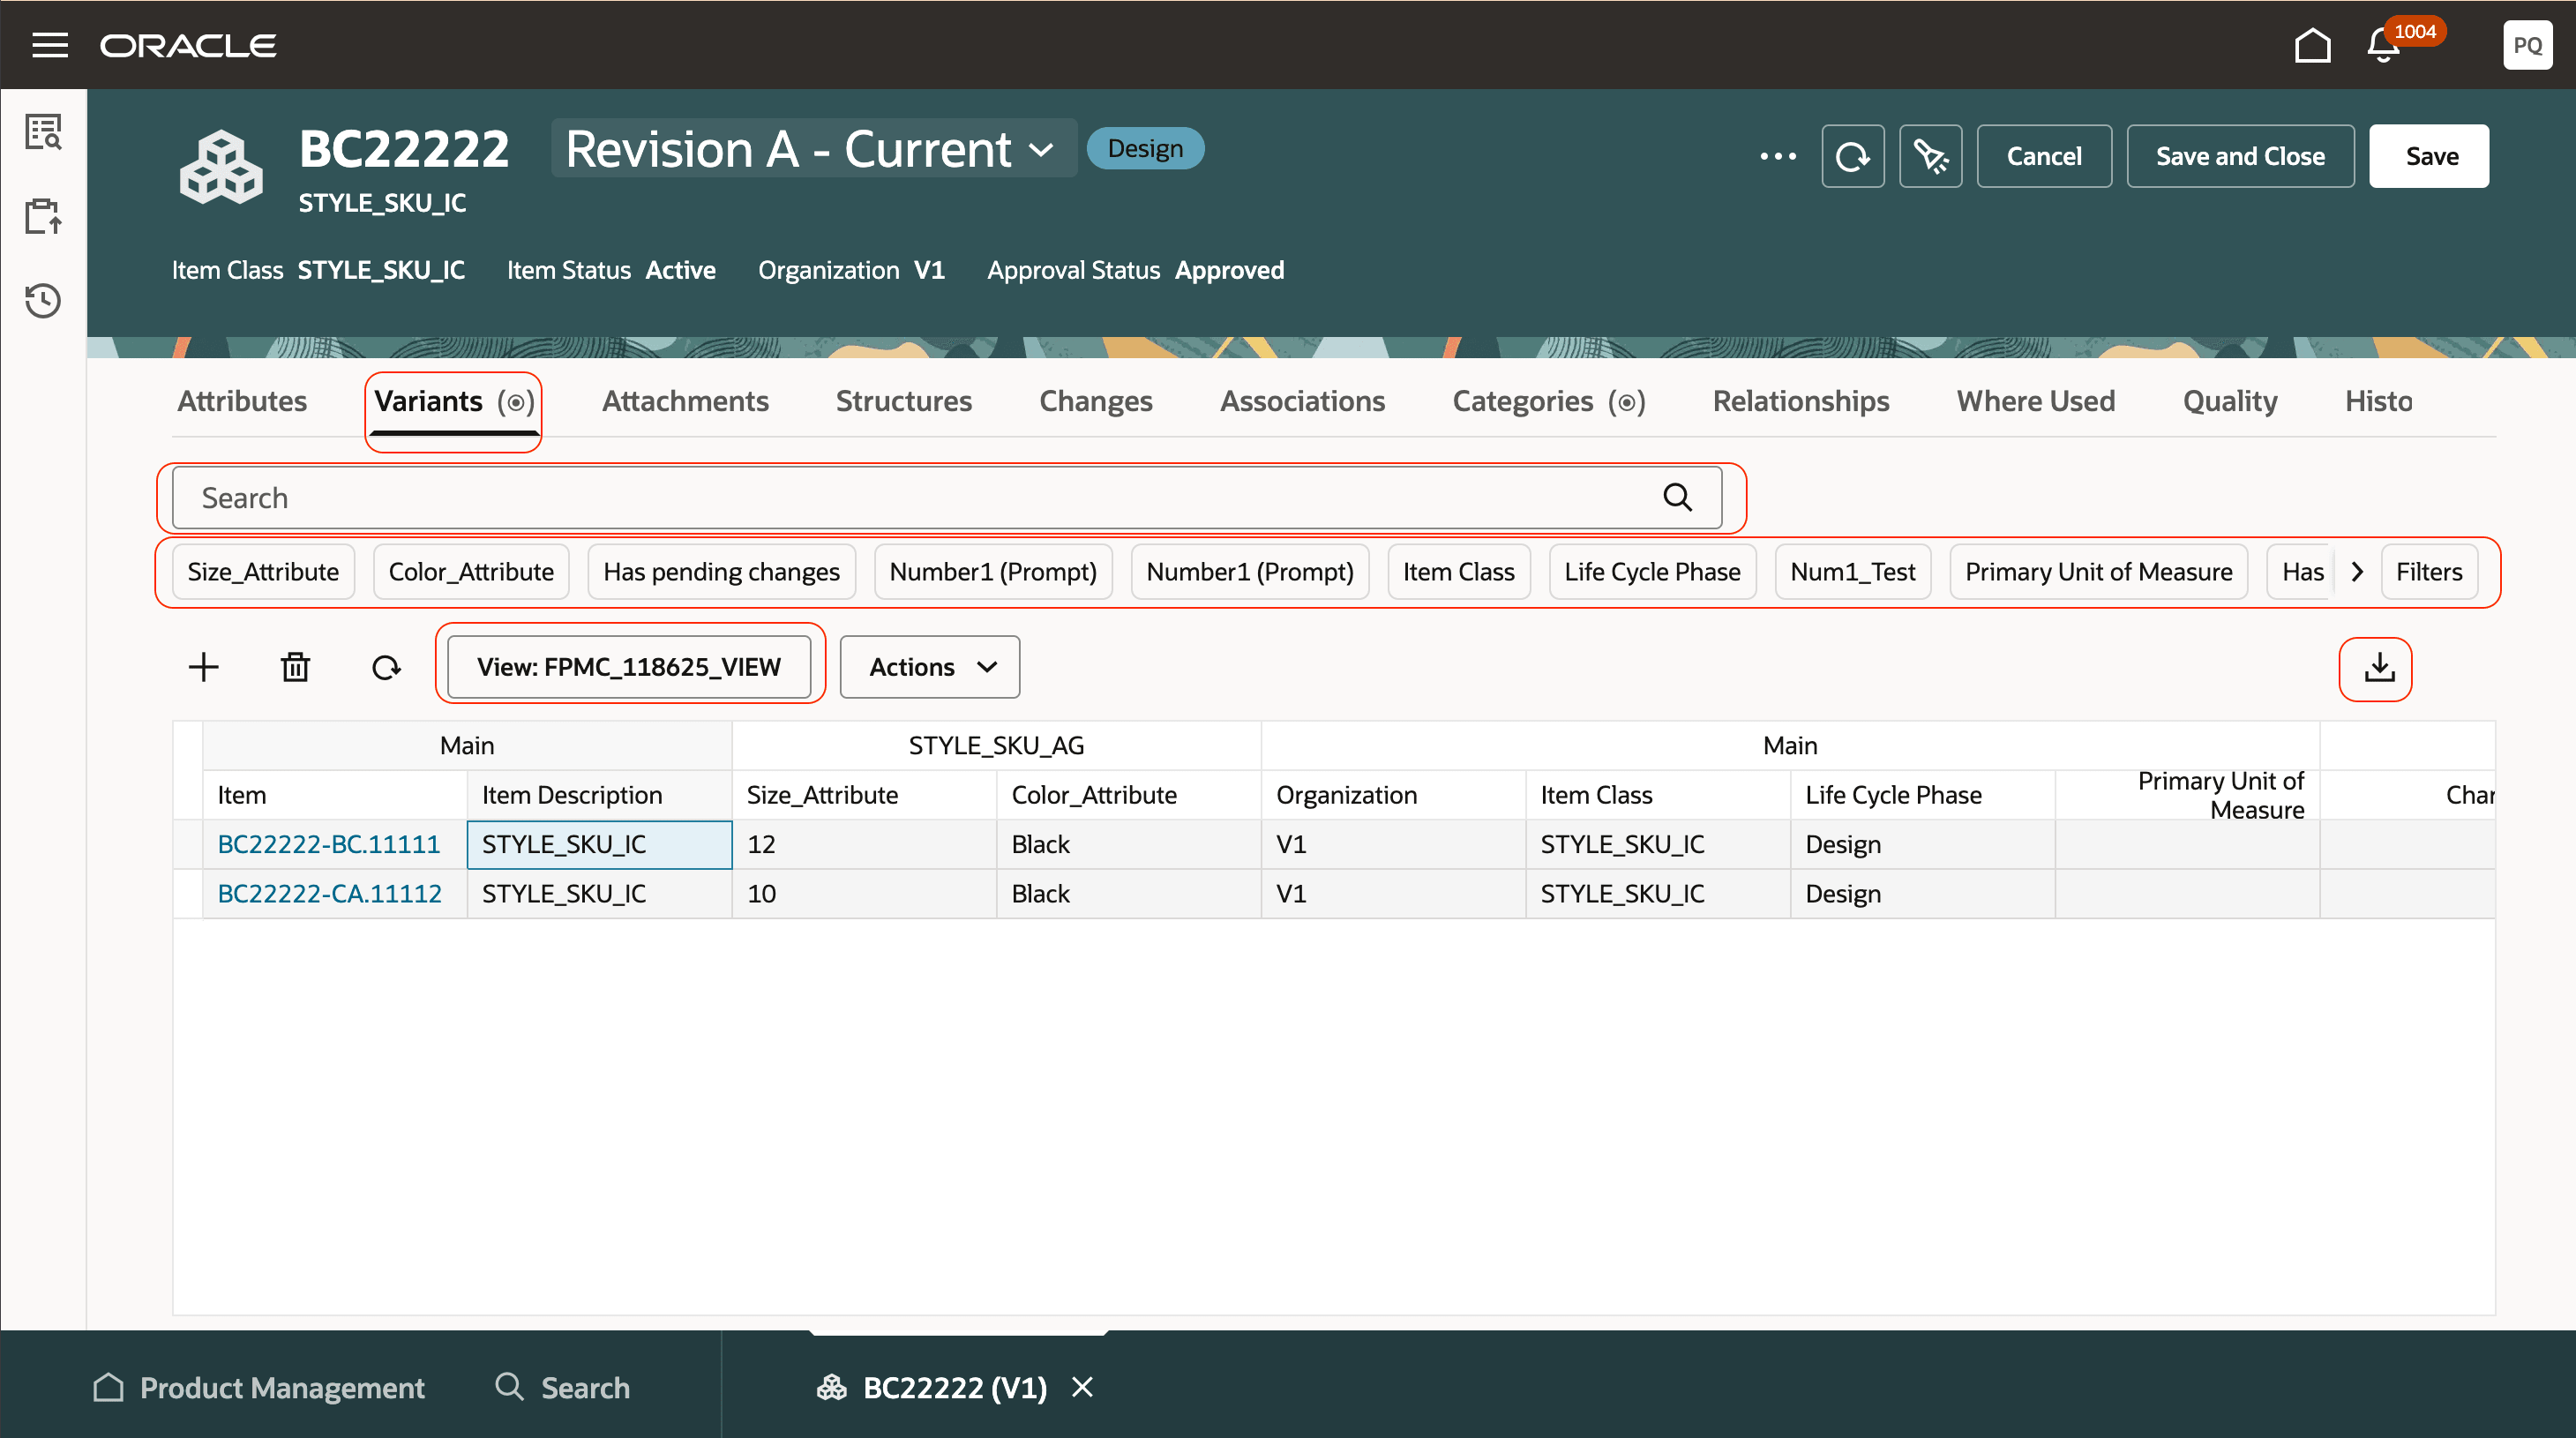
Variants Tab and Features
Add Variant
To add a new variant:
- On the Variants tab, click Add.
The Select variants values drawer displays all the required variants attributes. - Each variant attribute has a multi select list. Select the required combination and click Continue.
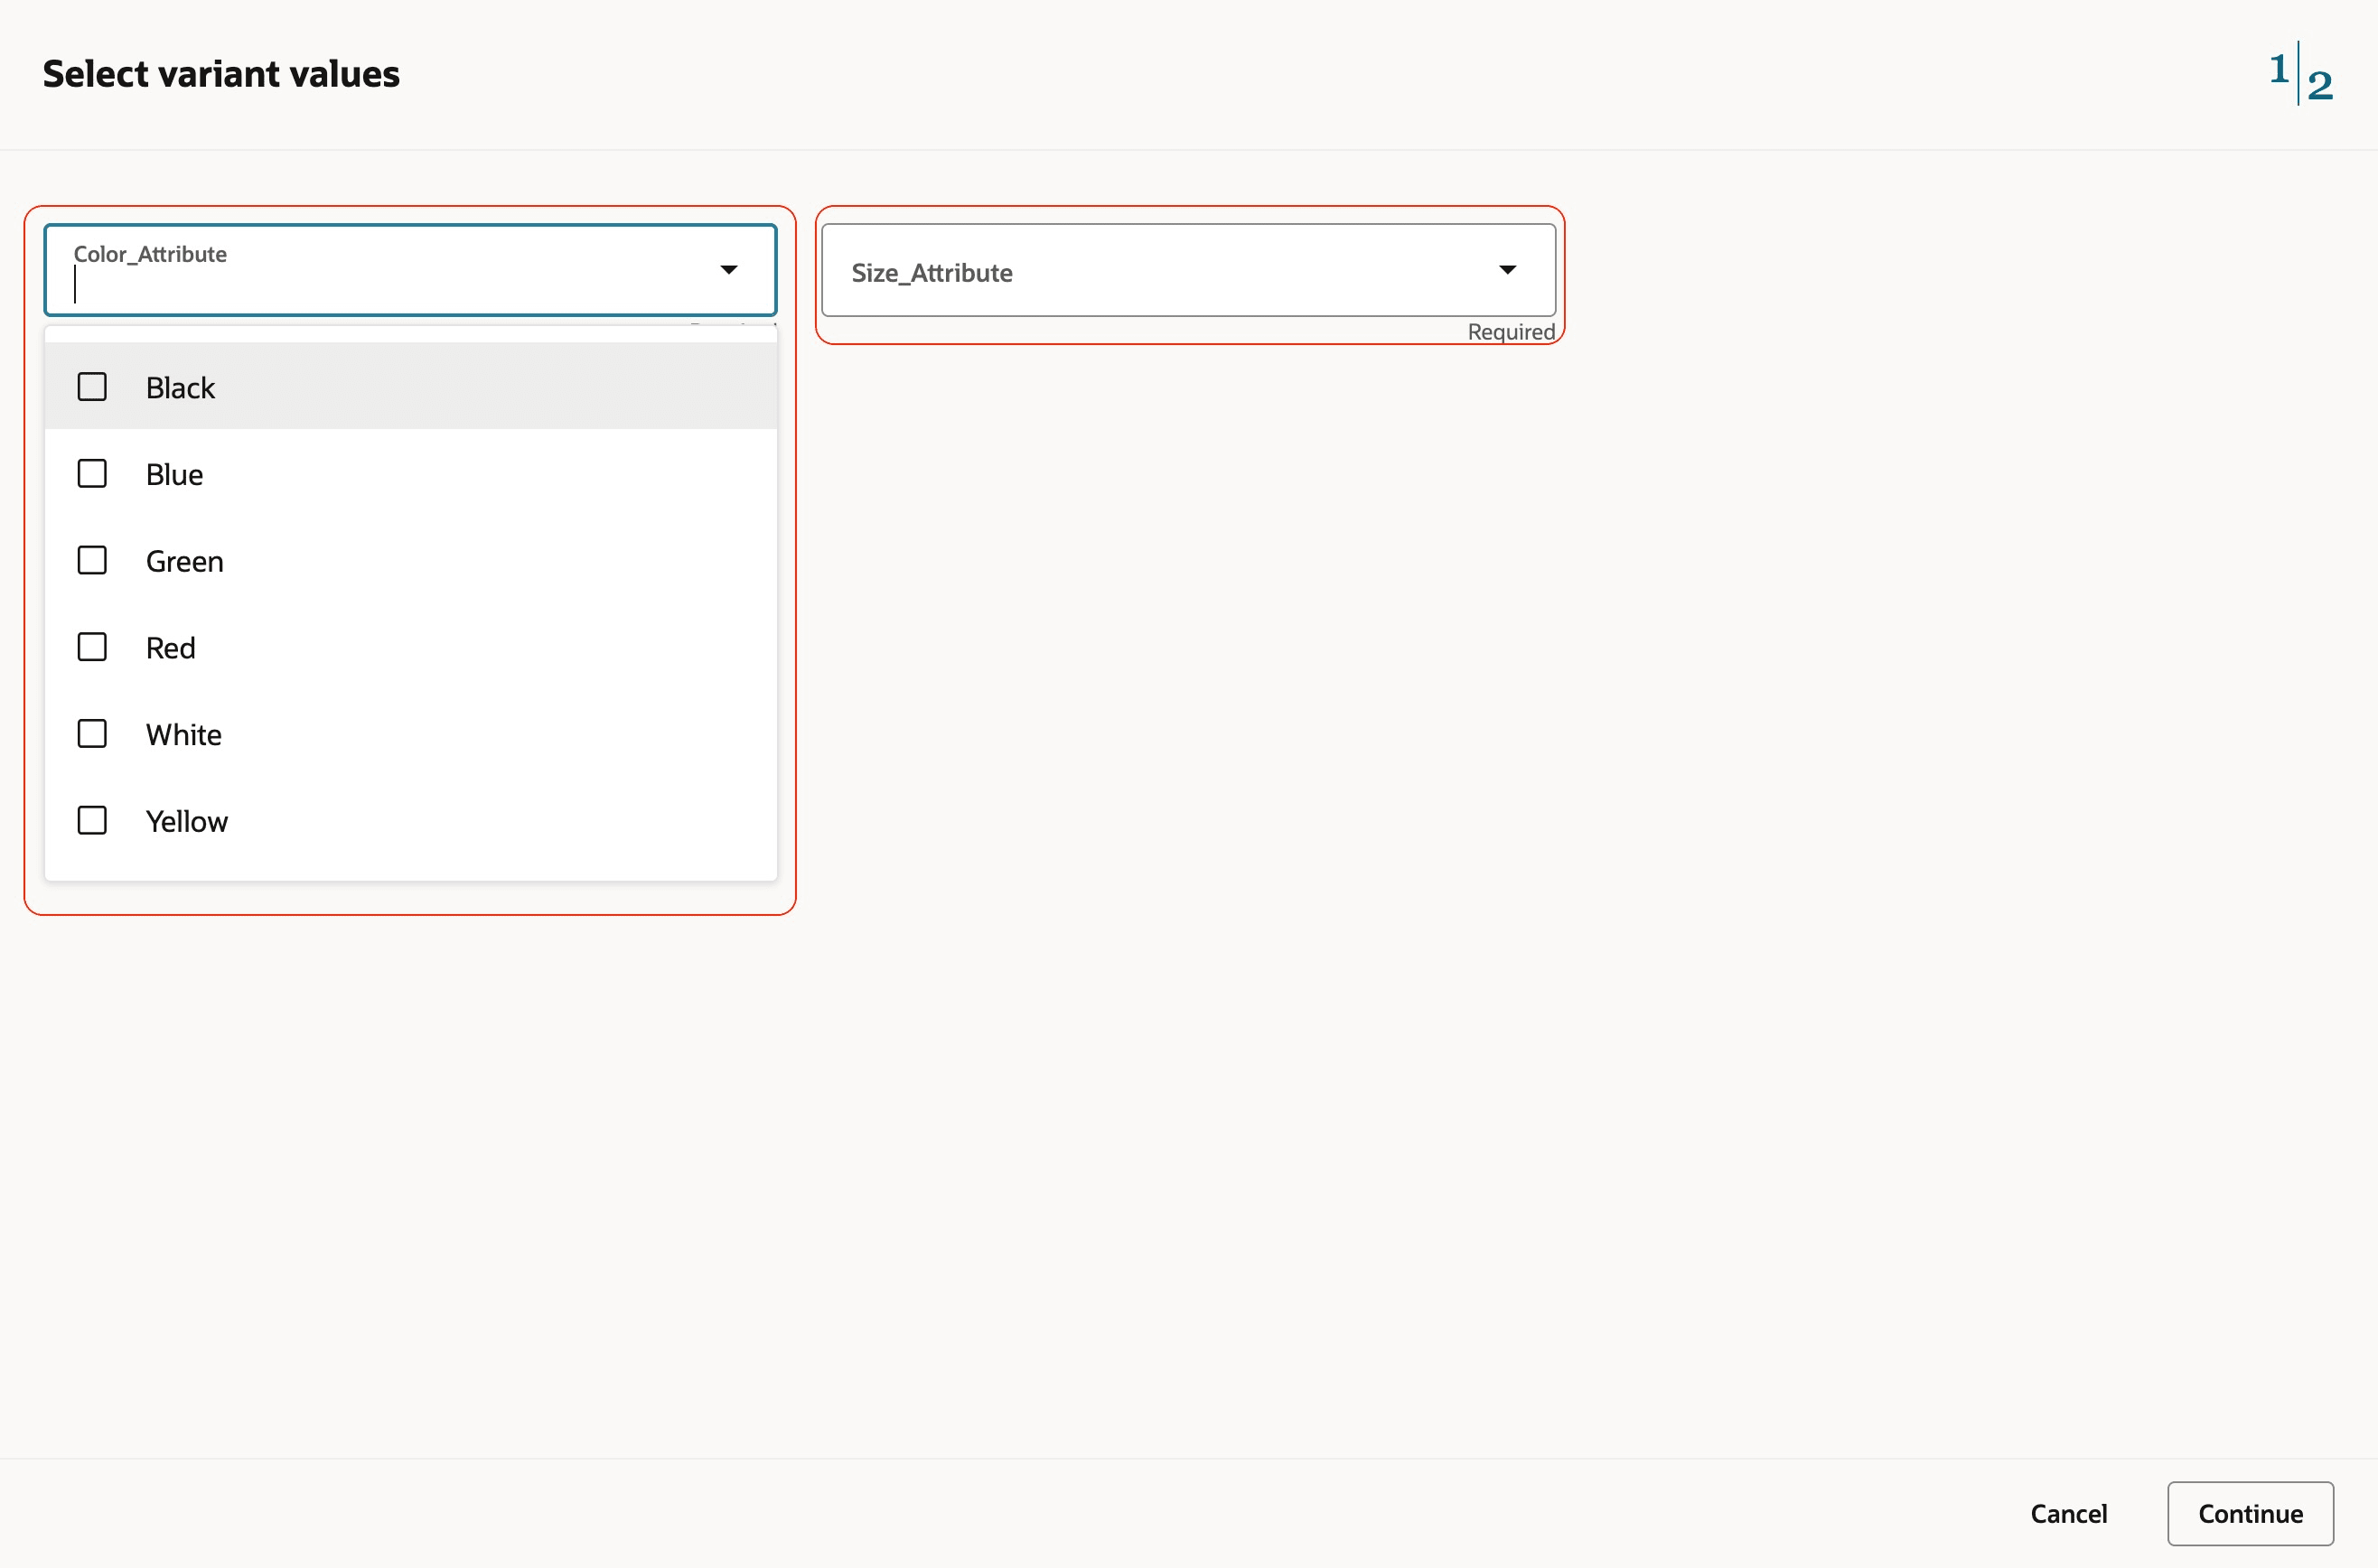
Select Variant Values
- Based on the variant values selected, two sections are available in the Review and edit variant combinations drawer:
- New variants: Lists the new variant attribute combinations. Provide all the required information.
- Existing variants: Displays variant attribute combination that already exist. Use the Views to analyze more details for these combinations.
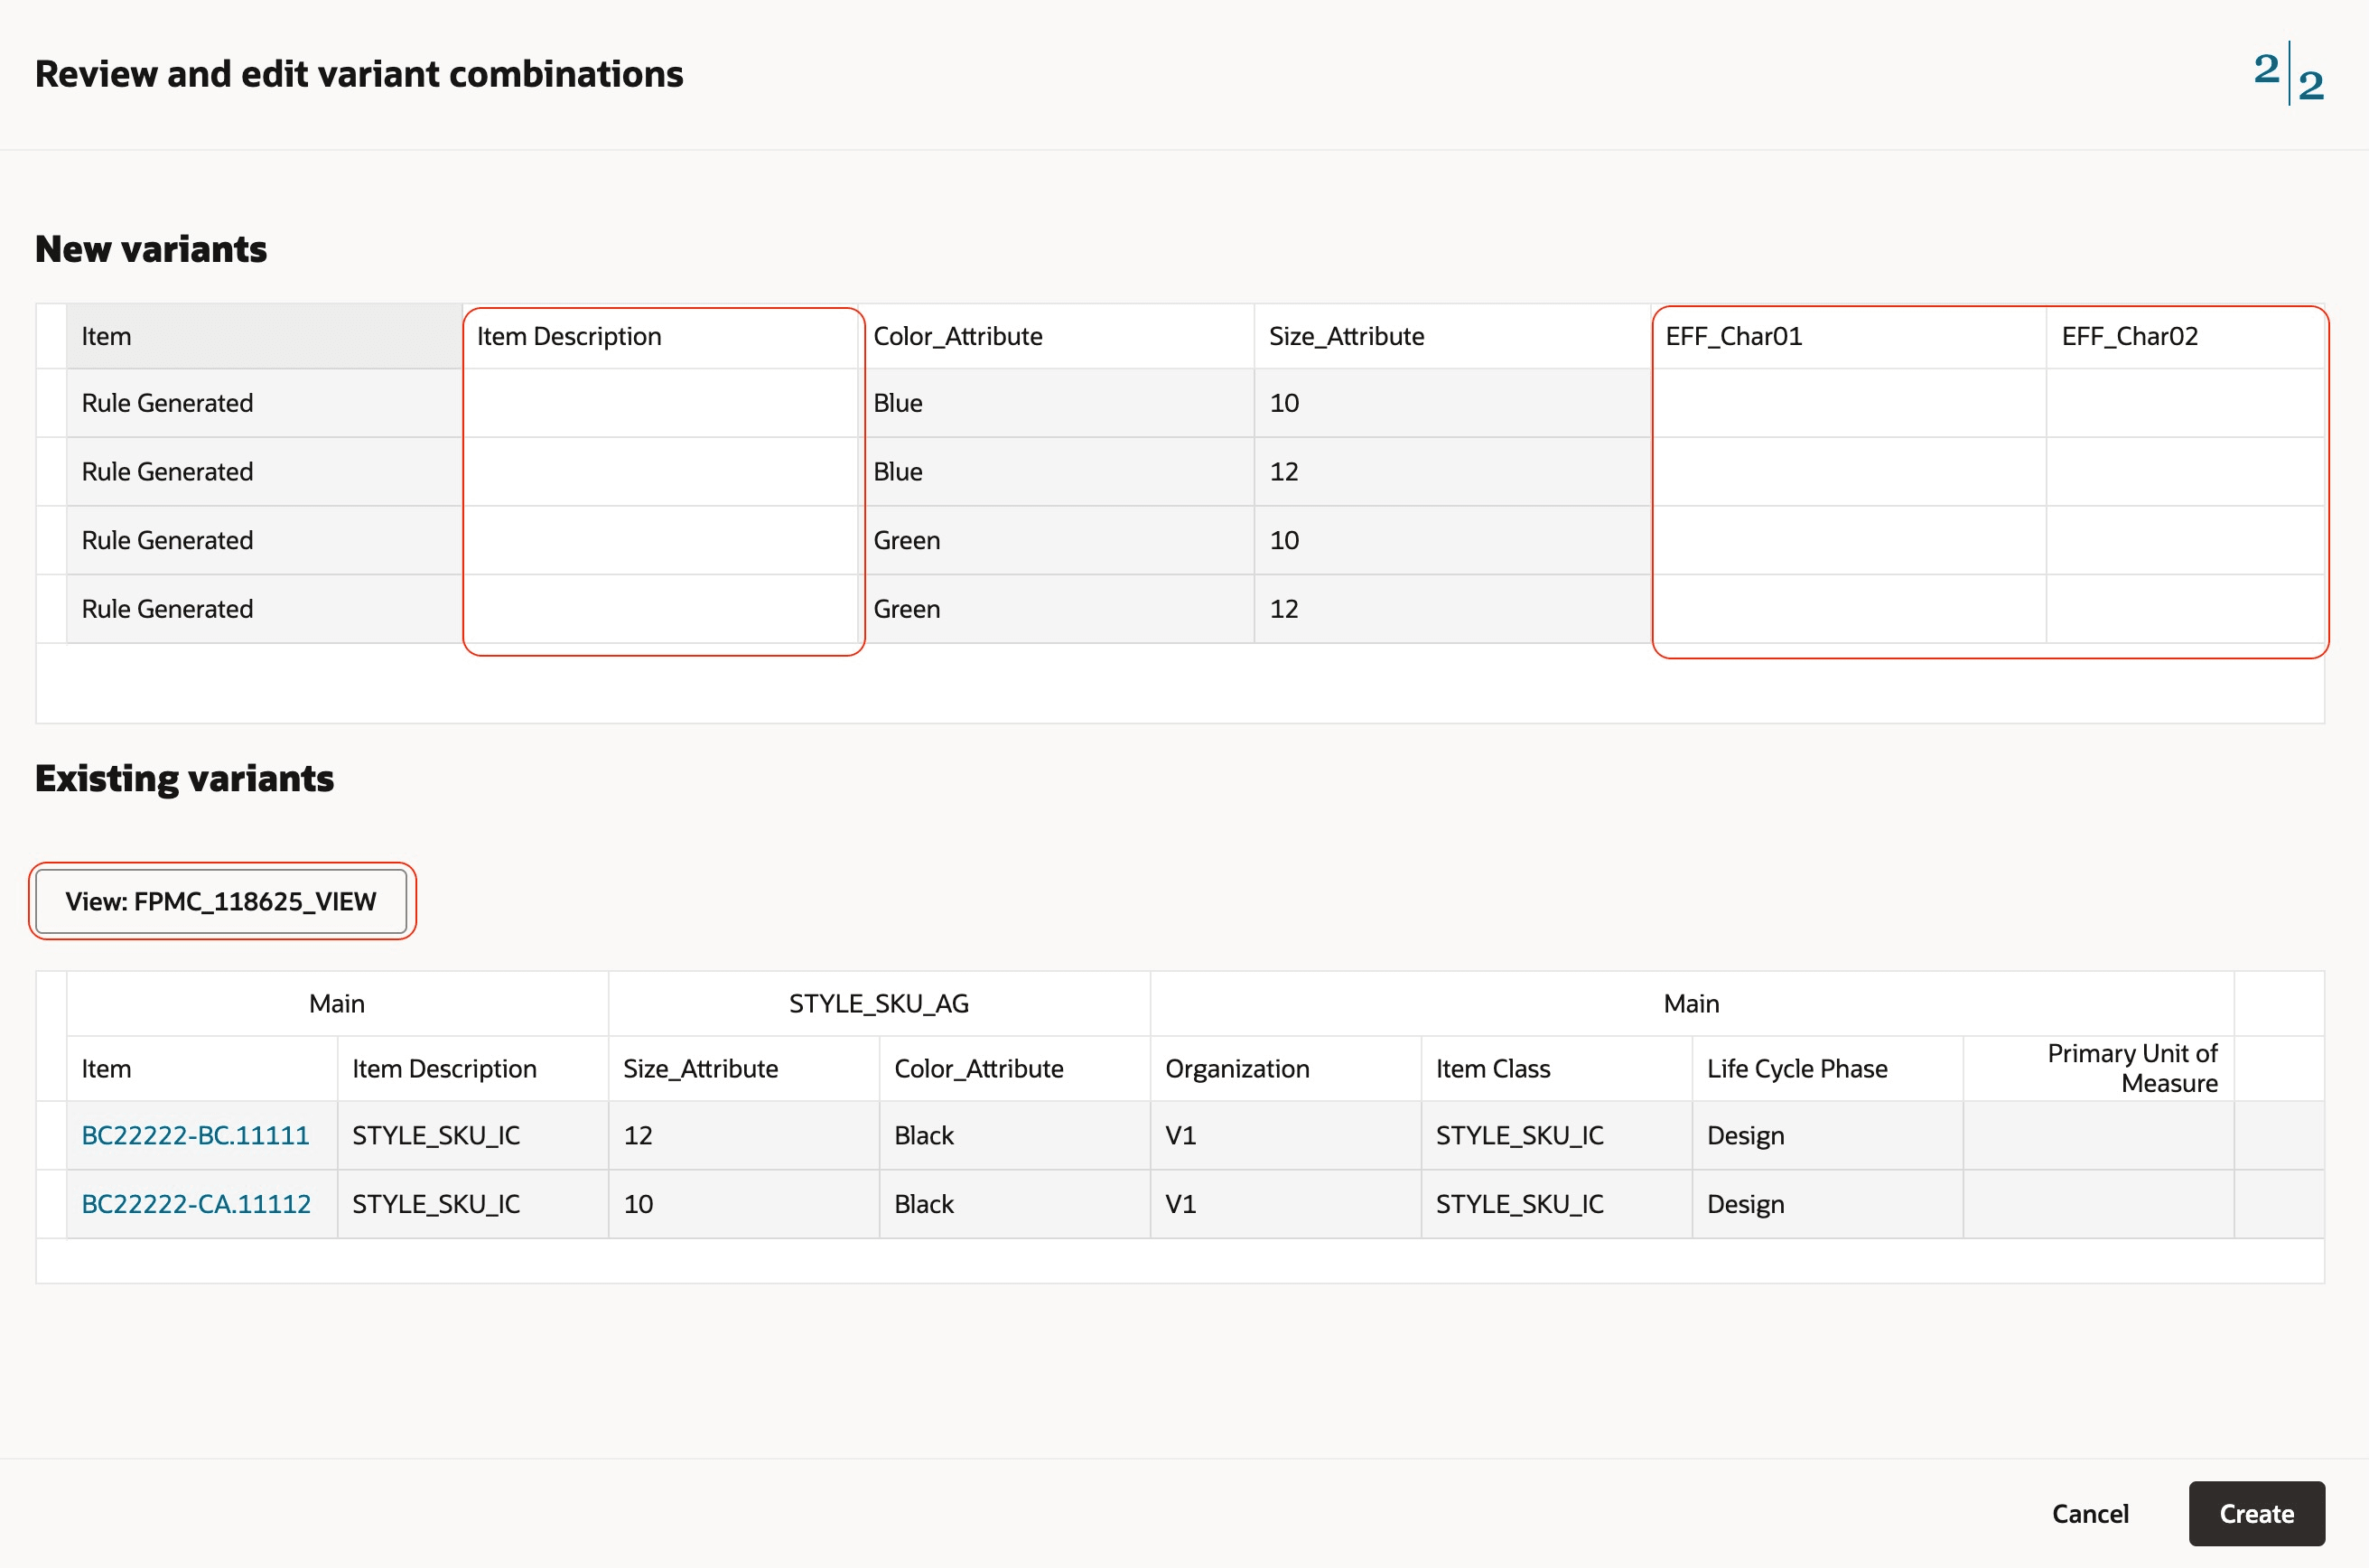
Review and Edit Variant Combinations
- Use the guided task sequence on the top right and click Select variant values if any changes are required for the selected variant values.
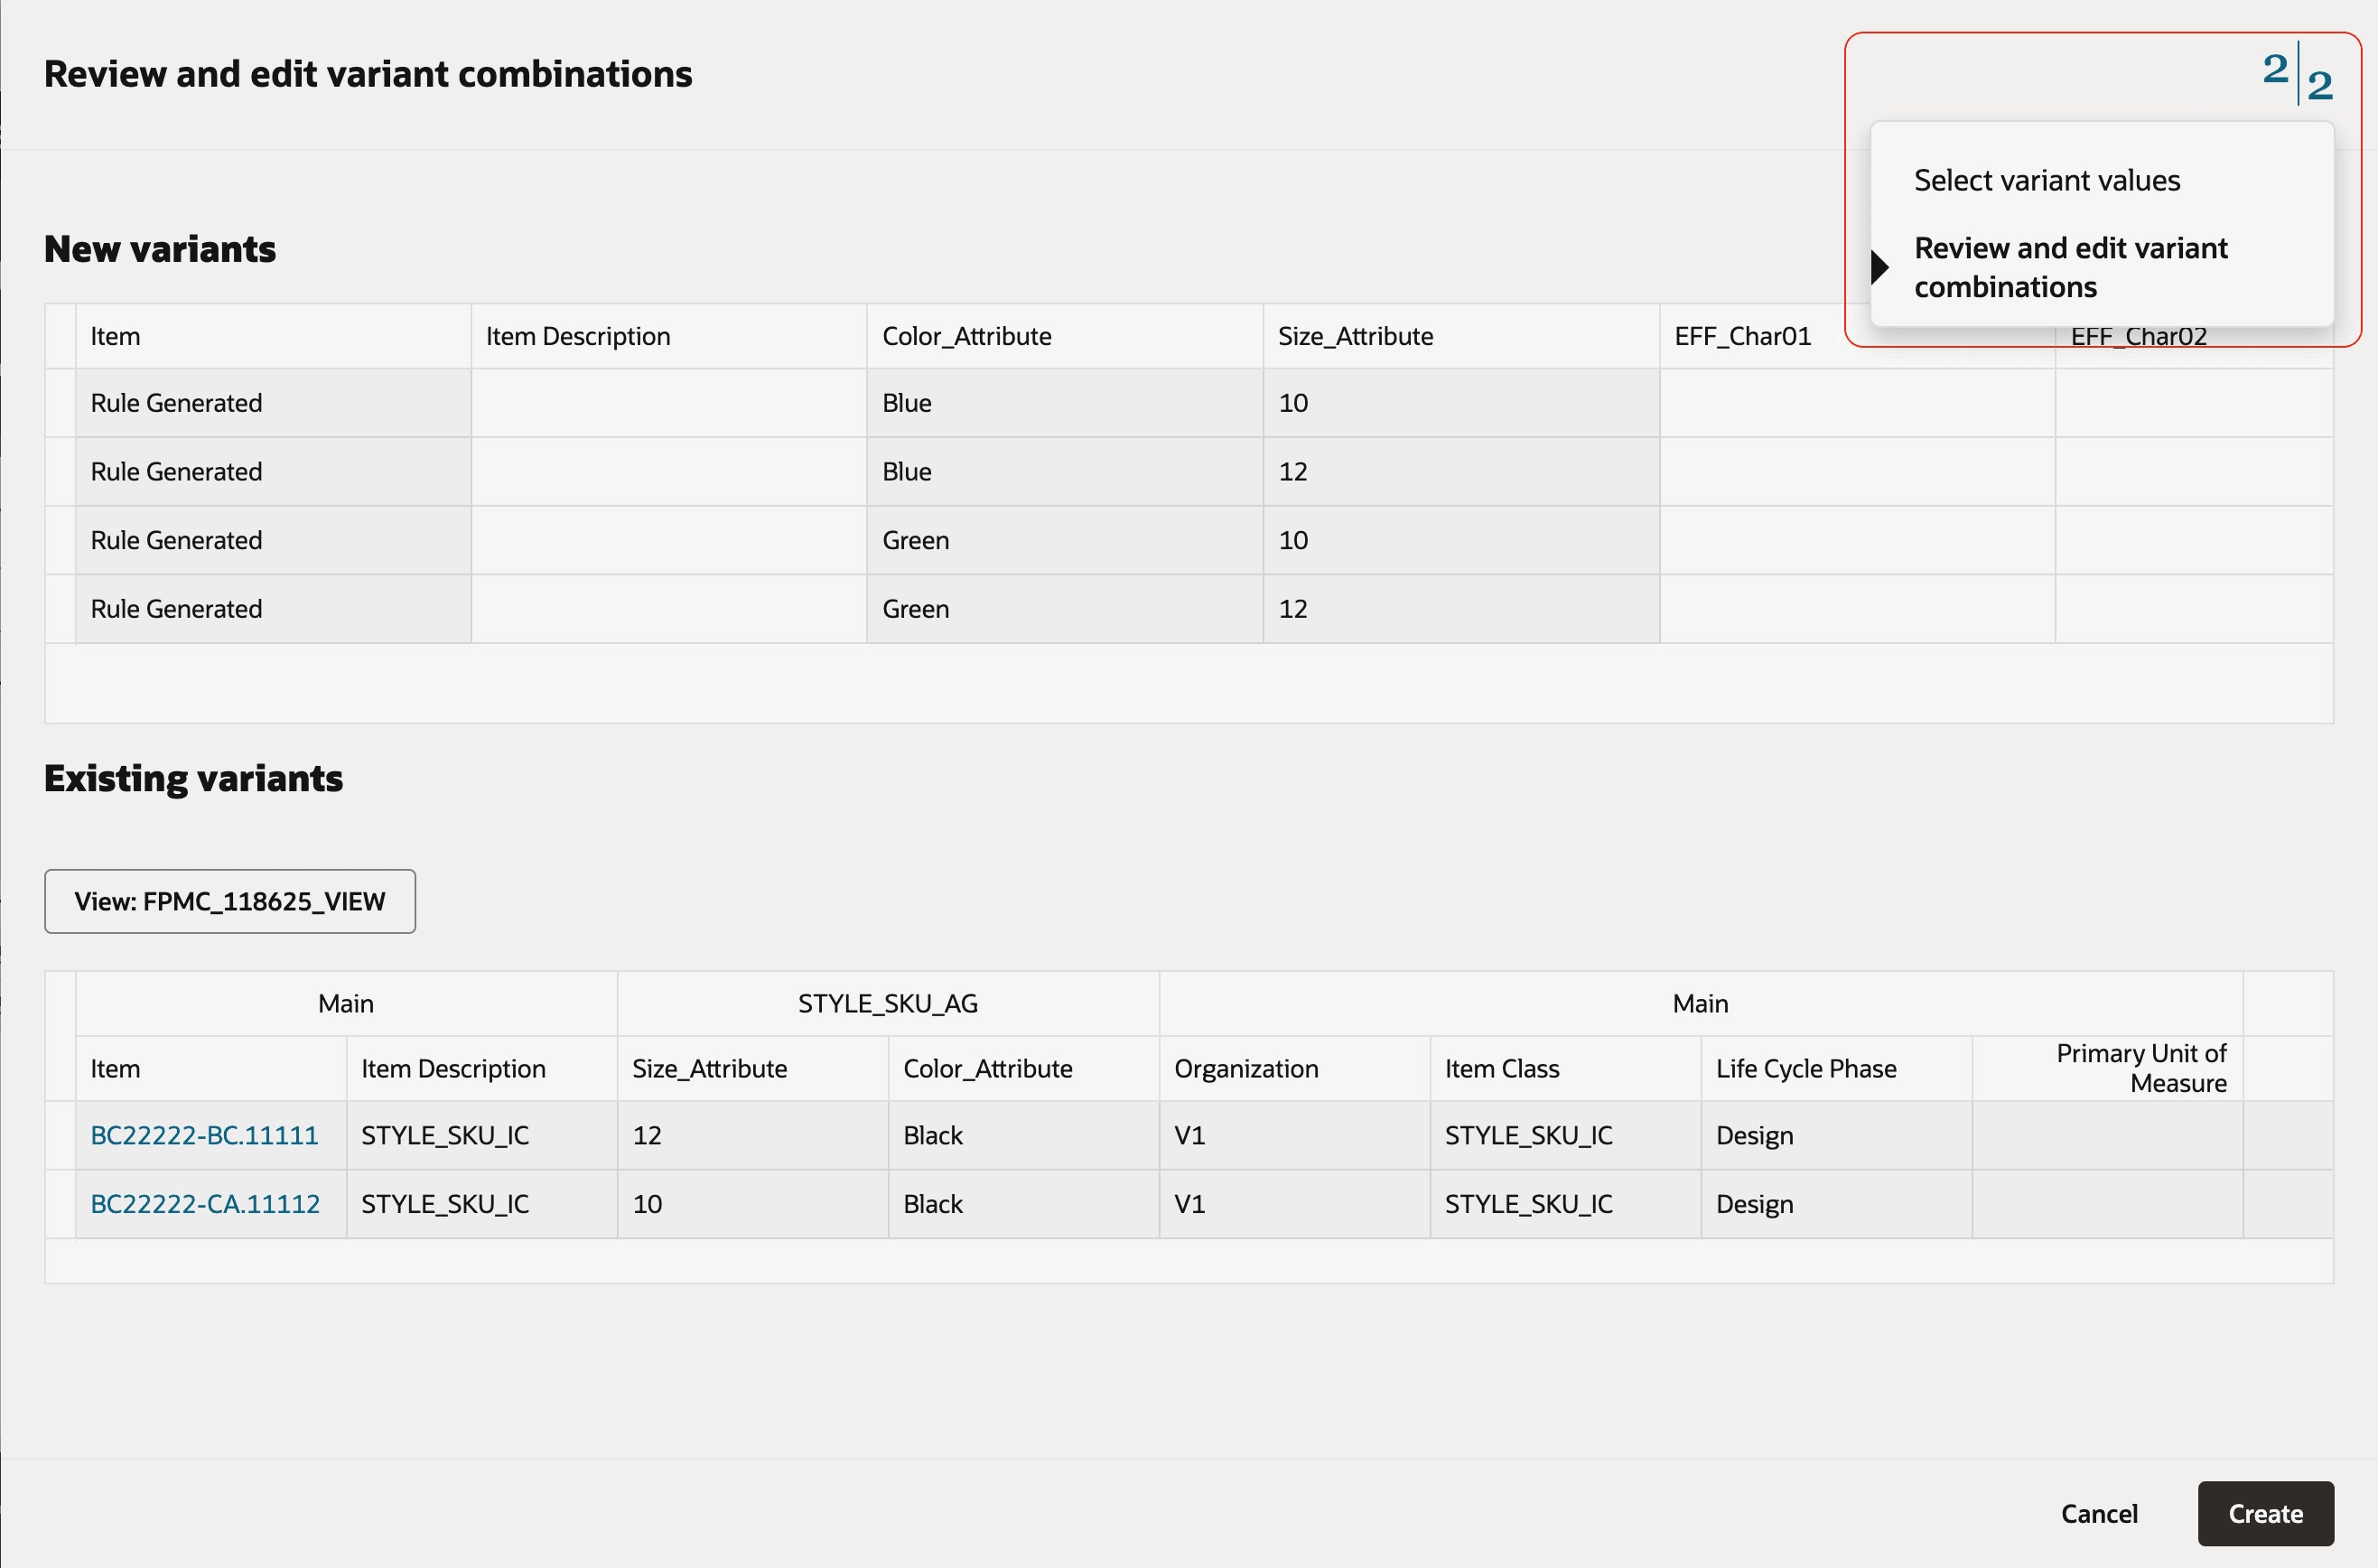
Guided Task Sequence
- After you provide the required information, click Create. The variant is created and a confirmation message is displayed. Click the Refresh icon momentarily to view the new variants.

Variant Creation Confirmation
Delete a Variant
You can delete a variant using deletion groups only.
To delete an existing variant:
- On the Variants tab, select the variant and click Delete. The Add to deletion group drawer is displayed.
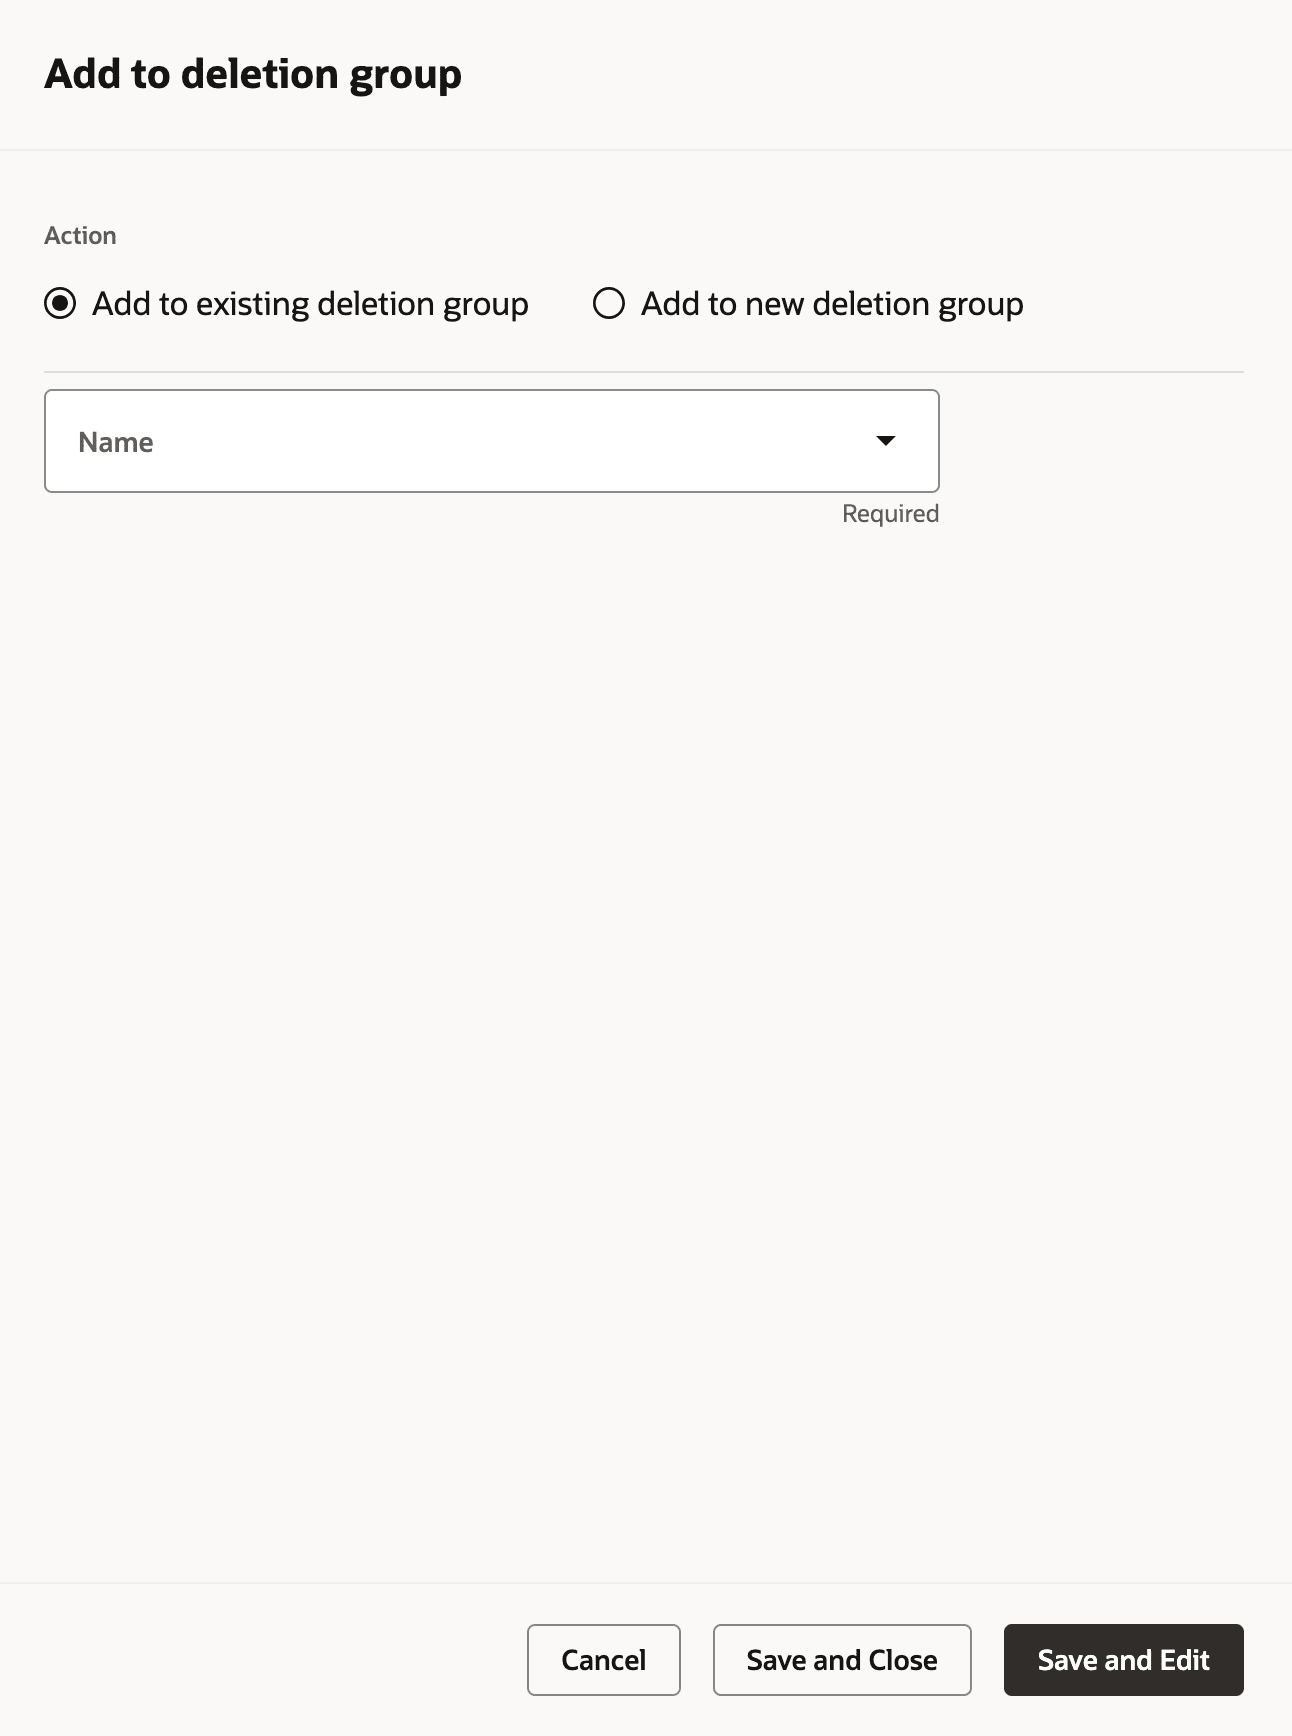
Add to Deletion Group
- Do one of the following options:
- Select Add to existing deletion group and then select a deletion group from the drop-down list.
- Select Add to new deletion group and then specify the name and the description.
- Click Save and Edit.
The variant is added to the specified deletion group.
Convert Item to Variant
To convert a standard item to a variant for a style item:
- On the Variants tab, from the Actions menu, click Convert Item to Variant as shown in the following screenshot. The Select item drawer is displayed.
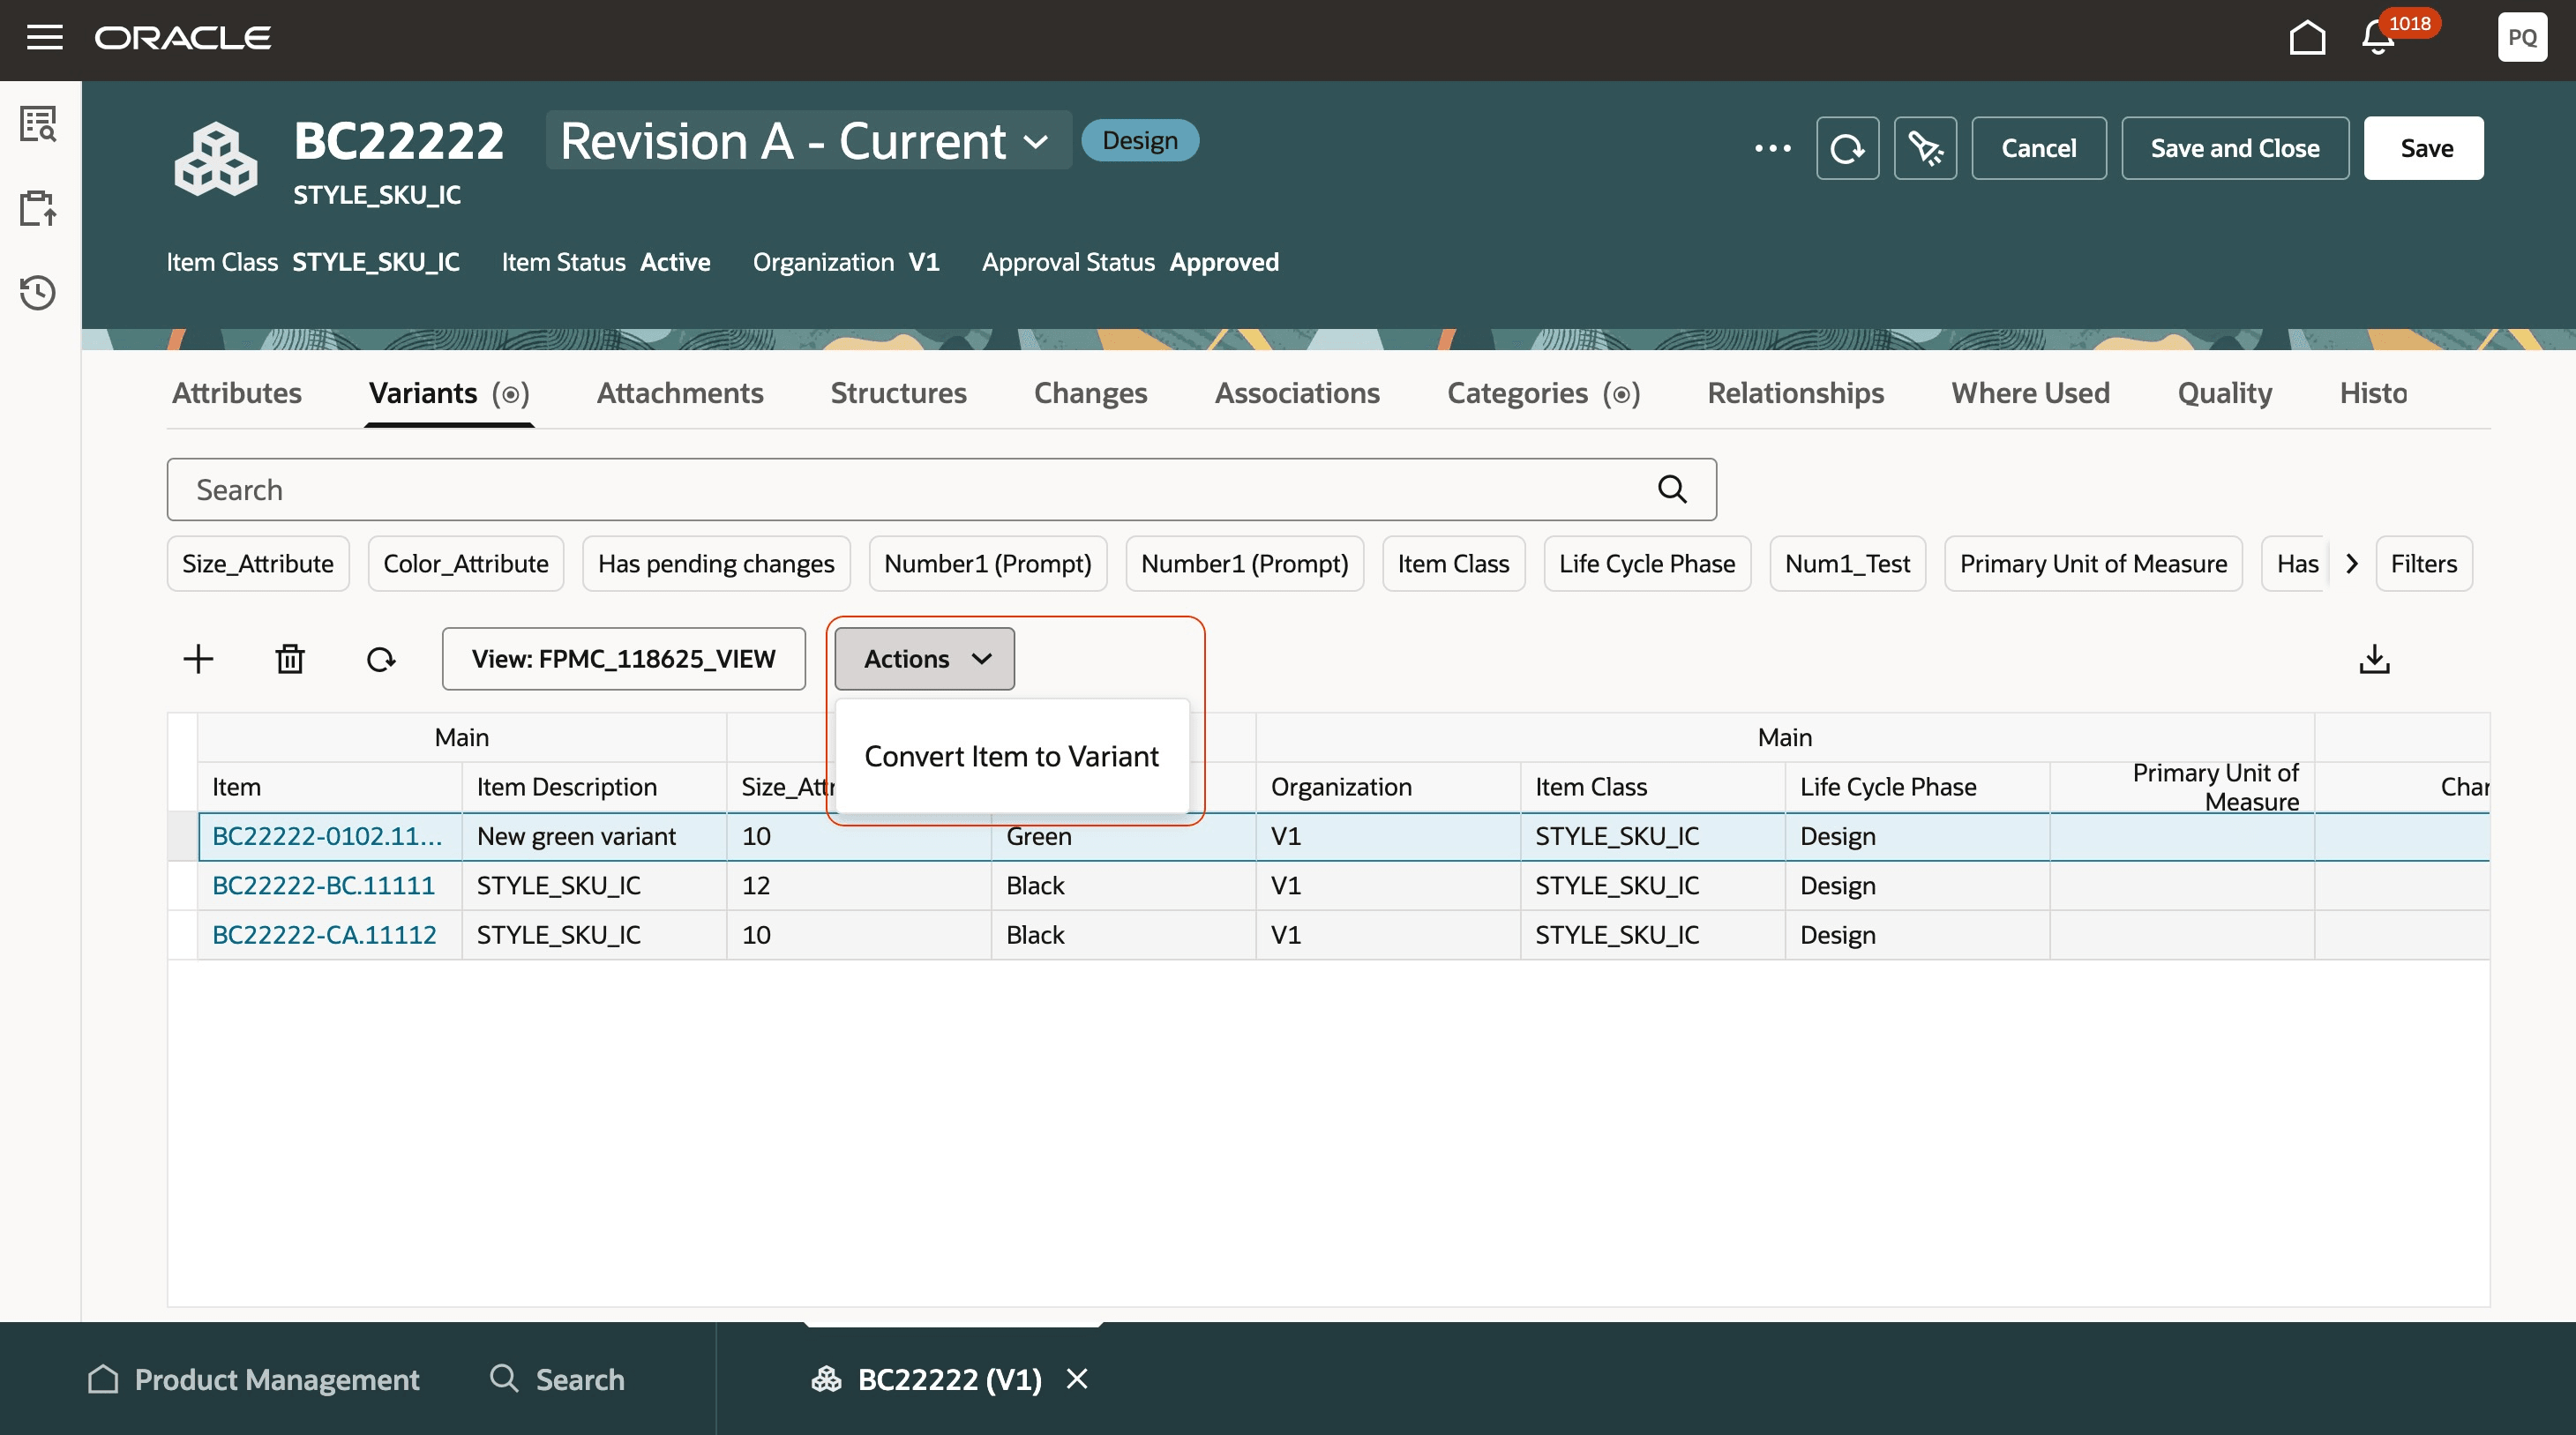
Convert Item to Variant
- Select a standard item from the same item class and click Continue.
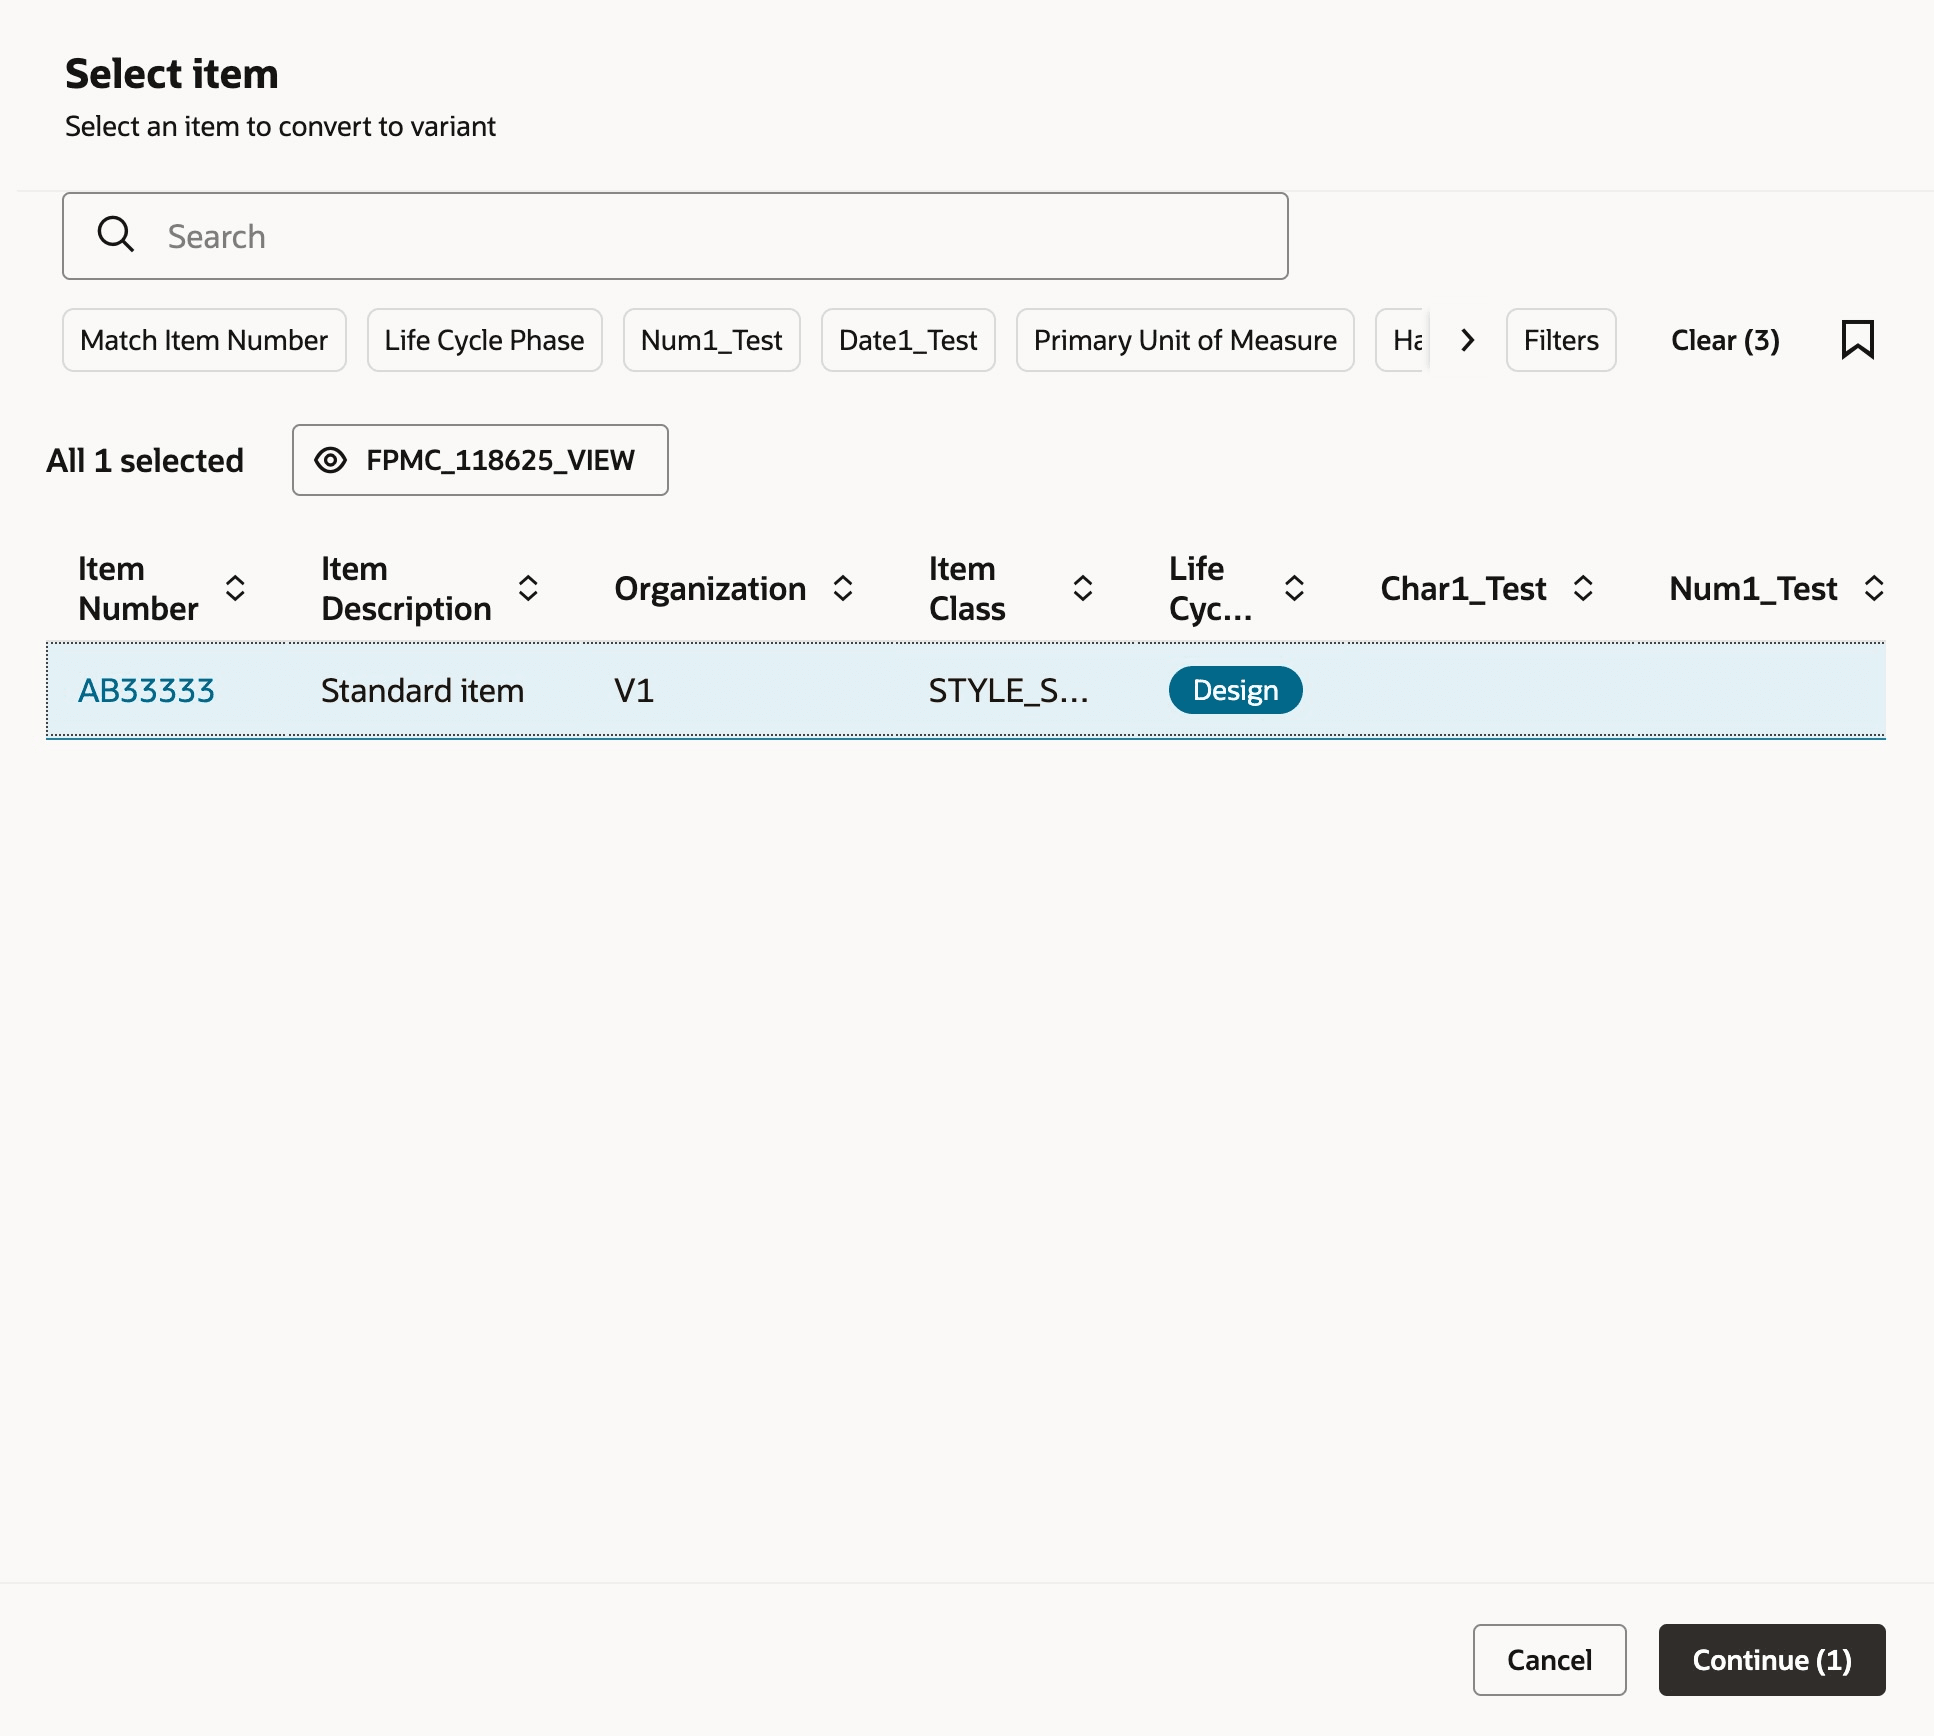
Select Standard Item
- Assign attribute values to the selected item (if missing) and click Continue.

Assign Attribute Values
- If the variant combination already exists, the following pop-up message appears. Click Change Values to correct the variants values in the Assign attribute values drawer or click Cancel to terminate the process.
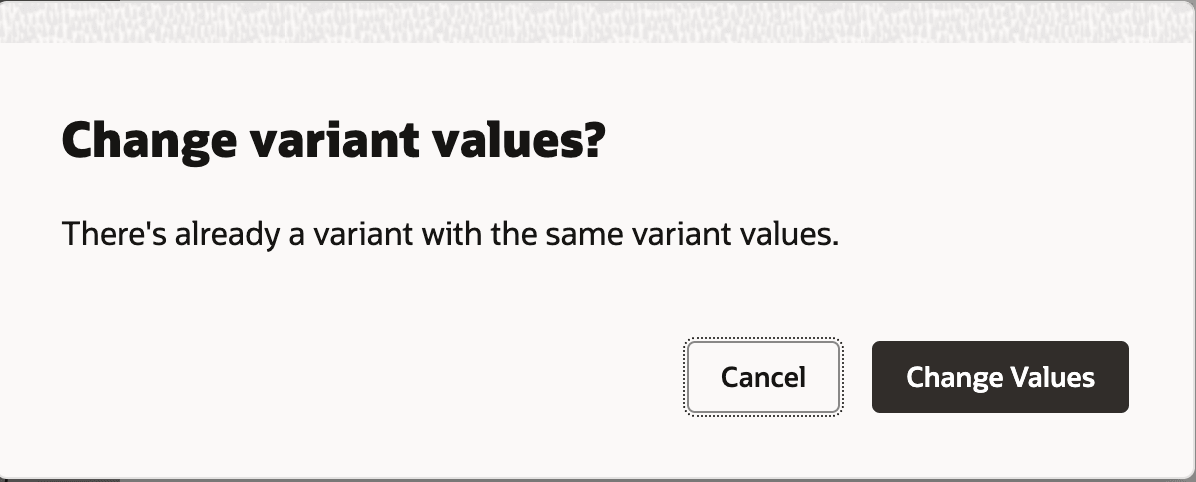
Change Variant Values Message
This feature streamlines the creation of product variants, minimizing errors and redundant data entry, while saving time compared to creating items from scratch, leveraging the built-in deduplication in the more modern Redwood user interface.
Here's the demo of these capabilities:
Steps to enable and configure
Before you create or view product variants, you must rebuild the item index:
- On Product Management page, click the View all actions link.
- In the Actions drawer, click Indexes.
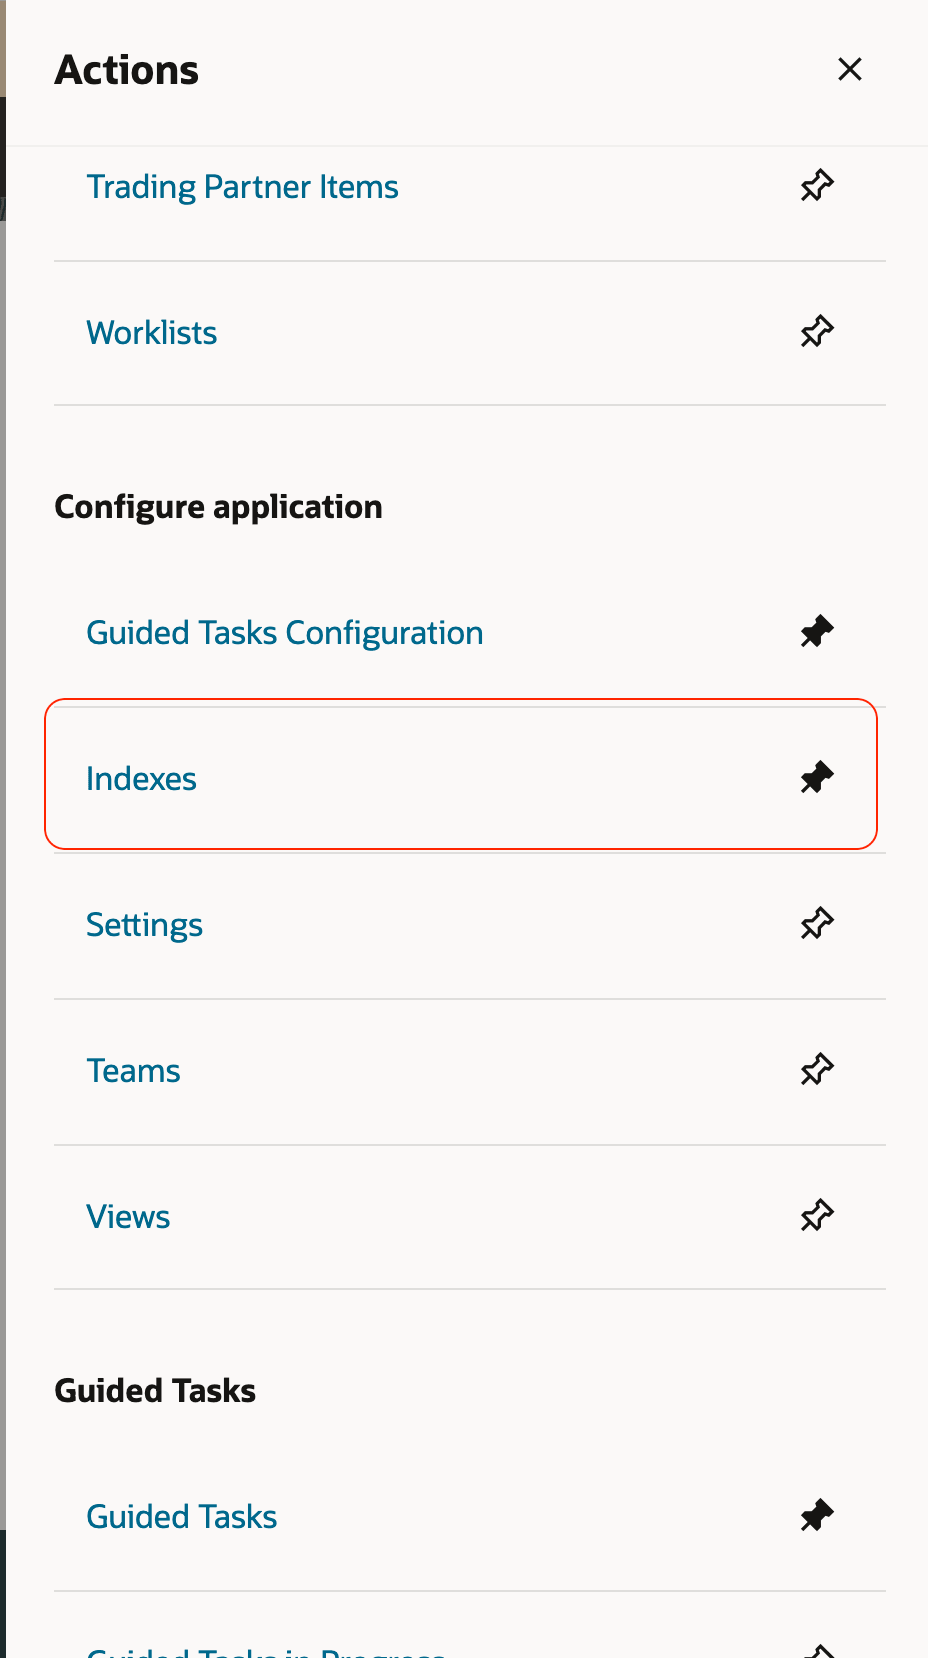
Actions Drawer - Indexes
- Click the Item index.
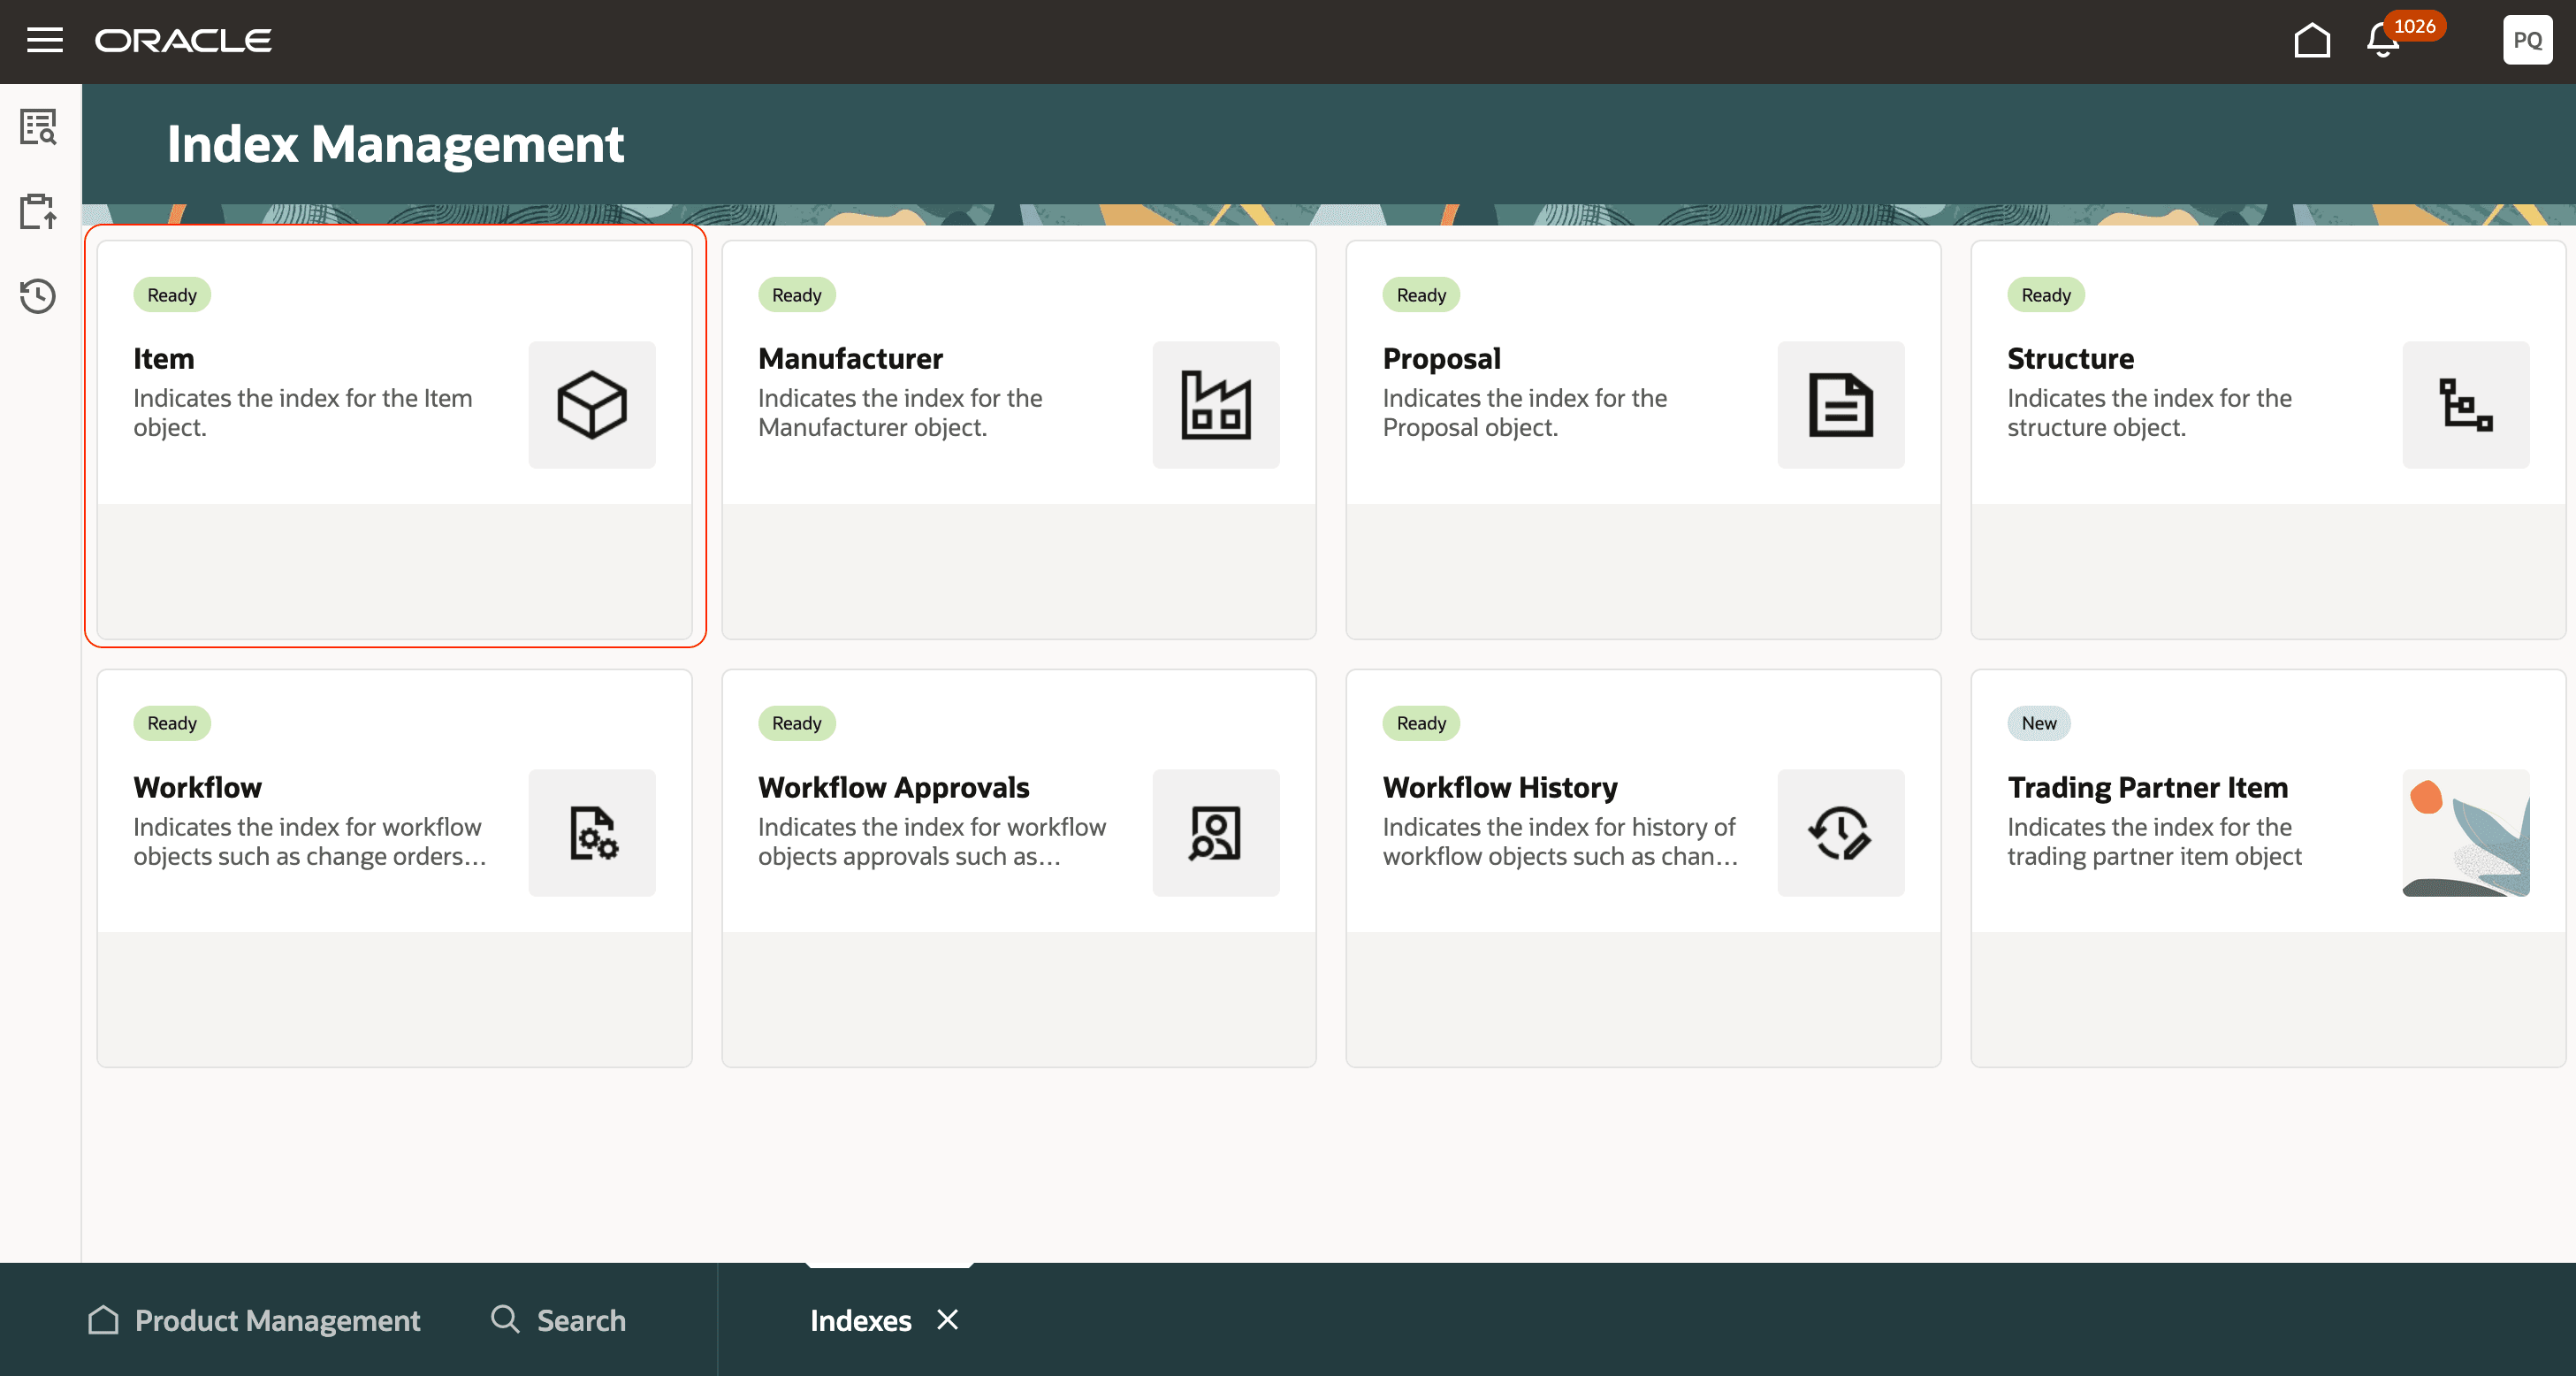
Item Index
- From the More Actions menu on the top right, click Rebuild and wait for the process to complete.
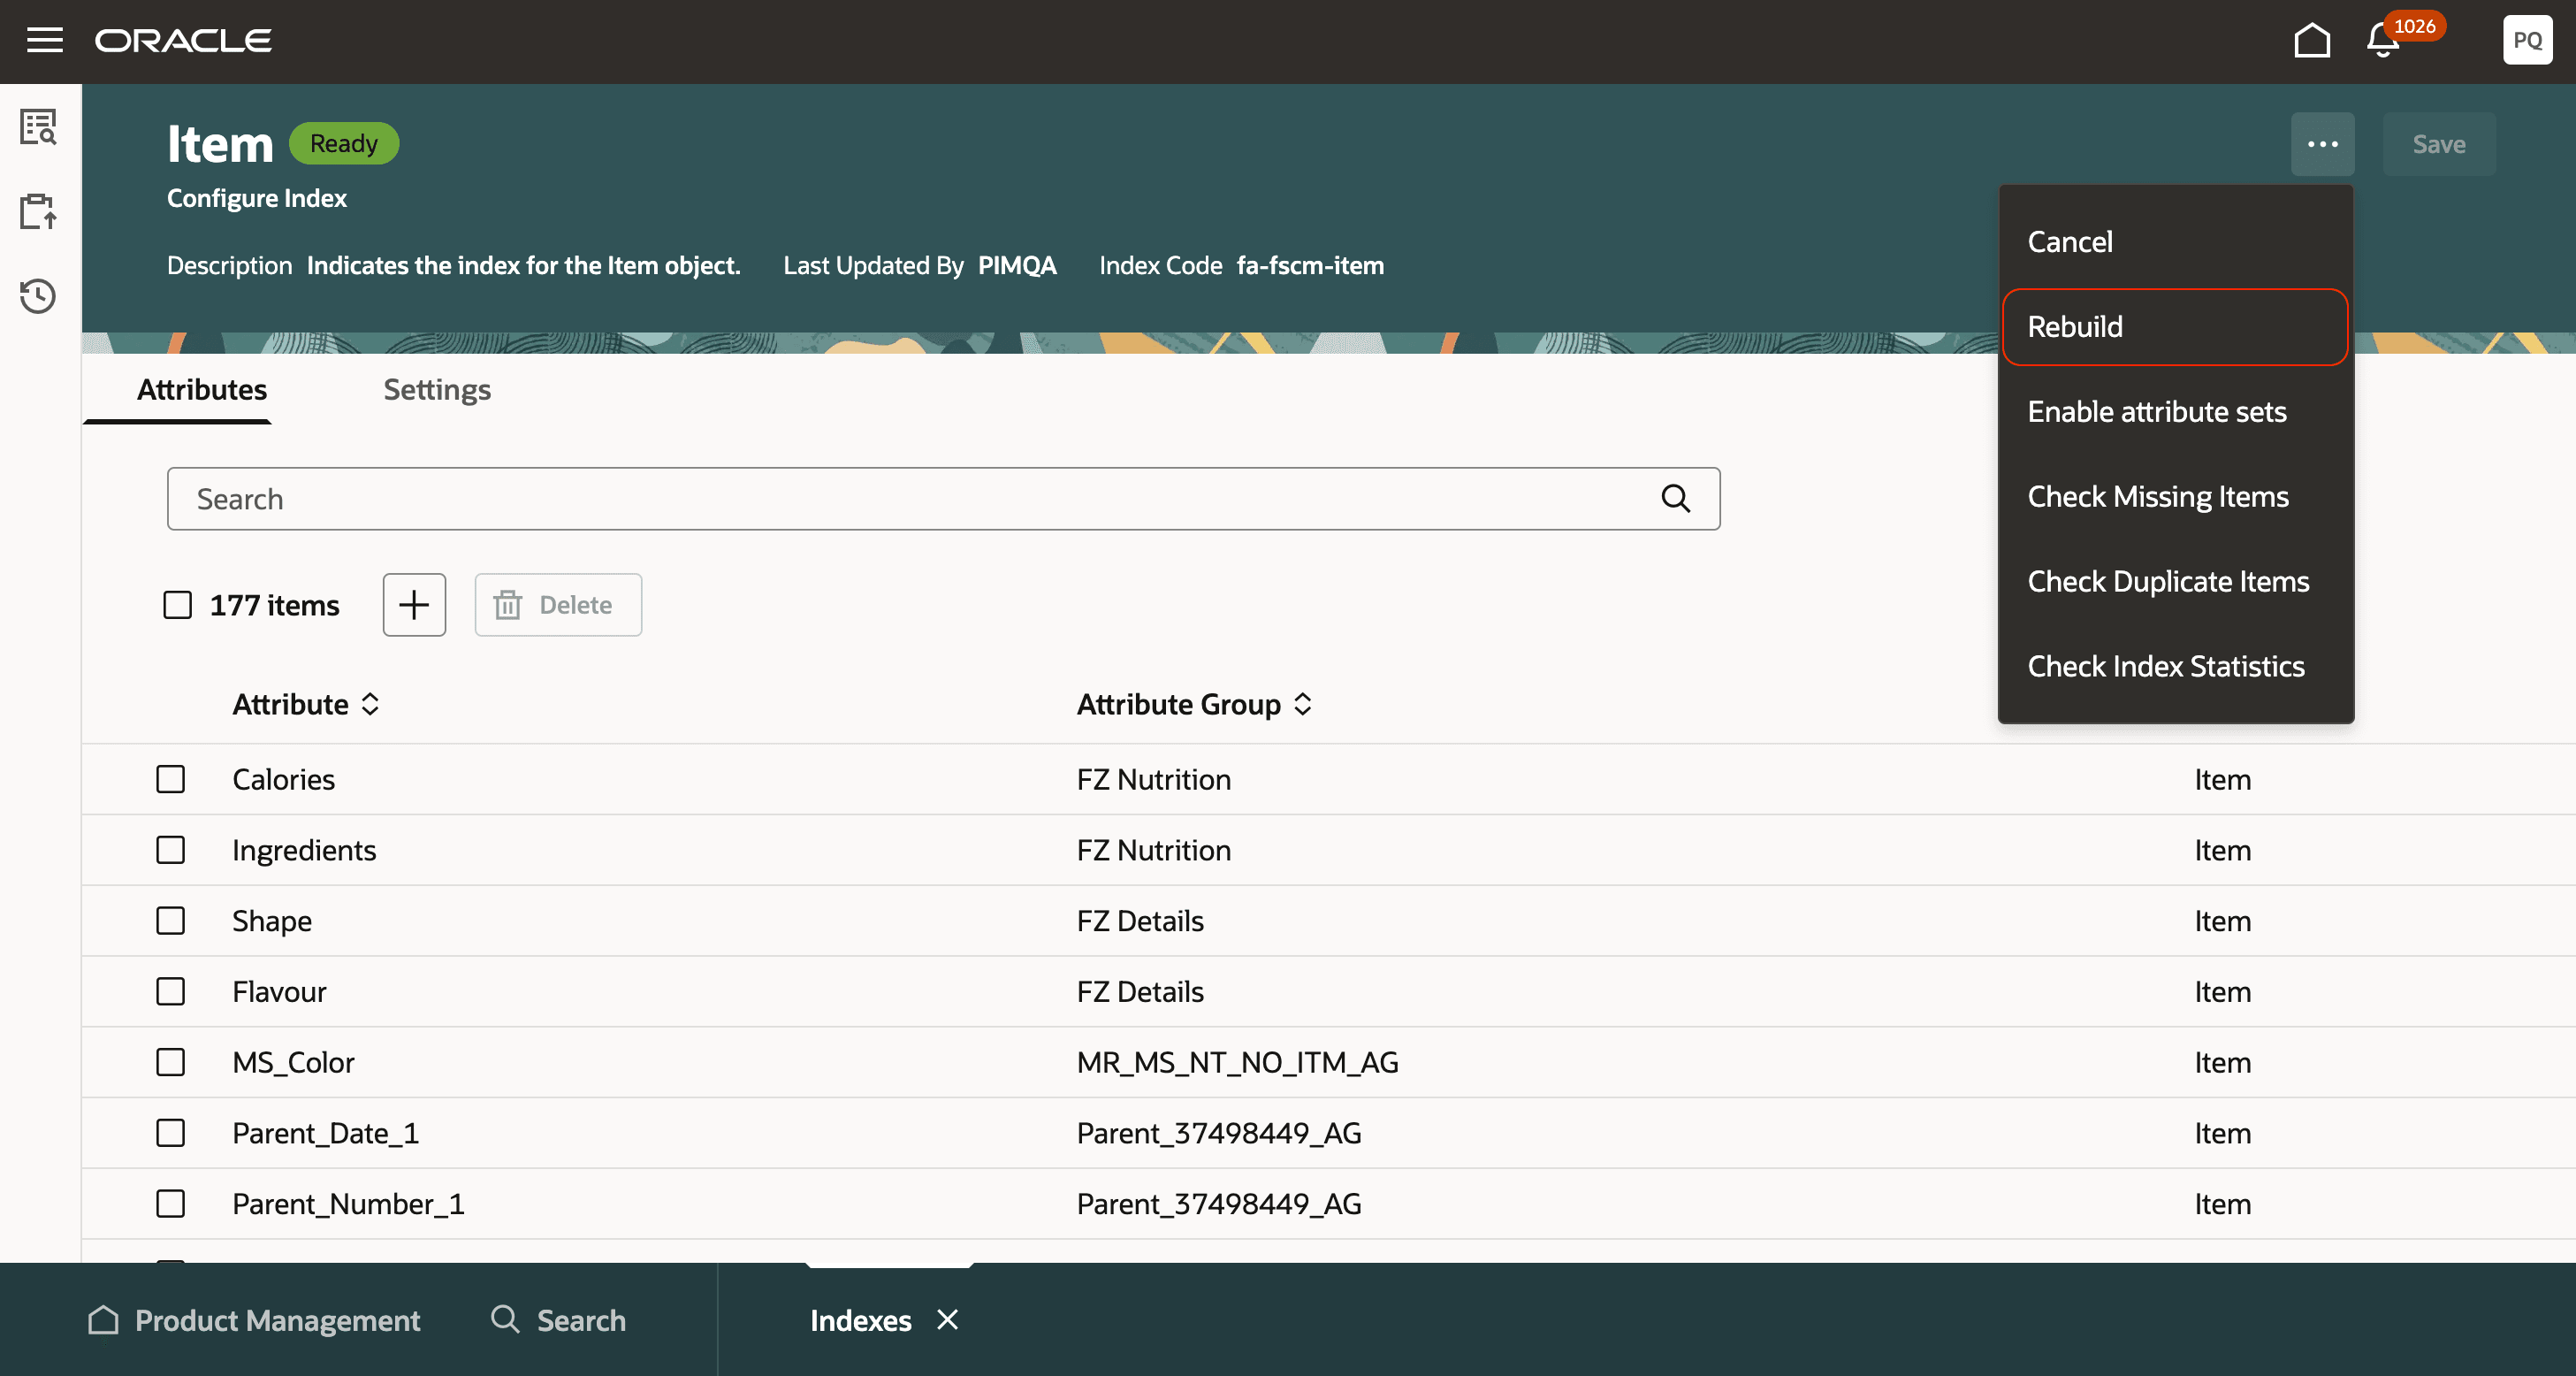
Rebuild Index
Key resources
- Refer to the Oracle Fusion Cloud SCM: Using Product Master Data Management guide, available on the Oracle Help Center.
- Watch the Create and Manage Products and Product Variants video.
Access requirements
Users who are assigned a configured job role that contains these duty roles and privileges can access this feature:
- Manage Item Redwood (ORA_EGP_REDWOOD_MANAGE_ITEM_DUTY )
- Manage Item Redwood Items (EGP_MANAGE_REDWOOD_ITEM_PRIV)
This duty and privilege were available prior to this update.