View Shopping List Items in a Table Layout
You can now view shopping list items in a list view (in a table) in the Redwood Self Service Procurement application. This feature applies to both public and personal shopping lists. You can also edit your personal shopping lists using the table layout.
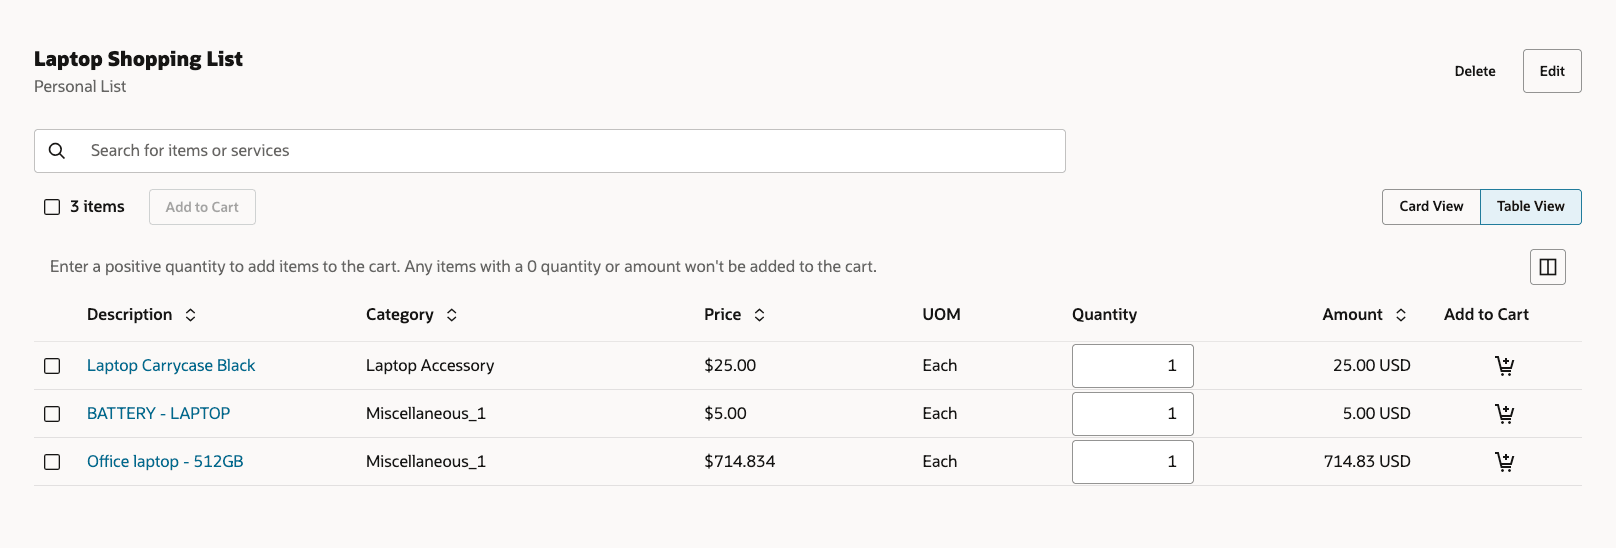
Table Layout for a Shopping List
Search for Specific items Within a Shopping List
You can search for specific items within a shopping list using these attributes. You can search using complete or partial keywords. However, partial keywords must match a term that starts with that keyword.
- Item Description
- Category Name
- Item Number
- Agreement
- Agreement Number
- Manufacturer
- Supplier Item
Table Organizer to Hide or Show Table Columns
You can use the Table Organizer button to reorder columns and add or remove columns from the default view. By default, any attributes you add will be placed at the end of the list. You will need to manually reorder the columns to achieve your desired layout.
For both the Shopping List Details and the Edit Shopping List pages, these columns will be available by default:
- Description
NOTE: You can sort the shopping list items by Description in this release.
- Category
- Price
- UOM
- Quantity
- Amount
You can add or remove these and additional columns on both the Shopping List Details and the Shopping List Edit pages. These are the additional columns available for inclusion:
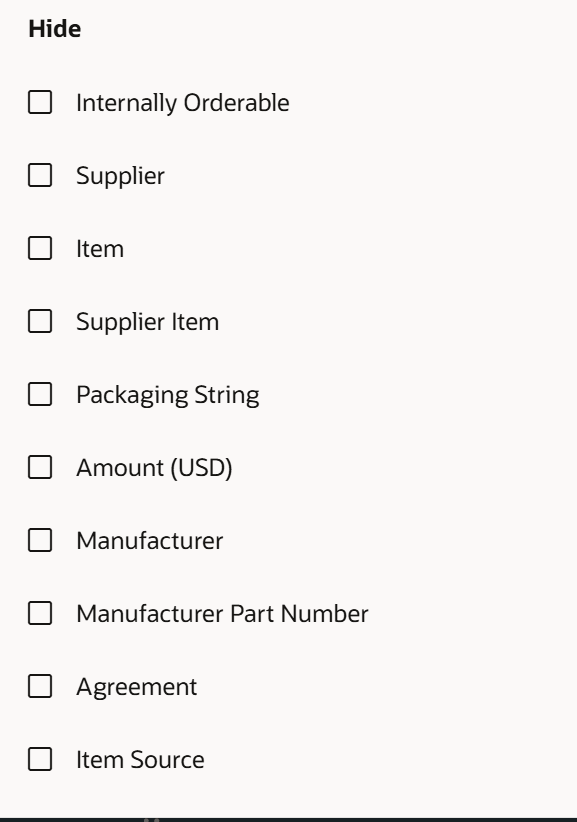
Additional Columns Available in the Shopping List Table
Note: The Packaging String and the Internally Orderable columns will only be available to be added if the relevant opt ins are enabled.
Sort Logic on the Table
Here's the default sort logic on the table:
- For a personal shopping list, the results are ordered on the newest item first logic. This means that the newest item to be added to the shopping list would be shown at the top.
- For a public shopping list, the results are ordered based on the preference set by the catalog administrator where available.
Add Items from a Shopping List to the Cart
This feature allows you to see more items, minimizing the need for scrolling. From the table view, you can add multiple items to your cart at once using the 'Add to Cart' button. Additionally, you can adjust the quantity directly on the table before adding items to your cart.
You can click the Add to Cart button to:
- Add master items, items referenced by a blanket purchase agreement (BPA), and amount-based items to the cart.
- Navigate to the Smart Form page for smart form-based items.
- Navigate to the Noncatalog Request page for noncatalog-based items.
NOTE: The punchout catalog items aren't available on a shopping list.
You can add a maximum of 500 items from your shopping list to the cart. If any items are ineligible for adding, relevant error messages will be displayed. Some examples of these errors include: the category of a master item is invalid, or a source organization for an internal item could not be determined.
Edit Shopping Lists
The table view is also accessible when editing shopping lists. Additionally, you can easily identify items that were previously added but are now unavailable. This feature allows you to remove these items or work with their catalog administrators to restore them for use as needed. These unavailable items won't be shown on the Shopping List Details page.
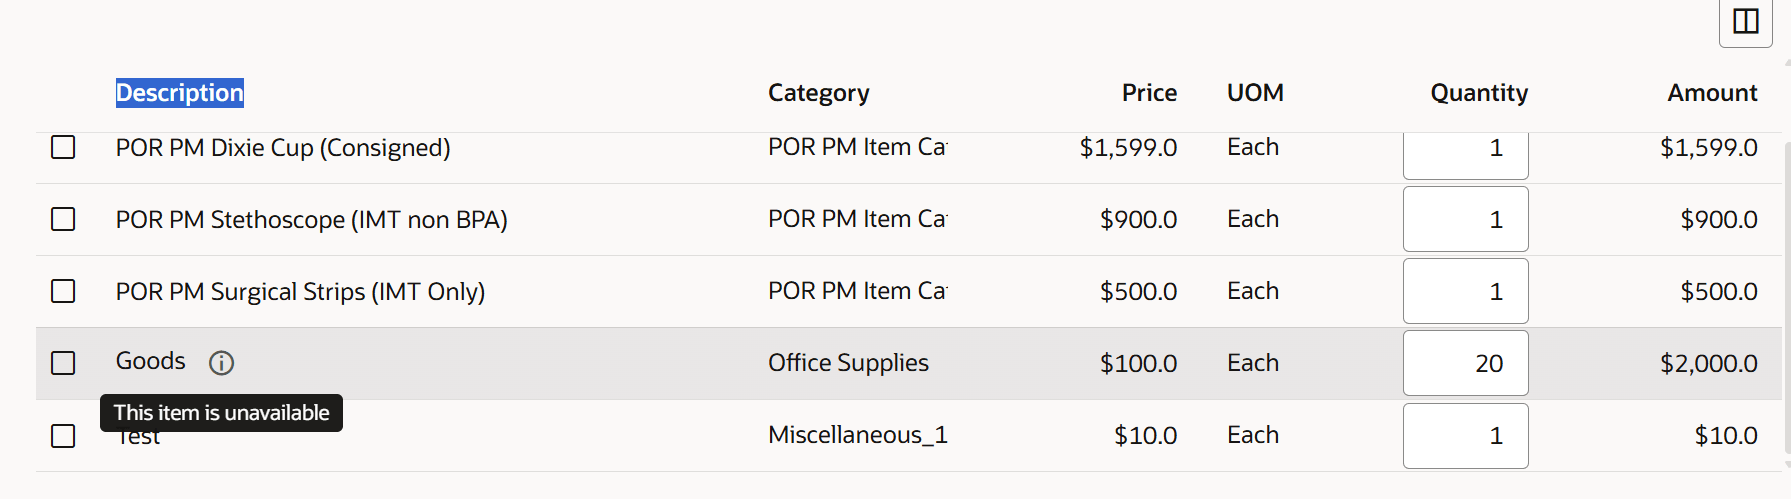
Item Unavailable Indicator in the Shopping List
Steps to enable and configure
You don't need to do anything to enable this feature.
Tips and considerations
- You can configure the Display Setting feature in your Preferences to set a default view for shopping list items. This setting will apply to all business units for a given user.
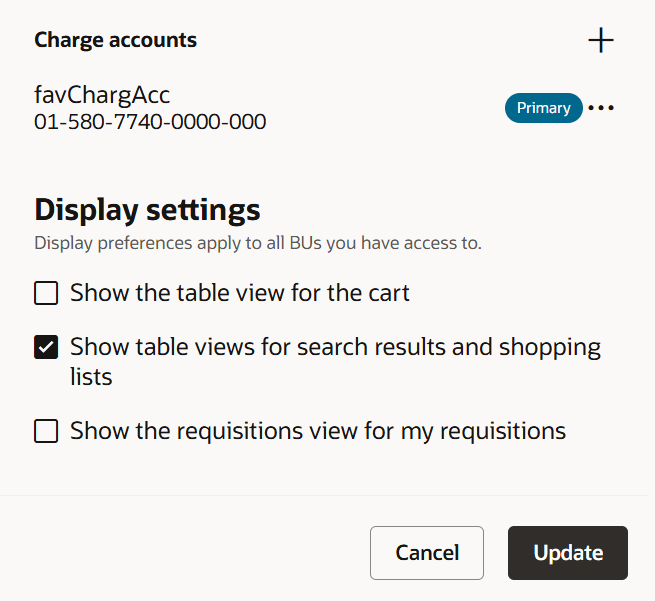
Display Setting to Default Shopping List Table View in Preferences
- The default view for displaying the shopping list items is the Card View. Application administrators can change the default view for all users to the Table View by setting the Table View Enabled for Catalog Shopping Search Results (ORA_POR_SHOP_SEARCH_TABLE_VIEW_ENABLED) profile option.
- You can toggle between the two views as needed. However, any quantity updates that you make won't persist between the views.
- You can now use the back chevron to return to the home page from the Shopping Lists page.
- When reviewing the items available on a shopping list, smart forms and noncatalog requests will only display if the requisitioning business unit (in Preferences) is the same as when the items were originally added to the list.
- When adding items to a shopping list in a special handling mode, you won't be asked to provide additional details. You can provide these details when adding the item from the list to the shopping cart.
NOTE: If you do provide special handling additional details when adding a smart form or noncatalog request to a shopping list, these won't be retained.
- Information templates related additional details are also handled in a similar as special handling flows.
- When adding a foreign currency line to a shopping list, if conversion rate type is 'User', the conversion rate details won't be added to the list. You will have to reenter the details when adding the item from the list to the shopping cart.
- Extensibility support is available for the table view of shopping lists including:
- Ability to use business rules.
- Ability to configure guided journeys for the page.
Key resources
- To know how to provide the required privileges to your requesters to use your own configured role instead of the Requisition Self Service User role, refer to the Privileges Required for a Predefined Role for a Requisition Self Service User topic.
- For more information on how to enable a guided journey for Redwood pages, refer to the Enable a Guided Journey for Redwood Pages topic.
- For information about using Oracle Visual Builder Studio to extend your Redwood application pages, see Oracle Fusion Cloud HCM and SCM: Extending Redwood Applications for HCM and SCM Using Visual Builder Studio.