Redwood: Configure Exceptions Using a New User Experience
You can use the Redwood user experience to view, create, edit, duplicate, or delete measure-based exceptions. You can also edit order-based exceptions to set applicable thresholds with relevant validations. This capability streamlines setup and maintenance of planning exceptions and ensures consistent detection logic and notification across planning modules.
The Configure Exceptions page allows you to:
- Review existing exceptions
- Create, edit, duplicate, and delete user-defined measure-based exceptions
- Edit the triggering thresholds for predefined order-based exceptions
- Edit and duplicate predefined measure-based exceptions
The Configure Exceptions page can be accessed from Plan Inputs, supply plans, demand and supply plans, replenishment plans, and sales and operations plans in the Redwood Supply Chain Planning work area.
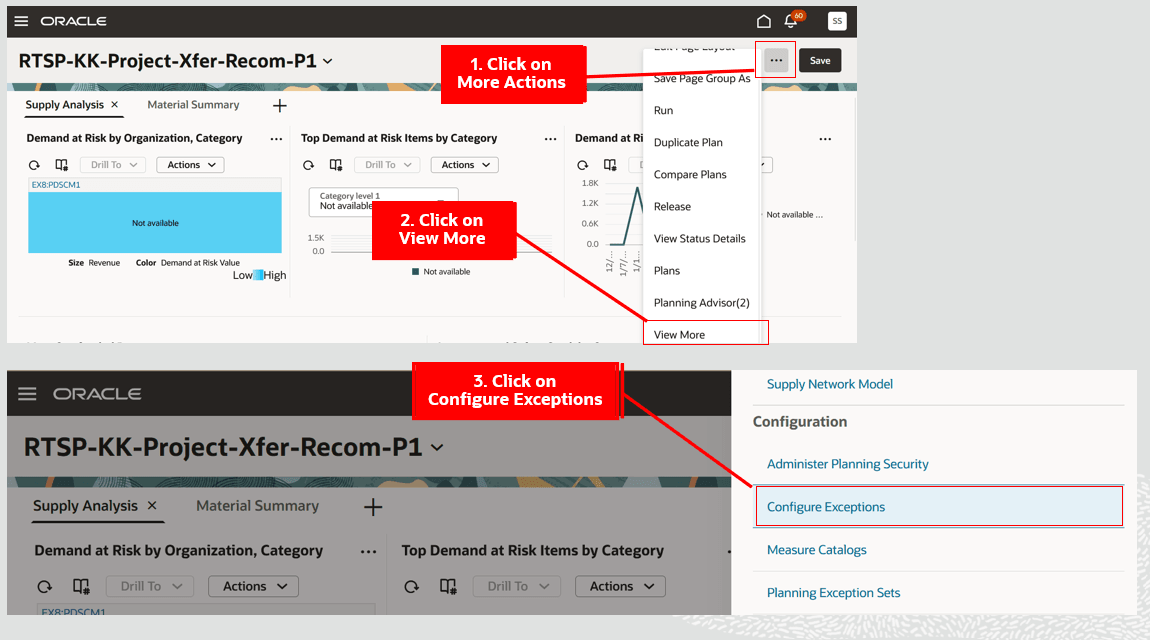
To access the Configure Exceptions page:
- Click the More Actions (...) icon.
- Click View More.
- Click Configure Exceptions in the Configuration section.
The Configure Exceptions page opens in a new browser tab.
Navigate to the Configure Exceptions Page
Configure Exceptions Page
Configure Exceptions Page
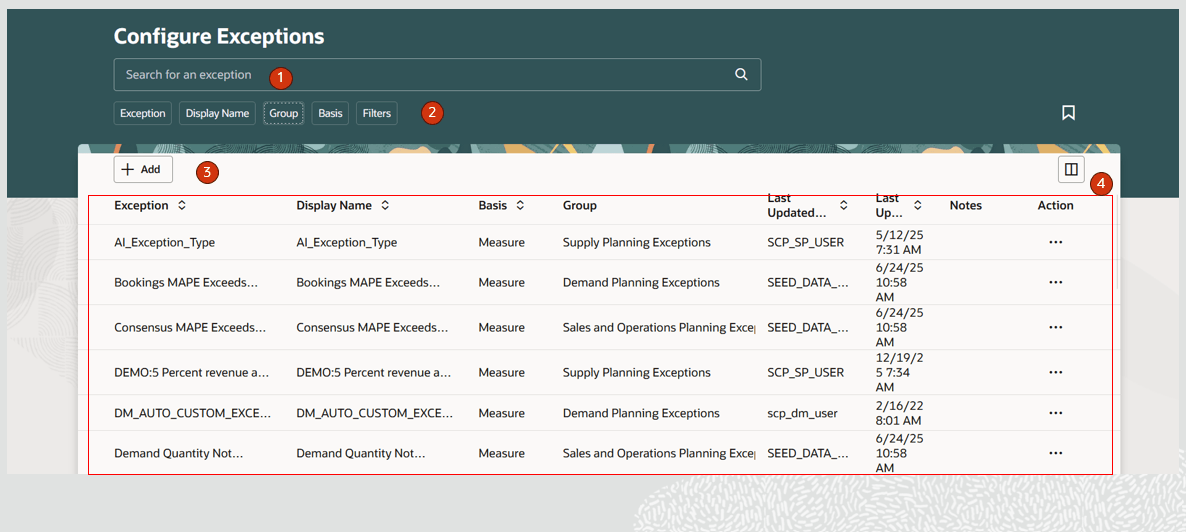
The Configure Exceptions page contains the following:
- Keyword search - Lets you search across the Configure Exceptions page. You can search by exception name. The search is case insensitive and performs a search using the contains operator.
- Suggested filters - Filters the Configure Exceptions page by Exception, Display Name, Group, Basis, Last Updated By, Last Updated Date, Creation Date, and Created By.
- Action toolbar - Lets you create and manage columns.
- Exceptions table - Displays the exceptions that have been created or predefined. You can enter Notes for an exception. You can also select an exception to edit, delete, or copy from the Action column.
Configure Exceptions Actions
Let’s now understand the actions you can take on the Exceptions page.
Create Exception
You can create only measure-based exceptions.
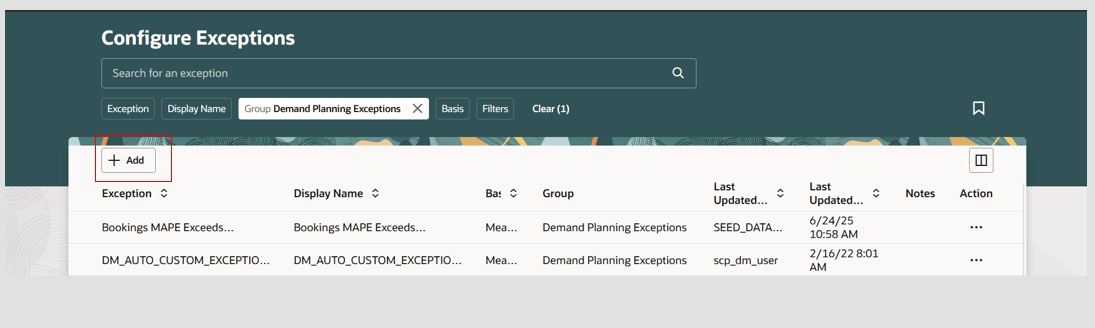
To create an exception:
- Click the Add (+) button on the Configure Exceptions page.
Create an Exception
The New Exception page opens on the Configure Exceptions page in the same tab.
- In the General properties section, select one or more applicable exception groups and then enter an exception name and display name.
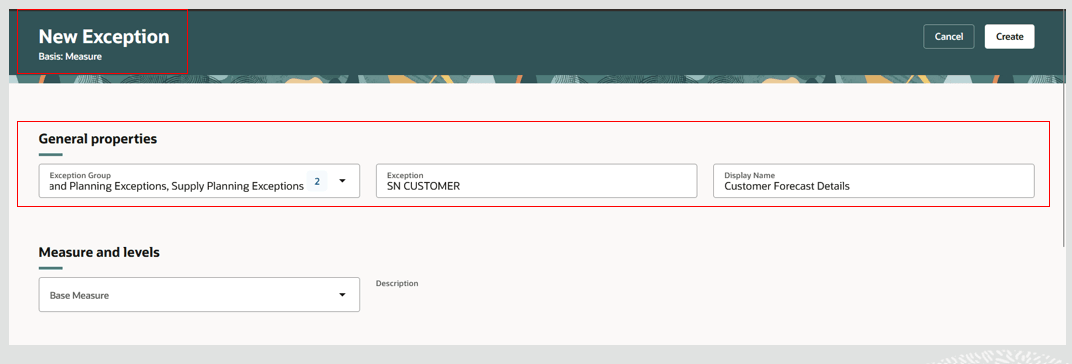
Enter General Properties for an Exception
- In the Measure and levels section, select the measures for the exception and the levels at which the exception needs to be computed.
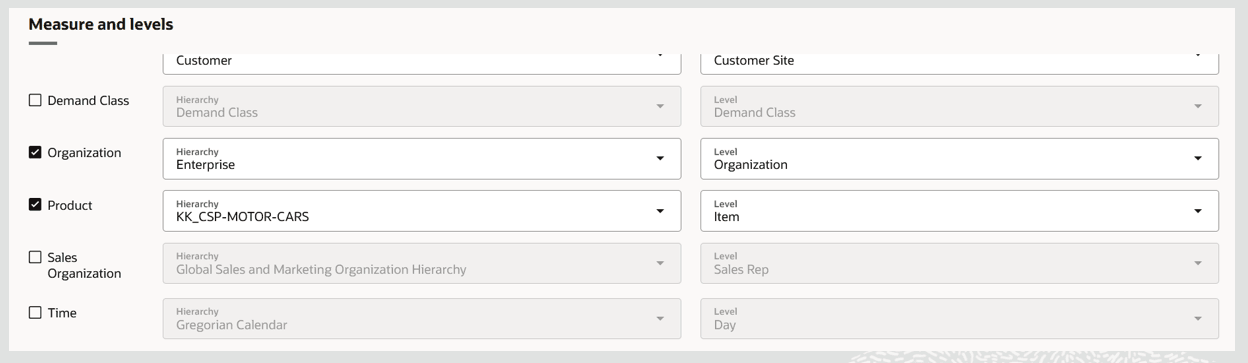
Specify the Measure and Levels for an Exception
- Select the exception threshold and associated threshold type – either Value or Measure – in the Threshold section. Selection of a threshold is optional. For details, see the Additional Details for Measure-Based Exceptions section in this document.
- Configure notifications for the exception in the Notification section. Notification configuration is optional. For details, see the Additional Details for Measure-Based Exceptions section in this document.
- Click Create.
The exception is created and is now displayed on the Configure Exceptions page.
Delete Exception
You can delete only user-defined measure-based exceptions.
To delete an exception:
- In the exception row, click the Action (…) icon and select Delete.
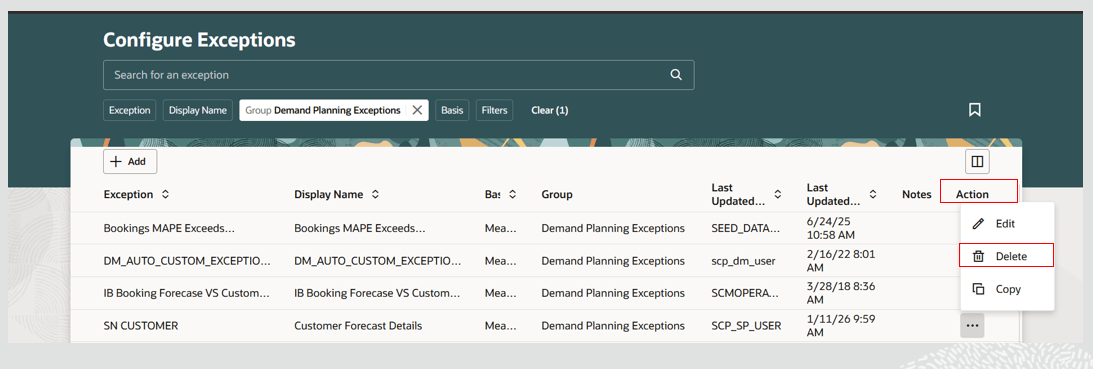
Select the Delete Action
- A message is displayed, warning that the exception might be referenced by one or more exception sets and asking you to confirm the deletion of the exception.
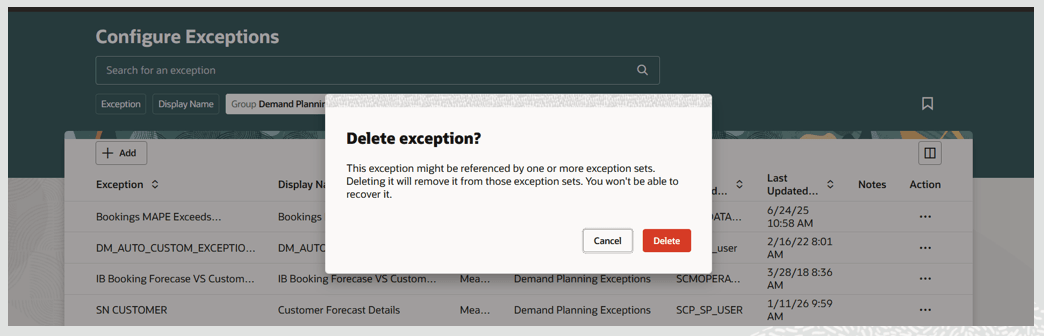
Confirmation to Delete an Exception
- Click Delete to confirm. The exception is now deleted.
Copy Exception
You can copy only measure-based exceptions.
To copy an exception:
- In the exception row, click the Action (…) icon and select Copy.
- The page refreshes and shows a New Exception page. The exception name and exception display name default to the source names with “Copy of” added at the beginning.
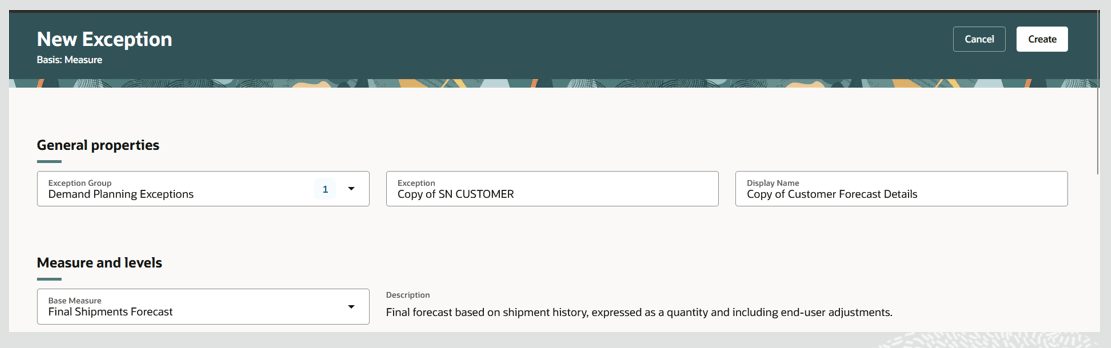
Copy Exception
- Update the exception name and exception display name and other details on the page as desired.
- Click Create.
The copied exception is now displayed in the table on the Configure Exceptions page.
Edit Exception
You can edit order-based and measure-based exceptions. The steps vary slightly, as described in the following.
To edit an order-based exception:
- In the exception row, click the Action (…) icon and select Edit.
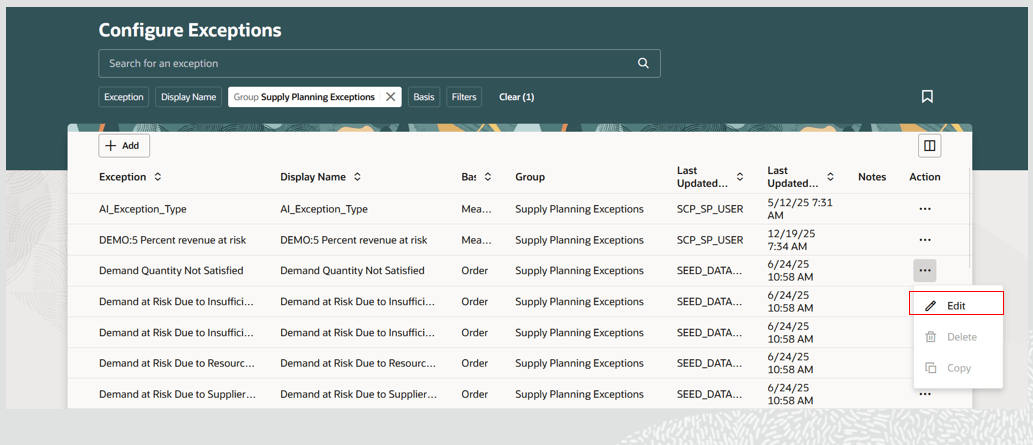
Select the Edit Action for an Order-Based Exception
- Exception details are displayed. For order-based exceptions, you can edit only the exception threshold.
- Select the applicable fact for the exception (valid choices are Exception Value or Exception Quantity or Exception Days), an operation, and provide a value for the threshold.
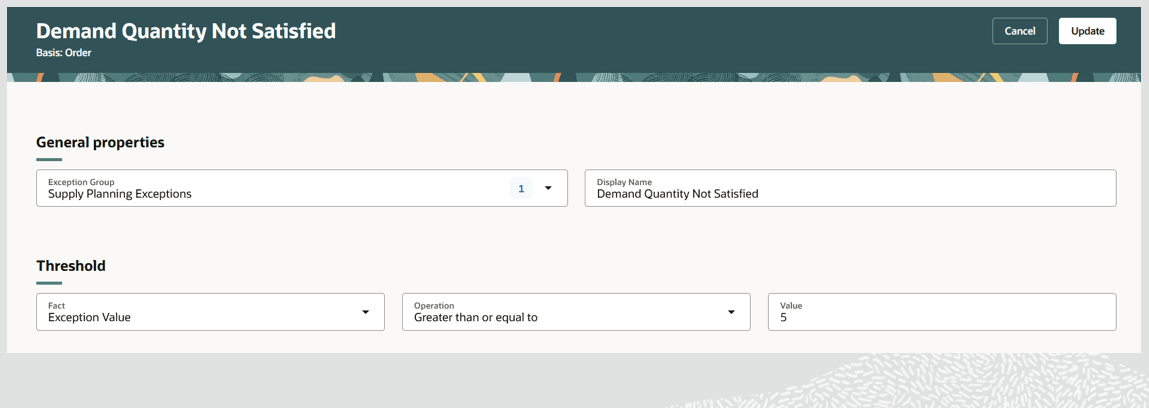
Provide Threshold Details for an Order-Based Exception
- Click Update.
To edit a measure-based exception
- In the exception row, click the Actions (…) icon and select Edit.
- Edit the exception details as applicable.
a. For predefined measure-based exceptions, you can edit measure levels, threshold, and notifications. But the base measure field can’t be edited.
b. For user-defined measure-based exceptions, you can edit measure and measure levels, the threshold and threshold type, and notifications.
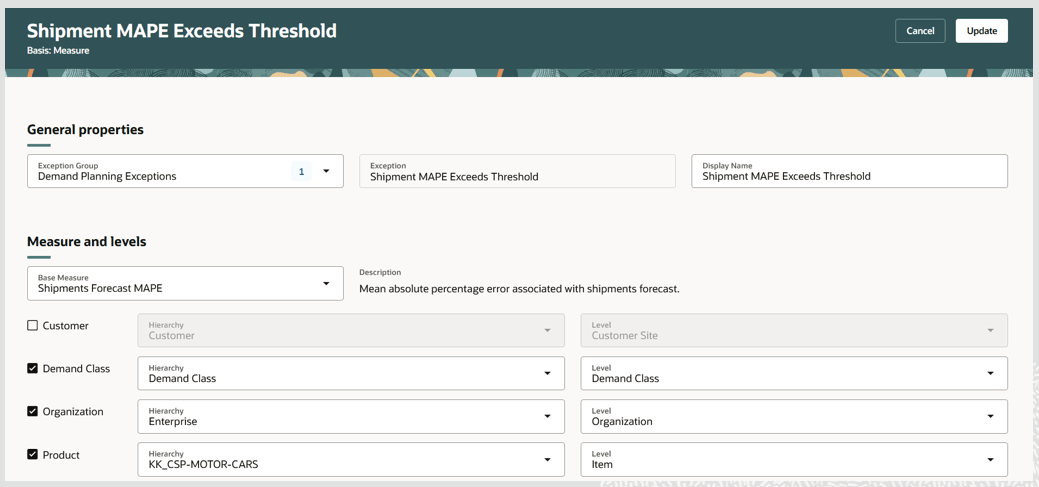
Edit Details for a Measure-Based Exception
- Click Update.
Additional Details for Measure-Based Exceptions
The following provides additional information about how to complete the fields in the Measures and levels, Threshold, and Notifications sections.
Measure and Levels Section
- Select a base measure that’s relevant for the exception.
- Based on the measure granularity, the associated dimensions, default hierarchies, and lowest hierarchy levels are displayed. You must select at least one dimension, a hierarchy, and its associated level.
- You can change the hierarchy for a dimension and its associated level.
Threshold Section
- Select a relevant operation for comparison of the measure value to the threshold.
- Select a threshold type (Value or Measure) for the operation.
- If the threshold type is Value, provide a numerical threshold to be compared to the base measure value during exception computation.

Threshold Type as Value
- If the threshold type is Measure, select a measure whose value will be used as a threshold for comparison with the base measure value during exception computation.

Threshold Type as Measure
Notification Section
The Notification section allows to you to send notifications to individual users or to roles when exceptions occur.
To create exception notifications and enable notifications to be sent:
- Click the Add (+) button in the Notifications section.
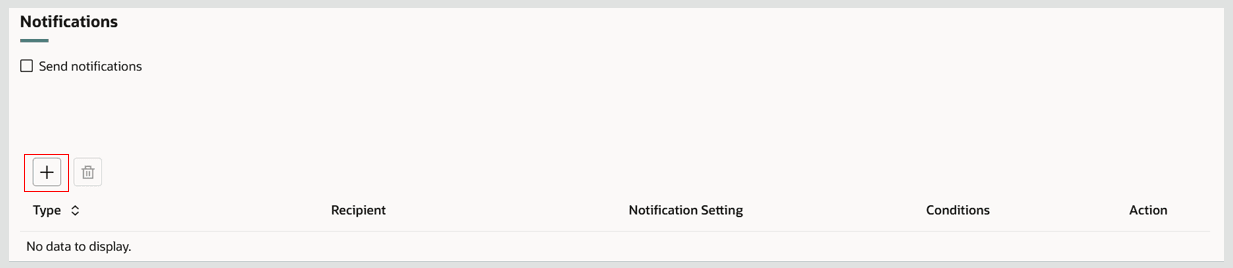
Create Notification Setup
- The Add notification drawer opens. Select a Type for the notification. The Type can be Role or User.
- Select a Recipient based on the Type selected. If the Type is Role, select a role name as the Recipient. If the type is User, then select a user name as the Recipient.
- Enter a name for this notification in the Notification Setting field.
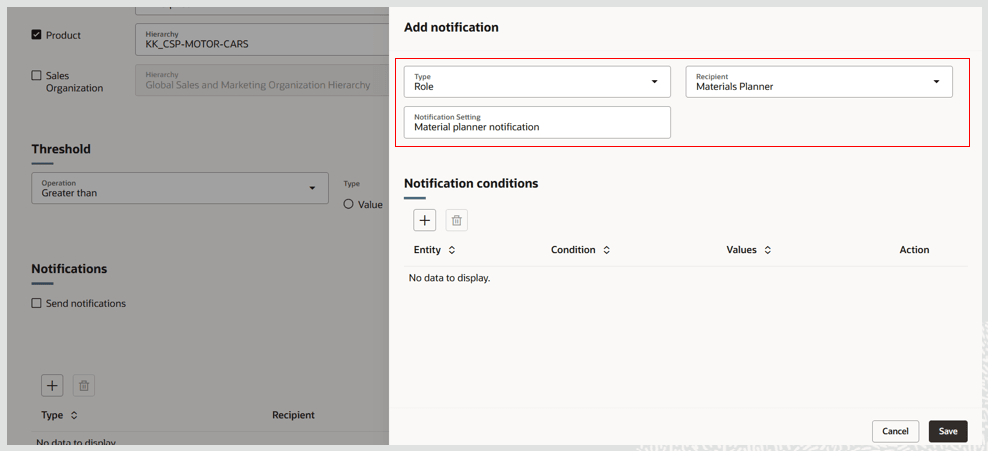
Enter Notification Details
- Optionally, you can also enter notification conditions, which specify what conditions need to be met for notifications to be sent.
a. Click Add (+) in the Notification conditions section.
b. Select options from the Entity, Condition, and Values fields (for example, Item equals a particular item).
c. Click on the check mark to confirm the entered details.
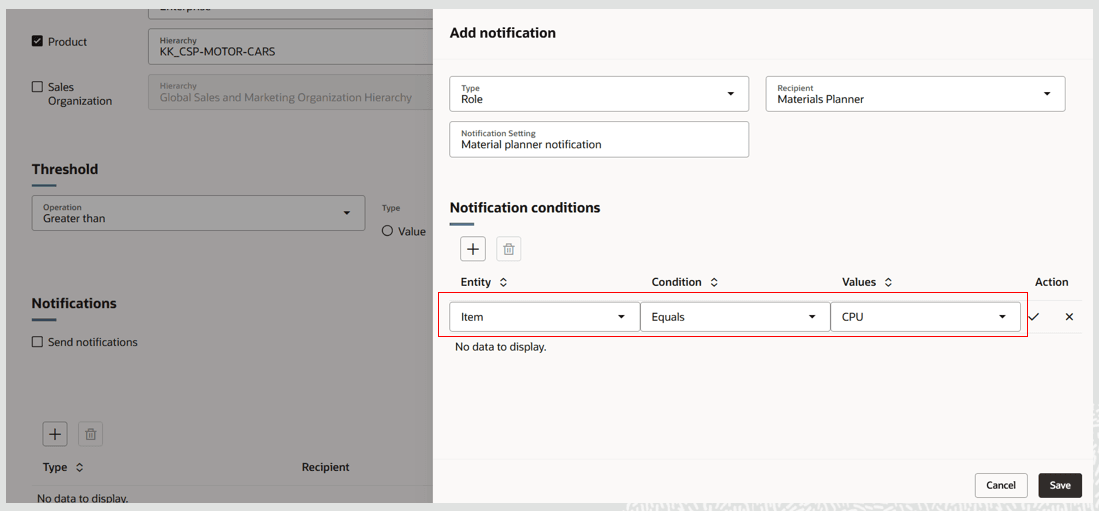
Enter Notification Conditions
- Click Save.
- The drawer closes and the notification details and condition are created.
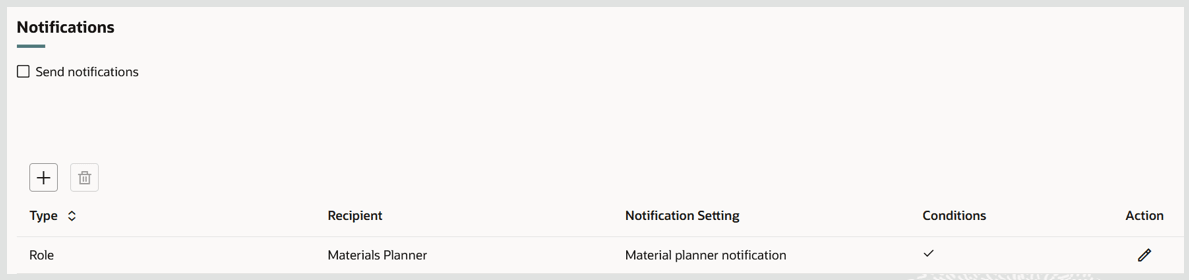
Notification Details Saved
- Select the Send notifications checkbox in the Notifications section to enable the notifications listed in this section to be sent when the criteria are met.
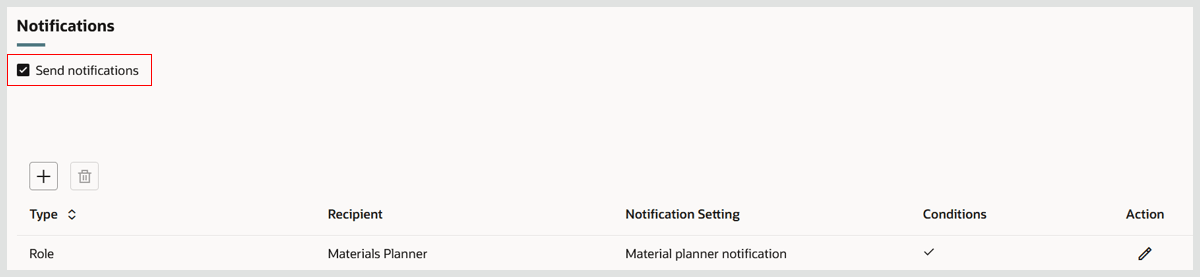
Select Send Notifications Checkbox
- Click Create (or Update, if you’re updating an existing exception) on the Exceptions page to save the changes.
You can enter only one recipient for a notification. However, you can have multiple notifications if you need to cover different recipients and types.
Quick Actions
You can now navigate to the Configure Exceptions page from Quick Actions. To enable this navigation:
- Go to Navigator > My Enterprise > Setup and Maintenance.
- Search for and select the Manage Administrator Profile Values task.
- Search for the profile display name Redwood Page for Configure Exceptions.
- Set the Profile Value to Yes and save. (You can set this profile at the User or Site level.)
Steps to enable and configure
Use the Opt In UI to enable this feature. For instructions, refer to the Optional Uptake of New Features section of this document.
Offering: Supply Chain Planning
Tips and considerations
- If you want to use the Redwood: Configure Exceptions Using a New User Experience feature, then you must opt in to its parent feature: Replenishment Planning. If you’ve already opted in to this parent feature, then you don’t have to opt in again
- You can enable guided journeys for the Configure Exceptions page.
- If you’ve updated threshold or notification details in a measure-based exception, you can submit the Calculate Measure Based Exceptions scheduled process to recompute the exception details and notifications for a plan.
- To consider threshold updates for order-based exceptions, you must rerun plans in full refresh mode.
- To consider measure and levels updates for measure-based exceptions, you must rerun plans in full refresh mode.
- Navigation from a plan context to Configure Exceptions in the Redwood Supply Chain Planning work area applies the plan type filter by default to the exception groups used to display the exceptions. However, exceptions from other groups can also be viewed based on privileges assigned to the user.
Access requirements
Users who are assigned a configured job role that contains these privileges can access this feature:
- Monitor Supply Planning Work Area (MSC_MONITOR_SUPPLY_PLANNING_WORK_AREA_PRIV)
- Monitor Demand and Supply Planning Work Area (MSC_MONITOR_DEMAND_AND_SUPPLY_PLANNING_WORK_AREA_PRIV)
- Manage Replenishment Planning (MSC_MONITOR_REPLENISHMENT_PLANNING_WORK_AREA_PRIV)
- Manage Sales and Operations Planning (MSC_MONITOR_SALES_AND_OPERATIONS_PLANNING_WORK_AREA_PRIV)
- Edit Planning Exceptions Configuration (MSC_CONFIGURE_PLANNING_EXCEPTIONS_PRIV)
- View Planning Exceptions Configuration (MSC_VIEW_PLANNING_EXCEPTIONS_PRIV)
These privileges were available prior to this update.