Manage content zones
As a catalog administrators, you can now create, edit, duplicate, and delete content zones using the new user experience.
Search content zones
You can search for content zones using a single character Starts With search on name. You can also use these filters to refine your search:
| Filter | Details |
|---|---|
| Procurement BU |
Case insensitive single character Contains search. You can only search for BUs that are active and to which you have access. |
| Requisitioning BU |
Case insensitive single character Contains search. You can only search for BUs that are active and to which you have access. |
| Usage | Select between Requisitioning and Procurement usages. |
| Worker | Case insensitive single character Contains search on name and email. |
| Deliver-to Location | Case insensitive single character Contains search on location name. |
View the search results in a table. You can hide columns using the Column selector and export the displayed data to Excel.
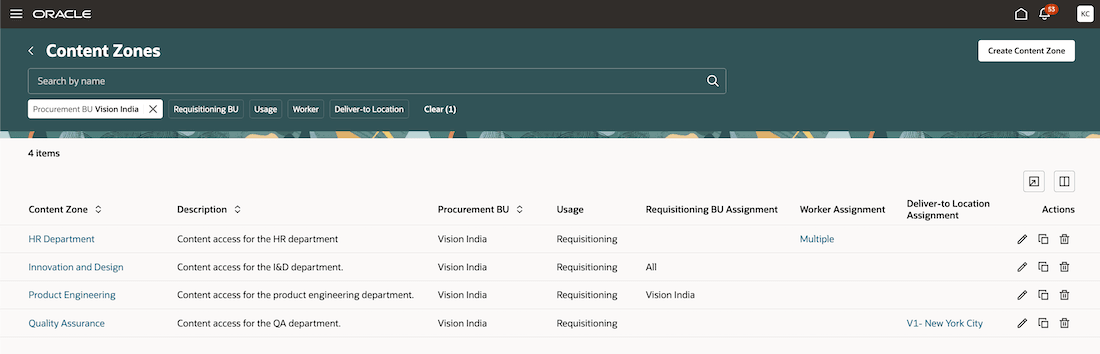
Search and manage content zones
Note: When you return to the search page from the create or edit flow, your search keyword and filters are retained. They aren't retained when you open the page from the springboard or sign in to the application again.
You can view additional details about one or more workers and locations in a drawer by clicking the links.
Create and edit content zones
When you create a content zone, the procurement BU and requisitioning usage are selected by default. The procurement BU is the first available business unit when the business units are sorted by name in ascending order. After you provide these details, continue to the edit page to work on the content zone.
You can secure access to the content zone and assign shopping content that's available to users when they shop.
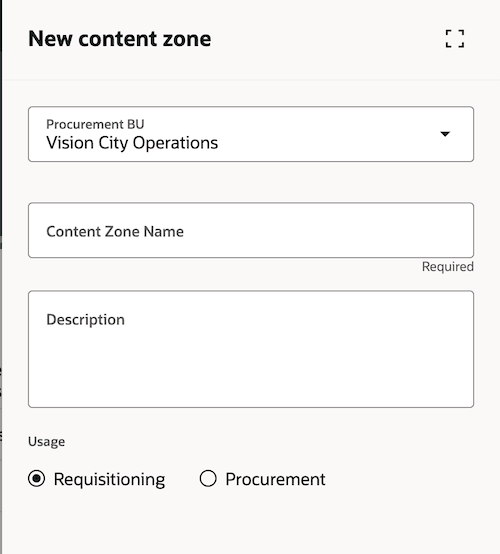
Create content zone
Secure content zone access
Determine the appropriate level of access for each content zone. For example, for broad availability, assign the content zone to all requisitioning BUs. For more granular access, assign the content zone to one or more requisitioning BUs, workers, or locations. Assigning a business unit or location makes the shopping content available to all workers who can access that business unit or location.
Note: Content zones are created for a given usage, requisitioning, or procurement BU. During editing, you can switch between these usages. When you save, only content relevant to the selected usage is retained. For example, if you switch to procurement usage, smart forms, informational catalogs, and punchout catalogs assigned to the content zone will be removed. Any security assignments based on locations or requisitioning BUs will also be removed.
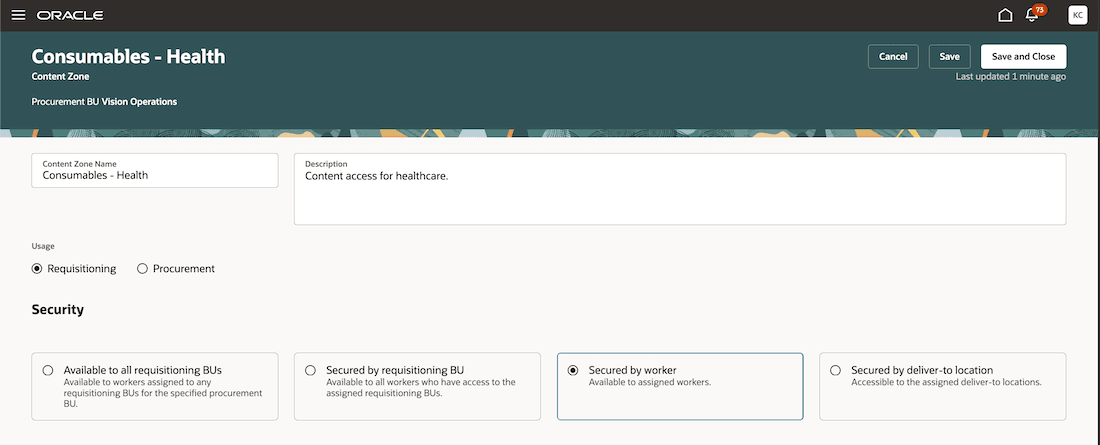
Edit content zone
You can view existing security assignments in a table and search or filter the assignments. This can help for instance, when you have to delete one or more specific assignments because they are no longer relevant.
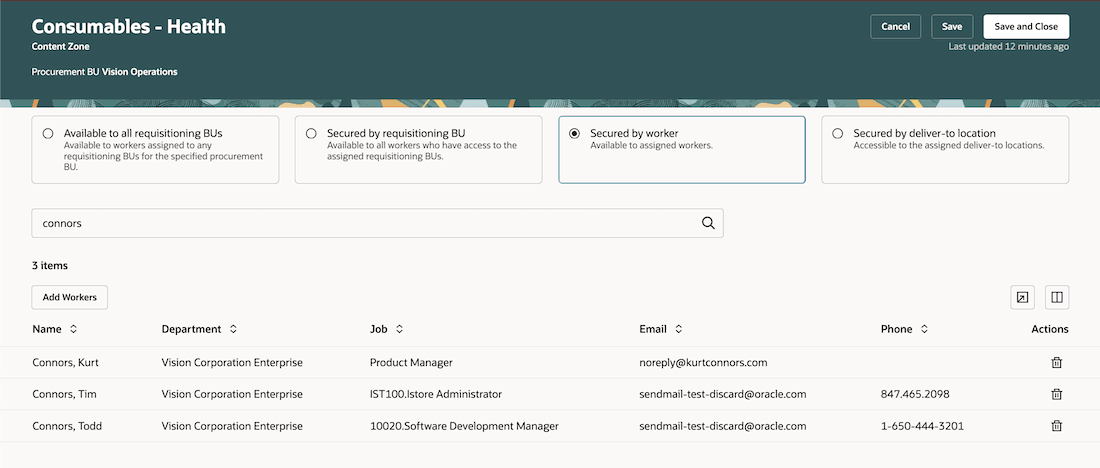
Search for assigned workers
To add workers, requisitioning BUs, or locations to a content zone, use the corresponding Add action. A drawer opens where you can search for and select the values you need.
When adding locations, you can use Starts With or Contains search on the location name. You can also use available filters such as Location Code and Address Line1.
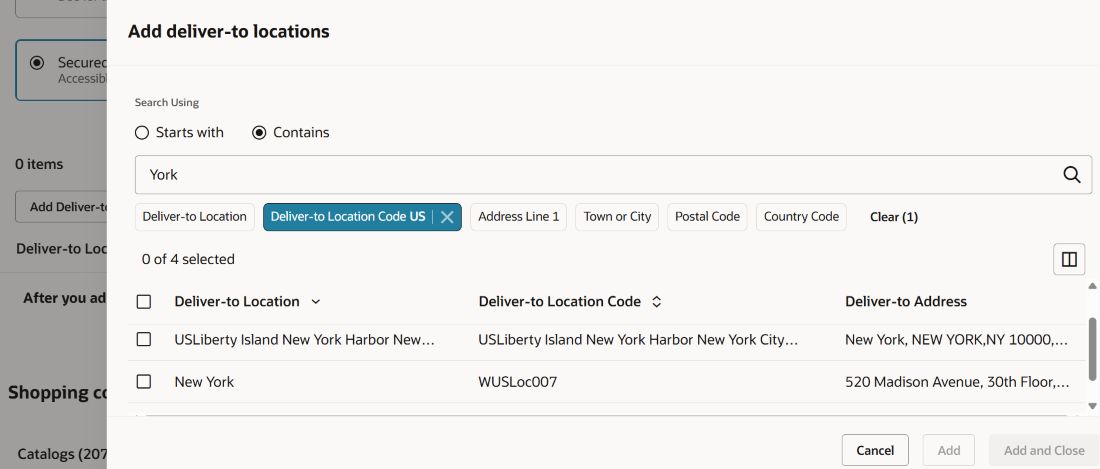
Search for locations
Add workers using email addresses
When assigning workers to a content zone, you can now assign workers in bulk using their email addresses. Select the Use list of emails option.
Note: You can add up to 500 workers at a time. If a batch contains errors, such as invalid email addresses or formats, you can correct them and retry the failed entries. Successfully processed entries will still be added.
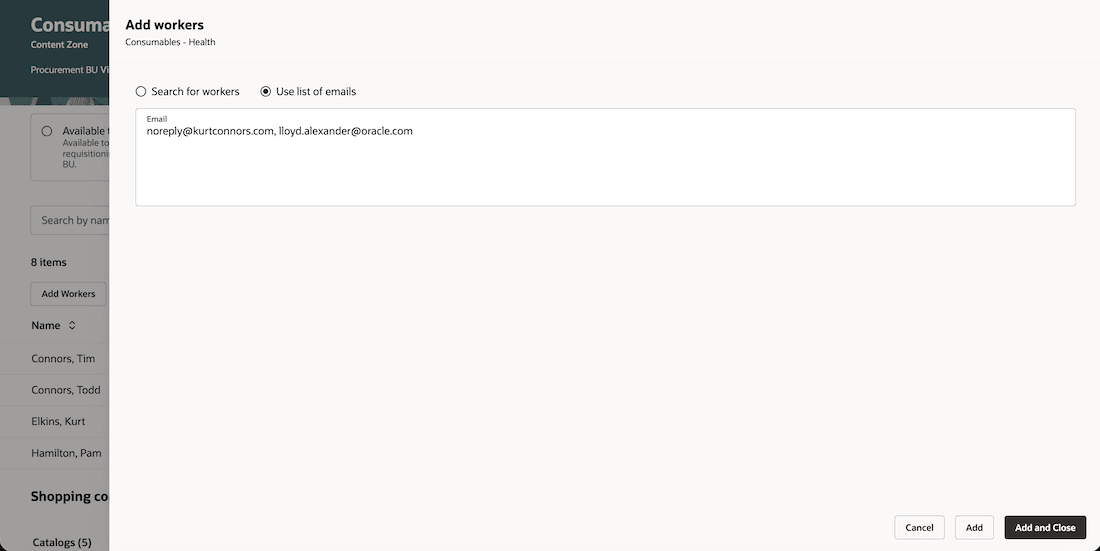
Assign workers to a content zone using email addresses
Manage shopping content
Assign catalogs, public shopping lists, and smart forms that need to be available to the requesters or buyers who have access to the content zone.
Use the corresponding Add action to open a drawer where you can assign one or more shopping-content items to the content zone. The content zone is saved before the drawer opens. You must correct incomplete or duplicate details before you can continue.
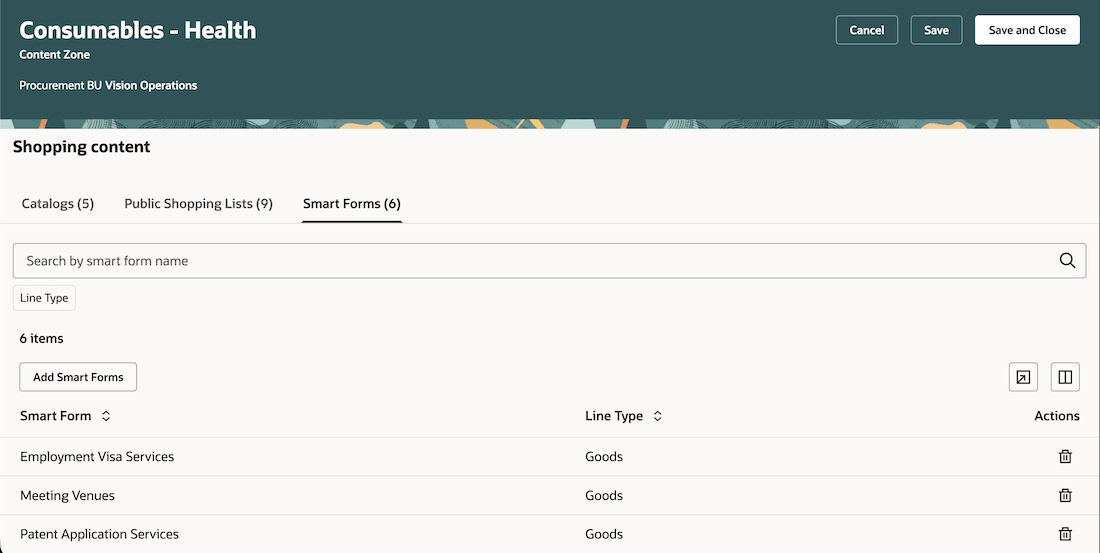
Manage shopping content for a content zone
Duplicate a content zone
You can duplicate an existing content zone within the same procurement BU and change its usage. Security assignments and shopping content that are applicable to the selected usage are copied to the new content zone. If you change the usage during duplication, only assignments and shopping content applicable to the new usage are copied.
Steps to enable and configure
You must enable this profile option to access this feature:
- Redwood Catalog Setup Pages Enabled (ORA_POR_REDWOOD_CATALOG_SETUP_ENABLED). By default, this profile option is set to No.
To enable the profile option, follow these steps:
- In the Setup and Maintenance work area, search and select the Manage Administrator Profile Values task.
- On the Manage Administrator Profile Values page, search for and select the Redwood Catalog Setup Pages Enabled (ORA_POR_REDWOOD_CATALOG_SETUP_ENABLED) profile option name or the code.
- Set Profile Value to Yes.
- Select Save and Close.
Note: The updated profile value takes effect the next time users sign in.
Tips and considerations
- Navigation: You can navigate to the Content Zones page:
- From the Catalog Administration landing page.
- Using the quick actions link in the APPS section of the Oracle Fusion Applications home page.
- Additional Considerations:
- Content zone names are case-sensitive when the application checks for duplicate names.
- When you add security assignments or shopping content:
- Newly added values appear at the top of the table. If you refresh the page or return to edit the content zone, the default sort is applied.
- The content zone is saved when you open any drawers. If there are errors, such as missing or duplicate details, you must correct them before you can continue.
- Changes that you make to the columns displayed in assignment or drawer tables are retained when you return to the application.
- When you edit a content zone, use the Cancel button if you need to discard changes to the content zone details such as name, description, before you open the Add actions drawers on the page.
- Extensibility:
- You can make optional content zone attributes required using personalization.
- You can use extensibility to set default values for Procurement BU and Usage.
- You can create guided journeys using these constants:
- Manage Content Zones Guided Journey Code
- Content Zone Edit Page Guided Journey Code
Key resources
- For information about using Oracle Visual Builder Studio to extend your Redwood application pages, see Oracle Fusion Cloud HCM and SCM: Extending Redwood Applications for HCM and SCM Using Visual Builder Studio.
- To know about the guided journeys, refer to the Overview of Guided Journeys topic.
Access requirements
If you're assigned a custom job role that contains these previously delivered privileges and meet all of the following data security conditions, then you can access this feature.
Data security conditions (both):
- Be a procurement agent for one or more procurement BUs.
-
Have the Manage Catalog Content permission for each of those procurement BUs.
Privileges:
| Privilege status | Privilege name and code |
|---|---|
| Previously delivered | Manage Procurement Catalog Content POR_MANAGE_PROCUREMENT_CATALOG_CONTENT_PRIV |
| Previously delivered | Use REST Service - Public Workers Read Only ORA_PER_REST_SERVICE_ACCESS_PUBLIC_WORKERS_RO |
| Previously delivered | Use REST Service - Worker Searches V2 ORA_PER_REST_SERVICE_ACCESS_WORKER_SEARCHES_V2 |
| Previously delivered | Use REST Service - Workers List of Values PER_REST_SERVICE_ACCESS_WORKERS_LOV_PRIV |