Configure the Header on the Detail Page
The header on a record's detail page displays key details right at the top, so that users can quickly find what they need. The header displays a predefined set of attributes, but you can configure the region to display any attributes that your users are most interested in.
Where's the Header?
When you drill down to a record's detail page from a list page, the header displays at the top of the detail page.

Configure the Header Region Using a Rule Set
You can modify the header using Oracle Visual Builder Studio. To modify any region on a page, you create a new rule that returns a custom layout.
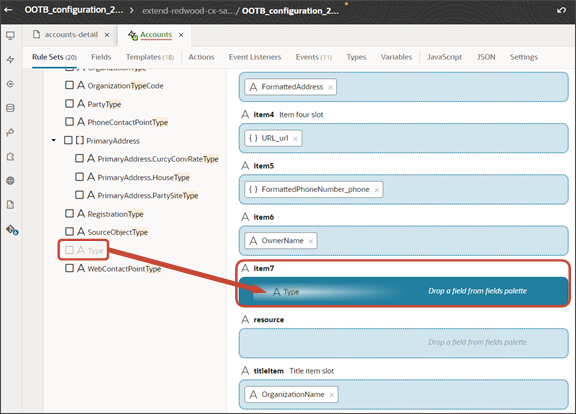
In this example, let's look at adding the Type field to the header on the account detail page.
-
Navigate to the page that displays the area you want to extend.
In this example, navigate to the My Team's Accounts page and then click an account record.
-
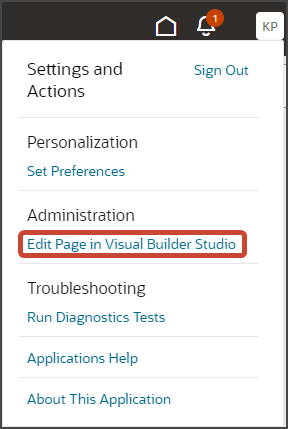
To access Visual Builder Studio, you have one of two options:
Under the Settings and Actions menu, select Edit Page in Visual Builder Studio.
-
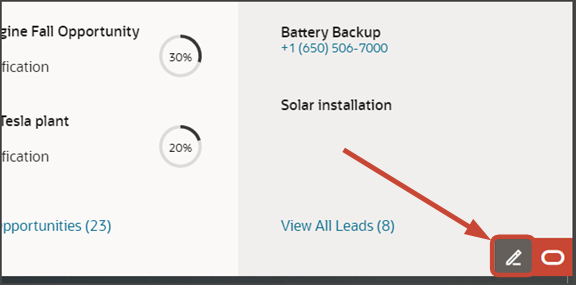
If you don't see the Settings and Actions menu, then in the lower right corner of the page, hover over the Ask Oracle icon and click Edit Page in Visual Builder Studio.
-
If you're working on multiple projects, then select the Extend Redwood CX Sales project to keep your fragments extension separate from non-fragments changes.
-
If you're working in an active sandbox when you launch Visual Builder Studio, then Visual Builder Studio looks for a workspace that's associated with your sandbox. If you're not working in a sandbox, then Visual Builder Studio looks for a workspace without a sandbox. You might have to select a workspace if more than one workspace exists. If no workspace exists, then Visual Builder Studio automatically creates one for you.
-
When you enter into your workspace in Visual Builder Studio, the accounts-detail page is displayed in the Page Designer canvas.
Tip:To display more of the accounts-detail page in the canvas, collapse the left pane by clicking the App UIs tab on the left. Then, select Desktop or Wide screen from the list at the top of the Page Designer.

-
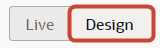
Click the Design button.
-
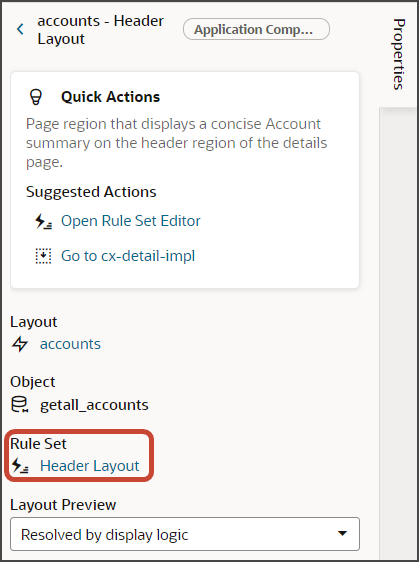
On the Structure panel, click the accounts - Header Layout node.
The header is highlighted in the canvas.
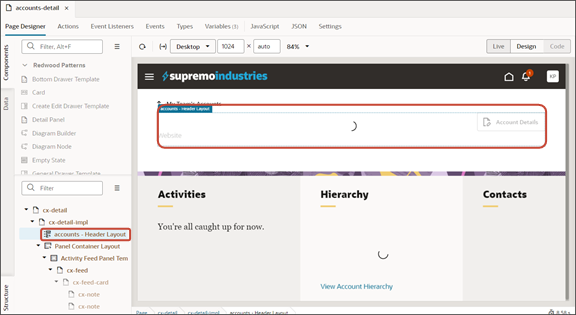
On the Properties pane, the rule set is also displayed.
On the Properties pane, click the Rules button.
-
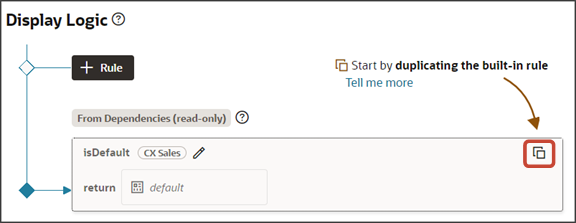
Click the Duplicate Rule icon.
-
In the Duplicate Rule dialog, accept the default rule name or enter a new name. The name you enter here is both the rule name and also the layout name, so enter a layout name that makes sense for you.
Also, make sure that the Also create a copy of the layout check box is selected.
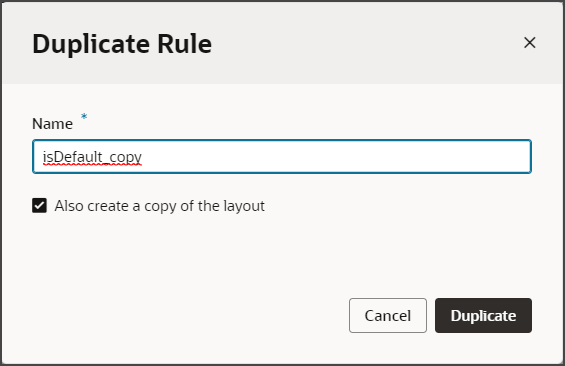
- Click Duplicate.
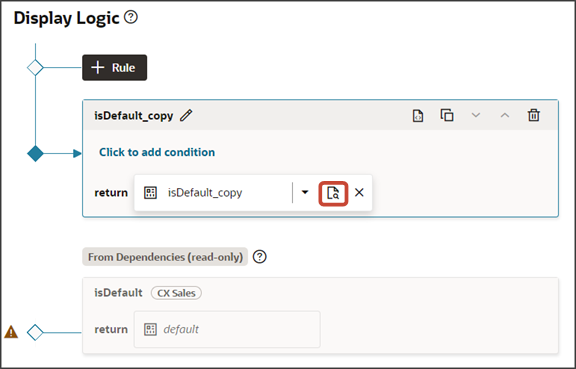
The new rule displays at the top of the list of existing rules, which means that this rule will be evaluated first at runtime. If the rule's conditions are met, then the associated layout is displayed to the user.
In this example, we're not adding any conditions which means that the associated layout will always be displayed.
-
Modify the rule's copied layout.
-
Click the Open icon to edit the copied layout.
-
In the Filter field, enter
typeto locate the Type field. -
Drag the Type field to an available section in the header.
In our example, drag the Type field to the item7 section.
-
-
Click the Preview button to see your changes in your runtime test environment.

The preview link must include the
application/containersegments in the URL. If not, then change the preview link using the following example URL:https://<servername>/fscmUI/redwood/cx-sales/application/container/accounts/accounts-detail?id=300000003513233&puid=7050&view=foldout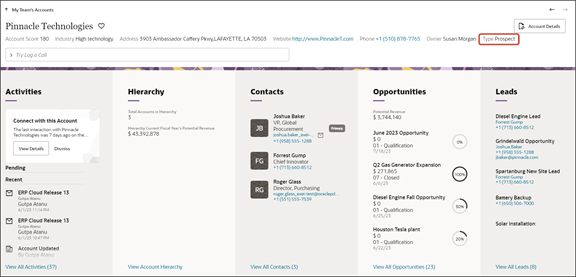 Note:
Note:The header displays a field only if the field has a value. For example, if an account doesn't have a Type specified, then the Type field won't display.