Configure the Subview for Related Objects (Many-to-Many)
After adding a related object panel to your custom object's detail page, you can now create and configure the subview. This topic illustrates how to create the subview for a related object (related via a many-to-many relationship).
What's the Scenario?
In our example relationship, the Payment object has a many-to-many relationship with the Contact object. At runtime, users should be able to view contacts for a payment on the Payment detail page, and then drill down to a Contacts subview.
We have already added a Contacts panel to the Payment detail page. Let's create the Contacts subview next.
Create the Contacts Subview
Create a new template for the subview that displays the contacts created for a payment.
-
In Visual Builder Studio, click the App UIs tab.
-
Expand cx-custom > payment_c, then click the payment_c-detail node.
-
On the payment_c-detail tab, click the Page Designer subtab.
-
Click the Code button.
-
Confirm that you are viewing the page in Page Designer.

-
In the "actionBar" parameter, add a "subviewLabel" property, so that the code looks like this:
<oj-vb-fragment-param name="actionBar" value='[[ {
                            "applicationId": "ORACLE-ISS-APP", "subviewLabel":
                            {"PaymentContactMMInter_Src_Payment_cToPaymentContactMMInter_c_Tgt":
                            $translations.CustomBundle.Contacts()},"resource": {"name":
                            $flow.constants.objectName, "primaryKey": "Id", "puid": "Id", "value":
                            $variables.puid }} ]]'></oj-vb-fragment-param>
This replaces the intersection object name in the automatically generated Show smart action to a label that's more user-friendly as well as translatable. In the parameter above, be sure to replace PaymentContactMMInter_Src_Payment_cToPaymentContactMMInter_c_Tgt and translation bundle name and string with your own subview display property (typically the intersection object name), translation bundle name, and string.
Tip: Alternatively, in this fragment code, you can reference a subviewLabel constant to achieve the same thing. See Understanding "Show" Actions. -
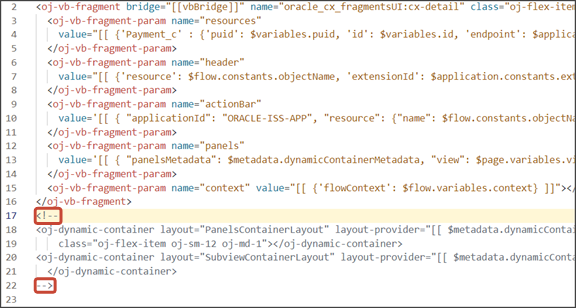
Remove the comment tags for the dynamic container components that contain the panels and any subviews.
-
Highlight the
<oj-dynamic-container>tags for the subviews.
-
On the Properties pane, in the Case 1 region, click the Add Section icon, and then click New Section.
-
In the Title field, enter a title for the section using the object's name, such as
Contacts Subview. -
In the ID field, change the value to
PaymentContactMMInter_Src_Payment_cToPaymentContactMMInter_c_Tgt.Note: Use the REST API object name for this ID. -
Click OK.
-
Manually update the template's JSON with the correct subview name.
-
On the payment_c-detail tab, click the JSON subtab.
-
In the section for the SubviewContainerLayout's section template layout, replace the
sectionTemplateMapanddisplayPropertiesvalues to match the subview's ID name,PaymentContactMMInter_Src_Payment_cToPaymentContactMMInter_c_Tgt.This is the object's REST API name.In our example, this is what the SubviewContainerLayout's
sectionTemplateMapanddisplayPropertiesshould look like: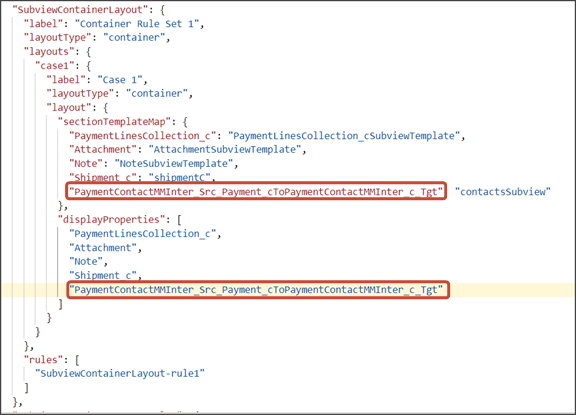
-
Configure the Subview Layout
Next, let's build the structure of the subview using the cx-subview fragment.
-
On the payment_c-detail tab, click the Page Designer subtab.
-
On the Properties pane, click the Contacts Subview section that you just added.
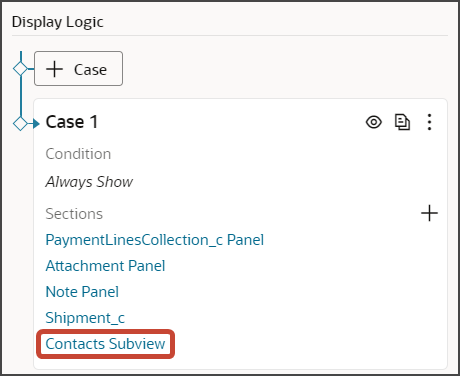
Page Designer navigates you to the template editor, still on the payment_c-detail tab, where you can design the PaymentContactMMInter_Src_Payment_cToPaymentContactMMInter_c_Tgt template.
-
Click the Code button.
-
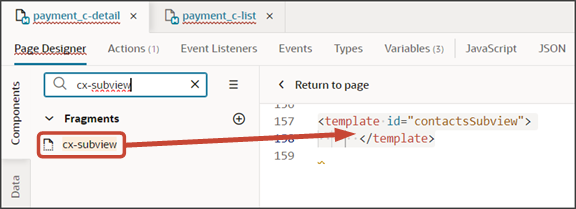
On the Components palette, in the Filter field, enter
cx-subview. -
Drag and drop the cx-subview fragment to the template editor, between the contactsSubview template tags.
-
Add the following parameters to the fragment code so that the code looks like the below sample. Be sure to replace
Payment__c_IdandPaymentContactMMInter_Src_Payment_cToPaymentContactMMInter_c_Tgtwith the appropriate values for your source object ID and intersection object name. Modify the translation bundle name, as well, if required.Note: The format of the intersection object name is always<Relationship Name>_Src_<Source Object API Name>To<Relationship name>_Tgt. You can also retrieve the field name by doing a REST describe of the source object (Payment).<template id="contactsSubview"> <oj-vb-fragment bridge="[[vbBridge]]" name="oracle_cx_fragmentsUI:cx-subview"> <oj-vb-fragment-param name="resource" value='[[ {"name": $flow.constants.objectName, "primaryKey": "Id", "endpoint": $application.constants.serviceConnection } ]]'> </oj-vb-fragment-param> <oj-vb-fragment-param name="sortCriteria" value='[[ [{"attribute": "LastUpdateDate","direction": "desc" }] ]]'> </oj-vb-fragment-param> <oj-vb-fragment-param name="query" value='[[ [{"type": "selfLink", "params": [{"key": "Payment__c_Id", "value": $variables.id }]}] ]]'> </oj-vb-fragment-param> <oj-vb-fragment-param name="child" value='[[ {"name": "PaymentContactMMInter_Src_Payment_cToPaymentContactMMInter_c_Tgt", "primaryKey": "Id", "relationship": "M2M"} ]]'></oj-vb-fragment-param> <oj-vb-fragment-param name="context" value="[[ {} ]]"></oj-vb-fragment-param> <oj-vb-fragment-param name="extensionId" value="{{ $application.constants.extensionId }}"></oj-vb-fragment-param> <oj-vb-fragment-param name="title" value="[[$translations.CustomBundle.Contacts()]]"></oj-vb-fragment-param> </oj-vb-fragment> </template>This table describes some of the parameters that you can provide for the subview:
Parameters for Subview
Parameter Name Description sortCriteria Specify how to sort the data on the subview, such as sort by last updated date and descending order. query Include criteria for querying the data on the subview.
Next, let's configure the subview layout.
-
Click the Layouts tab, then click PaymentContactMMInter_Src_Payment_cToPaymentContactMMInter_c_Tgt > Rule Sets subtab.
-
Click + Rule Set to create a new rule set for the layout.
-
In the Create Rule Set dialog, in the Component field, select Dynamic Table.
-
In the Label field, enter exactly this value, which is case-sensitive:
SubViewLayout. -
In the ID field, enter exactly this value, which is case-sensitive:
SubViewLayout. -
Click Create.
-
-
Add the fields that you want to display in the layout.
-
Click the Open icon next to the default layout.
-
From the list of fields, select the fields that you want to display on the subview table. The fields display as columns in the order that you click them, but you can rearrange them.
Note: Fields for selection on a related object panel (related via a many-to-many relationship) are available only from the intersection object. To add custom fields to a layout, you must add those custom fields to the intersection object in Application Composer.
-
-
Create an event that updates the URL when a user navigates to a subview. This enables users to be automatically navigated back to the subview after editing a record.
Note: If you already created this event when configuring a subview for a different object, then you can skip this step.-
On the payment_c-detail tab, click the Page Designer subtab.
-
Confirm that you are viewing the page in Page Designer.
You might have to click < Return to page to get to the correct location in Page Designer.
-
Click the Code button.
-
In the code for the detail page, click the
oj-vb-fragmenttag.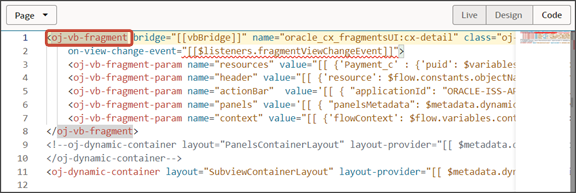
-
On the Properties pane for the cx-detail fragment, click the Events subtab.
-
Click + New Event > On 'viewChangeEvent'.
-
Drag an Assign Variable action onto the canvas.
-
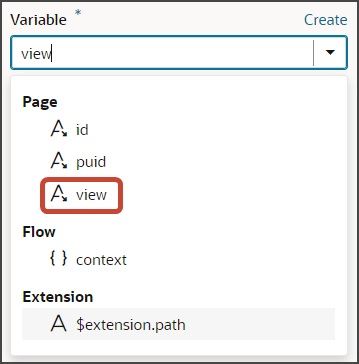
On the Properties pane, in the Variable field, click view under the Page heading.
-
In the Value field, enter
{{ payload.view
                                        }}
.
-
-
-
Comment out the dynamic container components from the payment_c-detail page.
-
On the payment_c-detail tab, click the Page Designer subtab.
-
Click the Code button.
Select Page from the dropdown.
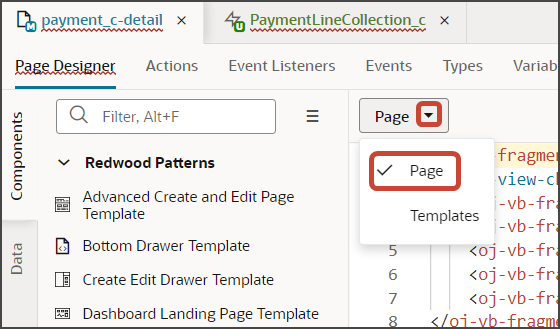
-
Comment out the dynamic container components that contain the panels and subviews.
-
-
Add an Actions menu to the subview.
To do this, create a custom field,
Actions Menu.-
On the PaymentContactMMInter_Src_Payment_cToPaymentContactMMInter_c_Tgt tab, click the Fields subtab.
-
Click + Custom Field.
-
In the Create Field dialog, in the Label field, enter
Actions Menu. -
In the ID field, the value should be
actionsMenu. -
In the Type field, select String.
-
Click Create.
Map the custom field to the field template.
-
On the PaymentContactMMInter_Src_Payment_cToPaymentContactMMInter_c_Tgt tab, click the JSON subtab.
-
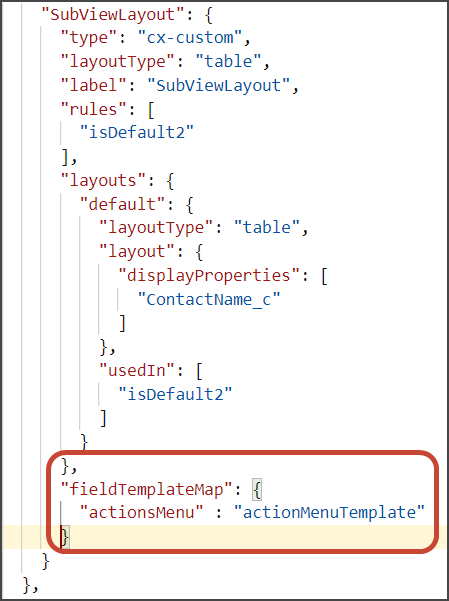
In the
SubViewLayoutsection, add this code:, "fieldTemplateMap": { "actionsMenu" : "actionMenuTemplate" }The resulting code will look like this:
Add the custom field to the subview table.
-
Click the PaymentContactMMInter_Src_Payment_cToPaymentContactMMInter_c_Tgt tab > Rule Sets subtab.
-
Click SubViewLayout.
-
Click the Open icon next to the default layout.
-
From the list of fields, click the actionsMenu field to add it to the subview table as the final column in the table.
-
Test Your Panel and Subview
Test the subview by previewing your application extension from the payment_c-list page.
From the payment_c-list page, click the Preview button to see your changes in your runtime test environment.

-
The resulting preview link will be:
https://<servername>/fscmUI/redwood/cx-custom/payment_c/payment_c-list -
Change the preview link as follows:
https://<servername>/fscmUI/redwood/cx-custom/application/container/payment_c/payment_c-listNote: You must add/application/containerto the preview link.The screenshot below illustrates what the list page looks like with data.
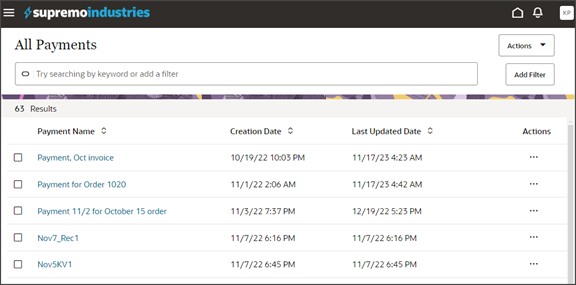
-
If data exists, you can click any record on the list page to drill down to the detail page. The detail page, including header region and panels, should display.
You should now see a Contacts panel.
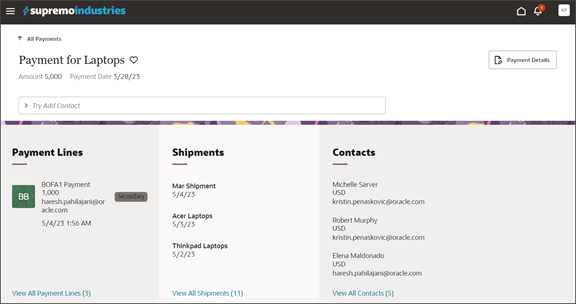
-
Click the View All Contacts link at the bottom of the Contacts panel to drill down to the subview.
-
Click the browser back button.
-
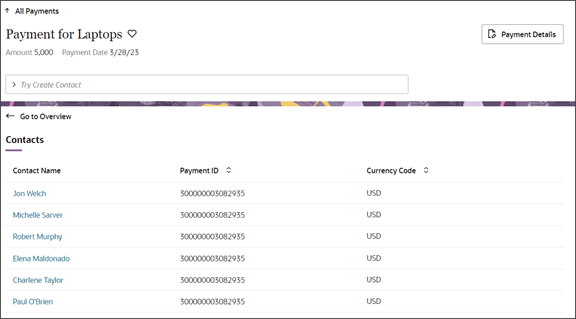
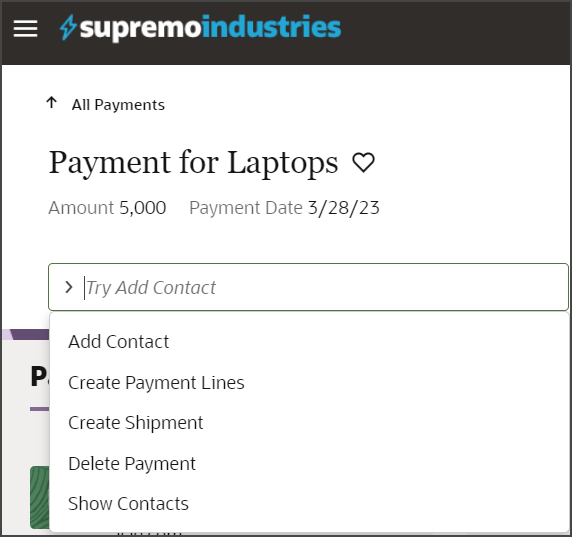
You can also navigate to the Contacts subview by using the Show Contacts smart action.
In the Action Bar, select the Show Contacts action.
You should now see the Contacts subview.
-
On the Contacts subview, click Edit or Delete from the Actions column to test the actions.
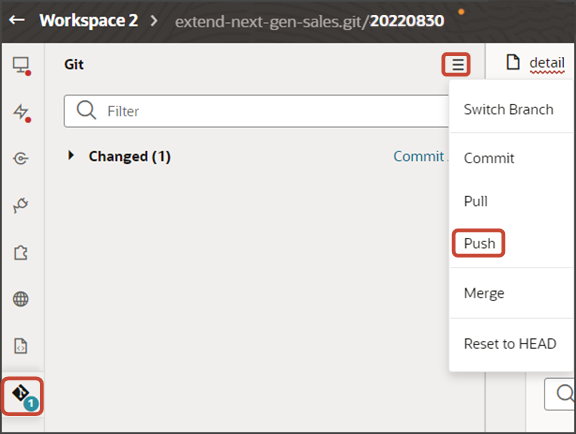
Note: The Edit Contact page only displays fields from the intersection object. To add fields to the Edit Contact layout, you must add those custom fields to the intersection object in Application Composer. Save your work by using the Push Git command.
Navigate to the Git tab, review your changes, and do a Git push (which does both a commit and a push to the Git repository).