Configure the Add Layout for Related Objects (Many-to-Many)
In our example, the Payment object has a many-to-many relationship with a standard object, Contact. From the payment detail page, users can add contacts to a payment using a Contact picker. This topic illustrates how to configure a Contact picker.
What's the Scenario?
To add a contact to a payment, the user selects the Add Contact smart action from the Action Bar. The Add Contact smart action launches the Add Contact page which includes a Contact picker. The user picks a contact from the Contact picker to add to the payment. Let's configure the Contact picker.
Setup Overview
To configure and display a Contact picker, you must do the following:
-
Create the Add Contact smart action.
See Create Smart Actions.
-
Configure the Add Contact page layout.
The page layout includes the Contact Name field so that users can select the contact they want.
-
Configure the Contact picker.
-
First, create the Contact picker field template.
This template associates the Contact Name field with the picker fragment.
-
Then, create the Contact picker layout.
The picker layout determines the fields included in the Contact picker.
-
Configure the Add Contact Layout
To configure the Add Contact layout:
-
Click the Layouts tab, then click PaymentContactMMInter_Src_Payment_cToPaymentContactMMInter_c_Tgt > Rule Sets subtab.
-
Click + Rule Set to create a new rule set for the layout.
-
In the Create Rule Set dialog, in the Component field, select Dynamic Form.
-
In the Label field, enter
AddLayout. -
In the ID field, change the value to
AddLayout. -
Click Create.
-
-
Add the required fields that you want to display in the layout.
-
Click the Open icon next to the default layout.
-
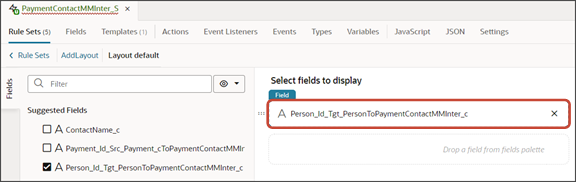
Click Select fields to display.
-
Click Person_Id_Tgt_PersonToPaymentContactMMInter_c.
-
Create the Contact picker field template next.
Configure the Contact Picker
You can configure the Contact picker field template while configuring the Add Contact layout.
-
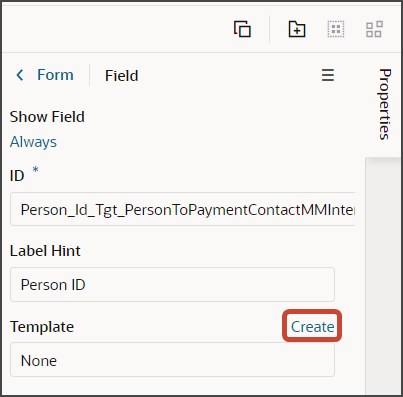
While reviewing the layout that you just created in the AddLayout rule set, make sure that the Person_Id_Tgt_PersonToPaymentContactMMInter_c field is still selected.
-
On the Properties pane, in the Template field, click Create.
-
In the Create Template dialog, in the Label field, enter
contactPicker. -
Click Create.
The template editor displays.
-
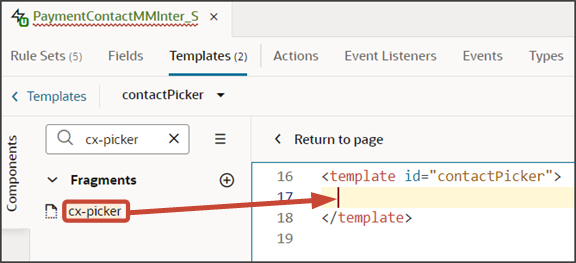
In the template editor, click the Code button.
-
In the template editor, delete the placeholder code between the contactPicker template tags.
-
On the Components palette, in the Filter field, enter
cx-picker. -
Drag and drop the cx-picker fragment to the template editor, between the contactPicker template tags.
-
Add the following parameters to the fragment code so that the code looks like the below sample. Be sure to replace
contactsandContactNamewith the appropriate values for your object's REST API name and field name.Also update the below extensionId parameter with your extension ID, if required.
<template id="contactPicker">
  <oj-vb-fragment bridge="[[vbBridge]]" name="oracle_cx_fragmentsUI:cx-picker">
    <oj-vb-fragment-param name="dynamicLayoutContext" value="[[ $dynamicLayoutContext ]]"></oj-vb-fragment-param>
    <oj-vb-fragment-param name="resource"
      value='[[ {"name": "contacts", "displayField": "ContactName", "endpoint": "cx-custom" } ]]'></oj-vb-fragment-param>
    <oj-vb-fragment-param name="extensionId" value="{{ $application.constants.extensionId }}"></oj-vb-fragment-param>
    </oj-vb-fragment>
</template>
Next, configure the layout of the picker itself.
-
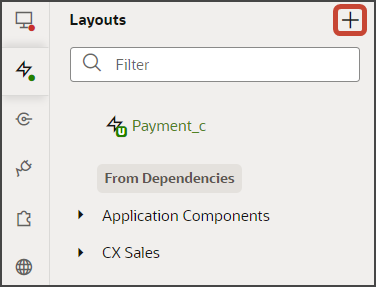
Click the Layouts tab, then click the Create Layout icon.
-
In the Create Layout dialog, click the REST resource for your related object.
In our example, expand cx-custom and click contacts.
-
Click Create.
-
On the Contacts tab, click + Rule Set to create a new rule set for the layout.
-
In the Create Rule Set dialog, in the Component field, select Dynamic Table.
-
In the Label field, enter
PickerLayout. -
In the ID field, change the value to
PickerLayout. -
Click Create.
-
-
Add the fields that you want to display in the picker.
-
Click the Open icon next to the default layout.
-
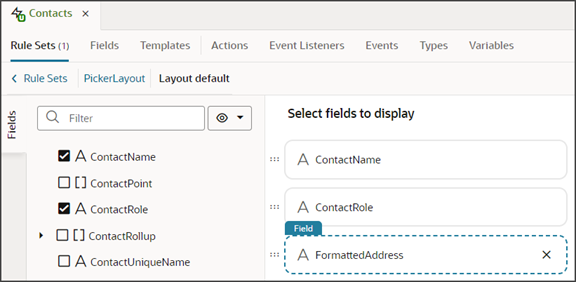
From the list of fields, select the fields that you want to display in the picker. The fields display as columns in the order that you click them, but you can rearrange them.
-
Test the Add Contact Flow
Test the Add Contact flow by previewing your application extension from the payment_c-list page.
From the payment_c-list page, click the Preview button to see your changes in your runtime test environment.

-
The resulting preview link will be:
https://<servername>/fscmUI/redwood/cx-custom/payment_c/payment_c-list -
Change the preview link as follows:
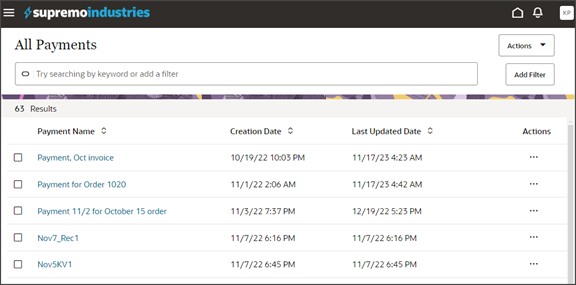
https://<servername>/fscmUI/redwood/cx-custom/application/container/payment_c/payment_c-listNote: You must add/application/containerto the preview link.The screenshot below illustrates what the list page looks like with data.
-
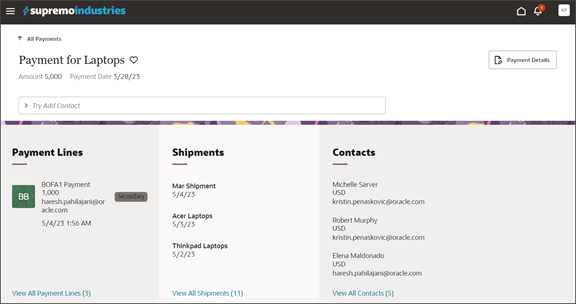
If data exists, you can click any record on the list page to drill down to the detail page. The detail page, including header region and panels, should display.
-
In the Action Bar, select the Add Contact action.
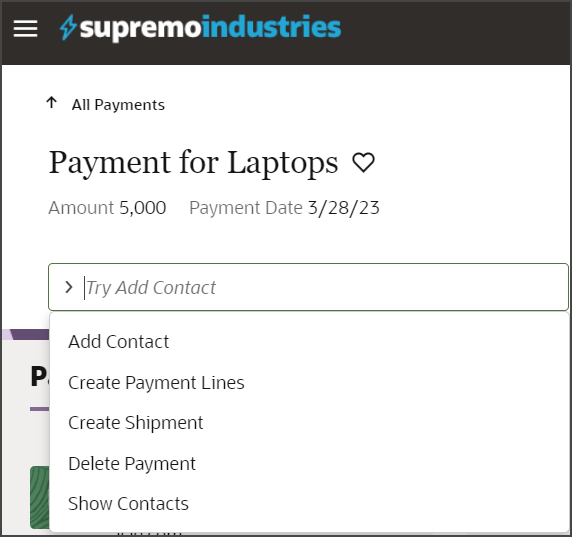
The Add Contact page displays.
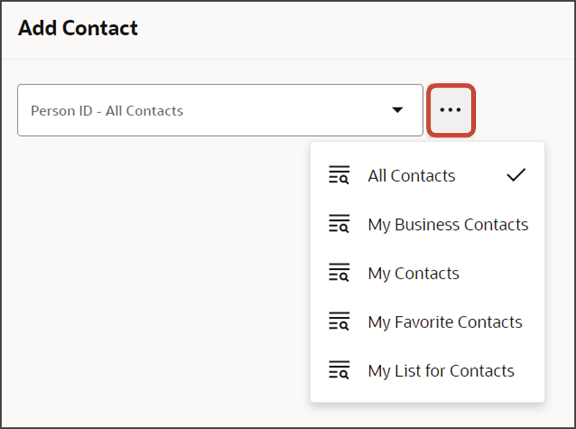
In the Person ID field, select a saved search to search a subset of records.
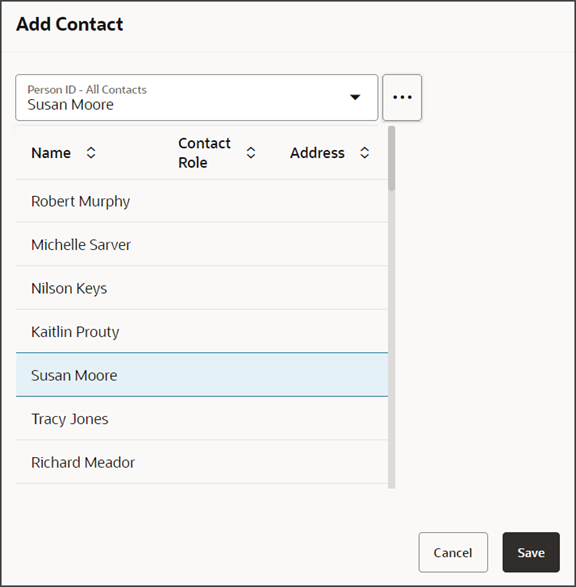
Then, in the Person ID field, enter a contact name to search for and select to add to the payment record.
After adding a contact, you can confirm that the contact was added by navigating to the Contacts subview.
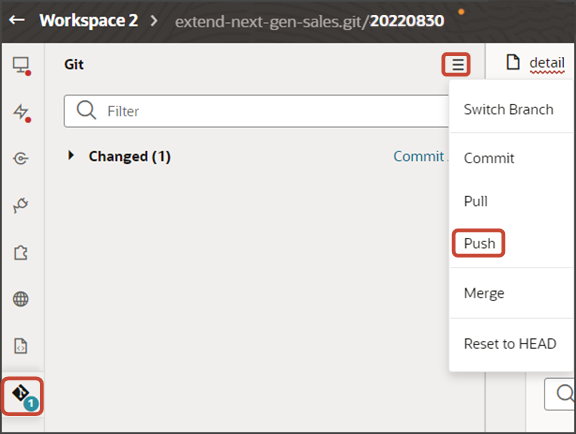
Save your work by using the Push Git command.
Navigate to the Git tab, review your changes, and do a Git push (which does both a commit and a push to the Git repository).