Create a Link Field for Related Objects (Many-to-Many)
When we configured the Contacts subview, we added a few fields to the subview table, including the ContactName_c field. Let's make the ContactName_c field into a hyperlinked field so that, at runtime, users can click that field to navigate to the Contact detail page.
Create the Link Field on a Subview
-
Click the Layouts tab, then click PaymentContactMMInter_Src_Payment_cToPaymentContactMMInter_c_Tgt > Rule Sets subtab.
-
Click the SubViewLayout rule set.
-
Click the Open icon next to the default layout.
-
Click the ContactName_c field to highlight it.
-
Create a field template.
-
On the Properties pane, next to the Template field, click Create.
-
In the Create Template dialog, in the Label field, enter
linkTemplate. -
Accept the template's ID and click Create.
You're navigated to the Templates subtab where you can design the linkTemplate.
-
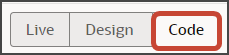
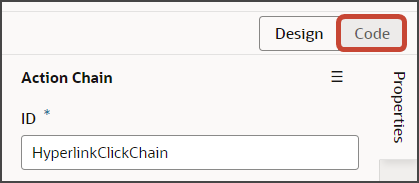
Click the Code button.
-
Delete the line for the default Input Text entry between the
linkTemplatetags.<oj-input-text value="{{ $value }}" label-hint="[[ $labelHint ]]"></oj-input-text> -
On the Templates tab, expand the Components palette if necessary.
-
In the Filter field, enter
Hyperlink. -
Drag and drop the Hyperlink component to the template editor, between the
linkTemplatetemplate tags.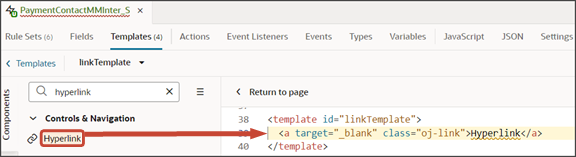
-
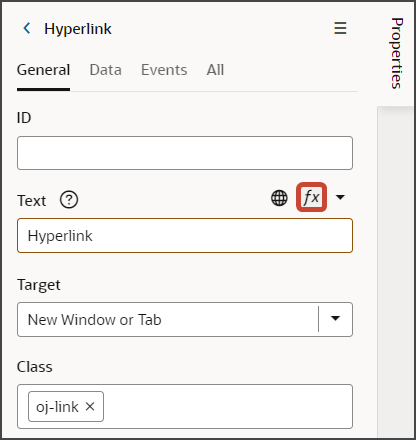
On the Properties pane for the Hyperlink node, in the Text field, click the Expression Editor icon (fx).
-
In the Expression Editor dialog, delete the value from the text box and enter
$value.ContactName_c. -
Click Save.
-
In the Target field, select Same Frame.
-
On the Data tab, in the URL field, enter #.
-
Add the following property to the template, using the ID field that's passed to the detail page:
:_primaryKeyId="[[$value.<idFieldName>()]]"In our example, add this:
:_primaryKeyId="[[$value.Person_Id_Tgt_PersonToPaymentContactMMInter_c()]]"The resulting code looks like this:
<template id="linkTemplate">
  <a target="_self" class="oj-link" href="#" :_primaryKeyId="[[$value.Person_Id_Tgt_PersonToPaymentContactMMInter_c()]]"><oj-bind-text value="[[ $value.ContactName_c ]]"></oj-bind-text></a>
</template>
-
-
Next, create a virtual field.
-
On the PaymentContactMMInter_Src_Payment_cToPaymentContactMMInter_c_Tgt tab, click the Fields subtab.
-
Click + Custom Field.
-
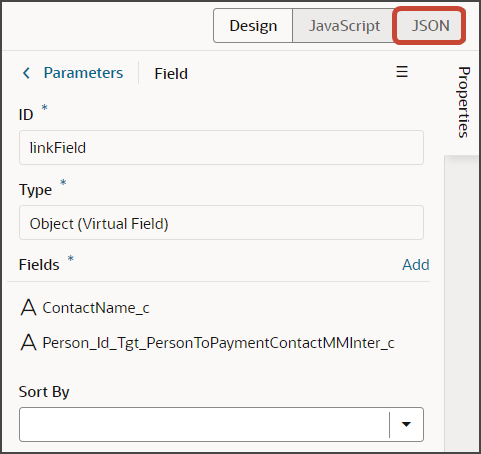
In the Create Field dialog, in the Label field, enter
linkField. -
In the Type field, select Object (Virtual Field).
-
Click Create.
-
On the Properties pane for the new virtual field, next to the Fields section, click Add and add these two fields:
-
Person_Id_Tgt_PersonToPaymentContactMMInter_c
-
ContactName_c
The first field is the ID field that's passed to the detail page, and the second field is the name field that's needed to show in the Hyperlink component.
-
-
Set the labelHint property so that the column label will display at runtime.
-
On the Properties pane, click the JSON button.
-
Add the following to the JSON for the linkField field:
"labelHint":
                                            "[[$translations.CustomBundle.ContactName()]]",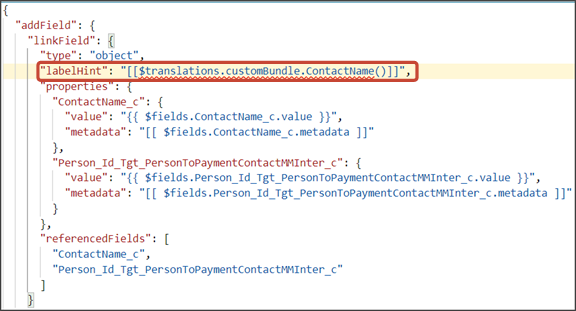
-
-
In the same JSON, add the following "imports" section as a peer of "addField":
,
"imports": {
  "translations": {
      "self": [
        "CustomBundle"
      ]
    }
-
-
Next, add the link field to the Contact subview's layout:
-
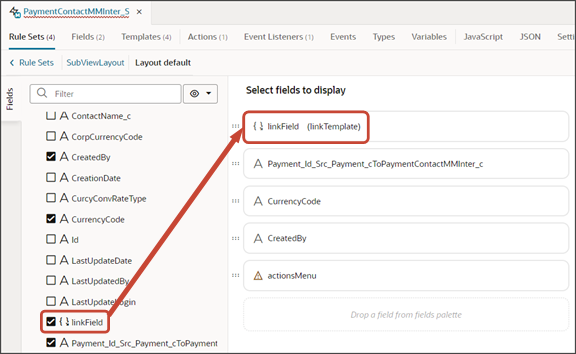
Click the Rule Sets subtab, then click SubViewLayout to return to the subview rule set.
-
Click the Open icon next to the default layout.
-
Delete the ContactName_c field from the list of fields to display.
-
Click the linkField field to add it to the subview layout.
-
Under Select fields to display, drag the linkField field to the first position.
-
On the Properties pane, in the Template field, select linkTemplate.
-
-
Next, create an event listener and action chain.
-
On the PaymentContactMMInter_Src_Payment_cToPaymentContactMMInter_c_Tgt tab, click the Templates subtab.
-
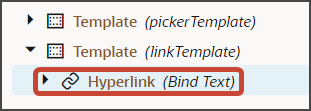
Click the linkTemplate.
-
In the Structure view, click the Hyperlink node.
-
On the Properties pane, click the Events subtab.
-
Click + New Event > On 'click'.
On the Actions subtab, above the Properties pane, click the Code button.
-
In the code, update the HyperlinkClickChain section so that it looks like this (update as needed for your own use case if you're not using the Contact object):
  class HyperlinkClickChain extends ActionChain {

    /**
     * @param {Object} context
     */
    async run(context, {event}) {
      const { $layout, $extension, $responsive, $user } = context;

          const navigateToApplicationCxSalesResult = await Actions.navigateToApplication(context, {
        application: 'cx-sales',
        flow: 'application',
        page: 'container/contacts/contacts-detail',
        params: {
          id: event.target.getAttribute('_primarykeyid'),
          view: 'foldout',
        },
      });
    }
  }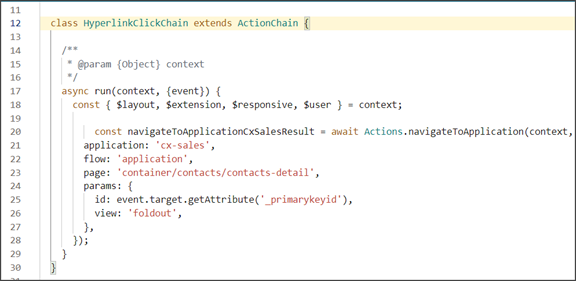
-
-
Map the event variable to the event parameter:
-
On the PaymentContactMMInter_Src_Payment_cToPaymentContactMMInter_c_Tgt tab, click the Event Listeners subtab.
-
In the Component Event Listeners section, highlight the HyperlinkClickChain row.
-
On the Properties pane, in the Input Parameters section, click event.
-
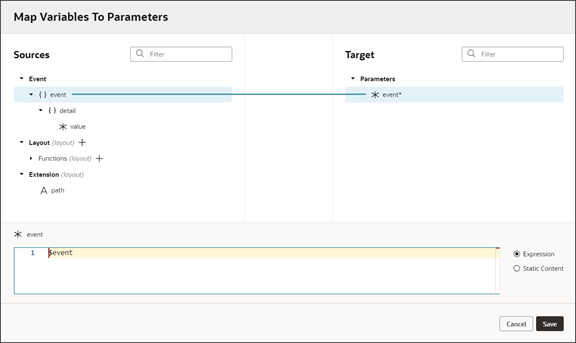
In the Map Variables to Parameters dialog, map the Event > event variable on the Sources side to the event parameter on the Target side.
-
Click the Expression option.
-
Click Save.
-
-
Create the Link Field on a Panel
We have already created the field template and virtual field, so we can update the panel with the link field, as well.
-
Click the Layouts tab, then click PaymentContactMMInter_Src_Payment_cToPaymentContactMMInter_c_Tgt > Rule Sets subtab.
-
Click the PanelCardLayout rule set.
-
Click the Open icon next to the default layout.
-
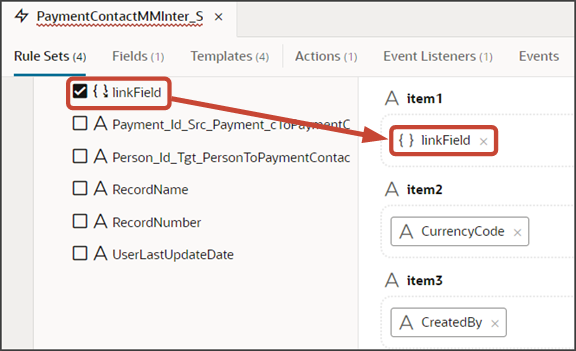
In the item1 slot, delete the ContactName_c field and add the linkField field instead.
-
To associate the linkField field with the linkTemplate template:
-
Click the PaymentContactMMInter_Src_Payment_cToPaymentContactMMInter_c_Tgt tab > JSON subtab.
-
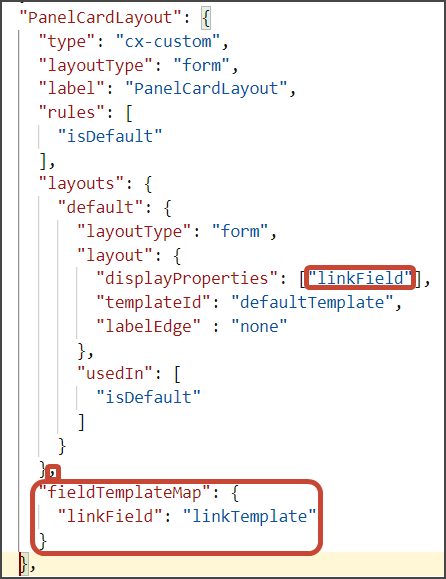
In the PanelCardLayout layout section, add the linkField field to the "displayProperties" section.
Add the linkTemplate template as follows:
,
      "fieldTemplateMap": {
        "linkField":"linkTemplate"
      }
The updated JSON should look like this:
-
Test the Link Fields on the Panel and Subview
Test the link fields by previewing your application extension from the payment_c-list page.
From the payment_c-list page, click the Preview button to see your changes in your runtime test environment.

-
The resulting preview link will be:
https://<servername>/fscmUI/redwood/cx-custom/payment_c/payment_c-list -
Change the preview link as follows:
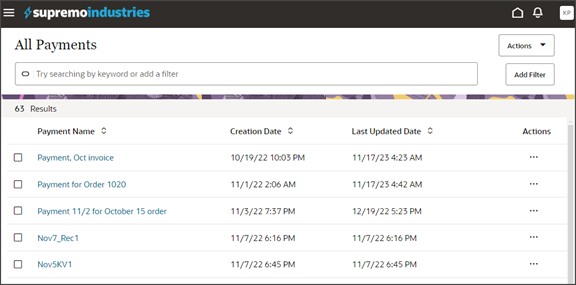
https://<servername>/fscmUI/redwood/cx-custom/application/container/payment_c/payment_c-listNote: You must add/application/containerto the preview link.The screenshot below illustrates what the list page looks like with data.
-
If data exists, you can click any record on the list page to drill down to the detail page. The detail page, including header region and panels, should display.
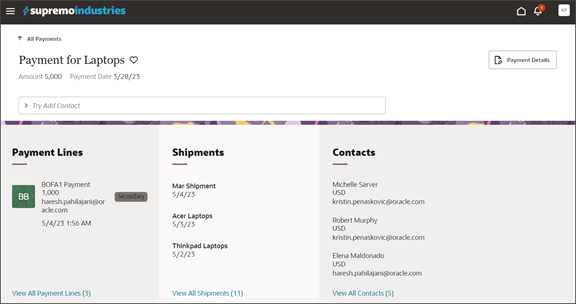
You should now see a Contacts panel.
-
Click a contact name on the Contacts panel to drill down to the Contact detail page.
-
Click the browser back button.
-
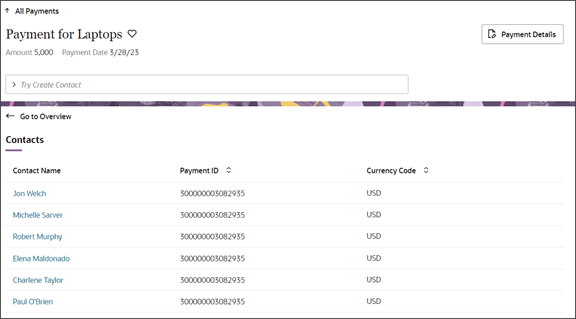
Click the View All Contacts link at the bottom of the Contacts panel to drill down to the subview.
-
Click a contact name on the subview to drill down to the Contact detail page.
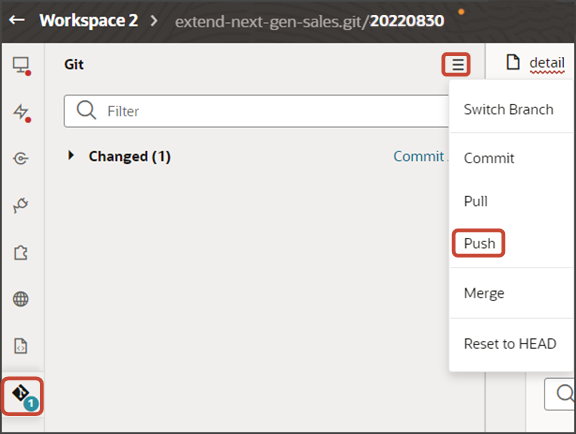
Save your work by using the Push Git command.
Navigate to the Git tab, review your changes, and do a Git push (which does both a commit and a push to the Git repository).