Display Different Fields in a Picker
Depending on how you use the context parameter in the cx-picker fragment, you can display different fields in the picker at runtime. For example, the picker could display either Field A or Field B.
To display different fields in a picker, use the context parameter. You'll also have to do the following:
-
create a custom variable
-
update the picker layout display properties in the picker object's JSON
Let's look at an example using the Account picker documented in Configure the Picker.
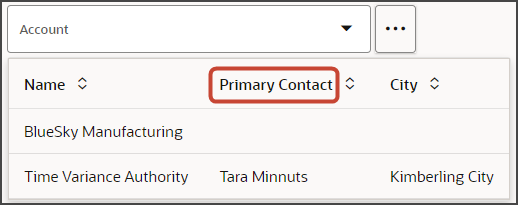
In this example, the picker you already created includes both the Address and Primary Contact fields.
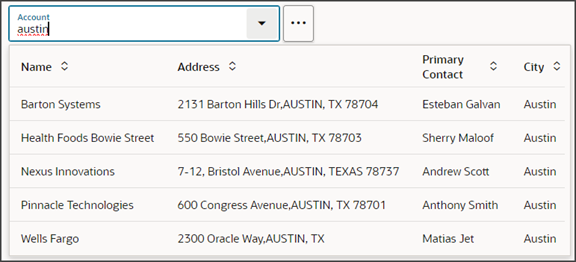
Using the context parameter, you can instead show either the Address or Primary Contact field, depending on the value of a custom variable.
Here's how to set this up:
1. Create the Custom Variable
First, create the custom variable on the picker's object:
-
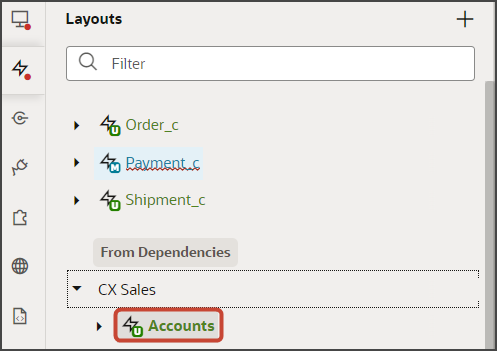
On the Layouts side tab, click the node.
-
On the Accounts tab, click the Variables subtab.
-
Click + Variable.
-
In the Create Variable dialog, make sure the Variable option is selected and, in the ID field, enter
showContact. -
In the Type field, select Boolean.
-
Click Create.
2. Add the Condition to the Picker Display Properties
Next, add the condition (which field to show depending on the value of the variable) to the picker layout display properties in the Account object's JSON.
-
On the Accounts tab, click the JSON subtab.
-
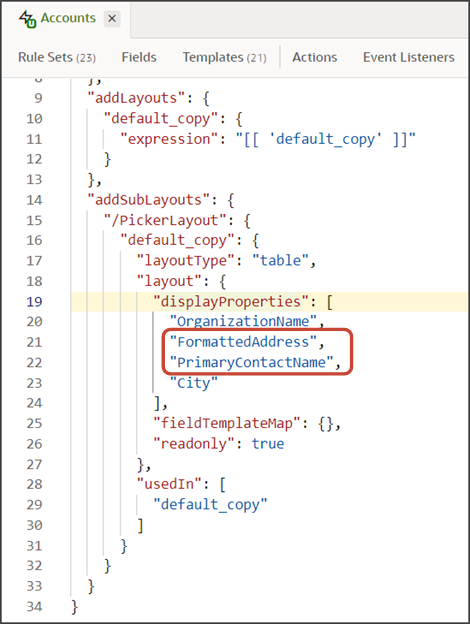
Find the picker layout display properties.
-
In the display properties section, replace the two lines for the
"FormattedAddress"and"PrimaryContactName"fields with a single line:"{{ $componentContext.showContact ? 'PrimaryContactName' : 'FormattedAddress' }}",
3. Set the Value of the Variable in the Picker Fragment
Finally, define the value of the variable (true or false) in the picker fragment itself.
-
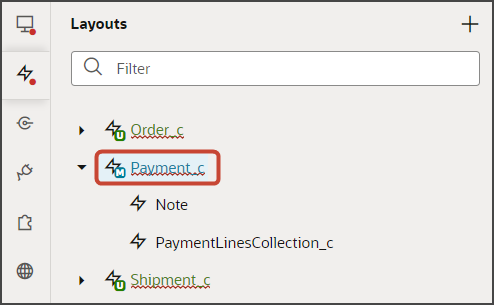
On the Layouts side tab, click the Payment_c node.
-
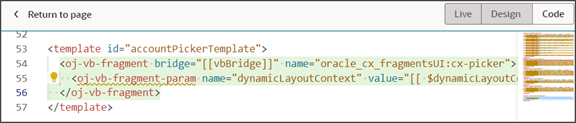
On the Payment_c tab, Templates tab, click the AccountPickerTemplate template.
-
Make sure the fragment code is selected, as illustrated in this screenshot.
 Tip:
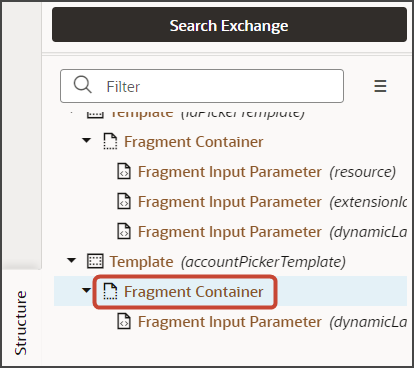
Tip:On the Structure pane, selecting the Fragment Container node for the picker template accomplishes the same thing.
-
On the Properties pane for the cx-picker fragment, in the Input Parameters section, set the value for the context parameter. You can set the showContact variable to true or false:
[[ {'showContact':true} ]]or
[[ {'showContact':false} ]]
4. Test Your Setup
You can now test each variable setting.
-
Preview your extension and test the picker with the showContact variable as true:
-
Next, preview your extension and test the picker with the showContact variable as false:
