Modify an Existing Custom Application Using the CX Extension Generator
Once you have a working application extension in Oracle Visual Builder Studio (VBS), you can use the CX Extension Generator to add additional custom objects and custom panels to custom objects. The CX Extension Generator automatically generates their custom subviews and required smart actions. To use the tool, download your workspace as a .zip file from Visual Builder Studio and then import it into the CX Extension Generator.
The process of adding objects and panels is the same as when you're created the application after you import from Visual Builder Studio. Here's an overview of the steps detailed in this topic:
- Export the files from Visual Builder Studio.
- Import the files into CX Extension Generator.
- Add objects, panels, and subviews.
- Generate the modified files for export.
- Import the files back into Visual Builder Studio.
- Add the panels and subviews to the panel and subview layouts.
- Preview the updated application.
Prerequisites
In Application Composer:
-
Create the new custom objects and child objects that you want to add to your existing application.
Export Files from Visual Builder Studio
To update an existing custom application, you must first download the application from your Visual Builder Studio workspace.
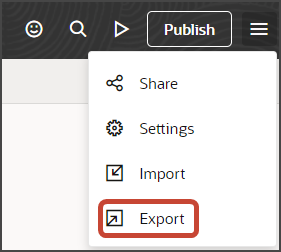
In Visual Builder Studio, click the Menu icon at the top of the page, then click Export.
Import the .Zip File into CX Extension Generator
-
In a sandbox, navigate to .
-
Click Import Extension.

-
In the Import Application drawer, select your .zip file and click Import.
The existing objects in your application are now visible in the CX Extension Generator.
Add Objects, Panels, and Subviews
Using CX Extension Generator, you can add additional objects, panels, and subviews. And you can generate smart actions for them. To delete existing panels, change their order, and configure them, you must use Visual Builder Studio.
- To add objects, click and add any of the objects you want to configure.
- Drill down on each object to configure the detail page. In the runtime
application, the detail page is called the Overview page.Note: The CX Extension Generator displays only the Configure Panel and the panels you add during your configuration. It doesn't display any of the panels you've added previously.
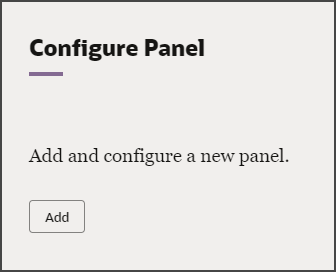
- To add a panel:
- On the default Configure Panel, click
Add.
- In the Add Panels drawer, select the custom related objects that you
want to create the panels for. These can be child objects and objects
with either a 1:M or M:M relationship.
For example, select Shipments.
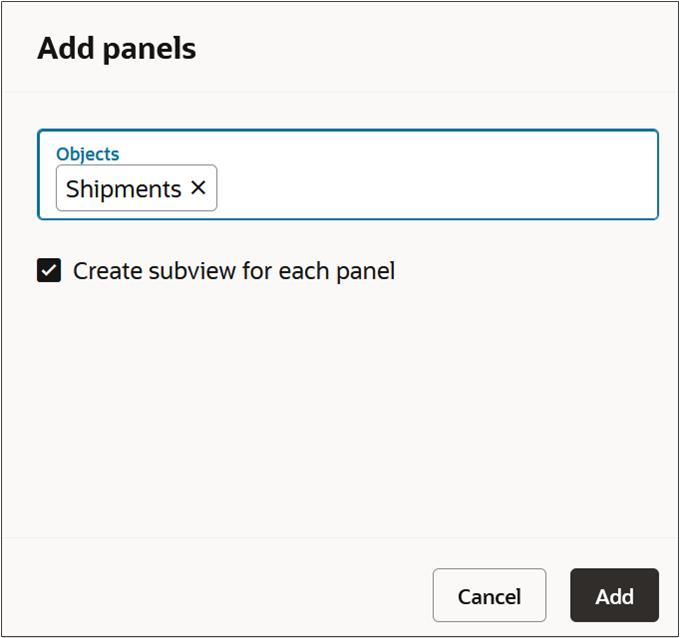
- Select the Create subview for each panel checkbox
to automatically create a subview along with each panel.Note: If you don't select this check box, then you can add subviews later. See the next step.
- Click Add.Important: When you add a panel for an object with a M:M relationship, the generator creates the panel for the intersection object you created as part of the M:M relationship rather than the object itself.
- Optionally, click to add and remove subviews for each panel.
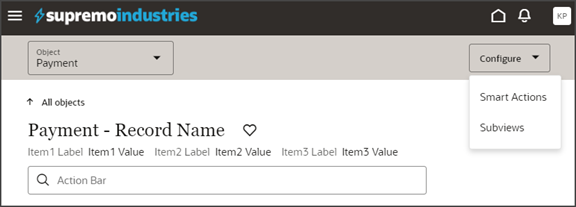
- Click to review the smart actions that the Extension Generator
will automatically create for the objects that you selected.Tip:
You can optionally enhance a smart action's configuration after the Extension Generator creates them. You do this by editing the smart action in Application Composer (). See Overview of Smart Actions.
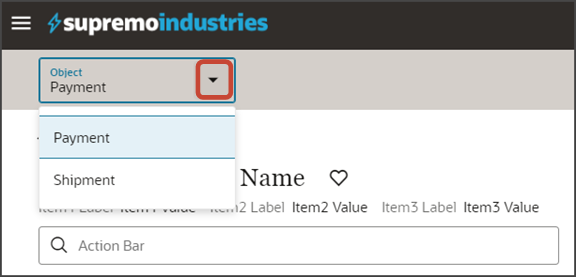
If your application includes more than one object, then use the Object drop-down list to switch between objects to configure multiple detail pages.
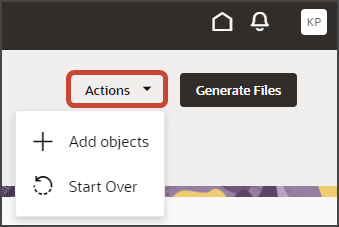
- After you've completed your changes, you can generate and download the .zip file.
- On the default Configure Panel, click
Add.
Generate Files
When you're done with your application extension changes, navigate back to the CX Extension Generator list page and click Generate Files.
The CX Extension Generator generates and downloads a .zip file that includes the pages and layouts for your selected objects.
Import the Files Back into Visual Builder Studio
The CX Extension Generator generates a .zip file that you can import into Visual Builder Studio.
-
Use the Navigator to navigate to Visual Builder Studio: .
-
In Visual Builder Studio, navigate to the workspace that contains your existing application.
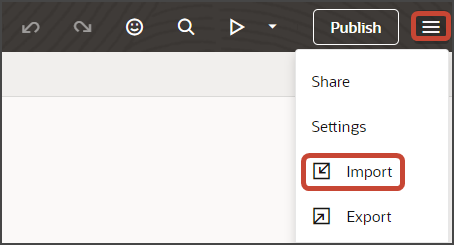
Click the Menu icon at the top of the page, then click Import.
-
In the Import Resources dialog, add your .zip file and click Import.
Your workspace is updated with the newly added objects and related artifacts, without disturbing the existing objects in the application.
For Custom Objects You Imported, Add the Panels and Subviews to the Layout
After you import the custom objects you exported from CX Extension Generator, you must add the imported panels and subviews to the custom Panel Container and Subview Container layouts.
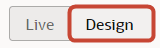
Click the Design button.
-
Confirm that you're viewing the page in Page Designer.

- Add the panels you imported to the Panel Container
Layout:
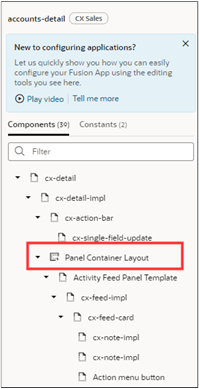
On the Structure panel, click the Panel Container Layout node.
-
Add the imported panels to the custom layout by clicking Add Panel (the plus icon highlighted in the screenshot).
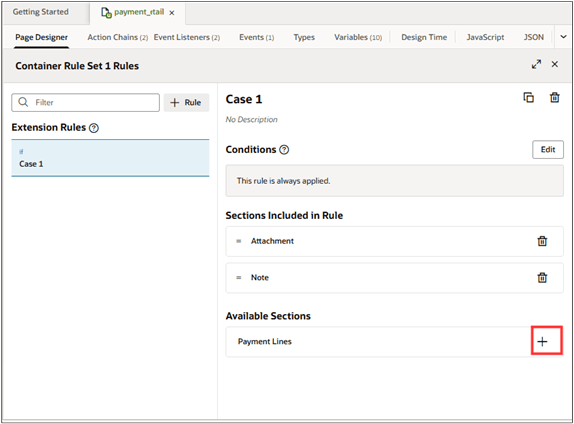
Now repeat the same process for the Subview Container Layout.
-
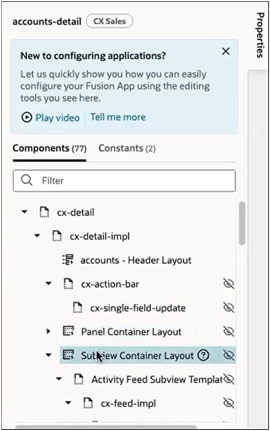
On the Structure panel, click the Subview Container Layout node.
-
Add the subview layouts to the custom subview layout, by clicking Add Panel (the plus icon next to the Sections heading).
-
Click the Preview button to see the newly added objects in the application.
