Enable Microsoft Application Permissions So Sync Continues without Re-Authentication
When you set up the application in Microsoft Azure, you granted delegated permissions to the APIs required for the integration, such as Calendars.ReadWrite. These API permissions are needed so that sync and the add-in can access users' emails, appointments, contacts, and tasks in Microsoft.
With delegated permissions, when your users' Microsoft token expires (90 days from last sign-in to the add-in), sync doesn't run until the users re-sign in to the add-in.
If you want sync to continue seamlessly without your users needing to sign-in to the add-in every 90 days, then you can add application permissions for certain APIs. The APIs are required for the integration with the application registered in Microsoft Azure.
After you give the additional application permissions to the application in Microsoft Azure, the Microsoft 365 Standard Sync scheduled process uses the permissions to sign in. The add-in, meanwhile, continues to use the existing delegated permissions.
After you give the application permissions, your users have to sign in to the add-in just once before sync starts, and then they don’t have to sign in to the add-in again.
Overview of the Setup Steps
To add and enable the application permissions for the add-in:
- Add the application permissions in Microsoft Azure for the application you created for the Oracle Microsoft 365 add-in.
- Enable application permissions in the Sales application.
- Notify your users to sign in to the add-in once.
Add Application Permissions in Microsoft Azure
- Sign in to Microsoft Azure.
- Open the application you have registered for the Oracle Microsoft 365 add-in.
- Go to the API Permissions tab and click Add a permission.
- Select Microsoft Graph.
- Click Application Permissions and add the permissions
shown in this table:
Permission Option to Select Calendars Calendars.ReadWrite Contacts Contacts.ReadWrite Mail Mail.ReadWrite Mailbox Settings MailboxSettings.ReadWrite Tasks Tasks.ReadWrite -
Click Add Permissions.
- On the API permissions page, select Grant admin consent for each permission you added as consent on behalf of users.
Enable Application Permissions in the Sales Application
-
Navigate to the Sync Configuration page. See How to Get to the Sync Configuration Page for more information.
- Under Synchronization Settings, select the Enable Application Permission check box.
- Save the changes.
Configure an Application Access Policy to Secure Your Mailboxes
Theoretically, any accounts using the application with the application permissions granted can gain access to all mailboxes in the Microsoft tenant that the application is for. However, the Oracle-Microsoft 365 sync processes – which uses these application permissions – only uses the permissions to access the mailboxes of those users who have signed in to the add-in. The add-in doesn't use application permissions on the application; it only uses the delegated permissions.
Depending on your company's security requirements, you might want to further restrict this application to only certain users. For this use case, you can configure an application access policy before you enable the application permissions on the application.
As a Microsoft Azure administrator, configure an application access policy:
- Create a mail-enabled security group in the Microsoft Exchange admin center.
- Create an application access policy in Microsoft PowerShell for the security
group you created.
The access policy restricts the scope of mailboxes that the standard sync process can access.
Create a Mail-Enabled Security Group
- Sign in to the Exchange Admin Center at
https://admin.exchange.microsoft.com/#/. - Navigate to .
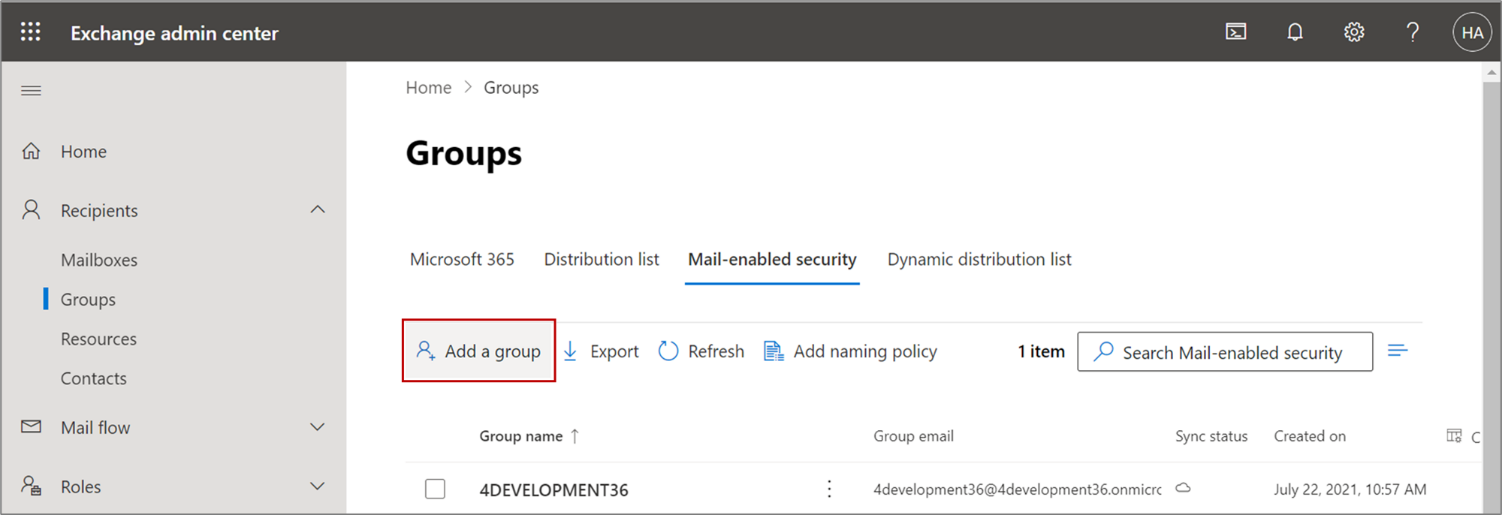
- Click Add a group, as shown in this screenshot:
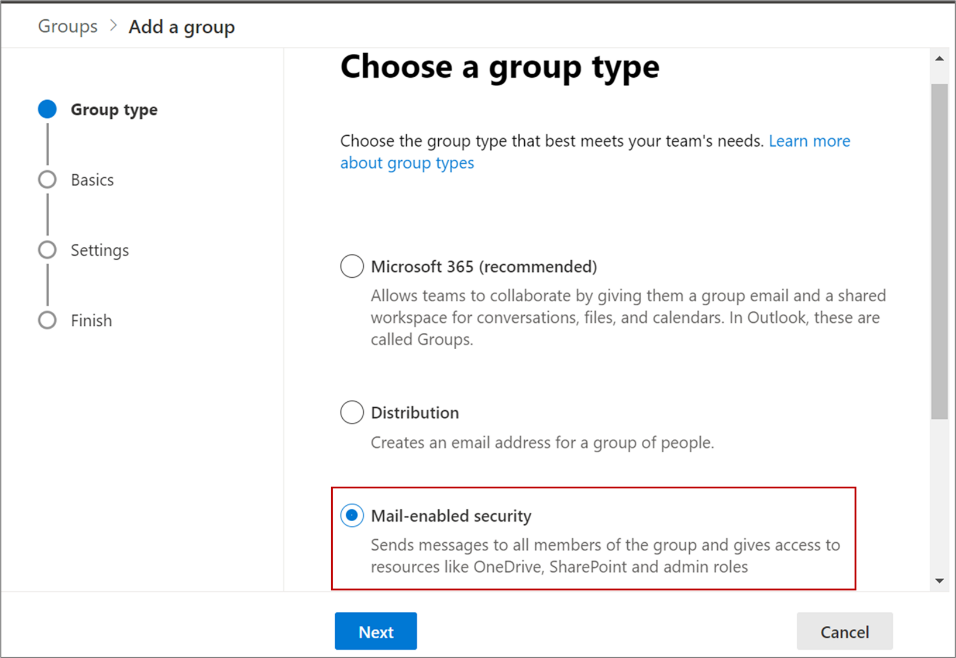
- In the Group type section, select Mail-enabled security
and click Next, as shown in this screenshot:
- In the Set up the basics section, enter a name and description, and click
Next, as shown in this screenshot:

- In the Settings section, enter the group email address, and configure the
following. The image shows the Settings menu, with the Edit settings page
active. It also shows two check boxes in the Communication and Approval
sections.
- Communication: Do not select the check box.
- Approval: Select the Require owner
approval to join the group check box, as shown in this
screenshot:
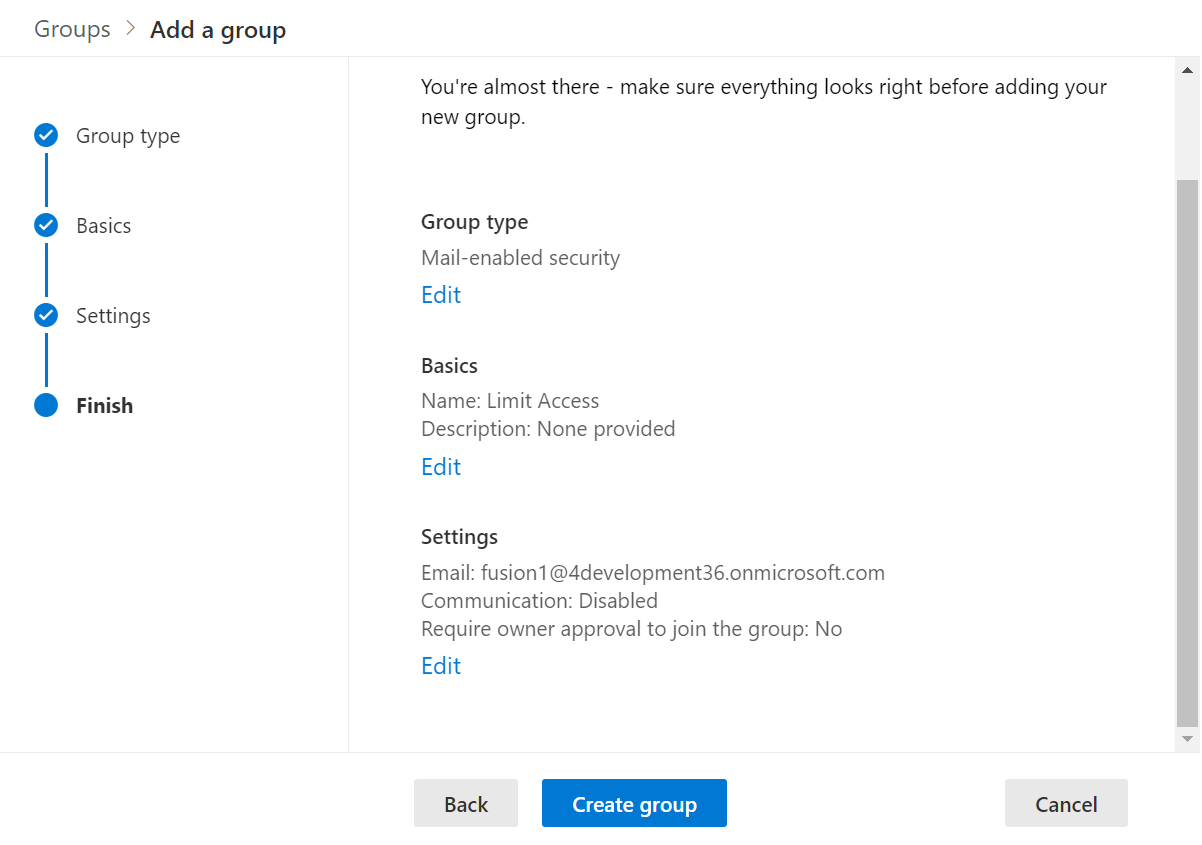
-
In the Finish section, verify all the details and click Create group, as shown in this screenshot:
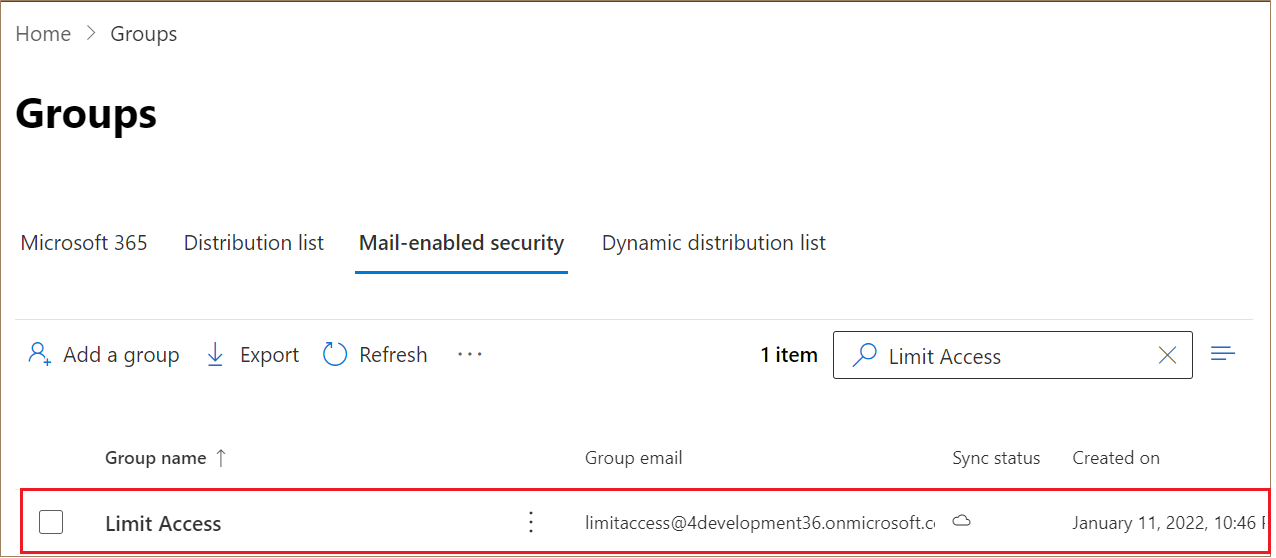
- The mail-enabled security group you created shows up in the Groups list, as
shown in this screenshot:
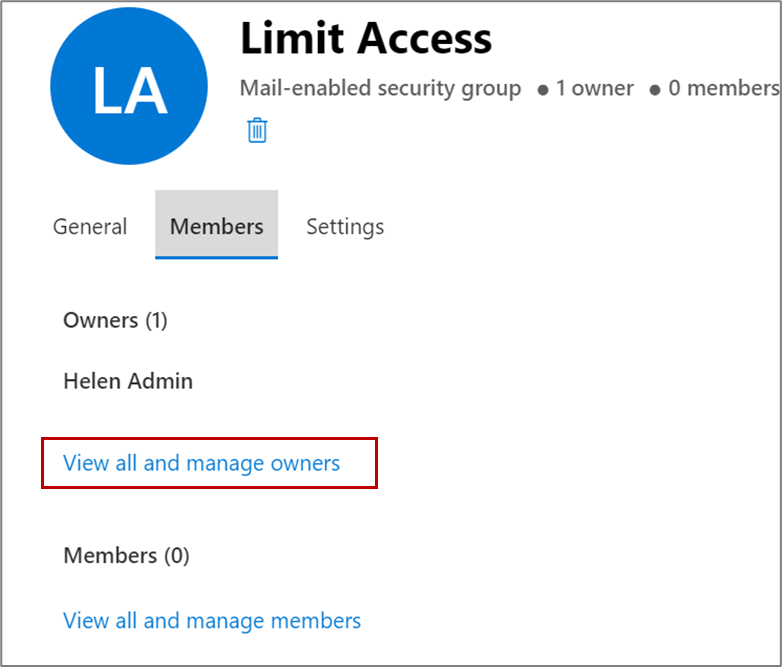
- Next, you need to assign owners and add members to the group. To do that, click the group name.
- On the Group Details window, click the Members tab.
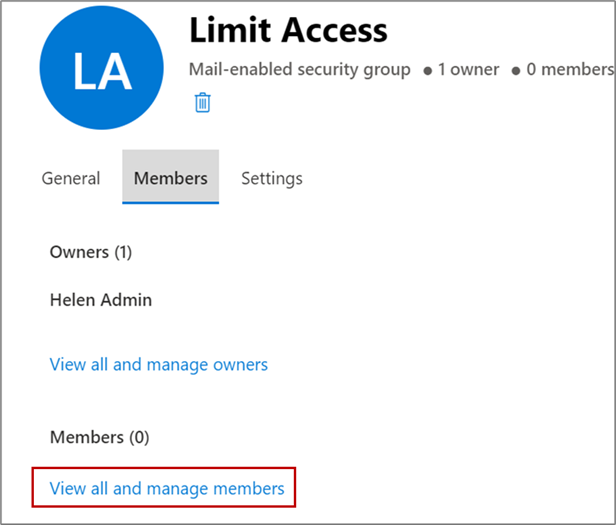
- You're the owner of the group you created. If you want to add more
owners, click View all and manage owners.This screenshot shows the Limit Access window with the Members tab highlighted, along with the View and manage all owners link:
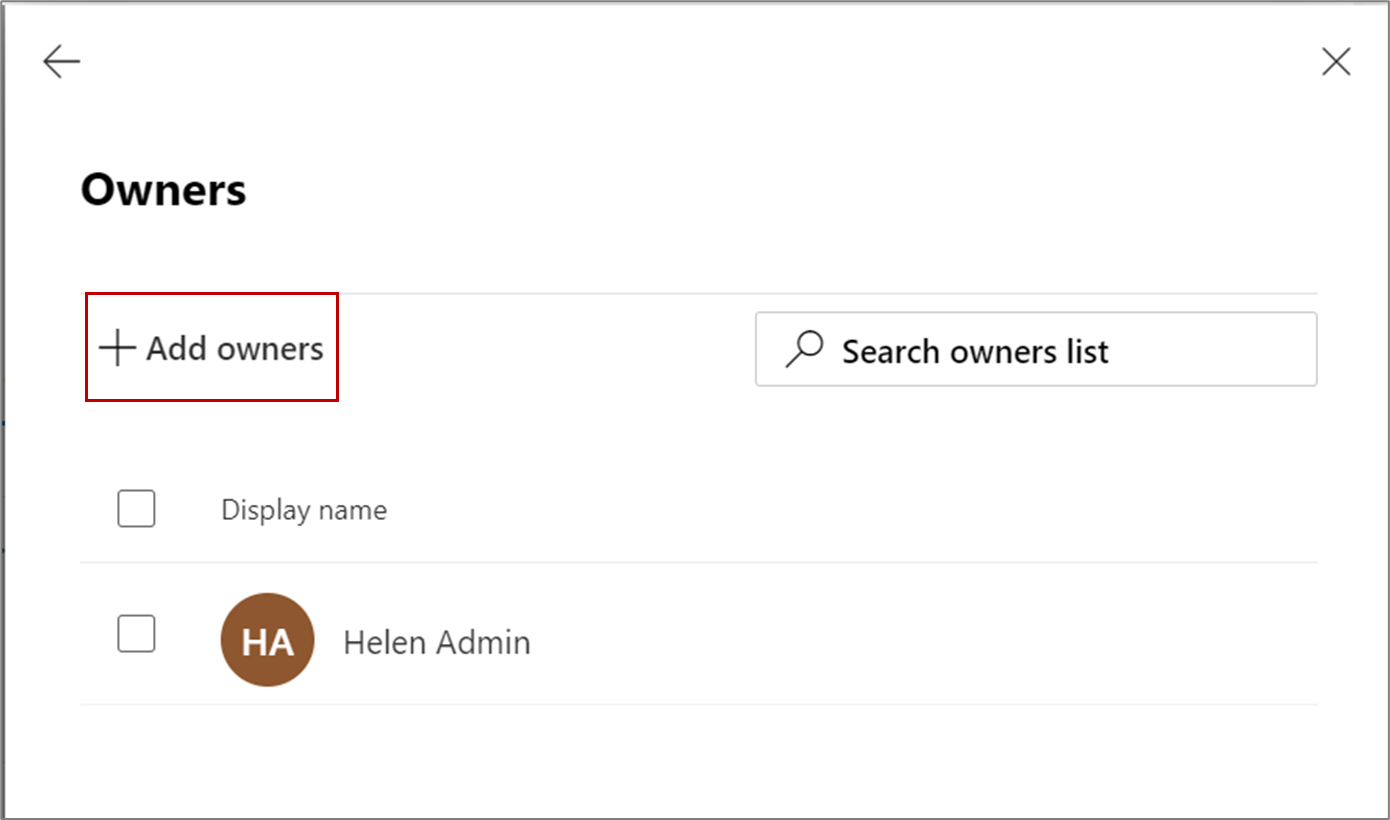
- On the Owners page, click Add owners, as shown in
this screenshot:
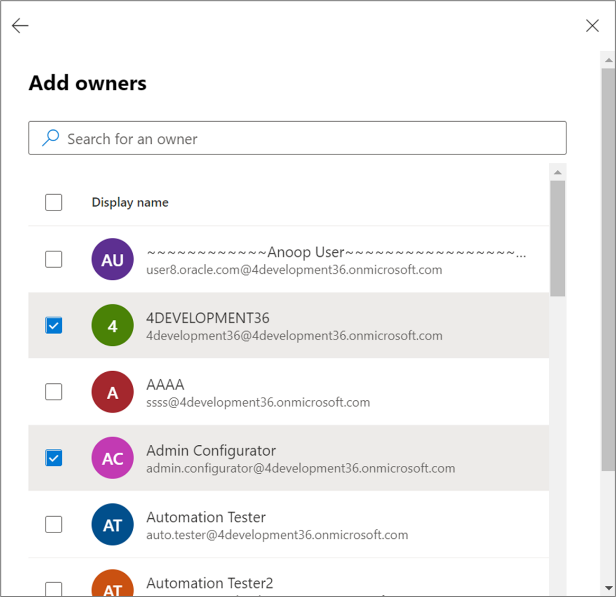
- Select the group owners from the list and click
Add, as shown in this screenshot:
Click the back arrow to go back to the Members tab.
- Next, to the security group, add users you want to give seamless access
to. On the Members tab, click View all and manage
members, as shown in this screenshot:
- On the Members page, click Add members.
- Select the members from the list and click
Add.
Click the back arrow to go back to the Members tab.
- You're the owner of the group you created. If you want to add more
owners, click View all and manage owners.
- Close the group.
The mail-enabled security group is ready for use.
Create an Application Access Policy
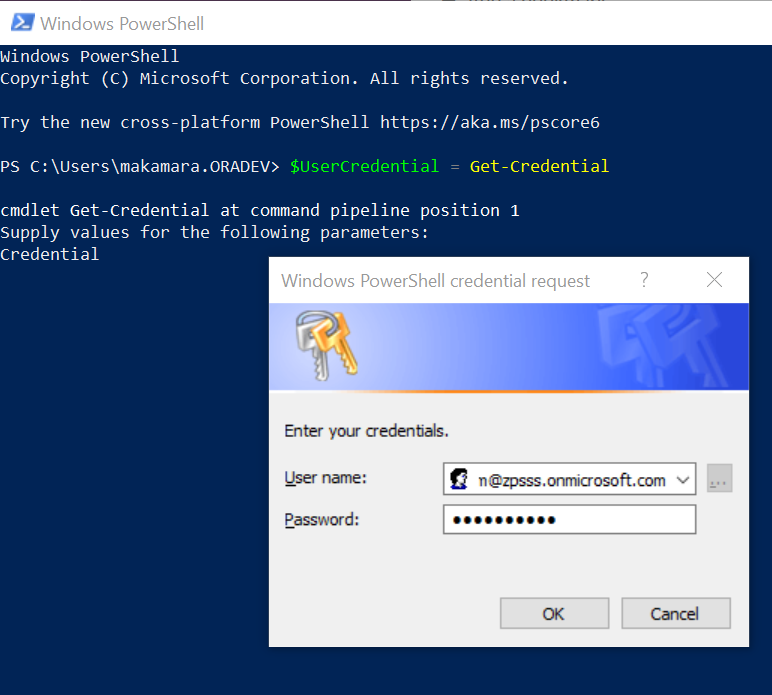
- Open Windows PowerShell.
- Run the following commands in Windows PowerShell.
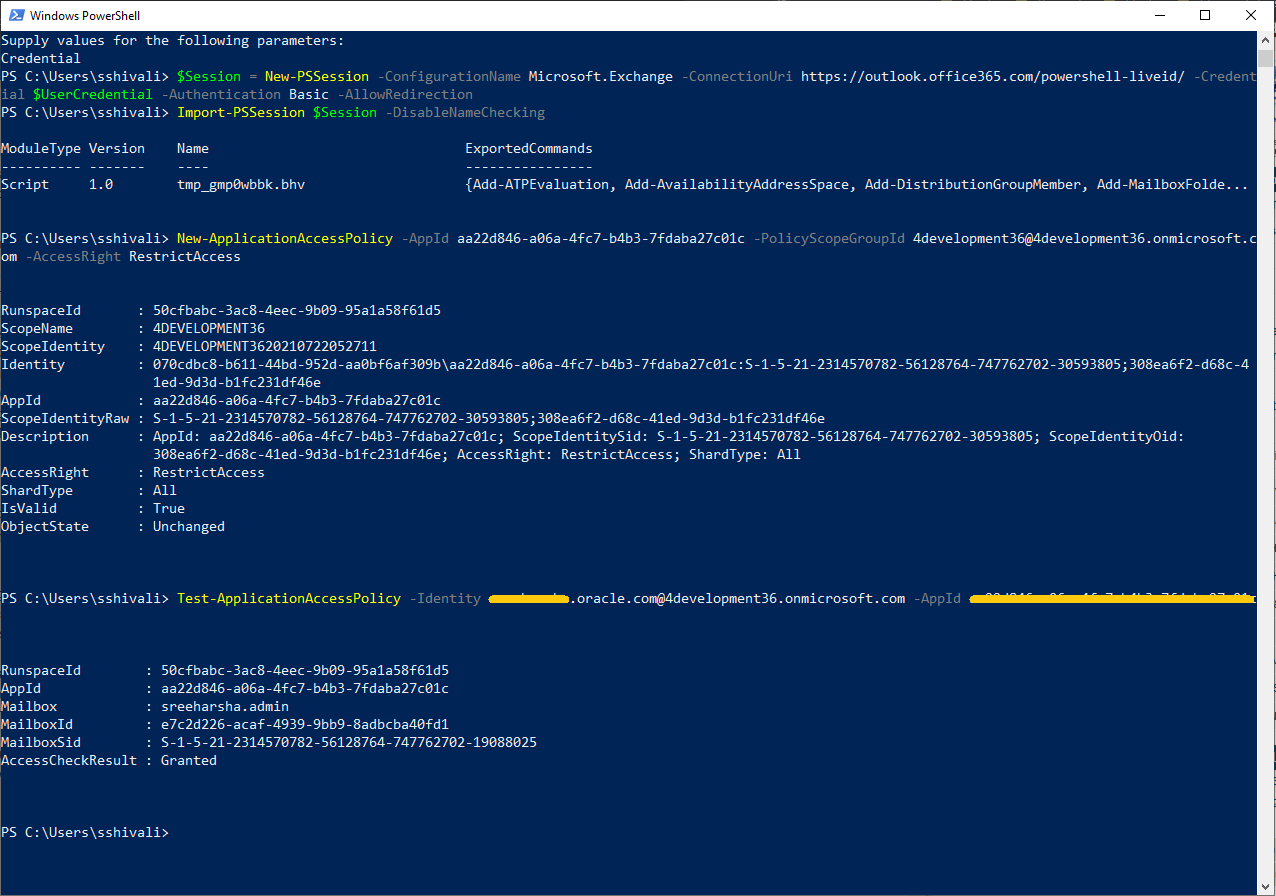
$UserCredential = Get-CredentialOn entering the command, a window to enter your Windows PowerShell administrator credentials appears. Enter the administrator credentials, as shown in this sample screenshot:
- Next, enter the command,
$Session = New-PSSession
                                -ConfigurationName Microsoft.Exchange -ConnectionUri
                                https://outlook.office365.com/powershell-liveid/ -Credential
                                $UserCredential -Authentication Basic -AllowRedirection
, as shown in this sample screenshot: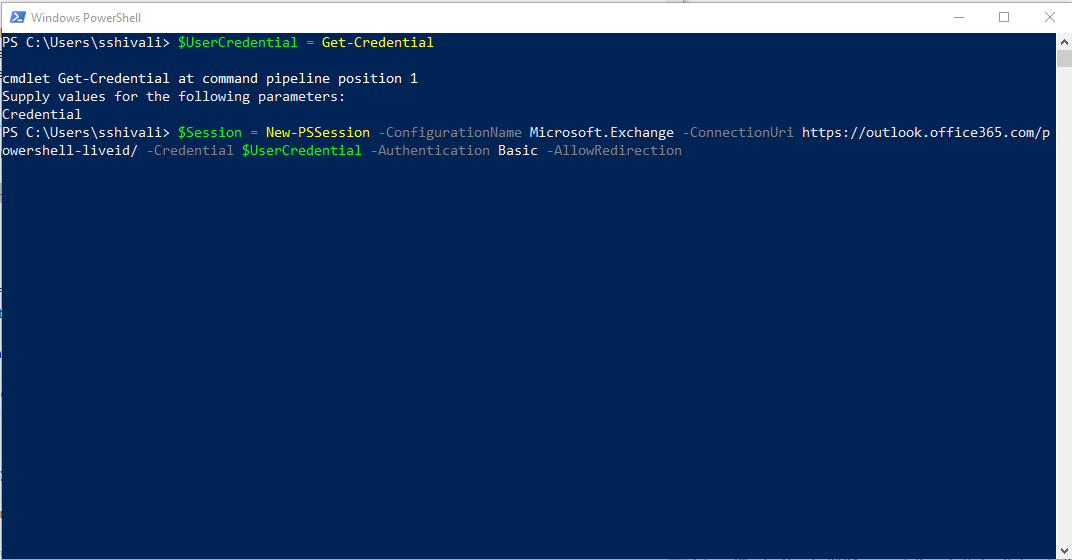
You get a prompt to enter your administrator credentials again. Enter them.
- Next, enter the command,
Import-PSSession $Session
                                -DisableNameChecking
, as shown in this sample screenshot:.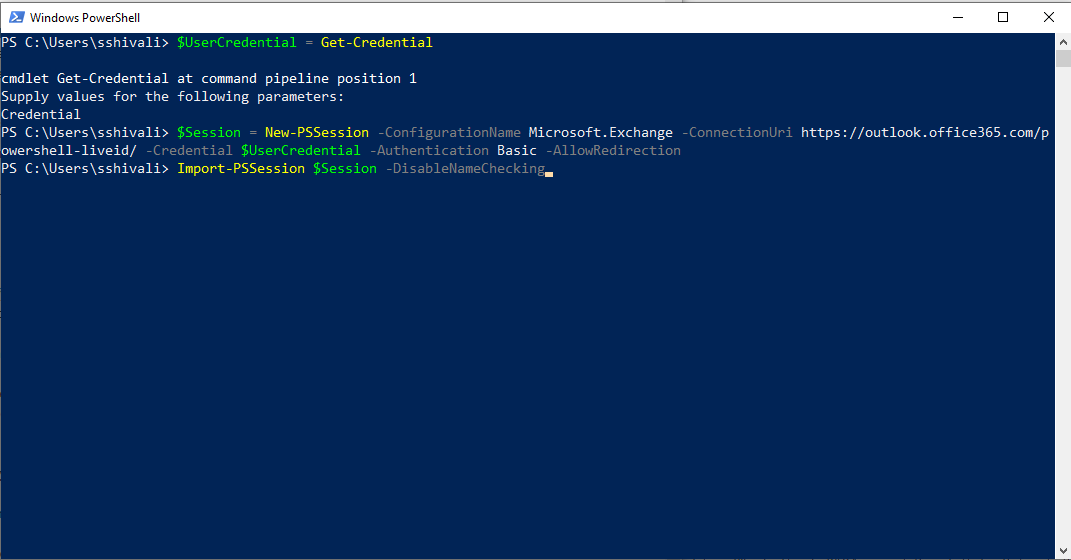
- Identify the application's Application (client) ID and a mail-enabled security
group to restrict the access to the application.Note: You can get the application's Application (client) ID from Microsoft Azure. Use the mail-enabled security group you just created, by following the steps provided in the section above, Create a Mail-Enabled Security Group.
- Next, create an application access policy.
Replace the arguments for App Id, Application ID registered with Microsoft Azure, PolicyScopeGroupId, the security group email address, and run the following command:
New-ApplicationAccessPolicy -AppId xxxxxxxxxxxxxxxxxxxx
                                -PolicyScopeGroupId xxxxxxxxxxxxxxxxxx -AccessRight
                                RestrictAccess.
, as shown in the following sample screenshot: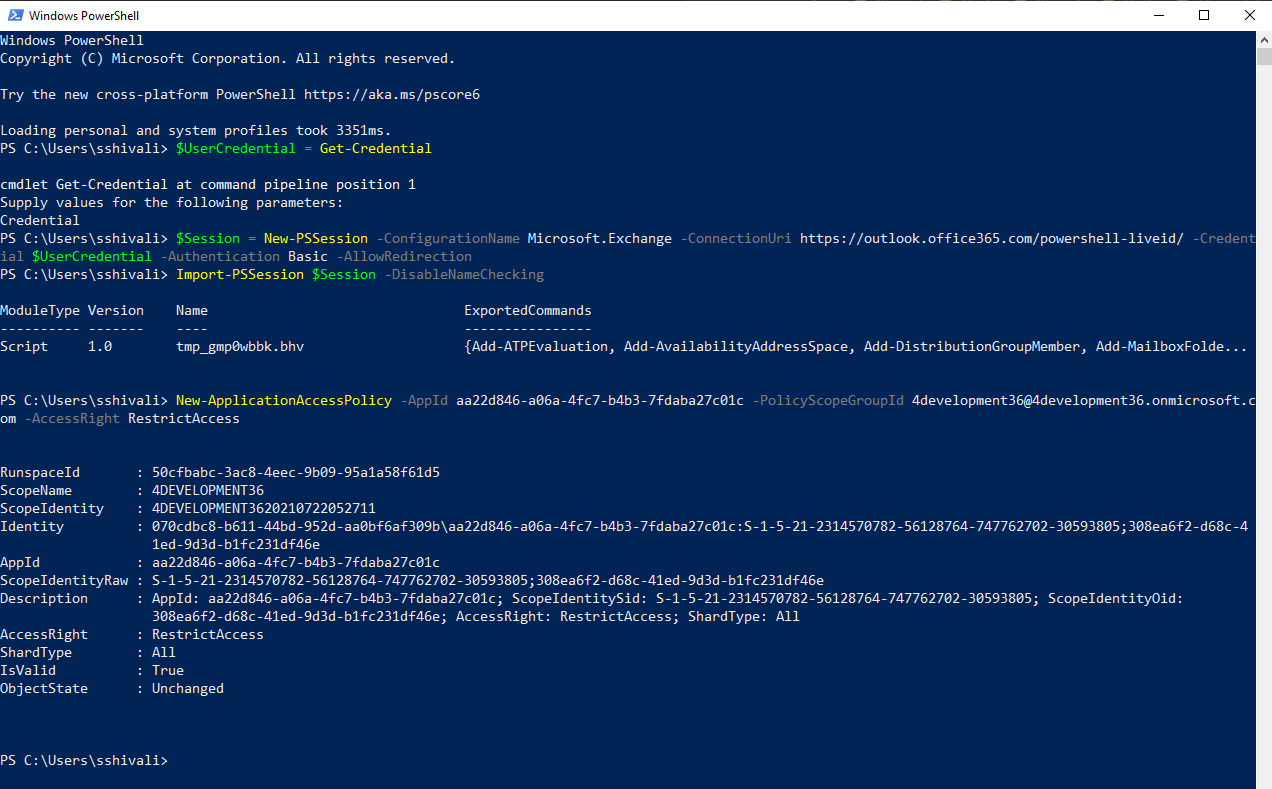
It may take about 30 mins for your changes to be reflected.
- Test the newly created application access policy:
Run the following command, replacing the arguments for Identity and App Id. Identity is the user’s email address added to the Security Group and AppId is the Application Id registered with Microsoft Azure.
Test-ApplicationAccessPolicy -Identity <Identify> -AppId
                                <AppId>