Set Up the Application in Microsoft Azure
Setting up the application in Microsoft Azure involves these steps:
- Sign in to Azure and registering the application.
- Enter a Host Name.
- Add Redirect URIs.
- Specify Client Secret and duration of the secret.
- Add API permissions.
Sign In and Register
- As an Azure/Exchange administrator, sign in to the Microsoft Azure portal at
https://portal.azure.com.Note: If you're a first-time user, then you must sign up for your Microsoft Azure Active Directory account. - On the homepage of Microsoft Azure, search for
App
                        registrations
. - Click App registrations.
- Click the New registration tab.
- On the Register an application page, enter a name for the application.
The name you enter appears during Azure setup only. It doesn't appear in the add-in.
- For Supported account types, make sure Accounts in this
organizational directory only (single tenant) is selected.Note: Other options for tenancy:
- For single tenant with more than one domain set up, select Accounts in any organizational directory (Any Azure AD directory - Multitenant) instead of the single-tenant option.
- If you're using multi-tenancy, select Accounts in any organizational directory (Any Azure AD directory - Multitenant) and personal Microsoft accounts. See Use Multi-Tenancy for more information.
- Leave the Redirect URI blank.
- Click Register.
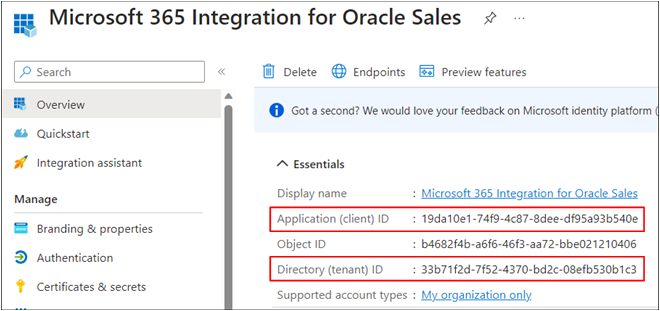
- Back on the Overview page, copy the Application (client) ID and Directory
(tenant) ID for later use.
Here's an example of a portion of the App registrations overview page, showing Display name, Application (client) ID, Object ID, Directory (default) ID, and Supported account types:
Enter a Host Name
- Next, in the navigation pane, click Branding &
properties.
The Branding & properties page shows these fields: Name, Logo, Upload new logo, Home page URL, Terms of service URL, Privacy statement URL, Service management reference, and Internal notes. Here's an example of the menu item and the Branding & properties page:
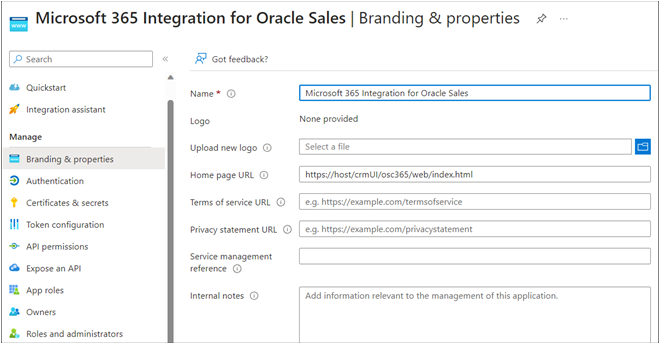
- In the Home page URL field, enter the host name of your
Sales environment with this string appended to it:
https://<Host
                        Name>//crmUI/o365nextgen/web/index.html
. - Click Save.
Add Redirect URIs
- In the navigation pane, click Authentication (callout 1
in this sample image).
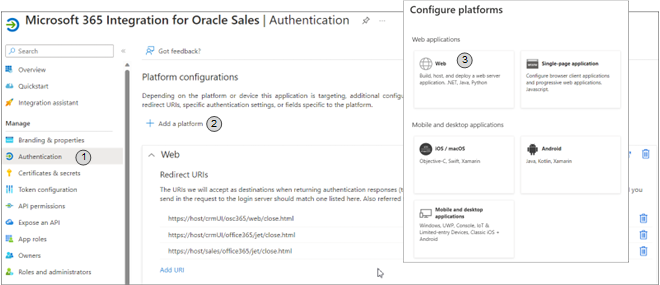
- Click Add a platform (callout 2 in the image).
- In the Configure platforms page, click Web (callout 3 in the image).
- In the Redirect URIs section of the Configure Web popup
window, add the URIs shown in the following table. When done, click
Configure.Note: You need to add each URI separately.
URI Base Values
URI Base Values Example URIs https://<host>/sales/office365/jet/close.htmlhttps://sample-pod.oraclecloud.com/sales/office365/jet/close.htmlhttps://<host>/crmUI/office365/jet/close.htmlhttps://sample-pod.oraclecloud.com/crmUI/office365/jet/close.htmlhttps://<host>/crmUI/osc365/web/close.htmlhttps://sample-pod.oraclecloud.com/crmUI/osc365/web/close.html
Specify Client Secret and Duration
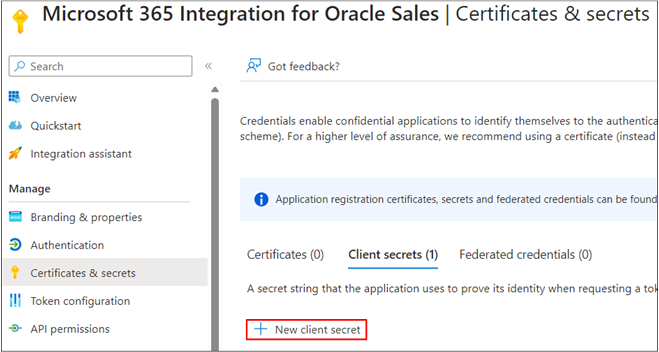
- In the navigation pane, click Certificates & secrets.
- In the Certificates & secrets page's Client secrets section, click
New client secret, as shown in this sample
image:
-
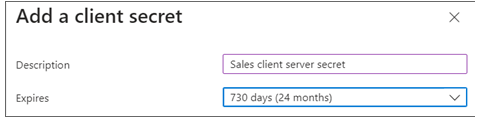
In the Add a client secret popup window, enter a description, for example:
Sales client server secret. - Select a duration for the expiration of the client secret. The recommendation is
24 months. See What should I do if the client secret expires? for more details.
If you select Custom, enter your start and end dates. These dates need to be in a 24-month time span. After the end date, you must sign in to the client again to start the sync.
Note: If the client secret expires, the sync processes will stop and salespeople won't be able to log into the add-in. You can change this later in the Add-In Registration page. - Click Add.
- Copy the generated string from the Value field. This value is the Client Secret value. Note it for later use.
- Copy the Client Secret Expires Date. Note it for later use.
Add API Permissions
- In the navigation pane, click API permissions.
- Click Add a permission.
- On the Request API permissions page, on the Microsoft APIs tab, select the Microsoft Graph section.
- Click Delegated permissions. Add these
permissions:
Permission Option to Select Calendars
Allows the application to create, read, update, and delete events in user calendars.
Calendars.ReadWrite
Contacts
Allows the application to create, read, update, and delete user contacts.
Contacts.ReadWrite
MailboxSettings
Allows the application to create the Shared with Oracle category.
MailboxSettings.ReadWrite
Mail
Allows the application to create, read, update, and delete email in user mailboxes. Doesn't include permission to send mail.
Mail.ReadWrite
Tasks
Allows the application to create, read, update, and delete the signed-in user's tasks and task lists, including any shared with the user.
Tasks.ReadWrite
- Click Add Permissions.
- On the API permissions page, in the Configured permissions section, click Grant admin consent to consent on the behalf of users.