Get Started with the Add-In
After salespeople open the add-in for the first time, they can pin it so that it remains visible as they browse their emails. Salespeople can access the add-in from the desktop application or from their web browser. Welcome and tool tip screens help them get started taking advantage of the add-in's features.
Steps to Open the Add-In
- Navigate to the Microsoft Outlook application on a computer or from a web browser.
- Sign in to Outlook.
- In Outlook, click on an email to preview it.Note: If you don't select an email, you won't see the add-in in the ribbon.
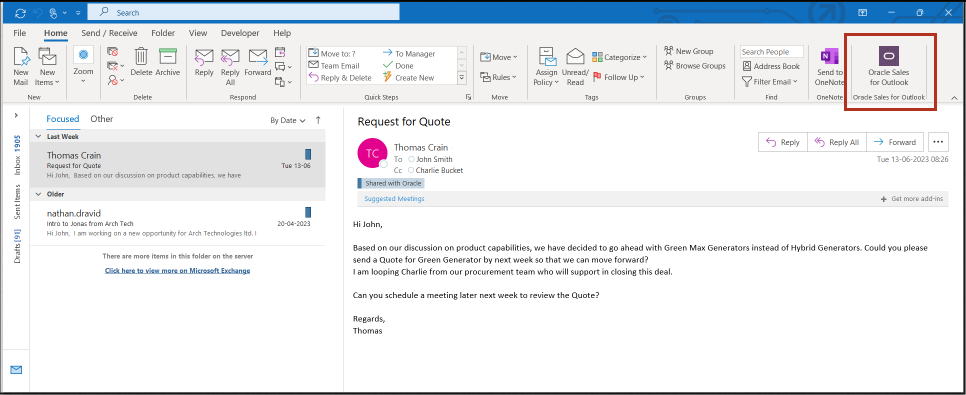
- In the Outlook ribbon from the desktop app, click Oracle Sales for
Outlook, as shown in this sample image:
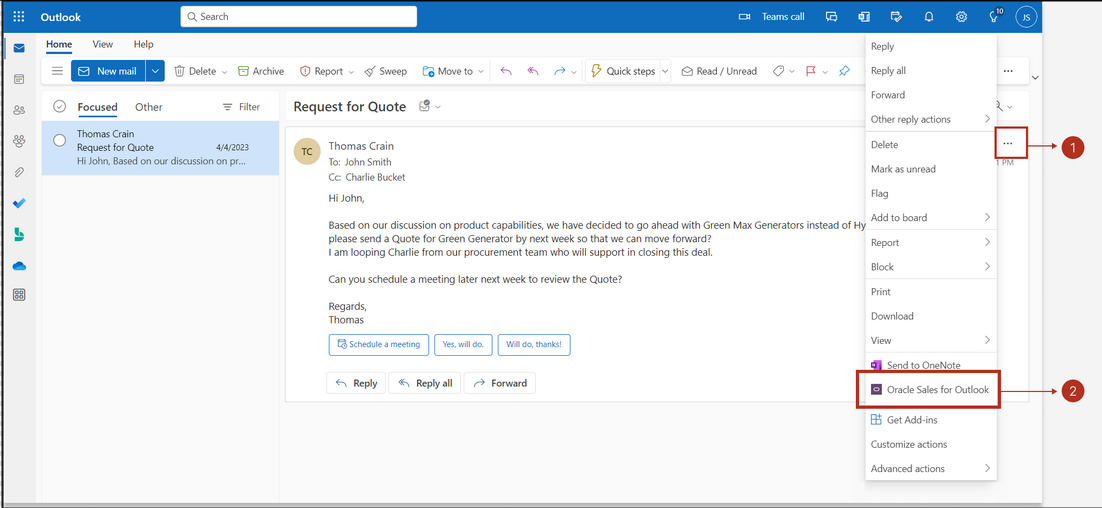
- If accessing the add-in from the web, click More actions
(callout 1 in the following image) and then click Oracle Sales for
Outlook (callout 2):
- The connection might take a while to establish. Wait for the connection to establish. If the add-in is trying to connect, you'll see a "working" indicator.
- Click Connect.
- You're prompted to sign in with your sales credentials to Oracle Sales in a
separate browser window. Note: If you're not prompted to sign in, then check that you have popups enabled. If opening the add-in from the web, then you must respond to any options to enable popups and to add
outlook.office.comas an application mail-to links. - Click Authorize, and if applicable, sign in with Microsoft 365 credentials.
- Once the connection establishes, salespeople are ready to start working in the add-in.
View Useful Tips for the First Time
Welcome and tooltip screens help salespeople get started using add-in features. They contain some key insights into capabilities and give salespeople some tips and tutorials to help them get started. For example, tool tips might show information about the features salespeople can access from the home page or provide some details about the available insights. Salespeople can access the welcome and tips and tutorials area from the add-in navigational bar, as shown in this sample image:

Tooltips appear when salespeople start to compose new emails, but they can choose not to display the tip by selecting the Don’t show this again option.
Pin the Add-in
After salespeople have viewed the welcome screens for the first time, they're prompted to pin the add-in feature so that it automatically opens each time they begin to browse through their emails. They simply select the pushpin to pin it.