Configure the Contract Approval Layout Template
The contract approval layout template decides the formatting of the approval notification. Don’t make any changes to the standard template. Make a copy of the standard template, save it to the Custom folder, and edit the sample template.
- Sign in to Analytics Publisher with administrator privileges and navigate to the Catalog.
- In the Shared Folders directory, open .
- Click More.
- Click Customize.
The Customize option automatically creates a copy of a predefined report and stores it in the folder within the Catalog.
- In the Custom folder, open .
- Select the report and click the Edit link of the layout to download the RTF file: ContractApprovalNotificationReport.rtf
- Open the downloaded RTF template file in Microsoft Word.
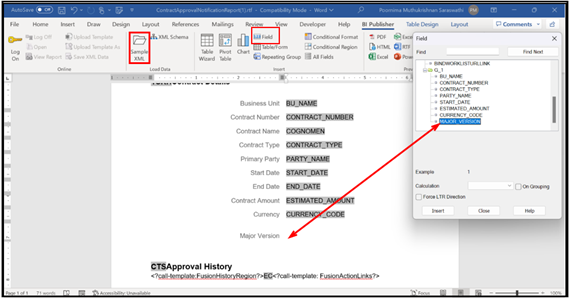
- Load the sample data that you generated by clicking on Sample XML in the BI Publisher ribbon.
- Insert the fields in the file according to your business requirements. After the
upload is complete, all the Oracle Analytics Publisher options are enabled to
configure the template. When you click the Field icon,
you see the contract-related fields from the data model. You drag or move the
required fields to change the template.
- Save the file as Rich Text Format (RTF).