Create the Product Group Hierarchy
If you're manually creating the product group hierarchy in the UI, create the remaining product groups under the root product:
-
Click the root product group in the side pane.
Keep in mind that when you view product groups in the Manage Product Groups page, you have two view options: List view: When you first enter the Manage Product Groups page, you see the product groups as a list of folders. Click the tree view icon to enter tree view.Tree view: Tree view shows the product groups as nested parent-child groups. To return to list view, click the list view icon. In order to see the list view icon and the list of product groups, you may need to expand the Manage Product Groups pane.Here's what the list view and tree view icons look like on the Manage Product Groups page: 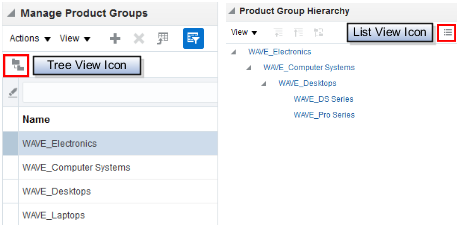
-
In the Manage Product Groups page, click the Subgroups tab in the main work area.
The product group information for the selected group appears in the main work area.
Tip: A product group must be "locked" to be edited, so ensure that the parent of the product group you're creating is locked. -
Click the Create icon.
-
In the Create Subgroup dialog box, enter the product group information.
-
In the Name field, enter a unique name without spaces.
-
In the Display field, enter the product group display name.
-
Enter a description and start and end dates if you want.
-
Select these check boxes:
-
Active: Only active product groups are available for use in the consuming applications.
-
Root Catalog: Don't select the Root Catalog check box. You can have only one root catalog.
-
-
Deselect the Allow Duplicate Children check box to make sure that product groups and products don't appear multiple times in the hierarchy.
-
-
Click Save and Close.
-
Verify that the product subgroup is visible in the Manage Product Groups pane. If the new subgroup doesn't appear, then click View and then Refresh.
-
Repeat the steps to create additional levels in your sales catalog hierarchy.