6Fields and Selection Lists

Fields and Selection Lists

    Fields

      Field

      The Recruiting Center uses standard fields supplied by the system and which provide standardized information on candidates, requisitions, offers. User-defined fields (UDFs) can also be created to capture any additional information required by your organization.

      Fields are divided into four categories based on where they are used in the Recruiting Center:

      • Candidate

      • Department

      • Offer

      • Requisition

      When you click on a category, standard fields for that category are displayed. You can filter the list using the Show Fields filter. If you click the Show User-defined Fields link, you can see available UDFs. You can also click Create User-defined Fields to create new UDFs.

      Field Category Filter
      Candidate
      • Certifications

      • Contingent Staffing

      • Education

      • Employee Metrics

      • Evaluation Management

      • Personal Information

      • References

      • Submission

      • Work Experience

      Offer
      • All Offer Types

      • Competitive Offer

      • Expectations

      • Offer Terms

      • Requisition

      Requisition
      • All

      • Department

      • Offer

      • Requisition

      Field Properties

      Various properties can be applied to both standard fields and user-defined fields:

      • Availability: Where the field is used, that is the Recruiting Center, career sections, the candidate search feature, the History tab, reports (for UDFs). See Field Availability.

      • Personally Identifiable Information (in Career Section): This option is available for the Date of Birth, Social Security Number, and candidate user-defined fields. When the option is selected, if candidates enter a value in these fields and save the page, the value is no longer displayed in the field and asterisks are displayed in place of the value on the Summary page. See Masking Values for Date of Birth, Social Security Number and Candidate UDFs.

      • Content Required: The content of a field may be required to save, approve (requisition fields only), or source (requisition fields only) and users must enter information in the field in order to proceed. If content is not required, users do not have to enter any information in the field.

      • Security Level: Each field is associated to a security level to restrict access or viewing of a field. Security levels are General, Restricted, or Confidential. See Field Security Level.

      • Organizations, Locations, and Job Fields: To make fields relevant to a specific context. See Field Contextualization.

      • Exceptions: An exception regarding a staffing type, that is Professional, Hourly, Campus, Contingent, Executives. See Field Staffing Type Exception.

      Default Maximum Number of UDFs

      There are limitations to the number of user-defined fields (UDF) that can be created. The default maximum number of UDFs is 100 per category of fields. Examples of category of fields are Requisition, Candidate, Offer, Department, Work Experience, Education, etc. There is a limit of 100 reportable UDFs per business entity. If a customer wants more than 100 UDFs, the customer will need to enter a service request with Oracle Support.

        Field Availability

        Standard fields and user-defined fields (UDFs) can be made available for use in the Recruiting Center, career sections, the candidate advanced search feature, the History tab, and reports (UDFs only).

        The availability of a field varies by field category. The following table indicates where categories of fields are available.

        Availability Candidate Requisition Offer Department
        Taleo Recruiting Yes Yes Yes Yes
        Career Section Yes Yes
        Candidate Search Yes
        History Yes
        Custom Report Universe (UDFs only) Yes Yes Yes Yes

        The Recruiting setting "UDF Tracking Activation" defines the number of candidate user-defined fields (UDF) that can be tracked when changes are made. Each time a change is made to a candidate UDF of type Personal Information, Work Experience and Education, a tracking entry appears in the candidate file History tab to track the previous value. A limit of 20 candidate UDFs can be tracked. Once the limit is reached, system administrators are not able to set more UDFs as available in "History".

        Candidate Submission User-Defined Fields Available in Recruiting Center

        When candidate submission user-defined fields (UDFs) are made available to be used in the Recruiting Center, they can be used in the following areas:

        • User-defined forms and files: Submission UDFs are available in the Basic Profile, Candidate Personal Information, and Submission Information form types. When administrators create user-defined forms using one of these form types, they can select submission UDFs to design their form. When administrators create user-defined files, Submission Information forms are available under the Basic Profile, Candidate Personal Information, and Submission Information blocks. Submission Information forms can be used in both profile and submission contexts. Depending on which context Submission Information forms are being used, the visibility of submission UDFs is controlled. Even though the form and block contain submission information, submission information is visible to the users only in a submission context. In a profile context, submission information is automatically hidden. Note that in a submission context, if a block doesn’t contain any submission information, the entire block is hidden.

        • List formats: Submission UDFs can be used in the following list format contexts: All contexts associated to CSW steps, Requisition-specific Candidate List Global (GLOBAL), All Candidates / By Offer, All Candidates / By Requisition. Submission UDFs are not available in list formats which are used in profile context.

        • Auto-progression of candidates: Submission UDFs can be used to create conditions to automatically progress candidates in the candidate selection workflow. When administrators create a new condition, submission UDFs are available for selection under Job-specific submission > User-defined Field > Submission Information.

        • Message variables: Submission UDFs can be used as variables in message templates. The token format is {Submission.UDF_fieldname} where fieldname is the UDF value.

        Candidate Submission User-Defined Fields Available in Career Section

        When candidate submission user-defined fields (UDFs) are made available to be used in career sections, they can be used in the following areas:

        • Forms and flows: Submission UDFs are available in the Basic Profile, Candidate Personal Information, Candidate Personal Information - Agency, and Submission form types. When administrators create user-defined forms using one of these form types, they can select submission UDFs to design their form. When administrators create application flows, Submission Information forms are available under the Basic Profile, Candidate Personal Information, and Submission Information blocks.

          Field Security Level

          Each field is associated to a security level to restrict access or viewing of a field.

          When configuring fields, system administrators define how sensitive each field is by assigning the General, Restricted or Confidential security level..

          Security Level Description
          General No security, fields can be viewed and edited. It is the most basic security level; most fields have this level by default.
          Restricted Medium security, most users can view the fields, but only designated users can edit them. It is used to restrict specific users from either viewing or editing the information.
          Confidential Top secret security, only designated users can view and edit the fields. This is a confidentiality level beyond the Restricted security level that can be used to restrict users from viewing and/or editing the information, especially sensitive information. Two fields are marked as Confidential by default: Social Security Number and Date of Birth.

          Some requisition fields are always visible regardless of their security level. This allows control over who can edit fields, but does not prevent visibility, important in most cases.

          • Requisition ID

          • Title

          • Primary Location

          • Organization

          • Job Field

          • Recruiter

          • Hiring Manager

          The security level of a field is also associated to security level permissions granted for requisitions, candidates and offers, in view mode and in edit mode. Security level permissions define if users have a general, restricted or confidential access to fields displayed in the system. Note that for the above listed fields, the security level in view mode can be configured, but will not apply. Only the security level in edit mode will be applied.

          User Type Permission Location
          Security level for requisitions (in view mode) Configuration > [SmartOrg] Administration> User Types > Recruiting > Requisitions > General
          Security level for requisitions (in edit mode) Configuration > [SmartOrg] Administration> User Types > Recruiting > Requisitions > General
          Security level for internal candidates (in view mode) Configuration > [SmartOrg] Administration> User Types > Recruiting > Candidates > General
          Security level for external candidates (in view mode) Configuration > [SmartOrg] Administration> User Types > Recruiting > Candidates > General
          Security level for internal candidates (in edit mode) Configuration > [SmartOrg] Administration> User Types > Recruiting > Candidates > General
          Security level for external candidates (in edit mode) Configuration > [SmartOrg] Administration> User Types > Recruiting > Candidates > General
          Security level for offers (in view mode) Configuration > [SmartOrg] Administration> User Types > Recruiting > Offers > General
          Security level for offers (in edit mode) Configuration > [SmartOrg] Administration> User Types > Recruiting > Offers > General

          When defining a user type, system administrators need to decide which security level will be granted for these specific permissions. Each user type has one of the above security levels associated to it to define if the user type has a general, restricted or confidential access to information.

          The security level of a field can be modified at any time, thus impacting the user types associated to that security level.

          At a high level, the user type permissions work as follows:

          • Users having the "general" permission access will only see/edit fields set at the "general" security level.

          • Users having the "restricted" permission access will see/edit fields set at the "general" and "restricted" security levels.

          • Users having the "confidential" permission access will see/edit fields set at all security levels, that is "general", "restricted", and "confidential".

          For example, a hiring manager might have a view and edit access to general requisition fields, a view only access to restricted requisition fields and no access at all to confidential requisition fields, while having a view only access to general offer fields.

          More specifically the behaviors of these permissions are:

          • Restricted/Confidential fields in View mode in the file:

            If a field is at a higher security level than the user has access to view, the field will not be displayed to the user.

          • Restricted/Confidential fields in Edit mode in the file:

            If a field is at a higher security level than the user has access to edit, but the field security level gives them access to view it, then the field will be in read only mode in the edit. If a field is at a higher security level than the user has access to edit or view, then the field will not be displayed to the user.

          • Restricted/Confidential fields on the list:

            If a field is at a higher security level than the user has access to view for both external AND internal candidates, the user will see what he is allowed to see and an empty field will be displayed for the information the user cannot see. If a field is at a higher security level than the user has access to view for either external OR internal, but not both, then the column will be displayed and the field will be empty for those candidates that the user is restricted from seeing the content, whether the field has data or not. As well, grouping by this field on the list will not be possible in this scenario.

          • Restricted/Confidential fields in the advanced/quick filters of a list:

            If a field is at a higher security level than the user has access to view for both external AND internal candidates, then the column will not be available in the advanced or quick filters. If a field is at a higher security level than the user has access to view for either external OR internal, but not both, then the column will be available in the advanced or quick filters. If the user filters using this field, then the system will filter as specified for the candidate type that they can view, but will not filter the candidate type that they are restricted from seeing the content and therefore will return all candidates for that type.

          • Restricted/Confidential fields in the search (Quick/Advanced/Duplicate Check):

            If a field is at a higher security level than the user has access to view for both external AND internal candidates, then the field will not be available in the search.

            If a field is at a higher security level than the user has access to view for either external OR internal, but not both, then the field will be available in the search. If the user searches using this field, then the system will search as specified for the candidate type that they can see, but will not search the candidate type that they are restricted from seeing the content.

          • Restricted/Confidential fields in message templates (correspondence):

            If a field is at a higher security level than the user has access to view, then the user will not be able to send a message template that contains the restricted or confidential token.

          Attention:

          Some candidate fields may automatically be set to Restricted or Confidential and should be reviewed and possibly edited to achieve the desired behavior. For example, by default many related personal information fields may be set to Restricted, and date of birth and social security number are always set to Confidential. It is important to review the state of these fields and ensure they are set properly according to the customer desired outcome.

            Field Contextualization

            Field contextualization resides in specifying the Organization-Location-Job Field structure for a field.

            For each field, with the exception of fields set as mandatory by the system, system administrators can choose to define that a field is only available for a specific Organization, Location or Job Field. This means that outside of the defined structure, the field will not be visible.

            Example: Let's say your organization wants the "Citizenship Status" field to only appear in US jobs. To do that, the system administrator needs to associate the "Citizenship Status" field to the "United States" location (Configuration > [Recruiting] Administration > [Fields] Requisition > Citizenship Status > Edit Field Availability). When creating a requisition, the "Citizenship Status" field will only be available if the location of the requisition is the United States.

            The contextualization of candidate fields in Career Sections will display based on the Organization-Location-Job Field of the requisition for which candidates are applying or based on the Organization-Location-Job Field in the candidate's record if candidates are in a General Profile flow.

            There are two ways for the Organization-Location-Job Field contextualization to get onto the general profile of a candidate.

            • When the Organization-Location-Job Field block is part of the General Profile flow, then the candidate must make a selection on Organization-Location-Job Field .

            • When a candidate applies on a requisition, the Organization-Location-Job Field for that requisition is added to the candidate's General Profile.

            Example: Let's say your organization wants the "Social Security Number" field to appear for candidates applying to jobs in the US. To do that, the system administrator needs to associate the "Social Security Number" field to the "United States" location (Configuration > [Recruiting] Administration > [Fields] Candidate > Social Security Number > Edit Field Availability). With this contextualization:
            • When a candidate applies for a job, the job must have the United States location in order for the Social Security Number field to be presented for completion.

            • When a candidate creates a general profile, the candidate must have the United States location specified in his/her job preferences for the Social Security Number field to be presented for completion.

            • When a recruiter views/edits (if authorized) a job submission, the Social Security Number field will not appear unless the job associated with the submission has a United States location.

            • When a recruiter views/edits (if authorized) a candidate general profile, the Social Security Number field will not appear unless the candidate's job preferences include a United States location.

            Note: The following fields cannot be contextualized or marked with various security level because they are mandatory to support the requisitions or candidates in the system: Creation Date, Last Modified Date, Requisition Number.

              Field Staffing Type Exception

              A field can be associated to a given Organization-Location-Job Field structure for different staffing types.

              An exception regarding the staffing type (Professional, Hourly, Campus, Contingent, Executives) can be created for a field. System administrators can define an Organization-Location-Job Field structure specifically for staffing types where specific contextualization is required. When doing this, system administrators are able to define new properties for the field as well as a new Organization-Location Job Field structure for the field for that staffing type.

              Examples:
              • A customer wants the Shift Availability Grid field to be visible for Hourly job submissions only. This would be done by modifying the property of the field to not available, and then adding an exception for the Hourly staffing type where the property for the field is set to available.

              • A customer wants to set the Social Security Number field so that it does not appear on any candidate submissions except for Hourly submissions in the United States. This would be done by modifying the property for the field to not available, and then adding an exception for the Hourly staffing type where the property for the field is set to available and has the United States location linked to it.

              • A customer wants to allow the designation of whether medical clearance is an employment precondition on all requisitions in the Medical Testing division except for executive jobs where clearance is only required for Medical Testing requisitions in China, the United States and the United Kingdom. The customer does NOT want this field to display in any other contexts. This would be done by making the field available for recruiting, linking the field to the Medical Testing organization, and then creating an exception for the Executives staffing type where the property of the field is set to available and is linked to the China, United Kingdom and United States locations and the Medical Testing organization.

                Defining the Properties of a Field

                Configuration > [Recruiting] Administration > Fields
                1. Click a field category.

                2. Click the name of a field.

                3. Click Edit Field Availability next to Properties.

                4. Select where the field will be available: Recruiting Center, career sections, the candidate search feature, the History tab, and in reports (UDFs only).

                5. For the Date of Birth, Social Security Number, and any candidate user-defined fields, the Personally Identifiable Information (in Career Section) option is available. When selected, if candidates enter a value in these fields and save the page, the value is no longer displayed in the field and asterisks are displayed in place of the value on the Summary page. See Masking Values for Date of Birth, Social Security Number and Candidate UDFs.

                6. Indicate if the content for the field is required to save, approve (requisition fields only), or source (requisition fields only) or if it is not required.

                  Recruiting Center users will need to enter information in the field in order to proceed. If content is not required, users do not have to enter information in the field. If a field in a file is mandatory and the user is not authorized to edit the field because of the security level of the field, an error message will be displayed and the user will not be allowed to complete the transaction.
                  Offer fields configured as required only apply in the context of a job offer (Offer Terms). As a result, offer fields are not required when users are creating other types of offers (that is, current job, competitive offer, expectations). Also, users permitted to create/edit supplementary offers are able to enter as much or as little data as they desire, and when creating a job offer they are required to complete any required fields prior to saving.
                7. Specify the security level of the field, that is General, Restricted, or Confidential.

                8. Click Save.

                  Associating a Field to an Organization, Location, and/or Job Field

                  The Enable Field Classification setting must be enabled in the Recruiting settings.

                  Configuration > [Recruiting] Administration > Fields
                  1. Click a field category.

                  2. Click the name of a field.

                  3. Click Add next to Organizations, Locations, or Job Fields.

                  4. In the selector, select one or more elements.

                  5. Click Select.

                  The organizations, locations and job fields selected appear in the field page. The field is available in the Recruiting Center for an Organization-Location-Job Field structure context associated to the same organizations, locations or job fields. For details, see Field Contextualization.

                    Creating a Staffing Type Exception for a Field

                    Configuration > [Recruiting] Administration > Fields

                    1. Click a field category.

                    2. Click the name of a field.

                    3. Click Add next to Exceptions.

                    4. Select a staffing type from the Staffing Types drop-down list.

                    5. Click Create.

                    6. If desired, click Add next to Organizations, Locations and/or Job Fields.

                    7. Select organizations, locations and/or job fields.

                    8. Click Select.

                    The selected staffing type appears in the Exceptions section of the field page. The field will no longer be available when creating a user-defined form for a specific staffing type or Organization-Location-Job Field structure of a staffing type. For details, see Field Staffing Type Exception.

                      Granting Security Level Permissions for Requisitions, Candidates, and Offers

                      The security level of a field is associated to the security level for requisitions, candidates and offers, in view mode and in edit mode.

                      This is done using the following security level permissions:

                      User Type Permission Location
                      Security level for requisitions (in view mode) Configuration > [SmartOrg] Administration> User Types > Recruiting > Requisitions > General
                      Security level for requisitions (in edit mode) Configuration > [SmartOrg] Administration> User Types > Recruiting > Requisitions > General
                      Security level for internal candidates (in view mode) Configuration > [SmartOrg] Administration> User Types > Recruiting > Candidates > General
                      Security level for external candidates (in view mode) Configuration > [SmartOrg] Administration> User Types > Recruiting > Candidates > General
                      Security level for internal candidates (in edit mode) Configuration > [SmartOrg] Administration> User Types > Recruiting > Candidates > General
                      Security level for external candidates (in edit mode) Configuration > [SmartOrg] Administration> User Types > Recruiting > Candidates > General
                      Security level for offers (in view mode) Configuration > [SmartOrg] Administration> User Types > Recruiting > Offers > General
                      Security level for offers (in edit mode) Configuration > [SmartOrg] Administration> User Types > Recruiting > Offers > General

                        Granting Security Level Permissions for Requisitions

                        Configuration > [SmartOrg] Administration > User Types

                        1. Click on a user type.

                        2. In the Recruiting functional domain, click Edit next to Requisitions.

                        3. Select the permission Security level for requisitions (in edit mode).

                        4. Set the desired security level.

                        5. Select the permission Security level for requisitions (in view mode).

                        6. Set the desired security level.

                        7. Click Save.

                          Granting Security Level Permissions for Candidates

                          Configuration > [SmartOrg] Administration > User Types

                          1. Click on a user type.

                          2. In the Recruiting functional domain, click Edit next to Candidates.

                          3. Select the permission Security level for internal candidates (in edit mode).

                          4. Set the desired security level.

                          5. Select the permission Security level for internal candidates (in view mode).

                          6. Set the desired security level.

                          7. Select the permission Security level for external candidates (in edit mode).

                          8. Set the desired security level.

                          9. Select the permission Security level for external candidates (in view mode).

                          10. Set the desired security level.

                          11. Click Save.

                            Granting Security Level Permissions for Offers

                            Configuration > [SmartOrg] Administration > User Types

                            1. Click on a user type.

                            2. In the Recruiting functional domain, click Edit next to Offers.

                            3. Select the permission Security level for offers (in edit mode).

                            4. Set the desired security level.

                            5. Select the permission Security level for offers (in view mode).

                            6. Set the desired security level.

                            7. Click Save.

                              Creating a User-Defined Field

                              User-defined fields (UDF) can be created to collect information according to specific organization requirements.

                              The following types of user-defined fields can be created:

                              • Text and multilingual text

                              • Number

                              • Date

                              • Selection

                              The creation of a user-defined field consists of the following steps:

                              1. Creating a user-defined field of type text, number, date, selection.

                              2. Defining the properties of the field.

                              3. Associating the field to Organizations, Locations, Job Fields.

                              4. Creating a staffing type exception for the field.

                              5. Granting security level permissions for requisitions, candidates, and offers.

                                Creating a User-Defined Field of Type "Text" or "Multilingual Text"

                                Configuration > [Recruiting] Administration > Fields
                                1. Click a field category.

                                2. Click Create User-defined Field.

                                3. In the Type list, select Text or Multilingual Text.

                                4. Enter a name for the field.

                                  The name is used internally. It must be unique and without any spaces. Spaces can result in problems for integration with other HRIS applications. Underscores can be used.
                                5. Enter help text if you are creating a Candidate field.

                                  The help text will be displayed in the career section directly below the user-defined field, providing candidates with an explanation of the field. If using multiple languages, you will have to enter a translation of the help text for those languages. If translations are not provided, the system copies the help text into the other languages and adds the wording "not translated" at the end.
                                  The help text can contain up to 1000 characters (spaces count as characters). It is recommended, however, that help text be kept as short as possible to improve readability and to ensure that the text does not compete against more important information for the user's attention.
                                6. Enter a label.

                                  This is the name that will be displayed to candidates in the career section, and to recruiters and hiring managers in the Recruiting Center.
                                7. Enter a short label.

                                  This label name is used in lists. Short Label is not available for Department, Requisition, and Offer user-defined fields.
                                8. Enter information in the Attributes section.

                                  1. In the Max. Num. Chars. field, enter a number to set the maximum number of characters in this field.

                                  2. In the Width field, enter a number to set the width of the field in terms of characters. For example, a value of 20 means that the field will be 20-character wide.

                                  3. In the Num. of lines field, enter a total number of lines for this field.

                                  4. In the Default field, enter the default text that will appear in the Text field when it is displayed. The text must respect the format settings listed previously.

                                9. Translate the field into all available languages. Languages are available at the upper right of the page.

                                10. Click Save.

                                  Creating a User-Defined Field of Type "Number"

                                  Configuration > [Recruiting] Administration > Fields
                                  1. Click a field category.

                                  2. Click Create User-defined Field.

                                  3. In the Type list, select Number.

                                  4. Enter a name for the field.

                                    The name is used internally. It must be unique and without any spaces. Spaces can result in problems for integration with other HRIS applications. Underscores can be used.
                                  5. Enter a label.

                                    This is the name that will be displayed to candidates in the career section, and to recruiters and hiring managers in the Recruiting Center.
                                  6. Enter a short label.

                                    This label name is used in lists. Short Label is not available for Department, Requisition and Offer user-defined fields.
                                  7. Enter information in the Attributes section.

                                    1. In the Specific Number Type field, select a number type: Not Specified, Number, Amount.

                                      In you selected Not Specified, enter in the Num. of Decimals field a number to set the maximum number of decimals in this field (numeric value only). Decimals count as digits. Therefore, the value entered in Num. of Decimals must be lower than the number entered in the Maximum field.
                                    2. In the Width field, enter a number to set the width of the field in terms of characters. For example, a value of 20 means that the field will be 20-character wide.

                                    3. In the Maximum field, enter a number to set the maximum number of digits in this field, including decimals.

                                    4. In the Default field, enter the number that will appear in the Number field by default. This number must reflect the settings entered previously. The Default value must be equal to, or higher, or lower than the maximum number of digits.

                                  8. Translate the field into all available languages. Languages are available at the upper right of the page.

                                  9. Click Save.

                                    Creating a User-Defined Field of Type "Date"

                                    Configuration > [Recruiting] Administration > Fields
                                    1. Click a field category.

                                    2. Click Create User-defined Field.

                                    3. In the Type list, select Date.

                                    4. Enter a name for the field.

                                      The name is used internally. It must be unique and without any spaces. Spaces can result in problems for integration with other HRIS applications. Underscores can be used.
                                    5. Enter a label.

                                      This is the name that will be displayed to candidates in the career section, and to recruiters and hiring managers in the Recruiting Center.
                                    6. Enter a short label.

                                      This label name is used in lists. Short Label is not available for Department, Requisition and Offer user-defined fields.
                                    7. Enter information in the Attributes section.

                                      1. In the First Year in Range field, select the earliest year to be displayed.

                                      2. In the Last Year in Range field, select the last year to be displayed.

                                      3. In the Display Order field, select the order in which the years will be displayed.

                                      4. Select Day Displayed option to display the day.

                                    8. Translate the field into all available languages. Languages are available at the upper right of the page.

                                    9. Click Save.

                                      Creating a User-Defined Field of Type "Selection"

                                      Configuration > [Recruiting] Administration > Fields
                                      1. Click a field category.

                                      2. Click Create User-defined Field.

                                      3. In the Type list, select Selection.

                                      4. Enter a name for the field.

                                        The name is used internally. It must be unique and without any spaces. Spaces can result in problems for integration with other HRIS applications. Underscores can be used.
                                      5. Enter a label.

                                        This is the name that will be displayed to candidates in the career section, and to recruiters and hiring managers in the Recruiting Center.
                                      6. Enter a short label.

                                        This label name is used in lists. Short Label is not available for Department, Requisition and Offer user-defined fields.
                                      7. In the New/Modified Element field, enter a value for the selection then click Apply.

                                        The newly created value appears in the Available Elements list.
                                      8. Repeat step 7 for all the values in the selection.

                                      9. Activate the values by selecting each value and clicking Add.

                                      10. If you want one of the value to be selected by default, select the value in the Active Elements list, then select the Default option.

                                        The word Default appears in parenthesis beside the value.
                                      11. Indicate if you want the selection to be of type single answer or multiple answers.

                                      12. Translate the selection into all available languages. Languages are available at the upper right of the page.

                                      13. Click Save.

                                        Defining the Properties of a Field

                                        Configuration > [Recruiting] Administration > Fields
                                        1. Click a field category.

                                        2. Click the name of a field.

                                        3. Click Edit Field Availability next to Properties.

                                        4. Select where the field will be available: Recruiting Center, career sections, the candidate search feature, the History tab, and in reports (UDFs only).

                                        5. For the Date of Birth, Social Security Number, and any candidate user-defined fields, the Personally Identifiable Information (in Career Section) option is available. When selected, if candidates enter a value in these fields and save the page, the value is no longer displayed in the field and asterisks are displayed in place of the value on the Summary page. See Masking Values for Date of Birth, Social Security Number and Candidate UDFs.

                                        6. Indicate if the content for the field is required to save, approve (requisition fields only), or source (requisition fields only) or if it is not required.

                                          Recruiting Center users will need to enter information in the field in order to proceed. If content is not required, users do not have to enter information in the field. If a field in a file is mandatory and the user is not authorized to edit the field because of the security level of the field, an error message will be displayed and the user will not be allowed to complete the transaction.
                                          Offer fields configured as required only apply in the context of a job offer (Offer Terms). As a result, offer fields are not required when users are creating other types of offers (that is, current job, competitive offer, expectations). Also, users permitted to create/edit supplementary offers are able to enter as much or as little data as they desire, and when creating a job offer they are required to complete any required fields prior to saving.
                                        7. Specify the security level of the field, that is General, Restricted, or Confidential.

                                        8. Click Save.

                                          Associating a Field to an Organization, Location, and/or Job Field

                                          The Enable Field Classification setting must be enabled in the Recruiting settings.

                                          Configuration > [Recruiting] Administration > Fields
                                          1. Click a field category.

                                          2. Click the name of a field.

                                          3. Click Add next to Organizations, Locations, or Job Fields.

                                          4. In the selector, select one or more elements.

                                          5. Click Select.

                                          The organizations, locations and job fields selected appear in the field page. The field is available in the Recruiting Center for an Organization-Location-Job Field structure context associated to the same organizations, locations or job fields. For details, see Field Contextualization.

                                            Creating a Staffing Type Exception for a Field

                                            Configuration > [Recruiting] Administration > Fields

                                            1. Click a field category.

                                            2. Click the name of a field.

                                            3. Click Add next to Exceptions.

                                            4. Select a staffing type from the Staffing Types drop-down list.

                                            5. Click Create.

                                            6. If desired, click Add next to Organizations, Locations and/or Job Fields.

                                            7. Select organizations, locations and/or job fields.

                                            8. Click Select.

                                            The selected staffing type appears in the Exceptions section of the field page. The field will no longer be available when creating a user-defined form for a specific staffing type or Organization-Location-Job Field structure of a staffing type. For details, see Field Staffing Type Exception.

                                              Granting Security Level Permissions for Requisitions, Candidates, and Offers

                                              The security level of a field is associated to the security level for requisitions, candidates and offers, in view mode and in edit mode.

                                              This is done using the following security level permissions:

                                              User Type Permission Location
                                              Security level for requisitions (in view mode) Configuration > [SmartOrg] Administration> User Types > Recruiting > Requisitions > General
                                              Security level for requisitions (in edit mode) Configuration > [SmartOrg] Administration> User Types > Recruiting > Requisitions > General
                                              Security level for internal candidates (in view mode) Configuration > [SmartOrg] Administration> User Types > Recruiting > Candidates > General
                                              Security level for external candidates (in view mode) Configuration > [SmartOrg] Administration> User Types > Recruiting > Candidates > General
                                              Security level for internal candidates (in edit mode) Configuration > [SmartOrg] Administration> User Types > Recruiting > Candidates > General
                                              Security level for external candidates (in edit mode) Configuration > [SmartOrg] Administration> User Types > Recruiting > Candidates > General
                                              Security level for offers (in view mode) Configuration > [SmartOrg] Administration> User Types > Recruiting > Offers > General
                                              Security level for offers (in edit mode) Configuration > [SmartOrg] Administration> User Types > Recruiting > Offers > General

                                                Granting Security Level Permissions for Requisitions

                                                Configuration > [SmartOrg] Administration > User Types

                                                1. Click on a user type.

                                                2. In the Recruiting functional domain, click Edit next to Requisitions.

                                                3. Select the permission Security level for requisitions (in edit mode).

                                                4. Set the desired security level.

                                                5. Select the permission Security level for requisitions (in view mode).

                                                6. Set the desired security level.

                                                7. Click Save.

                                                  Granting Security Level Permissions for Candidates

                                                  Configuration > [SmartOrg] Administration > User Types

                                                  1. Click on a user type.

                                                  2. In the Recruiting functional domain, click Edit next to Candidates.

                                                  3. Select the permission Security level for internal candidates (in edit mode).

                                                  4. Set the desired security level.

                                                  5. Select the permission Security level for internal candidates (in view mode).

                                                  6. Set the desired security level.

                                                  7. Select the permission Security level for external candidates (in edit mode).

                                                  8. Set the desired security level.

                                                  9. Select the permission Security level for external candidates (in view mode).

                                                  10. Set the desired security level.

                                                  11. Click Save.

                                                    Granting Security Level Permissions for Offers

                                                    Configuration > [SmartOrg] Administration > User Types

                                                    1. Click on a user type.

                                                    2. In the Recruiting functional domain, click Edit next to Offers.

                                                    3. Select the permission Security level for offers (in edit mode).

                                                    4. Set the desired security level.

                                                    5. Select the permission Security level for offers (in view mode).

                                                    6. Set the desired security level.

                                                    7. Click Save.

                                                      Field - Other Configuration Tasks

                                                        Deleting a Field

                                                        Only user-defined fields can be deleted.

                                                        Configuration > [Recruiting] Administration > Fields
                                                        1. Click a field category.

                                                        2. Click Show Custom Fields.

                                                        3. Click Delete next to the field to be deleted.

                                                        4. Click Done.

                                                          Dissociating a Field from an Organization, Location, Job Field

                                                          The Enable Field Classification setting must be enabled in the Recruiting settings.

                                                          Configuration > [Recruiting] Administration > Fields
                                                          1. Click a field category.

                                                          2. Click the name of a field.

                                                          3. Click Remove next to an organization, location, or job field.

                                                          The field selected no longer appears in the field page. The field will be available in the Recruiting Center for all Organization-Location-Job Field structures.

                                                            Removing a Staffing Type Exception for a Field

                                                            Configuration > [Recruiting] Administration > Fields

                                                            1. Click a field category.

                                                            2. Click the name of a field.

                                                            3. Click Remove next to an exception.

                                                            The field is available when creating a user-defined form for a specific staffing type or Organization-Location-Job Field structure of a staffing type.

                                                              Masking Values for Date of Birth, Social Security Number and Candidate UDFs

                                                              The Date of Birth, Social Security Number, and candidate user-defined fields can be configured such that if candidates enter a value in the field and save the page, the value is no longer displayed in the field and asterisks are displayed in place of the value on the Summary page.

                                                              If candidates edit their candidate profile or the job-specific application after saving a page containing fields configured for masking, they have to reenter the information in these fields because the existing values will have been cleared. If candidates neglect to reenter the information, a warning message lists the cleared fields and invites the candidates to reenter values.

                                                              Similarly, if candidates fill out other job-specific applications on the same career section and the corresponding application workflows contain fields configured for masking, the candidates have to reenter the values if they want to include them in the job submission. If candidates neglect to reenter the information, a warning message lists the empty fields and invites the candidates to reenter values.

                                                              Candidate user-defined fields that can be configured for masking can be of Text, Multilingual Text, Selection, Date, Number or Boolean type. The values that candidates enter will be masked in the following blocks of application flows that include them: Candidate Personal Information, Referrer Personal Information, Personal Information-Agency, Education, Work Experience, Basic Profile Information.

                                                              Note:

                                                              Because candidates are obliged to reenter information in fields configured for masking each time they edit their general profile or apply for jobs, configuring fields in this manner can have a negative impact on the candidate experience. The inclusion of such fields in "primary" flows is therefore not recommended. Date of Birth, Social Security Number and candidate user-defined fields configured for masking (if included at all) are more suitable for "secondary" flows such as Invitation to Self-Identify and Request More Info.

                                                                Masking Values for Date of Birth, Social Security Number and Candidate UDFs

                                                                Configuration > [Recruiting] Administration > Fields
                                                                1. Click the Candidate link.

                                                                2. Click the Date of Birth field, the Social Security Number field, or any candidate user-defined field.

                                                                3. Click Edit Field Availability.

                                                                4. Select the Personally Identifiable Information (in Career Sections) option.

                                                                5. Click Save.

                                                                If candidates enter a value in these fields and save the page, the value is no longer displayed in the field and asterisks are displayed in place of the value on the Summary page.

                                                                  Field - Permissions and Settings

                                                                  The following permissions and settings can be used to configure fields.

                                                                  Setting Description Default Value Location
                                                                  Enable Field Classification Determines if fields can be classified by Organizations, Locations, and Job Fields. No Configuration > [Recruiting] Settings
                                                                  Maximum Number of UDFs This is a Private setting. The maximum number of available custom fields for any entity of the suite. 100 Configuration > [General Configuration] Settings
                                                                  UDF Tracking Activation This is a Protected setting. Activates the tracking of changes made to custom candidate fields relating to the personal information, work experience and education. For details, see Field Availability. 20 Configuration > [Recruiting] Settings

                                                                  The following permissions are used to associate the field security level for requisitions, candidates and offers, in view mode and in edit mode.

                                                                  User Type Permission Location
                                                                  Security level for requisitions (in view mode) Configuration > [SmartOrg] Administration> User Types > Recruiting > Requisitions > General
                                                                  Security level for requisitions (in edit mode) Configuration > [SmartOrg] Administration> User Types > Recruiting > Requisitions > General
                                                                  Security level for internal candidates (in view mode) Configuration > [SmartOrg] Administration> User Types > Recruiting > Candidates > General
                                                                  Security level for external candidates (in view mode) Configuration > [SmartOrg] Administration> User Types > Recruiting > Candidates > General
                                                                  Security level for internal candidates (in edit mode) Configuration > [SmartOrg] Administration> User Types > Recruiting > Candidates > General
                                                                  Security level for external candidates (in edit mode) Configuration > [SmartOrg] Administration> User Types > Recruiting > Candidates > General
                                                                  Security level for offers (in view mode) Configuration > [SmartOrg] Administration> User Types > Recruiting > Offers > General
                                                                  Security level for offers (in edit mode) Configuration > [SmartOrg] Administration> User Types > Recruiting > Offers > General

                                                                    Requisition Template Fields

                                                                      Requisition Template Job Code Field

                                                                      Requisition templates can be assigned a job code.

                                                                      Customers not using the Job Code field can deactivate it. When the Job Code field is deactivated:

                                                                      • The Code column does not appear in lists.

                                                                      • The Job Code field does not appear in files, in view or edit modes. It does not appear in the Requisition Templates list and cannot be included in the configurable Requisition lists.

                                                                      • The Job Code field is not available in selectors.

                                                                      • The Job Code field does not appear in callouts.

                                                                        Deactivating the Requisition Template Job Code Field

                                                                        Configuration > [Recruiting] Administration > Fields
                                                                        1. Click Requisition Template.

                                                                        2. Click Job Code.

                                                                        3. Click Edit Field Availability.

                                                                        4. Do not check the Taleo Recruiting option.

                                                                          Note that the Security Level and Content Required options cannot be configured. This is why they are grayed out. Also, no Organization-Location-Job Field contextualization and no staffing type exception can be specified.
                                                                        5. Click Save.

                                                                        The Job Code field is deactivated and is not displayed in the Recruiting Center.

                                                                          Selection Lists

                                                                            Global Selection List

                                                                            A global selection list is a list of elements (values) used to define a field, that can be used by several Oracle Talent Acquisition Cloud (OTAC) products and that can only be viewed and edited.

                                                                            These global selection lists are available in the Configuration menu, under Selection Lists:

                                                                            • Education Levels

                                                                            • Employee Statuses

                                                                            • Job Levels

                                                                            • Job Types

                                                                            • Schedules

                                                                            • Shifts

                                                                            • Travels

                                                                            • Currencies

                                                                            Global selection lists can be edited, that is system-defined items can be added or removed. Users will only see the items selected by the system administrator.

                                                                              Recruiting Selection List

                                                                              A recruiting selection list is a list of elements (values) used to define a field, that can be used in the Recruiting Center and that can be viewed, edited, and created.

                                                                              The following types of selections are available:

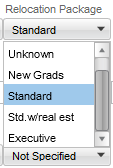
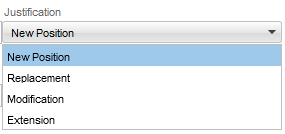
                                                                              • Small Selection - Standard: A predefined selection provided by the system. The selection provides a few elements and is represented by a radio button or a drop-down list. These selections can only be modified, that is elements in the selection can be created, added, or removed. For certain small standard selections (for example, Advance Notice), system administrators can add and remove pre-defined elements. For others (like Commission Package, Option Package, Relocation Package and Stock Package), they can create new elements.

                                                                              • Small Selection - Custom: A small selection created by system administrators to collect information for specific organization requirements.

                                                                              • Large Selection - Standard: Large standard selections such as Employers, Institutions, Locations are predefined selections provided by the system. The selection provides a large number of elements and is represented by a quick search lookup.

                                                                              • Large Selection - Custom: Large user-defined selections (LUDS) are created by system administrators. The selection provides a large number of elements and is represented by a quick search lookup. LUDS can be associated to Organizations, Locations, and Job Fields. The only goal of doing a OLF mapping is to filter down the list of possible values based on the OLF of the requisition. If there is no desire to filter down the values, it is suggested not to use such mapping.

                                                                              Example of Small Selection - Standard

                                                                              Image showing an example of a small standard selection. The selection Relocation Package contains New Grads, Standard, Executive, Not Specified.

                                                                              Example of Large Selection - Selection with a quick search lookup

                                                                              Image showing an example of a large selection with a quick search lookup. The selection is Education Program.

                                                                              Example of Large Selection - Selection with a drop-down

                                                                              Image showing an example of a large selection with a drop-down. The selection Justification contains New Position, Replacement, Modification, Extension.

                                                                                Creating Large User-Defined Selections (LUDS)

                                                                                  Creating a Large User-Defined Selection

                                                                                  Configuration > [Recruiting] Administration > [Fields] Selection Lists

                                                                                  1. Click the Large Selections tab, then the Custom tab.

                                                                                  2. Click New...

                                                                                  3. Enter a name and a code.

                                                                                  4. In the Language Requirements section, specify where descriptions are required. Once the large custom selection is created (including activated elements), it is no longer possible to edit this section.

                                                                                    • If you select "Require descriptions in WebTop languages", the selection and its elements will be available in the Recruiting Center only.

                                                                                    • If you select "Require descriptions in WebTop languages and content languages", the selection and its elements will be available in the Recruiting Center and Career Sections.

                                                                                  5. Select Activate effective dating if you want selections to be activated for specific periods of time.

                                                                                  6. You may associate the selection to the Organization, Location, or Job Field structure. The only goal of doing a OLF mapping is to filter down the list of possible values based on the OLF of the requisition. If there is no desire to filter down the values, it is suggested not to use such mapping.

                                                                                  7. Select Require mapping for every element if you want every element to be mapped to the Associated Structure Type selected.

                                                                                  8. Translate the selection into all available languages. Languages are available at the upper right of the page.

                                                                                  9. Click Done.

                                                                                    Adding Elements to a Large User-Defined Selection

                                                                                    The large selection must be created first.

                                                                                    Configuration > [Recruiting] Administration > [Fields] Selection Lists
                                                                                    1. Click the Large Selections tab, then the Custom tab.

                                                                                    2. Locate the large user-defined selection you just created.

                                                                                    3. Click the link (should display 0) located in the Number of Elements column.

                                                                                    4. In the Selection Element List page, click New...

                                                                                    5. Enter a code and a description.

                                                                                    6. Indicate if the element is always active or inactive.

                                                                                    7. Translate the element into all available languages. Languages are available at the upper right of the page.

                                                                                    8. Click Add.

                                                                                    9. Create as many elements as required.

                                                                                    10. Click Close.

                                                                                    The new elements are added to the large user-defined selection.

                                                                                      Creating a User-Defined Field that Displays the Elements of a Selection

                                                                                      Configuration > [Recruiting] Administration > Fields
                                                                                      1. Click on a field category.

                                                                                      2. Click Create User-defined Field.

                                                                                      3. In the Type list, select the large user-defined selection you created.

                                                                                      4. Enter a name for the field.

                                                                                        The name is used internally. It must be unique and without any spaces. Spaces can result in problems for integration with other HRIS applications. Underscores can be used.
                                                                                      5. Enter a label.

                                                                                        This is the name that will be displayed to candidates in the career section, and to recruiters and hiring managers in the Recruiting Center.
                                                                                      6. Enter a short label.

                                                                                        This label name is used in lists. Short Label is not available for Department, Requisition, and Offer user-defined fields.
                                                                                      7. Indicate if you want to display the code, description, or both in the Recruiting Center selector.

                                                                                      8. Indicate if you want to display the folder tree and the Start Date and End Date in the Recruiting Center selector.

                                                                                      9. Translate the field into all available languages. Languages are available at the upper right of the page.

                                                                                      10. Click Save.

                                                                                        Creating Small Custom Selections

                                                                                          Creating a Small Custom Selection

                                                                                          Configuration > [Recruiting] Administration > [Fields] Selection Lists

                                                                                          1. Click the Small Selections tab, then the Custom tab.

                                                                                          2. Click New...

                                                                                          3. Enter a name for the selection.

                                                                                            The name must be unique. The name of the selection cannot be modified once the selection is saved.
                                                                                          4. In the New/Modified Element field, enter a value for the selection, then click Apply.

                                                                                            The newly created value appears in the Available Elements list.
                                                                                          5. Repeat step 4 for all the values in the selection.

                                                                                          6. Activate the values by selecting each value in the Available Elements list and clicking Add. The values appear in the Active Elements section.

                                                                                          7. Order the values using the up and down arrows next to the Active Elements section.

                                                                                          8. Translate the selection into all available languages. Languages are available at the upper right of the page.

                                                                                          9. Click Done.

                                                                                          The selection is available under Small Selections, Custom.

                                                                                            Creating a User-Defined Field that Displays the Elements of the Selection

                                                                                            Configuration > [Recruiting] Administration > Fields
                                                                                            1. Click on a field category.

                                                                                            2. Click Create User-defined Field.

                                                                                            3. In the Type list, select the small custom selection you created.

                                                                                            4. Enter a name for the field.

                                                                                              The name is used internally. It must be unique and without any spaces. Spaces can result in problems for integration with other HRIS applications. Underscores can be used.
                                                                                            5. Enter a label.

                                                                                              This is the name that will be displayed to candidates in the career section, and to recruiters and hiring managers in the Recruiting Center.
                                                                                            6. Enter a short label.

                                                                                              This label name is used in lists. Short Label is not available for Department, Requisition, and Offer user-defined fields.
                                                                                            7. Indicate the type of answer available: single answer and multiple choice answer.

                                                                                            8. Translate the field into all available languages. Languages are available at the upper right of the page.

                                                                                            9. Click Save.

                                                                                              Recruiting Selection List - Other Configuration Tasks

                                                                                                Deleting Large User-Defined Selections (LUDS)

                                                                                                The large selection must not be in use.

                                                                                                Configuration > [Recruiting] Administration > [Fields] Selection Lists
                                                                                                1. Click the Large Selections tab, then the Custom tab.

                                                                                                2. Select a selection.

                                                                                                3. Click the Delete icon.

                                                                                                4. Confirm the deletion.

                                                                                                The large custom selection is no longer available under Large Selections, Custom.

                                                                                                  Removing Elements from Large User-Defined Selections (LUDS)

                                                                                                  An element cannot be removed if it is being used.

                                                                                                  Configuration > [Recruiting] Administration > [Fields] Selection Lists
                                                                                                  1. Click the Large Selections tab, then the Custom tab.

                                                                                                  2. Locate the desired selection.

                                                                                                  3. Click the number located in the Number of Elements column.

                                                                                                  4. In the Selection Element List page, select an element.

                                                                                                  5. Click the Delete icon.

                                                                                                    Deleting a Small Custom Selection

                                                                                                    Configuration > [Recruiting] Administration > [Fields] Selection Lists

                                                                                                    1. Click the Small Selections tab and the Custom tab.

                                                                                                    2. Click a selection name.

                                                                                                    3. In the Selection Editor, click the Delete icon.

                                                                                                    4. Confirm the deletion.

                                                                                                    5. Click Done.

                                                                                                    The small selection is no longer available under Small Selections, Custom.

                                                                                                      Removing an Element from a Small Custom/Standard Selection

                                                                                                      An element cannot be removed if it is being used.

                                                                                                      Configuration > [Recruiting] Administration > [Fields] Selection Lists
                                                                                                      1. Click the Small Selections tab and the Custom or Standard tab.

                                                                                                      2. Click a selection name.

                                                                                                      3. In the Active Elements list, select an element then click Remove.

                                                                                                      4. Click Done.

                                                                                                      The element is no longer displayed in the Active Elements list.

                                                                                                        Field Layout

                                                                                                          Field Layout

                                                                                                          Field layout consists in determining the position of standard and user-defined fields in offer forms, requisition files, and candidate files.

                                                                                                          Field layout works differently depending on the type of field.

                                                                                                          Offer Field Layout: Both standard and custom offer fields can be positioned in the offer form. The layout consists in specifying in which category/section of the offer form the field will be displayed (Top Section, General Terms, Bonuses, Details, Other Terms) and which sequential field position it should occupy.

                                                                                                          Offer field layout configuration is available in the Offer Field Layout feature available in the Recruiting Administration.

                                                                                                          Department Field Layout: Only custom department fields can be positioned in a department configuration page (Recruiting Administration > Department List). The layout consists in specifying the line and position where the field will appear in the department configuration page.

                                                                                                          Department field layout configuration is available in the Department Field Layout feature available in the Recruiting Administration.

                                                                                                          Candidate and Requisition Field Layout: To position candidate and requisition fields in a form, you need to create blocks of information (called user-defined forms) where you can place standard and custom fields intermixed within the same form.

                                                                                                          Candidate and requisition field layout configuration is available in the User-defined Form feature available in the Recruiting Administration.

                                                                                                            Adding a Field to the Offer Form

                                                                                                            Offer fields must first be created. See Creating a User-defined Field.

                                                                                                            Configuration > [Recruiting] Administration > [Fields] Offer Field Layout
                                                                                                            1. Click Add...

                                                                                                            2. Select a field to include in the form.

                                                                                                            3. Click Add.

                                                                                                            4. Click Done.

                                                                                                            The field appears in the Field Layout - Offer page.

                                                                                                              Positioning Fields in the Offer Form

                                                                                                              Both standard and custom offer fields can be positioned in the offer form.

                                                                                                              For custom fields to appear in the Field Layout - Offer page, you must first create them. See Creating a User-defined Field.

                                                                                                              Configuration > [Recruiting] Administration > [Fields] Offer Field Layout
                                                                                                              1. In the Field Layout - Offer page, for each field select a value under Category to specify in which section of the form the field will be placed.

                                                                                                              2. Select a number under Line to specify on which line in the section the field will be placed.

                                                                                                              3. Click Apply.

                                                                                                                Removing a Field from the Offer Form

                                                                                                                Custom offer fields must be included in the Offer form.

                                                                                                                Configuration > [Recruiting] Administration > [Fields] Offer Field Layout
                                                                                                                1. Select a field.

                                                                                                                2. Click Remove.

                                                                                                                The field no longer appears in the Field Layout -Offer page.

                                                                                                                  Adding a Department Field in the Department Field Layout Page

                                                                                                                  Custom department fields must first be created. See Creating a User-defined Field.

                                                                                                                  Configuration > [Recruiting] Administration > [Fields] Department Field Layout
                                                                                                                  1. Click Add...

                                                                                                                  2. Select a field to include in the form.

                                                                                                                  3. Click Add.

                                                                                                                  4. Click Done.

                                                                                                                    Positioning Department Fields in the Department Configuration Page

                                                                                                                    Custom department fields must first be created. See Creating a User-defined Field.

                                                                                                                    Configuration > [Recruiting] Administration > [Fields] Department Field Layout
                                                                                                                    1. In the Field Layout - Department page, for each field select the line and position to determine the position of the field.

                                                                                                                    2. Click Apply.

                                                                                                                      Removing a Field from the Department Field Layout Page

                                                                                                                      Custom department fields must be included in the form.

                                                                                                                      Configuration > [Recruiting] Administration > [Fields] Department Field Layout
                                                                                                                      1. Select a field.

                                                                                                                      2. Click Remove.