7Forms and Files

Forms and Files

    Requisitions and Candidate Files Configuration

      Configuring Requisition Files

      Requisition files are created with the combination of multiple forms and predefined blocks grouped within sections.

      The configuration of a requisition file consists of the following steps:

      1. Selecting the fields to include in the requisition file. You can use standard fields provided by Oracle or you can create your own user-defined fields.

      2. Selecting the forms to include in the requisition file. You can modify existing forms or create user-defined forms from scratch.

      3. Creating the requisition file.

      4. Selecting the situation when the requisition file will be used.

      5. Associating the requisition file to a staffing type.

      6. Associating the requisition file to configuration profiles.

      7. Granting permissions to create, view, and edit requisitions.

        Creating a User-defined Field

        Configuration > [Recruiting] Administration > Fields
        1. Click a field category.

        2. Click Create User-defined Field.

        3. In the Type list, select the type of field you want to create.

        4. Enter a name for the field.

          The name is used internally. It must be unique and without any spaces. Spaces can result in problems for integration with other HRIS applications. Underscores can be used.
        5. Enter help text if you are creating a Candidate field.

          The help text will be displayed in the career section directly below the user-defined field, providing candidates with an explanation of the field. If using multiple languages, you will have to enter a translation of the help text for those languages. If translations are not provided, the system copies the help text into the other languages and adds the wording "not translated" at the end.
          The help text can contain up to 1000 characters (spaces count as characters). It is recommended, however, that help text be kept as short as possible to improve readability and to ensure that the text does not compete against more important information for the user's attention.
        6. Enter a label.

          This is the name that will be displayed to candidates in the career section, and to recruiters and hiring managers in the Recruiting Center.
        7. Enter a short label.

          This label name is used in lists. Short Label is not available for Department, Requisition, and Offer user-defined fields.
        8. Enter information in the Attributes section.

        9. Translate the field into all available languages. Languages are available at the upper right of the page.

        10. Click Save.

        11. Click Done.

        12. In the list of fields, click the field you just created.

        13. Click Edit Field Availability.

        14. Select where the field will be available: Recruiting Center, career sections, the candidate search feature, the History tab, and in reports (for user-defined fields).

        15. For candidate user-defined fields, the Personally Identifiable Information (in Career Sections) option is available. When selected, if candidates enter a value in these fields and save the page, the value is no longer displayed in the field and asterisks are displayed in place of the value on the Summary page. See Masking Values for Date of Birth, Social Security Number and Candidate UDFs.

        16. Indicate if the content for the field is required to save, approve (requisition fields only), or source (requisition fields only) or if it is not required.

          Recruiting Center users will need to enter information in the field in order to proceed. If content is not required, users do not have to enter information in the field. If a field in a file is mandatory and the user is not authorized to edit the field because of the security level of the field, an error message will be displayed and the user will not be allowed to complete the transaction.
          Offer fields configured as required only apply in the context of a job offer (Offer Terms). As a result, offer fields are not required when users are creating other types of offers (that is, current job, competitive offer, expectations). Also, users permitted to create/edit supplementary offers are able to enter as much or as little data as they desire, and when creating a job offer they are required to complete any required fields prior to saving.
        17. Specify the security level of the field, that is General, Restricted, or Confidential.

        18. Click Save.

        19. Click Add next to Organizations, Locations, or Job Fields to associate the field to Organizations, Locations and/or Job Fields.

        20. Click Add next to Exceptions to create a staffing type exception..

          Creating a User-defined Form

          Configuration > [Recruiting] Administration > User-defined Forms

          1. Click Create.

          2. Select a file type and click Next.

          3. Select a form type and click Create. Or, if you want to use the default fields in the form type, select Use the default template.

          4. Provide a code, a name, and a description.

          5. Add rows, columns and sections using the Toolbox features.

          6. In the Field Chooser list, select fields, then drag and drop them in the desired sections.

          7. Edit the field properties by selecting a field and scrolling to the Selected Element Properties section at the bottom of the form.

          8. Click Save.

          The form appears in the User-defined Forms list and is available when creating user-defined files.

            Creating a Requisition File

            When creating a requisition file, the blocks in the Prescreening section must be placed in the following order: 1) Disqualification Questions 2) Competencies 3) Questions. Not all sections must be deployed, but when used they must be used in this relation to one another to ensure users do not encounter errors in the layout of the file.

            Configuration > [Recruiting] Administration > User-defined Files

            1. Click Create.

            2. Select Requisition File in the drop-down list then click Create.

            3. Provide a code and a name.

            4. Provide a description to facilitate future references.

            5. Determine how requisition approval and posting will be handled during the creation process of the file.

              • Without Assistants: This is the default value. There is no special behavior.

              • With Assistants: When this value is selected, Recruiting Center users will be prompted through the approval and posting pages upon saving and closing the requisition file provided the requisition is ready for approving and posting.

            6. Click Save. The requisition file you just created is displayed.

            7. If you want to add information on each of the requisition file tab, click Show next to Tab Management, then click on the tab name.

              The name of a tab in a user-defined file can be modified. You must send the new name to Oracle Support who will then activate the text for your zone. Contact Oracle Support for further information.
            8. Create sections in the requisition file.

              1. Click Edit next to Section Ordering.

              2. Type the name of the section in the Add a Section field.

                The name of the section is viewable by Recruiting Center users when they are in view and edit modes within a file as well as in the file's Table of Contents.
              3. Click Create Section. The new section appears on the right, under File.

            9. Add blocks to the sections.

              1. In the Available Blocks section, select a block.

              2. Drag and drop the block in the section.

            10. Click Save.

            11. Click Activate.

              Selecting the Situation When a Requisition File is Used

              The user-defined file must be created and activated.

              Configuration > [Recruiting] Administration > Requisition File Setup
              1. Click Edit.

              2. For Requisition 1, select the situation when the requisition file will be used. For example, without posting.

              3. Repeat the same process for Requisition File 2 and Requisition File 3.

              4. Click Save.

                Associating a Requisition File to a Staffing Type

                Configuration > [Recruiting] Administration > Requisition File Setup

                1. Click Edit.

                2. For Requisition File 1, click Add Staffing Type.

                3. In the first drop-down list, select a requisition type.

                4. In the second drop-down list, select the situation when the requisition file will be used.

                5. Click Save.

                  Associating a Requisition File to a Configuration Profile

                  Configuration > [SmartOrg] Administration > Configuration Profiles
                  1. Click a configuration profile.

                  2. Click the Requisition File Creation setting.

                  3. Click Edit.

                  4. Select the desired requisition file.

                  5. Click Save.

                    Permissions to Create, View, and Edit Requisitions

                    Permissions granted to Recruiting Center users so they can create, edit and view requisitions.

                    To create requisitions in the Recruiting Center, users must have the following permissions.

                    User Type Permission Location
                    Create requisitions Configuration > [SmartOrg] Administration> User Types > Recruiting > Requisitions > General
                    View requisitions Configuration > [SmartOrg] Administration> User Types > Recruiting > Requisitions > General
                    Allow access to n requisitions

                    Note: For a requisition type currently active.

                    Configuration > [SmartOrg] Administration> User Types > Recruiting > Requisitions > Requisition Types

                    To view requisitions in the Recruiting Center, users must have the following permissions.

                    User Type Permission Description Location
                    View requisitions Note that even if users can view requisitions "without restriction", users will not be able to view requisitions belonging to requisition/staffing types that they do not have access to. Configuration > [SmartOrg] Administration > [Users] User Types > Recruiting > Requisitions

                    To edit requisitions in the Recruiting Center, users must have the following permissions.

                    User Type Permission Description Location
                    Edit requisitions This permission also allows users to enter comments on requisitions they are allowed to edit. Users can also cancel requisitions with this permission.

                    When users have the Create requisitions permission but not the Edit requisitions permission, they will be able to edit a requisition until it is saved. Once the requisition is saved, they cannot change any value.

                    Also, for the Recruiter and Recruiter Assistant fields contained in a requisition, only users that have the Edit requisitions permission will be displayed in the User Selector. Users with the Create requisitions permission will not be displayed.

                    Regardless of the security level for certain requisition fields while in edit mode, users with the Create requisitions permission are able to capture foundation data in the Create a Requisition tool. Fields in the tool are always editable regardless of their security level.

                    Configuration > [SmartOrg] Administration > [Users] User Types > Recruiting > Requisitions
                    Attention:

                    The "Edit requisitions" user type permission has two constraints:

                    • But not if requisitions are in approval process

                    • But not if requisitions have been approved

                    These two constraints do not take effect in the user's current session; they will apply only at the user's next login. This is because user type permissions are verified at login to determine what a user can access and the system does not know of the change until the credentials are verified again. For example, a user has the "Edit requisitions - But not if requisitions have been approved" permission. If a requisition changes from Draft to Approved during the user's session, the user will still be able to edit the requisition or attach/remove files in the requisition until he/she logs out of the system.

                    Likewise, if a requisition was in the approval cycle during the user's login and it then completes the approval cycle. If that user is not authorized to edit requisitions during the approval process, he/she may need to log out and back in again in order to regain the edit access to the requisition.

                      Configuring Requisition Templates

                      A requisition template is a requisition file containing information that will likely be reused for a similar job position. Requisition templates are created with the combination of multiple forms and predefined blocks grouped within sections.

                      The configuration of a requisition template consists of the following steps:

                      1. Selecting the fields to include in the requisition template. You can use standard fields provided by Oracle or you can create your own user-defined fields.

                      2. Selecting the forms to include in the requisition template. You can modify existing forms or create user-defined forms from scratch.

                      3. Creating the requisition template.

                      4. Selecting the situation when the requisition template will be used.

                      5. Associating the requisition template to a staffing type.

                      6. Granting permissions to create, view, and edit requisition templates.

                        Creating a User-defined Field

                        Configuration > [Recruiting] Administration > Fields
                        1. Click a field category.

                        2. Click Create User-defined Field.

                        3. In the Type list, select the type of field you want to create.

                        4. Enter a name for the field.

                          The name is used internally. It must be unique and without any spaces. Spaces can result in problems for integration with other HRIS applications. Underscores can be used.
                        5. Enter help text if you are creating a Candidate field.

                          The help text will be displayed in the career section directly below the user-defined field, providing candidates with an explanation of the field. If using multiple languages, you will have to enter a translation of the help text for those languages. If translations are not provided, the system copies the help text into the other languages and adds the wording "not translated" at the end.
                          The help text can contain up to 1000 characters (spaces count as characters). It is recommended, however, that help text be kept as short as possible to improve readability and to ensure that the text does not compete against more important information for the user's attention.
                        6. Enter a label.

                          This is the name that will be displayed to candidates in the career section, and to recruiters and hiring managers in the Recruiting Center.
                        7. Enter a short label.

                          This label name is used in lists. Short Label is not available for Department, Requisition, and Offer user-defined fields.
                        8. Enter information in the Attributes section.

                        9. Translate the field into all available languages. Languages are available at the upper right of the page.

                        10. Click Save.

                        11. Click Done.

                        12. In the list of fields, click the field you just created.

                        13. Click Edit Field Availability.

                        14. Select where the field will be available: Recruiting Center, career sections, the candidate search feature, the History tab, and in reports (for user-defined fields).

                        15. For candidate user-defined fields, the Personally Identifiable Information (in Career Sections) option is available. When selected, if candidates enter a value in these fields and save the page, the value is no longer displayed in the field and asterisks are displayed in place of the value on the Summary page. See Masking Values for Date of Birth, Social Security Number and Candidate UDFs.

                        16. Indicate if the content for the field is required to save, approve (requisition fields only), or source (requisition fields only) or if it is not required.

                          Recruiting Center users will need to enter information in the field in order to proceed. If content is not required, users do not have to enter information in the field. If a field in a file is mandatory and the user is not authorized to edit the field because of the security level of the field, an error message will be displayed and the user will not be allowed to complete the transaction.
                          Offer fields configured as required only apply in the context of a job offer (Offer Terms). As a result, offer fields are not required when users are creating other types of offers (that is, current job, competitive offer, expectations). Also, users permitted to create/edit supplementary offers are able to enter as much or as little data as they desire, and when creating a job offer they are required to complete any required fields prior to saving.
                        17. Specify the security level of the field, that is General, Restricted, or Confidential.

                        18. Click Save.

                        19. Click Add next to Organizations, Locations, or Job Fields to associate the field to Organizations, Locations and/or Job Fields.

                        20. Click Add next to Exceptions to create a staffing type exception..

                          Creating a User-defined Form

                          Configuration > [Recruiting] Administration > User-defined Forms

                          1. Click Create.

                          2. Select a file type and click Next.

                          3. Select a form type and click Create. Or, if you want to use the default fields in the form type, select Use the default template.

                          4. Provide a code, a name, and a description.

                          5. Add rows, columns and sections using the Toolbox features.

                          6. In the Field Chooser list, select fields, then drag and drop them in the desired sections.

                          7. Edit the field properties by selecting a field and scrolling to the Selected Element Properties section at the bottom of the form.

                          8. Click Save.

                          The form appears in the User-defined Forms list and is available when creating user-defined files.

                            Creating a Requisition Template

                            Configuration > [Recruiting] Administration > User-defined Files

                            1. Click Create.

                            2. Select Requisition Template in the drop-down list then click Create.

                            3. Provide a code and a name.

                            4. Provide a description to facilitate future references.

                            5. Click Save. The requisition template you just created is displayed.

                            6. If you want to add information on each of the requisition template tab, click Show next to Tab Management, then click on the tab name.

                              The name of a tab in a user-defined file can be modified. You must send the new name to Oracle Support who will then activate the text for your zone. Contact Oracle Support for further information.
                            7. Create sections in the requisition template.

                              1. Click Edit next to Section Ordering.

                              2. Type the name of the section in the Add a Section field.

                                The name of the section is viewable by Recruiting Center users when they are in view and edit modes within a file as well as in the file's Table of Contents.
                              3. Click Create Section. The new section appears on the right, under File.

                            8. Add blocks to the sections.

                              1. In the Available Blocks section, select a block.

                              2. Drag and drop the block in the section.

                            9. Click Save.

                            10. Click Activate.

                              Selecting the Situation When a Requisition Template is Used

                              The user-defined file must be created and activated.

                              Configuration > [Recruiting] Administration > Requisition File Setup
                              1. Click Edit.

                              2. Under Requisition Template, select the situation when the requisition template will be used.

                              3. Click Save.

                                Associating a Requisition Template to a Staffing Type

                                Configuration > [Recruiting] Administration > Requisition File Setup

                                1. Click Edit.

                                2. Under Requisition Template, click Add Staffing Type.

                                3. In the first drop-down list, select a requisition template.

                                4. In the second drop-down list, select the situation when the requisition template will be used.

                                5. Click Save.

                                  Permissions to Create, View, and Edit Requisition Templates

                                  Several permissions are related to requisition templates.

                                  To create requisition templates in the Recruiting Center, users must have the following permissions.

                                  User Type Permission Description Location
                                  Create templates Configuration > [SmartOrg] Administration > [Users] User Types > Recruiting > Requisitions
                                  Modify template information imported from HRMS Configuration > [SmartOrg] Administration > [Users] User Types > Recruiting > Requisitions
                                  Note: It is possible to configure the requisition template file to include the CSW designation. If it is not necessary to specify this field on the requisition template, it should not be included on the Template File configuration. When not included on the template, the legacy CSW configuration of workflow OLF contextualization will be honored. If the template contains a CSW field, the CSW defined on the template will override the definition of workflow contextualization in the CSW configuration area.

                                  To view requisition templates in the Recruiting Center, users must have the following permission.

                                  User Type Permission Description Location
                                  View templates This permission only controls the list of templates in the Requisition Templates Library. It does not control template selection within a requisition, which is based on the selected requisition type and Organization-Location-Job Field contextualization. Configuration > [SmartOrg] Administration > [Users] User Types > Recruiting > Requisitions

                                  To edit requisition templates in the Recruiting Center, users must have the following permission.

                                  User Type Permission Description Location
                                  Edit templates Note that users are able to create requisition templates even if they do not have the Edit templates permission. Users will be able to fill the new template, save it, and modify it until the file has been closed. Once closed, it will no longer be possible for users to modify it. Configuration > [SmartOrg] Administration > [Users] User Types > Recruiting > Requisitions

                                    Configuring Candidate Files

                                    Candidate files are created with the combination of multiple forms and predefined blocks grouped within sections.

                                    The configuration of a candidate file consists of the following steps:

                                    1. Selecting the fields to include in the candidate file. You can use standard fields provided by Oracle or you can create your own user-defined fields.

                                    2. Selecting the forms to include in the candidate file. You can modify existing forms or create user-defined forms from scratch.

                                    3. Creating the candidate file.
                                    4. Selecting the situation when the candidate file will be used.
                                    5. Associating the candidate file to a staffing type.

                                      Creating a User-defined Field

                                      Configuration > [Recruiting] Administration > Fields
                                      1. Click a field category.

                                      2. Click Create User-defined Field.

                                      3. In the Type list, select the type of field you want to create.

                                      4. Enter a name for the field.

                                        The name is used internally. It must be unique and without any spaces. Spaces can result in problems for integration with other HRIS applications. Underscores can be used.
                                      5. Enter help text if you are creating a Candidate field.

                                        The help text will be displayed in the career section directly below the user-defined field, providing candidates with an explanation of the field. If using multiple languages, you will have to enter a translation of the help text for those languages. If translations are not provided, the system copies the help text into the other languages and adds the wording "not translated" at the end.
                                        The help text can contain up to 1000 characters (spaces count as characters). It is recommended, however, that help text be kept as short as possible to improve readability and to ensure that the text does not compete against more important information for the user's attention.
                                      6. Enter a label.

                                        This is the name that will be displayed to candidates in the career section, and to recruiters and hiring managers in the Recruiting Center.
                                      7. Enter a short label.

                                        This label name is used in lists. Short Label is not available for Department, Requisition, and Offer user-defined fields.
                                      8. Enter information in the Attributes section.

                                      9. Translate the field into all available languages. Languages are available at the upper right of the page.

                                      10. Click Save.

                                      11. Click Done.

                                      12. In the list of fields, click the field you just created.

                                      13. Click Edit Field Availability.

                                      14. Select where the field will be available: Recruiting Center, career sections, the candidate search feature, the History tab, and in reports (for user-defined fields).

                                      15. For candidate user-defined fields, the Personally Identifiable Information (in Career Sections) option is available. When selected, if candidates enter a value in these fields and save the page, the value is no longer displayed in the field and asterisks are displayed in place of the value on the Summary page. See Masking Values for Date of Birth, Social Security Number and Candidate UDFs.

                                      16. Indicate if the content for the field is required to save, approve (requisition fields only), or source (requisition fields only) or if it is not required.

                                        Recruiting Center users will need to enter information in the field in order to proceed. If content is not required, users do not have to enter information in the field. If a field in a file is mandatory and the user is not authorized to edit the field because of the security level of the field, an error message will be displayed and the user will not be allowed to complete the transaction.
                                        Offer fields configured as required only apply in the context of a job offer (Offer Terms). As a result, offer fields are not required when users are creating other types of offers (that is, current job, competitive offer, expectations). Also, users permitted to create/edit supplementary offers are able to enter as much or as little data as they desire, and when creating a job offer they are required to complete any required fields prior to saving.
                                      17. Specify the security level of the field, that is General, Restricted, or Confidential.

                                      18. Click Save.

                                      19. Click Add next to Organizations, Locations, or Job Fields to associate the field to Organizations, Locations and/or Job Fields.

                                      20. Click Add next to Exceptions to create a staffing type exception..

                                        Creating a User-defined Form

                                        Configuration > [Recruiting] Administration > User-defined Forms

                                        1. Click Create.

                                        2. Select a file type and click Next.

                                        3. Select a form type and click Create. Or, if you want to use the default fields in the form type, select Use the default template.

                                        4. Provide a code, a name, and a description.

                                        5. Add rows, columns and sections using the Toolbox features.

                                        6. In the Field Chooser list, select fields, then drag and drop them in the desired sections.

                                        7. Edit the field properties by selecting a field and scrolling to the Selected Element Properties section at the bottom of the form.

                                        8. Click Save.

                                        The form appears in the User-defined Forms list and is available when creating user-defined files.

                                          Creating a Candidate File

                                          Configuration > [Recruiting] Administration > User-defined Files

                                          1. Click Create.

                                          2. Select Candidate File in the drop-down list then click Create.

                                          3. Provide a code and a name.

                                          4. Provide a description to facilitate future references.

                                          5. Click Save. The candidate file you just created is displayed.

                                          6. If you want to add information on each of the candidate file tab, click Show next to Tab Management, then click on the tab name.

                                            The name of a tab in a user-defined file can be modified. You must send the new name to Oracle Support who will then activate the text for your zone. Contact Oracle Support for further information.
                                          7. Create sections in the candidate file.

                                            1. Click Edit next to Section Ordering.

                                            2. Type the name of the section in the Add a Section field.

                                              The name of the section is viewable by Recruiting Center users when they are in view and edit modes within a file as well as in the file's Table of Contents.
                                            3. Click Create Section. The new section appears on the right, under File.

                                          8. Add blocks to the sections.

                                            1. In the Available Blocks section, select a block.

                                            2. Drag and drop the block in the section.

                                          9. Click Save.

                                          10. Click Activate.

                                            Selecting the Situation when a Candidate File is Used

                                            User-defined files must first be created and activated.

                                            Configuration > [Recruiting] Administration > Candidate File Setup
                                            1. Click Edit.

                                            2. Under Candidate File, for each situation, select the candidate file that will be used.

                                            3. Click Save.

                                              Associating the Candidate File to a Staffing Type

                                              Configuration > [Recruiting] Administration > Candidate File Setup

                                              1. Click Edit.

                                              2. Under Candidate File, for each situation, click Add Staffing Type.

                                              3. In the first drop-down list, select a requisition type.

                                              4. In the second drop-down list, select the situation when the file will be used.

                                              5. Click Save.

                                                Configuring the Create Candidate File

                                                The Create Candidate feature is used when a recruiter receives a resume and wants to capture or enter the candidate's information into the system. The Create Candidate action is available in the Recruiting Center home page (center stage) as well as in the candidates list via the More Actions menu.

                                                The configuration of the Create Candidate feature consists of the following steps:

                                                1. Selecting the fields to include in the candidate file. You can use standard fields provided by Oracle or you can create your own user-defined fields.

                                                2. Selecting the forms to include in the candidate file. You can modify existing forms or create user-defined forms from scratch.

                                                3. Creating the Create Candidate file.
                                                4. Selecting the situation when the file will be used.
                                                5. Associating the candidate file to a staffing type.
                                                6. Associating the create candidate file to configuration profiles.
                                                7. Granting the Create candidates permission (SmartOrg Administration > User Types > Recruiting > Candidates). When the permission is granted, the Create Candidate action is available in the Recruiting Center.

                                                8. Granting the Attach a file (general) and Attach a file (on preselected candidates) permissions (SmartOrg Administration > User Types > Recruiting > Candidates). Users must have the "Attach a file (general)" and "Attach a file (on preselected candidates)" permissions for the resume parsing option to work properly when creating a candidate.

                                                  Creating a User-defined Field

                                                  Configuration > [Recruiting] Administration > Fields
                                                  1. Click a field category.

                                                  2. Click Create User-defined Field.

                                                  3. In the Type list, select the type of field you want to create.

                                                  4. Enter a name for the field.

                                                    The name is used internally. It must be unique and without any spaces. Spaces can result in problems for integration with other HRIS applications. Underscores can be used.
                                                  5. Enter help text if you are creating a Candidate field.

                                                    The help text will be displayed in the career section directly below the user-defined field, providing candidates with an explanation of the field. If using multiple languages, you will have to enter a translation of the help text for those languages. If translations are not provided, the system copies the help text into the other languages and adds the wording "not translated" at the end.
                                                    The help text can contain up to 1000 characters (spaces count as characters). It is recommended, however, that help text be kept as short as possible to improve readability and to ensure that the text does not compete against more important information for the user's attention.
                                                  6. Enter a label.

                                                    This is the name that will be displayed to candidates in the career section, and to recruiters and hiring managers in the Recruiting Center.
                                                  7. Enter a short label.

                                                    This label name is used in lists. Short Label is not available for Department, Requisition, and Offer user-defined fields.
                                                  8. Enter information in the Attributes section.

                                                  9. Translate the field into all available languages. Languages are available at the upper right of the page.

                                                  10. Click Save.

                                                  11. Click Done.

                                                  12. In the list of fields, click the field you just created.

                                                  13. Click Edit Field Availability.

                                                  14. Select where the field will be available: Recruiting Center, career sections, the candidate search feature, the History tab, and in reports (for user-defined fields).

                                                  15. For candidate user-defined fields, the Personally Identifiable Information (in Career Sections) option is available. When selected, if candidates enter a value in these fields and save the page, the value is no longer displayed in the field and asterisks are displayed in place of the value on the Summary page. See Masking Values for Date of Birth, Social Security Number and Candidate UDFs.

                                                  16. Indicate if the content for the field is required to save, approve (requisition fields only), or source (requisition fields only) or if it is not required.

                                                    Recruiting Center users will need to enter information in the field in order to proceed. If content is not required, users do not have to enter information in the field. If a field in a file is mandatory and the user is not authorized to edit the field because of the security level of the field, an error message will be displayed and the user will not be allowed to complete the transaction.
                                                    Offer fields configured as required only apply in the context of a job offer (Offer Terms). As a result, offer fields are not required when users are creating other types of offers (that is, current job, competitive offer, expectations). Also, users permitted to create/edit supplementary offers are able to enter as much or as little data as they desire, and when creating a job offer they are required to complete any required fields prior to saving.
                                                  17. Specify the security level of the field, that is General, Restricted, or Confidential.

                                                  18. Click Save.

                                                  19. Click Add next to Organizations, Locations, or Job Fields to associate the field to Organizations, Locations and/or Job Fields.

                                                  20. Click Add next to Exceptions to create a staffing type exception..

                                                    Creating a User-defined Form

                                                    Configuration > [Recruiting] Administration > User-defined Forms

                                                    1. Click Create.

                                                    2. Select a file type and click Next.

                                                    3. Select a form type and click Create. Or, if you want to use the default fields in the form type, select Use the default template.

                                                    4. Provide a code, a name, and a description.

                                                    5. Add rows, columns and sections using the Toolbox features.

                                                    6. In the Field Chooser list, select fields, then drag and drop them in the desired sections.

                                                    7. Edit the field properties by selecting a field and scrolling to the Selected Element Properties section at the bottom of the form.

                                                    8. Click Save.

                                                    The form appears in the User-defined Forms list and is available when creating user-defined files.

                                                      Creating the Create Candidate File

                                                      Configuration > [Recruiting] Administration > User-defined Files

                                                      1. Click Create.

                                                      2. Select Create Candidate in the drop-down list then click Create.

                                                      3. Provide a code and a name.

                                                      4. Provide a description to facilitate future references.

                                                      5. Specify if you want to send the ACE Candidate Alert email.

                                                      6. Specify if you want to send the Capture Resume Acknowledgement email.

                                                      7. Click Save. The file you just created is displayed.

                                                      8. If you want to add information on each of the file tab, click Show next to Tab Management, then click on the tab name.

                                                        The name of a tab in a user-defined file can be modified. You must send the new name to Oracle Support who will then activate the text for your zone. Contact Oracle Support for further information.
                                                      9. Create sections in the file.

                                                        1. Click Edit next to Section Ordering.

                                                        2. Type the name of the section in the Add a Section field.

                                                          The name of the section is viewable by Recruiting Center users when they are in view and edit modes within a file as well as in the file's Table of Contents.
                                                        3. Click Create Section. The new section appears on the right, under File.

                                                      10. Add blocks to the sections.

                                                        1. In the Available Blocks section, select a block.

                                                        2. Drag and drop the block in the section.

                                                      11. Click Save.

                                                      12. Click Activate.

                                                        Selecting the Situation when the Create Candidate File is Used

                                                        Configuration > [Recruiting] Administration > Candidate File Setup

                                                        1. Click Edit.

                                                        2. Under Create Candidate, for each situation, click Add Staffing Type.

                                                        3. In the first drop-down list, select a requisition type.

                                                        4. In the second drop-down list, select the situation when the file will be used.

                                                        5. Click Save.

                                                          Associating the Create Candidate File to a Staffing Type

                                                          Configuration > [Recruiting] Administration > Candidate File Setup

                                                          1. Click Edit.

                                                          2. Under Create Candidate, for each situation, click Add Staffing Type.

                                                          3. In the first drop-down list, select a requisition type.

                                                          4. In the second drop-down list, select the situation when the file will be used.

                                                          5. Click Save.

                                                            Associating the Create Candidate File to a Configuration Profile

                                                            Configuration > [SmartOrg] Administration > Configuration Profiles
                                                            1. Click a configuration profile.

                                                            2. Click the Candidate File Creation setting.

                                                            3. Click Edit.

                                                            4. Select the desired files.

                                                            5. Click Save.

                                                              Permission and Field Security Level not Considered when Creating a Candidate

                                                              Recruiting Center users have the ability to create candidates without the restriction of security level permissions and field security level.

                                                              When creating a candidate general profile or job-specific submission (via the Create Candidate action), the file presented to users will not take into consideration security level permissions in view and edit modes for those users and will allow them to input data into all the fields no matter the security level permissions granted or the security level set for the fields.

                                                              Security Level Permission Location
                                                              • Security level for internal candidates (in edit mode)

                                                              • Security level for internal candidates (in view mode)

                                                              • Security level for external candidates (in edit mode)

                                                              • Security level for external candidates (in view mode)

                                                              Configuration > [SmartOrg] Administration > User Types > Recruiting > Candidates

                                                              Security Level - Candidate Field Location
                                                              • General

                                                              • Restricted

                                                              • Confidential

                                                              Configuration > [Recruiting] Administration > Fields > Candidate

                                                              Below is an example of a candidate creation process. In this example, the user does not have security level permissions in edit and view mode for the First Name and Last Name fields:

                                                              • The user selects Create Candidate in the More Actions list.

                                                              • When doing the duplicate check before creating the candidate, the user has access to the First Name and Last Name fields.

                                                              • When creating the candidate, the user also has access to the First Name and Last Name fields.

                                                              • Once fields have been filled, the user clicks Save or Save and Close. The system does a check to see if all mandatory fields are filled. If not, the user remains in the create candidate process until he/she fills in all mandatory fields and clicks Save or Save and Close again.

                                                              • When all mandatory fields are filled, the user is then moved out of the create candidate process and into the edit or view candidate process. All security level permissions are then considered again. As a result, the user does not see the First Name and Last Name fields in view mode and in edit mode as he/she does not have the security level permissions for that.

                                                              Note that when creating a candidate job-specific submission, if the user does not have access (security level permissions) to view or edit the candidate file, the system will automatically redirect the user to the Recruiting Center home page. For example, if the user was creating an internal candidate and he/she is not allowed to see internal candidates, as soon as the user saves the file (that is, exit the create mode), the system will close the file and take the user back to the home page.

                                                                User-defined Files

                                                                  User-defined File

                                                                  User-defined files are used to build requisitions, requisition templates, and candidate files.

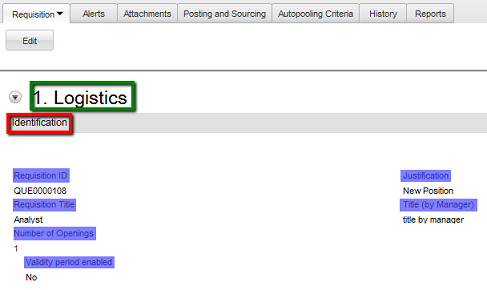
                                                                  A user-defined file is a page consisting of sections, each section contains blocks, a block contains forms, and a form contains fields.

                                                                  This image illustrates a requisition file. For this requisition file, there is a section called Logistics. A block contains the form Identification. The form contains several fields such as Requisition ID, Requisition Title, Number of Openings.


                                                                  Image showing a requisition file with a section, blocks, forms, and fields.

                                                                  Four types of user-defined files can be created:

                                                                  • Requisition File

                                                                  • Requisition Template

                                                                  • Candidate File

                                                                  • Create Candidate

                                                                  When creating a user-defined file and starting with a default, any fields that are part of the default which are inactive will still appear in the file and will need to be manually removed during the configuration of the file.

                                                                    Block

                                                                    Blocks are added to sections of a user-defined file.

                                                                    When creating a user-defined file, system administrators create sections then add blocks in each section. These blocks appear as sub-sections within the file. System administrators also define the properties of each block. This is where they can select a specific user-defined form for a block. For example, three Candidate Personal Information forms are available. When adding the Candidate Personal Information block to the file, the administrator can choose which of the three Candidate Personal Information forms will be used for that file.

                                                                    Some block types have special properties that system administrators can configure.

                                                                    Candidate Blocks Special Properties
                                                                    Candidate Personal Information Option to force users to provide a valid US social security number.
                                                                    Certification Option to set the minimum number of entries required.
                                                                    Education Option to set the minimum number of entries required.
                                                                    References Option to set the minimum number of entries required.
                                                                    Work Experience Option to set the minimum number of entries required.

                                                                    Requisition Blocks Special Properties
                                                                    Information This block must be one of the first four blocks in the file.

                                                                    Beside the user-defined forms that are used as blocks of information in a file, pre-defined blocks of information provided with the system are available and can be incorporated in a file. Some of these blocks have special properties. Note that the field level content of these blocks is not configurable, but system administrators do have control over the placement of this information in the file.

                                                                    System-defined Candidate Blocks Special Properties
                                                                    Account information None
                                                                    Additional Information None
                                                                    Contingent Staffing None
                                                                    Cover Letter None
                                                                    Disqualification Questions None
                                                                    Employment Preferences Option allowing the display of the Organization menu.
                                                                    Job Posting Notification Option to send by default an email notification whenever a new position matching this profile is posted.
                                                                    Prescreening Questionnaire Option allowing the display of mandatory questions (none, single answer, single and multiple answer, all).
                                                                    Prescreening Skills Option allowing the display of the mandatory statement checkbox. Setting allowing the selection of the skill assessment format (Simple, Detailed or Combined). Setting allowing to save only skill assessments when a candidate provides information about a given skill.
                                                                    Profile Questionnaire Option allowing the display of mandatory questions (none, single answer, single and multiple answer, all).
                                                                    Profile Skills Option allowing the display of the mandatory statement checkbox. Setting allowing the selection of the skill assessment format (Simple, Detailed or Combined). Setting allowing to save only skill assessments when a candidate provides information about a given skill.
                                                                    Regulations Option allowing the display of the mandatory statement checkbox. Setting allowing the selection of the skill assessment format (Simple, Detailed or Combined). Setting allowing to save only skill assessments when a candidate provides information about a given skill.
                                                                    Resume Option to define the minimum number of characters required in the resume field.
                                                                    Screening None
                                                                    Shift Availability Grid None
                                                                    Source Tracking None
                                                                    Submission Medium None

                                                                    System-defined Requisition Blocks Special Properties
                                                                    Abstract Not in template.
                                                                    Candidate Selection Workflow This block is required in a requisition file and the field is always required to save a requisition. This block is optional for inclusion in the requisition template file, and if included, it will be required to save a template.
                                                                    Disqualification Questions Not in template.
                                                                    Group Not in template. This block must be one of the first four blocks in the file.
                                                                    Owners This block must be one of the first four blocks in the file. In addition, settings allow the display of the following fields: hiring manager, hiring manager assistant, recruiter assistant, collaborators. Note: There is no setting to disable the recruiter field, but this can be accomplished by contextualizing the field so that it only shows up in very limited circumstances. Technically, this field is required to save a requisition to the database as the recruiter is considered the primary owner, but if the field is hidden from view, the user creating the requisition will be assigned the role of recruiter behind the scenes. If the customer has activated Dynamic Approval Routing, the Owners block display the Manager field for users to be able to route a requisition for approval.
                                                                    Questions None
                                                                    Regulatory Services None
                                                                    Screening None
                                                                    Skills Option to select the simple skill assessment format when the skill assessment format is set to Simple or Detailed.
                                                                    Structure This block must be one of the first four blocks in the file. Also, settings allow the display of organization, work location or job role fields.

                                                                      Duplicating a User-defined File

                                                                      Configuration > [Recruiting] Administration > User-defined Files

                                                                      1. Click Duplicate next to the file.

                                                                      2. Provide a code and a name.

                                                                      3. Provide a description to facilitate future references.

                                                                      4. Complete any other fields.

                                                                      5. Click Save.

                                                                        Editing the Description of a User-defined File

                                                                        The user-defined file must have the Inactive or Draft status.

                                                                        The user-defined file must not be in use.

                                                                        Configuration > Recruiting] Administration > User-defined Files
                                                                        1. Cick a user-defined file.

                                                                        2. Click Edit next to Properties.

                                                                        3. Modify the description.

                                                                        4. Click Save.

                                                                          Activating a User-defined File

                                                                          The user-defined file must have the Inactive or Draft status.

                                                                          Configuration > [Recruiting] Administration > User-defined Files
                                                                          1. Click a user-defined file.

                                                                          2. Click Activate.

                                                                          The user-defined file status is changed to Active. It can now be selected when specifying the situation when the file will be used (via the Candidate File Setup or Requisition File Setup feature).

                                                                            Deactivating a User-defined File

                                                                            The user-defined file must have the Active status.

                                                                            The user-defined file must not be in use.

                                                                            Configuration > [Recruiting] Administration > User-defined Files
                                                                            1. Click a user-defined file.

                                                                            2. Click Deactivate.

                                                                            The user-defined file status is changed to Draft. You can now modify the user-defined file or make it unavailable when building requisition or candidate files.

                                                                              Deleting a User-defined File

                                                                              The user-defined file must have the Inactive or Draft status.

                                                                              Configuration > [Recruiting] Administration > User-defined Files
                                                                              1. Click Delete next to the file.

                                                                              2. Confirm the deletion.

                                                                              The user-defined file no longer appears in the User-defined Files list and can no longer be used.

                                                                                Adding a Section in a User-defined File

                                                                                The user-defined file must have the Inactive or Draft status.

                                                                                Configuration > [Recruiting] Administration > User-defined Files
                                                                                1. Click a user-defined file.

                                                                                2. Click Edit next to Section Ordering.

                                                                                3. Type the name of the section in the Add a Section field.

                                                                                  The name of the section is viewable by Recruiting Center users when they are in view and edit modes within a file as well as in the file's Table of Contents.
                                                                                4. Click Create Section.

                                                                                A new section appears on the right, under File.

                                                                                  Deleting a Section in a User-defined File

                                                                                  The user-defined file must have the Inactive or Draft status.

                                                                                  Configuration > [Recruiting] Administration > User-defined Files
                                                                                  1. Click a user-defined file.

                                                                                  2. Click Edit next to Section Ordering.

                                                                                  3. Click Delete next to a section.

                                                                                  4. Click Save.

                                                                                  The section and its blocks are no longer displayed in the file.

                                                                                    Adding a Block in a User-defined File

                                                                                    The user-defined file must have the Inactive or Draft status.

                                                                                    At least one section must be created in the user-defined file.

                                                                                    Configuration > [Recruiting] Administration > User-defined Files
                                                                                    1. Click a user-defined file.

                                                                                    2. Click Edit next to Section Ordering.

                                                                                    3. In the Available Blocks section, select a block.

                                                                                    4. Drag and drop the block in the section.

                                                                                    5. Click Save.

                                                                                      Removing a Block from a User-defined File

                                                                                      The user-defined file must have the Inactive or Draft status.

                                                                                      The block must not be mandatory.

                                                                                      Configuration > [Recruiting] Administration > User-defined Files
                                                                                      1. Click a user-defined file.

                                                                                      2. Click Edit next to Section Ordering.

                                                                                      3. Select a block included in a section located on the right hand side.

                                                                                      4. Drag and drop the block to the Available Blocks list.

                                                                                      5. Click Save.

                                                                                        Modifying the Title of a Section

                                                                                        The user-defined file must have the Inactive or Draft status.

                                                                                        Configuration > [Recruiting] Administration > User-defined Files
                                                                                        1. Click a user-defined file.

                                                                                        2. Under Sections Ordering, click on a section.

                                                                                        3. Click Edit next to Properties.

                                                                                        4. Modify the value in the Title field.

                                                                                          The Title field supports 75 text based characters.
                                                                                        5. Click Save.

                                                                                        The title of a section is viewable by Recruiting Center users when they are in view and edit modes within a file as well as in the file's Table of Contents.

                                                                                          Modifying the Title of a Block

                                                                                          The user-defined file must have the Inactive or Draft status.

                                                                                          The Title field supports 75 text based characters.

                                                                                          Configuration > [Recruiting] Administration > User-defined Files
                                                                                          1. Click a user-defined file.

                                                                                          2. Under Sections Ordering, click on a block.

                                                                                          3. Click Edit next to Properties.

                                                                                          4. Modify the value in the Title field.

                                                                                            The Title field supports 75 text based characters.
                                                                                          5. Click Save.

                                                                                          The title of a block is viewable by Recruiting Center users when they are in view and edit modes within a file as well as in the file's Table of Contents.

                                                                                            Modifying the Name of a Tab in a User-defined File

                                                                                            The name of a tab in a user-defined file can be modified. The system administrator can send the new name to Oracle Support who will then activate the text for your zone. Contact Oracle Support for further information.

                                                                                              Adding Custom Instructions to a Block

                                                                                              Configuration > [Recruiting] Administration > User-Defined Files

                                                                                              1. Click a user-defined file.

                                                                                              2. Click on a block.

                                                                                              3. Click Edit next to Properties.

                                                                                              4. In the Description field, enter custom instructions.

                                                                                                The Description field supports 4000 text based characters.
                                                                                              5. Format instructions if desired.

                                                                                              6. Click Save.

                                                                                              The specific instructions appear underneath the block title of a file to assist Recruiting Center users in understanding what they need to do in a specific block of a file.

                                                                                                Adding Custom Instructions to a Section

                                                                                                Configuration > [Recruiting] Administration > User-Defined Files
                                                                                                1. Click a user-defined file.

                                                                                                2. In the Section Ordering section, click on a section title (displayed in bold).

                                                                                                3. Click Edit next to Properties.

                                                                                                4. In the Description field, enter custom instructions.

                                                                                                  The Description field supports 4000 text based characters.
                                                                                                5. Format instructions if desired.

                                                                                                6. Click Save.

                                                                                                Instructions are only viewable by Recruiting Center users when they are in edit mode within a file. The instructions appear underneath the section title to assist users in understanding what they need to do in a specific section of a file.

                                                                                                  Adding Custom Instructions to a Tab

                                                                                                  Configuration > [Recruiting] Administration > User-Defined Files
                                                                                                  1. Click a user-defined file.

                                                                                                  2. In the Tab Label Management section, click Show.

                                                                                                  3. Click on a tab.

                                                                                                  4. Click Edit next to Properties.

                                                                                                  5. In the Description field, enter custom instructions.

                                                                                                    The Description field supports 4000 text based characters.
                                                                                                  6. Format instructions if desired.

                                                                                                  7. Click Save.

                                                                                                  Instructions are only viewable by Recruiting Center users when they are in edit mode within a file. The instructions appear underneath the tab header to assist users in understanding what they need to do in the History, Referral and Attachments tabs of a file.

                                                                                                    Choosing a User-defined Form for a Block

                                                                                                    Not available for all block types.

                                                                                                    The user-defined file must have the Inactive or Draft status.

                                                                                                    Configuration > [Recruiting] Administration > User-defined Files
                                                                                                    1. Click a user-defined file.

                                                                                                    2. Under Section Ordering, click on a block.

                                                                                                    3. Click Edit next to Properties.

                                                                                                    4. Select a form in the User-defined Form drop-down list.

                                                                                                    5. Click Save.

                                                                                                      User-defined Forms

                                                                                                        User-defined Form

                                                                                                        A user-defined form is a page containing standard fields and user-defined fields.

                                                                                                        User-defined forms can be created for these file types:

                                                                                                        • requisition files

                                                                                                        • requisition templates

                                                                                                        • candidate files

                                                                                                        Several types of forms are available for each file type. These types of forms are suggested ways of packaging information and each form contains a default template that system administrators can use to start building the form. System administrators can also choose to build the form from scratch and ignore the default template. Note that it is possible to create multiple user-defined forms for each type of form. For example, three different user-defined forms for references could be created and used for different purposes.

                                                                                                        The table presents the types of user-defined forms available for requisition files, requisition templates, and candidate files.

                                                                                                        Requisition Files Requisition Templates Candidate Files
                                                                                                        Abstract Additional Information Background Check
                                                                                                        Additional Information Budget Basic Profile
                                                                                                        Budget Compensation Candidate Personal Information
                                                                                                        Compensation Contingent Terms Certifications
                                                                                                        Contingent Terms External Description Education
                                                                                                        External Description Identification Employee Metrics
                                                                                                        Identification Internal Description eSignature
                                                                                                        Internal Description Other References
                                                                                                        Other Profile Submission Information
                                                                                                        Profile Work Conditions
                                                                                                        Work Experience
                                                                                                          Creating a User-defined Form

                                                                                                          Configuration > [Recruiting] Administration > User-defined Forms

                                                                                                          1. Click Create.

                                                                                                          2. Select a file type and click Next.

                                                                                                          3. Select a form type and click Create. Or, if you want to use the default fields in the form type, select Use the default template.

                                                                                                          4. Provide a code, a name, and a description.

                                                                                                          5. Add rows, columns and sections using the Toolbox features.

                                                                                                          6. In the Field Chooser list, select fields, then drag and drop them in the desired sections.

                                                                                                          7. Edit the field properties by selecting a field and scrolling to the Selected Element Properties section at the bottom of the form.

                                                                                                          8. Click Save.

                                                                                                          The form appears in the User-defined Forms list and is available when creating user-defined files.

                                                                                                            Duplicating a User-defined Form

                                                                                                            Configuration > [Recruiting] Administration > User-defined Forms

                                                                                                            Click Duplicate next to the form.

                                                                                                            The new user-defined form has the same code with the extension (copy).

                                                                                                              Previewing a User-defined Form

                                                                                                              Configuration > [Recruiting] Administration > User-defined Forms

                                                                                                              Click Preview next to the user-defined form.

                                                                                                                Deleting a User-defined Form

                                                                                                                The user-defined file must have the Inactive status.

                                                                                                                Configuration > [Recruiting] Administration > User-defined Forms

                                                                                                                1. Click Delete next to the user-defined form.

                                                                                                                2. Confirm the deletion.

                                                                                                                The user-defined form no longer appears in the User-defined Forms list. The user-defined form can no longer be used in user-defined files.

                                                                                                                  Activating a User-defined Form

                                                                                                                  Configuration > [Recruiting] Administration > User-defined Forms

                                                                                                                  Click Activate next to the user-defined form.

                                                                                                                  The user-defined form status is changed to Active. The user-defined form can be used when creating user-defined files.

                                                                                                                    Deactivating a User-defined Form

                                                                                                                    The user-defined form status must be Active.

                                                                                                                    The user-defined form must not be in use.

                                                                                                                    Configuration > [Recruiting] Administration > User-defined Forms

                                                                                                                    Click Deactivate next to the user-defined form.

                                                                                                                    The user-defined form status is changed to Draft. The user-defined form is unavailable when creating user-defined files.

                                                                                                                      Adding Fields to a User-defined Form

                                                                                                                      Configuration > [Recruiting] Administration > User-defined Forms

                                                                                                                      1. Click a form.

                                                                                                                      2. Select a field from the Field Chooser list.

                                                                                                                      3. Drag and drop the field in the desired section.

                                                                                                                      4. Edit the properties of a field by selecting the field and scrolling to the Selected Element Properties section at the bottom of the form.

                                                                                                                      5. Click Save.

                                                                                                                        Editing the Properties of a User-defined Form

                                                                                                                        Configuration > [Recruiting] Administration > User-defined Forms

                                                                                                                        1. Click a user-defined form.

                                                                                                                        2. Modify the Name, Code and Description fields.

                                                                                                                        3. Click Save.

                                                                                                                          Editing the Properties of Fields in a User-defined Form

                                                                                                                          Configuration > [Recruiting] Administration > User-defined Forms

                                                                                                                          1. Click a user-defined form.

                                                                                                                          2. In the Page Content section, click in a field.

                                                                                                                          3. In the Selected Element Properties section, located at the bottom of the form, modify the properties of the field.

                                                                                                                          4. Click Save.

                                                                                                                            Adding a Static Hyperlink in a User-defined Form

                                                                                                                            Configuration > [Recruiting] Administration > User-defined Forms

                                                                                                                            1. Click a user-defined form.

                                                                                                                            2. Click a field.

                                                                                                                            3. In the Selected Element Properties section, under Field Type, select URL.

                                                                                                                            4. In the Selected Element Properties section, under Access Type, select Read-only.

                                                                                                                              Access must be set to read-only to ensure the user cannot change the value of the URL.

                                                                                                                              Adding Custom Instructions to a Field

                                                                                                                              Configuration > [Recruiting] Administration > User-Defined Forms
                                                                                                                              1. Click a user-defined form.

                                                                                                                              2. In the Page Content section, click in a field.

                                                                                                                              3. In the Selected Element Properties section at the bottom of the page, enter custom instructions in the Instructions field.

                                                                                                                                The Instructions field supports 1000 characters, embedded HTML and hyperlinks.

                                                                                                                                Note that the Help Callout field is not used in Recruiting.

                                                                                                                              4. Format instructions if desired.

                                                                                                                              5. Click Save.

                                                                                                                              Instructions are only viewable by Recruiting Center users when they are in edit mode within a file. The instructions appear underneath the field to assist users in understanding what they need to do with certain fields contained in a file.

                                                                                                                                User-defined Forms Selected Element Properties

                                                                                                                                Available properties depend on the type of field. Not all properties are available for all elements or for all products.

                                                                                                                                Property Option Description
                                                                                                                                Access (Editable/ Read Only) Indicates if the field is read-only or editable. When read-only is selected, a user is unable to modify the field. Default value is Editable.
                                                                                                                                Binding field Data source to which the element is bound. The value displayed in the Binding field represents the data value (available in the first list of the Field Chooser) to which the element is associated. For example, the Annual Bonus field is bound to the AssignmentOfferForForm/AnnualBonus. The value in the Binding field is not editable.
                                                                                                                                Columns Number of columns. Administrator can determine how many columns of fields to display in each area of each page of the forms.
                                                                                                                                CSS Style The desired visual style for displaying the value within an input field. Use styles as defined in the Cascading Style Sheets 2.0 standard: ww3.org reference. This style will override the main style that is used when the form is displayed to assignees and viewers. If no style information is entered, the default visual presentation will be used for that page.
                                                                                                                                CSS Style Label This is used to control the formatting of the label above the input field that is displayed to the assignee and form viewer.
                                                                                                                                CSS Style Instructions This style will override the style defined in the career section theme. If no information is entered, the style defined in the career section theme will be used.
                                                                                                                                Default Value Default value of the input field
                                                                                                                                Field Label Input Field Label
                                                                                                                                Field Size Indicates the number of elements displayed in a list. Field Size is used for multiple-selection fields. Default value is 1. For example, if the field size is 2, the list will display 2 values.
                                                                                                                                Field Type

                                                                                                                                This property should not be used for fields that are filled by candidates in career sections because RTF input is not supported. Field type is mainly used for requisition content.

                                                                                                                                • Text Input

                                                                                                                                • Password Input

                                                                                                                                • Suggest

                                                                                                                                • Text Area

                                                                                                                                • Check Box

                                                                                                                                • Radio Button

                                                                                                                                • Drop-down List

                                                                                                                                • Check Box

                                                                                                                                • Multi level Selector - this enables the user to select a collection of cascading values that are dependent on each other. Such as selecting a country, followed by a state/province and then a city.

                                                                                                                                • Date input

                                                                                                                                • Date Drop- down list

                                                                                                                                • Selector

                                                                                                                                • Read-only Text

                                                                                                                                • URL - this enables the value of the field to be displayed as a clickable link when the user accesses the form.

                                                                                                                                • Image URL - works the same as the URL, but makes the corresponding image a clickable link.

                                                                                                                                Help Callout Similar to instructions, but this is displayed as a help bubble on the form and can provide information about a field to the user.
                                                                                                                                Input Mask Format of the input value. The following syntax must be used:9=any number, a = any letter, n=any letter or number, |=logical, or\9=the 9 character, \a=the a character, \n=the n character, \|=the, | character, Any other symbol=the symbol (including a space). Possible formats for SSN and Zip/Postal codes: SSN: 999-99-9999ZIP Code United States: 99999|99999-9999Postal Code Canada: a9a9a9|a9a 9a9|a9a-9a9Note: Make sure to not add a space before and after the | operator. For example, do not enter 99999 | 99999-9999
                                                                                                                                Instructions This can be used to provide any special instructions necessary to explain what is being requested for the field. The instructions will appear just below the field. Note that the instructions are not displayed when the field type is "read-only text".
                                                                                                                                Mandatory Indicates, by selecting the Yes or No option, if the field must be completed. When a field is mandatory, a red square appears in front of the field. This can be useful for preventing an assignee from submitting a form with the value 'Not Specified' in a user-defined selection. Marking the field as Mandatory will require the assignee to specify a value.
                                                                                                                                Rows Number of rows available in a text area.
                                                                                                                                Save Literals If Input Mask is used for a field, it may require that specific numbers or letters appear within the field when the assignee fills it out at runtime. Save Literals determines if specific characters in the input mask will be saved in this field, or if they are simply required for the user to type in but removed from the saved value. This is useful for helping assignees to recognize the right information to type in, while removing the redundant characters for later use.
                                                                                                                                Status (Deactivated/Activated) Indicates if the field is activated or deactivated (that is, grayed out or not). The use of this field depends on the value selected in the Access field.

                                                                                                                                Editable access + Activated status=field can be modified

                                                                                                                                Read-only access + Activated status=field not editable

                                                                                                                                Read-only access + Deactivated status=field not editable

                                                                                                                                Editable access + Deactivated status=field not editable

                                                                                                                                Tooltip Displays the text entered in the input field as a tooltip when the assignee/viewer hovers over the field in the form.
                                                                                                                                Value Area where user input should be entered or where the information saved in a field is displayed.

                                                                                                                                  Candidate File and Requisition File Setup

                                                                                                                                    Candidate File Setup and Requisition File Setup

                                                                                                                                    The Candidate File Setup and Requisition File Setup features allow system administrators to indicate in which situations user-define files will be used and to associate user-defined files to staffing types.

                                                                                                                                    System administrators first define a primary file. Then, if desired, they can set a different file to be used for each staffing type. If a staffing type is not specified, the default file will be used.

                                                                                                                                    Candidate File Setup Purpose
                                                                                                                                    Candidate File Activated candidate file for viewing and editing general profiles.
                                                                                                                                    Note: The same file is used for both editing and viewing purposes.

                                                                                                                                    Activated candidate file for viewing and editing job submissions.

                                                                                                                                    Note: The same file is used for both editing and viewing purposes.
                                                                                                                                    Create Candidate Activated file for the quick creation of candidate profiles (default file).
                                                                                                                                    First activated file for creating candidate profiles.
                                                                                                                                    Second activated file for creating candidate profiles.
                                                                                                                                    Third activated file for creating candidate profiles.
                                                                                                                                    Fourth activated file for creating candidate profiles.
                                                                                                                                    First activated file for creating job-specific submissions.
                                                                                                                                    Second activated file for creating job-specific submissions.
                                                                                                                                    Third activated file for creating job-specific submissions.
                                                                                                                                    Fourth activated file for creating job-specific submissions.
                                                                                                                                    Activated file for creating referrer and candidate profiles.
                                                                                                                                    Activated file for capturing referrer profiles and job-specific submissions.

                                                                                                                                    At least one Create Candidate flow must be activated for the Create Candidate feature to work.

                                                                                                                                    Requisition File Setup Purpose
                                                                                                                                    Requisition File Requisition File 1.
                                                                                                                                    Requisition File 2.
                                                                                                                                    Requisition File 3.
                                                                                                                                    Requisition Template Activated file for creating requisition templates.

                                                                                                                                      Dissociating a Requisition File from a Staffing Type

                                                                                                                                      Configuration > [Recruiting] Administration > Requisition File Setup

                                                                                                                                      1. Click Edit.

                                                                                                                                      2. Click Remove next to a staffing type.

                                                                                                                                      3. Click Save.

                                                                                                                                      If no other staffing types are associated to the requisition file, the requisition file will be used with all types of staffing.

                                                                                                                                        Disassociating a Candidate File from a Staffing Type

                                                                                                                                        Configuration > [Recruiting] Administration > Candidate File Setup

                                                                                                                                        1. Click Edit.

                                                                                                                                        2. Click Remove next to a staffing type.

                                                                                                                                        3. Click Save.

                                                                                                                                        If no other staffing types are associated to the candidate file, the candidate file will be used with all types of staffing.