Working with National Tax Automation
Tax automation rules can be defined at various levels such as Global Rules, Domicile Rules, and Entity Rules.
When you add or save a global rule using the Tax Automation Global form, the rule is cascaded to all Domiciles and Entities. If required, the Global rule can be disabled at a lower level such as the Domicile or Entity. If needed, a new rule can be added at the lower level to run instead of the disabled one.
When you add or save a Domicile rule using the Tax Automation Domicile form, the rule is cascaded to all Entities that belong to that domicile. If required, the Domicile rule can be disabled at the Entity level. If needed, a new rule can be added at the entity level to run instead of the disabled one.
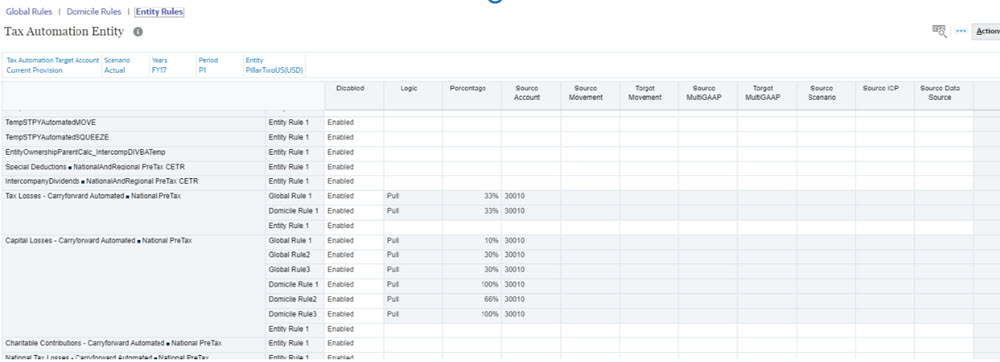
When you add or save an Entity Rule using the Tax Automation Entity form, the rule is saved and not cascaded as this is the lowest level of detail that a rule can be set on.
You can add multiple rules for each account. The result of the rules are accumulated and passed to the target account. To enhance the flexibility of tax automation, you can perform the following for each rule that is created:
- Select a different tax automation rule (Logic). You can create two or more rules all using the same Logic or a different logic selection for each one. Logic selections include Pull, Movement, Squeeze, Annualize, DeAnnualize, National Adjustment, and Prior Year.
- Select a different source (Source Account). You can select a different Source Account for each rule, or the same Source Accounts for one or more of the rules.
- Select a different Scenario (Source Scenario) member for each rule.
Tax automation is executed when you perform Consolidation.
To run National Tax Automation:
- From the Home page, click Application, and then click Overview.
- Click the Dimensions tab, then under the Data Source dimension, create the Data Source members that you require to store tax automation rules. See Adding Tax Automation Rules to Data Source Dimension.
- On the Home page, click Tools, then Variables.
- On the User Variables tab, under Account, select the Tax Automation Target Account form, and then click Save. The account is displayed on the Tax Automation form.
- On the Home page, click Application, then
Configuration, and then click Tax
Automation.
Note:
If the period has not been started, the Global Rules screen will be blank.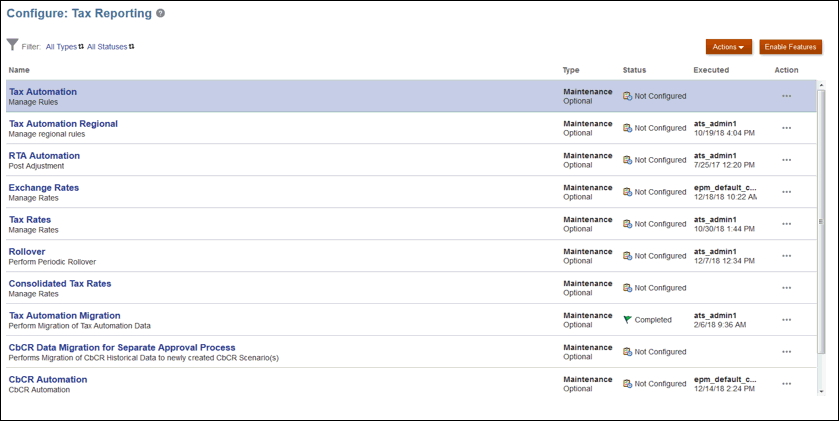
- Select the appropriate tax automation rule scope:
- Global Rules - Global rules apply to all entities regardless of
domicile. When you update a global rule in the Tax Automation Global
form, the modified rule is cascaded to all Entities. After a global rule is
cascaded to all Domiciles and Entities it shows up in the Tax Automation
Domicile and Tax Automation Entity forms. If required, global
rules can be disabled at the Domicile or Entity level.
Users or groups need to be granted Launch permission to the Tax Automation Save business rule in order to cascade and manage domicile rules.
- Domicile Rules - Domicile rules apply to all entities associated with
a particular domicile. Domicile refers to the country or jurisdiction where
the entity pays tax. For example, Canada is the national domicile for legal
entity Montreal, and US is the national domicile for legal entity New York.
When you modify a domicile rule in the Tax Automation Domicile form
and save it, the rule is cascaded to all entities that belong to the
selected domicile. After a domicile rule is cascaded to all Entities, it
shows up in the Tax Automation Entity form. If required, domicile
rules can be disabled at the Entity level.
Users or groups must be granted Launch permission to the Tax Automation Save business rule to cascade and manage domicile rules.
- Entity Rules - Entity rules apply to the entity that
you selected.
Note:
- Users with a Power User or User role must be granted Launch permission to the Tax Automation Global Save business rule to cascade and manage global rules.
- Users with a Power User or User role must be granted Launch permission to the Tax Automation Save business rule to cascade and manage domicile rules.
- No business rule Launch permissions are required for cascading and managing Entity Rules.
- If you are creating a custom form for configuring Tax Automation or
Pillar Two, then you must always attach the new rule Consol - Rule -
TRCS_ApplyReadOnly to run after load rule. This rule is used to
set information on the grid post load.

For example, a Service Administrator can grant Launch permission for the Tax Automation Global Save rule to the Global Automation Admins group from the Rules card. This enables members of the Global Automation Admins group to modify and cascade Global tax automation rules.
The table below shows the corresponding business rule and form for each national tax automation rule scope.
Table 23-5 Tax Automation National
Scope Cascading Business Rule Form Description of Rule Global Rules Tax Automation Global Save Tax Automation Global Cascades global rules to domicile and entity levels Domicile Rules Tax Automation Save Tax Automation Domicile Cascades domicile rules to entity levels Entity Rules N/A Tax Automation Entity N/A Global Rules TRCS_ApplyReadOnly Tax Automation Domicile Makes global rules read-only in domicile form Global Rules TRCS_ApplyReadOnly Tax Automation Entity Makes global rules read-only in Tax Automation Entity form Domicile Rules TRCS_ApplyReadOnly Tax Automation Entity Makes domicile rules read-only in Tax Automation Entity form Note that the cascading Global and Domicile rules must not be updated at Domicile and Entity levels. It is recommended to always disable the cascading rules and create local Domicile and Entity rule if cascading rules are not required. For example, you have a Global rule to PULL 100% from Account X, and then at a specific Domicile you need to update the rule to PULL at 50% from Account X. To achieve this, you must disable the Global rule at the Domicile level and then create a new Domicile rule which pulls 50% from Account X. You must not update the cascading Global rule at the Domicile level.
The same is applicable for cascading Domicile rules at Entity level.
- Global Rules - Global rules apply to all entities regardless of
domicile. When you update a global rule in the Tax Automation Global
form, the modified rule is cascaded to all Entities. After a global rule is
cascaded to all Domiciles and Entities it shows up in the Tax Automation
Domicile and Tax Automation Entity forms. If required, global
rules can be disabled at the Domicile or Entity level.
- Optional: If the page is blank, under Actions, select Tax Automation, and then Show All Accounts. This step adds a new blank rule for each tax account. See Adding Tax Automation Rules to Data Source Dimension.
- Right-click the rule name cell (for example, Global Rule 1) to display the pop-up
menu, and select Tax Automation, and then Add Rule to create one additional rule for
each tax account. The rule is created at the bottom as a last rule, and the selected
rule data is copied into the newly created row and cascaded to lower levels. Details
of the new rule can be edited.
Note:
- When adding the rule, ensure that placeholder members have already been created on the Data Source dimension, otherwise, the Add Rule will not create a new row. Rules are added in the same order as per the metadata in the Data Source dimension. See Adding Tax Automation Rules to Data Source Dimension
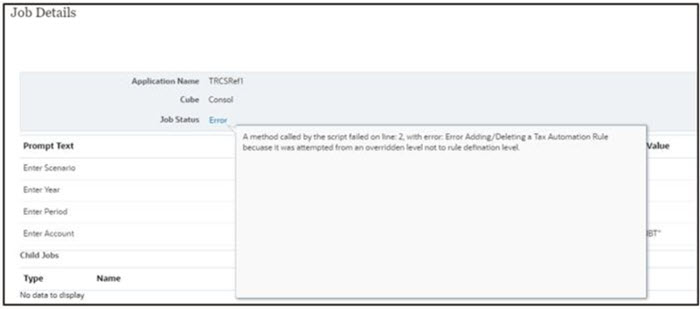
- Adding a rule when no rule is added in the metadata or adding a rule
from the wrong level returns an error message in the job
console.

- Click Save to save the rule.
- Optional: Right-click the rule name cell to display the menu, and select Tax
Automation, and then Delete Rule to delete one rule per account. The Delete rule
deletes the selected rule by shifting the rules up from the bottom of the list.
Deleting the first row only clears the rule, and the row is not removed.
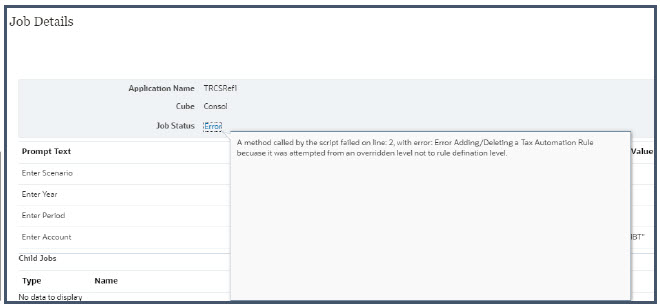
Note:
Deleting a rule from the wrong level returns an error message in the job console.
-
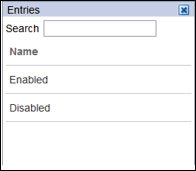
Optional: Under the Disabled column, select Disabled to exclude the entity from the calculation. By default, Enabled is selected for all base entities.
For example, to override Global and Domicile rules by an Entity rule, set the Global and rules to Disabled, and then enable an Entity Rule to override the other rules and redirect the values.
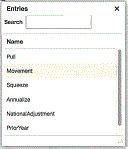
- Under Logic, from the drop-down, select the logic to be
applied to the row. You can select a different tax automation rule for each rule
created for the account. The following rules are available:
- Pull--Takes the specified percentage of the Source
account and applies it to the Target account
Example:
- PULL 50%
- Source Account : 100
- Destination = (100 * 50%) = 50
- Movement--Takes the difference between the current
period amount of the Source account and the last period of the prior year's
amount of the Source account, and applies the amount to the Target
account.
Example:
- MOVE 20%
- Source Account: Prior Year: 100; Current: 150
- Destination = ((150-100) * 20%) = 10
- Squeeze--The value at the intersection of the source
Account and source Movement must equal the ending balance in Temporary
Differences for the target Account when squeezing from the book or any
supplemental schedules.
Squeeze from supplemental schedule (such as Fixed Assets):
- Example 1: Fixed Assets:
- Source Account/Movement = -8110 (Book Basis minus Tax Basis for Property and Related Plant, and Current Year Movement)
- Ending Balance Temporary Differences for target
Account/Movement = -8110
Note:
If any other Movements for the target account are populated on Temporary Differences, they will be "squeezed out" (subtracted) so that the ending balance remains the value of the Source Account/Movement.
- Example 2:
- Fixed Assets Source Account/Movement = -8110 (Book Basis minus Tax Basis for Property and Related Plant, and Current Year Movement)
- Ending Balance Temporary Differences for target Account/Movement remains at = -8110.
- Opening Balance Adjusted on Temporary Differences for target Account = 1000
- The Difference between the Opening Balance Adjustment 1000 and P&L Total Movement -9100 still equals -8110
Squeeze when source data is Book Data:
- When no source or target Movement is specified in Tax Automation, the source Movement defaults to TB Closing and the target movement defaults to Automated (Current Year). A valid Source book account must be specified.
- The value will display in Temporary Differences in Movement Automated and the Ending Balance = Source Book Account value.
- Example 1: Fixed Assets:
- Annualize—Allows partial year amounts to be annualized to a full year amount.
- DeAnnualize—Allows full year values to be De-Annualized to a partial year amount based on the period of the rule.
- National Adjustment—Allows for adjustment (for example, reversal) of a National Permanent or Temporary Difference in the Regional Provision.
- Prior Year—Provides the ability to bring the prior year data into a provision.
Note:
For detailed examples of Annualize, DeAnnualize, National Adjustment and Prior Year logic, see Tax Automation Logic Examples.
For examples of creating rules that contain a combination of multiple rules to perform a transaction, see Creating Tax Automation Using Multiple Rule Combinations. - Pull--Takes the specified percentage of the Source
account and applies it to the Target account
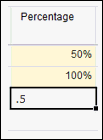
- Under Percentage, enter a whole number or decimal number to
represent the percentage of the book data to be copied to the selected entity. For
example, for 100%, enter 1, or for 50%, enter .5. The figures display
correctly when you exit the cell.
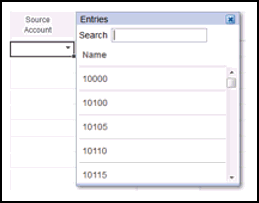
- Under Source Account, select the source account number from
which you want to copy data. You can select a different Source
Account for each rule created for the account.
Note:
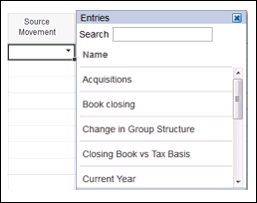
You can add accounts to the Automation Source Account Smart List that are not part of the default Smart List definition by adding custom attribute Tax Automation Source Account to the required account. See also: Defining Account Tax Attributes - Under Source Movement, select the Movement member which you
want to use to move the data.
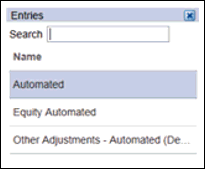
- From the drop-down under Target Movement, select the Movement
member which you want to use to move the data. If no value is selected, the default
is Automated for the Movement dimension.
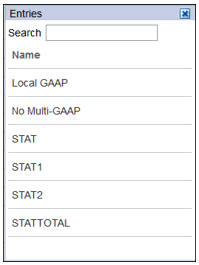
- Under Source MultiGAAP, select the Multi-GAAP member from
which the data will be drawn.
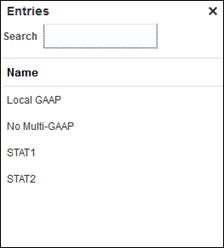
- From the drop-down under Target MultiGAAP, select the
Multi-GAAP member to which you want to move the data.
- From the drop-down under Source Scenario, select the Scenario
from which data will be drawn. You can define a different Scenario member for each
rule.
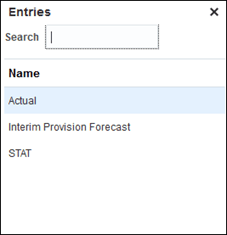
Changes in data in the source Scenario will not impact the target scenario based on the Tax Automation rules. For example, if a Tax Automation rule is defined to Pull data from the source GAAP scenario, any data changes in the GAAP Scenario system will not impact the STAT Scenario. Set the business rule Impact Entities with Data in Consol Cube. - For Intercompany Eliminations only, from the drop-down under Source
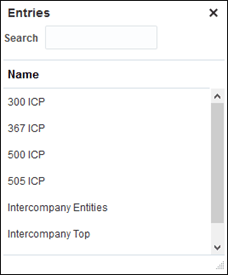
ICP, select the Intercompany member which you want to use as the
source to calculate Intercompany eliminations. You can define a different
Intercompany source member for each rule.
-
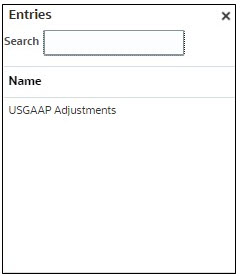
From the drop-down under Source Data Source, you can only select the Data Source members which have Tax Automation Source Data Source attribute attached. When you don’t select the Source Data Source column, then by default Source Data Source member is set as Pre Tax.
You can define a different Data Source member for each rule.
Note:
A new custom attribute Tax Automation Source Data Source is added in Data Source dimension. See also: Defining Data Source Tax Attributes - Click Save. You can see which entities have been impacted by viewing Data Status. When you click Save, all the rules are cascaded to lower level as defined in the above table for Tax Automation National.
- Under Actions, select Consolidate to perform Tax Automation.