1System Overview
Parent Child Company Hierarchy
In WMS, companies are divided into parent and child companies. This structure exists in order to help 3PLs view and manage their clients’ inventory separately. Depending on how many clients and how many warehouses the 3PL has, views can be managed accordingly:
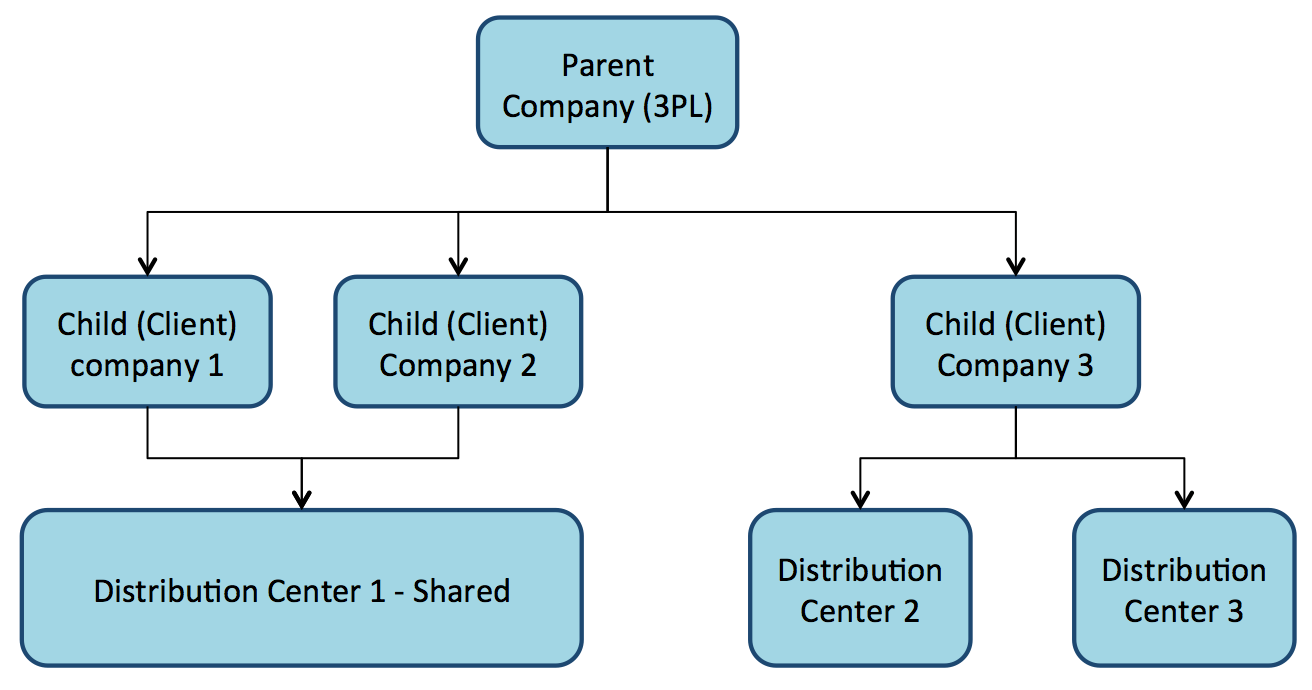
To toggle a specific Distribution Center (DC) view for a company, select the choices from the two drop-down menus located at the top right of the UI screen.
In the following screen, the first drop-down denotes a facility (DC), while the second drop-down denotes the companies in the environment:

Creating Users
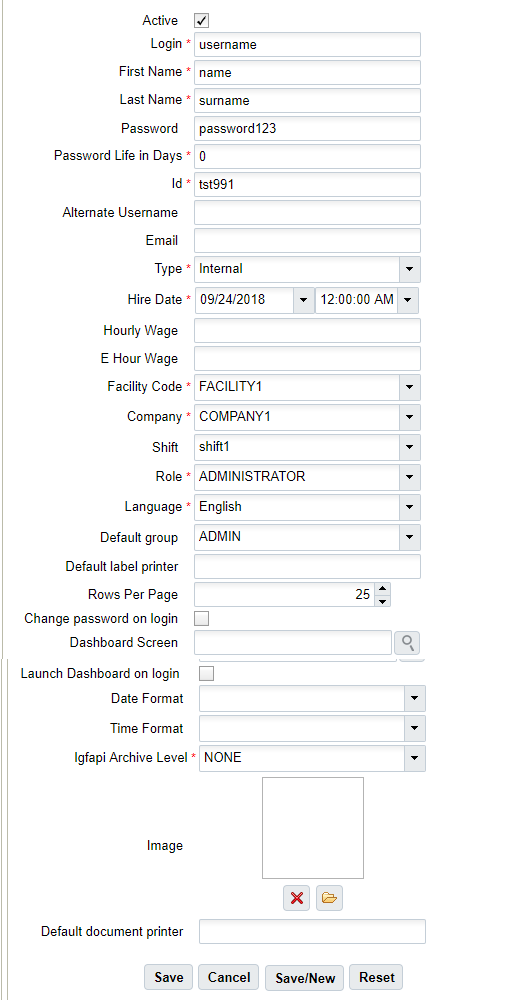
You can create new users through the “Users” screen. Here, you can define the following:
- Username and password
- The Facilities and Companies the user will have access
- The user’s role (Administrator, Management, Supervisor, etc.)
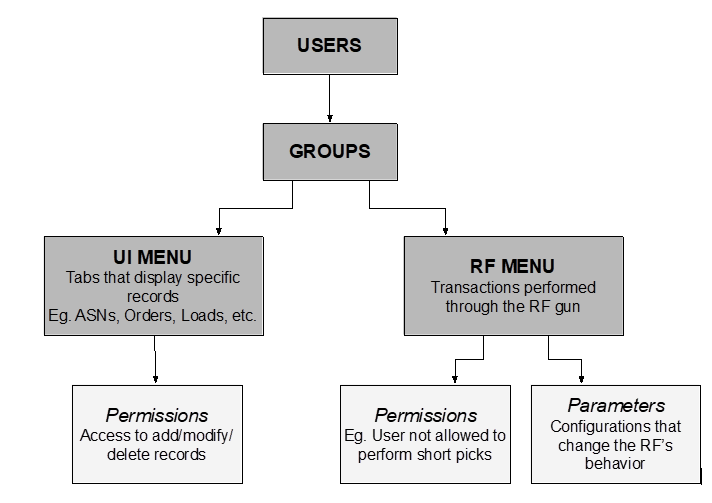
- The user’s default Group (UI and RF Menus)
- The user’s Language (corresponding/desired/appropriate supported language)
- The user’s default printer
- The user’s fixed Equipment Type
How to create new users:
- Go to the “Users” screen.
- Click ‘Create’ (
 ) and populate the necessary fields:
- Click Save.
- To configure the Facilities and Companies that the user has access to, select user and click the Eligible Facilities and Eligible Companies buttons.

- This will take you to a new screen displaying all of the records the user currently has access to. Click ‘Create’ (
 ) to add new Facilities or Companies:
- When finished, click ‘Back’ to return to the main screen.
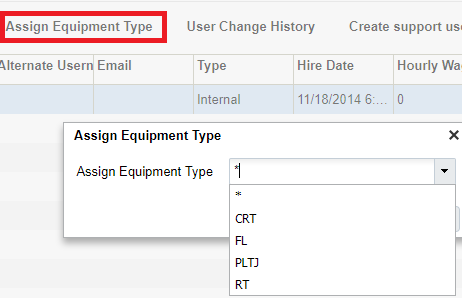
- To assign Equipment Types to the user, from the user screen, select the user, select an Equipment Type from the drop-down menu, and click “Assign Equipment Type”.
Note: Equipment Types must be defined first in the “Equipment Types” screen before assigning them to users.
Adding Screens
Adding Screens
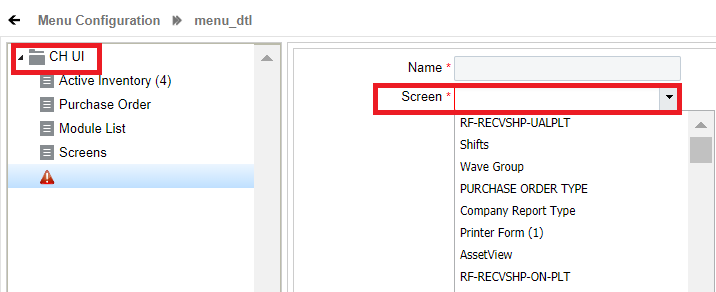
- Go to the “Screens” UI screen.
- Click “Generate Screens”.
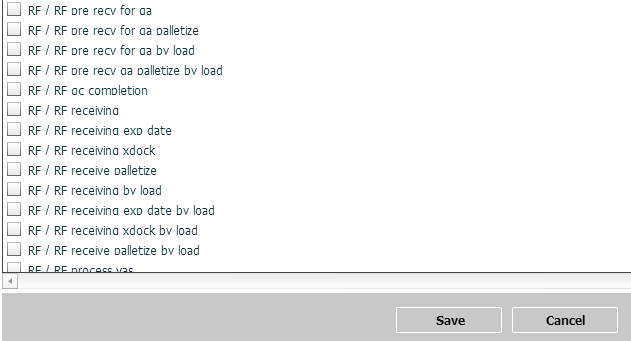
- Select all the necessary screens for the Group (e.g. ASNs, Appointments, Loads, etc.). Here the user will add both UI and RF screens. Click “Save”.
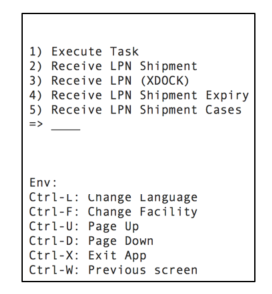
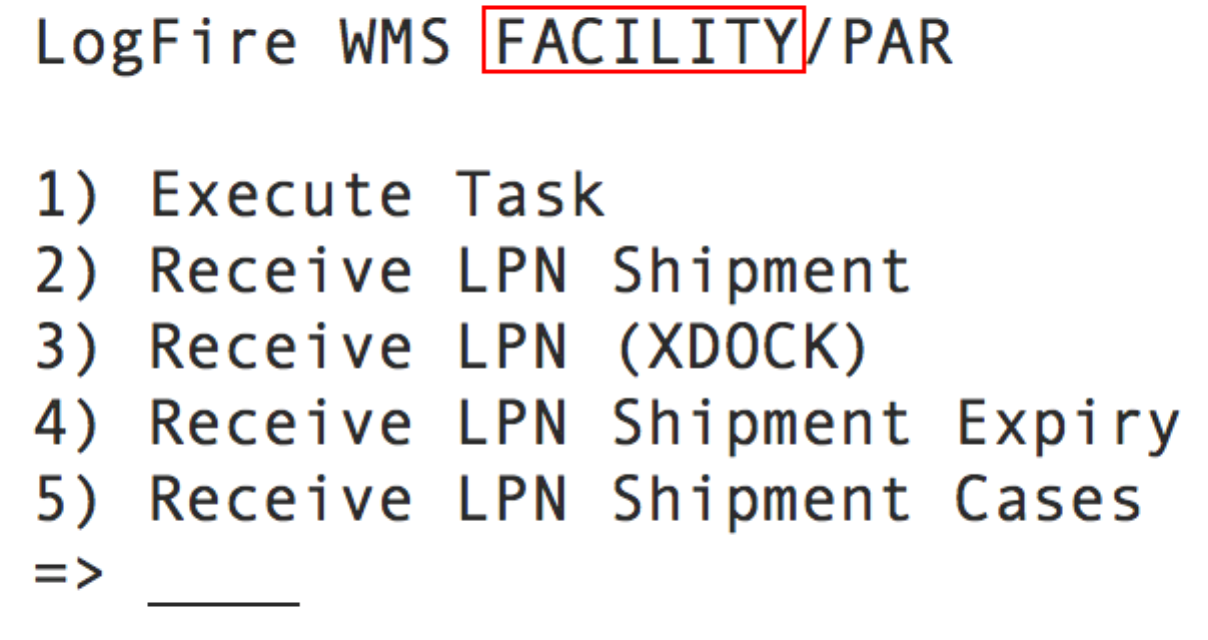
Note: For RF menus, for RF menus, extra configuration might be required (RF module parameters). To modify its parameters, select the RF screen and click on the Details button.
Assigning Groups to Users
Now that you have created Groups, you must now add the Users to each Group.
- Go to the “Users” screen.
- Select the user to assign the Group to.
- Click on “Groups”.
- Using the Create (
 ) button, add the Group(s) to assign the user the Group.
Additional: Creating and Assigning Facilities and Companies to Users
After user and group setup is complete, you must create facilities and companies in WMS.
Step 1: Creat Companies
- Go to the “Companies” screen.
- Click the Create (
 ) button.
 - Populate the company’s information such as the Code, Name, and Address. Note that the first company will be the parent company in the environment by default. To verify this, see the “Parent Company” column.
- Click “Save”.
Step 2: Create Facilities
Facilities are controlled at the company level. This means, that every company has its own set of facilities. This link is defined in the “Parent Company” column in the “Facilities” screen. By default, all parent and child company facilities are displayed.
- Go to the “Facilities” screen.
- Click the Create (
 ) button.
 - Populate the facility’s information such as the Code, Name, and Address.
- Default ship via code: This field is used when ‘ship via’ codes are activated through the company’s “PACKING_ROUTING_MODE” parameter. The system will default to this ship via value if the order header does not have a ship via code specified.
- Parent Company: Denotes the company that the facility belongs to.
- Accept Transfer Shipment: If checked and if this facility is a warehouse in WMS, this facility will accept ASNs from other facilities configured in the environment.
Step 3: Assign Facilities to Users
Once you have created the Companies and Facilities, the next step is to assign them to users. This step defines the list of companies and facilities that you will have access to.
- Go to the “Users” screen.
- Select the user to modify.
- Click on “Eligible Facilities”.
- Using the Create (
 ) button, add the Facilities that this user will have access to.
 - Repeat steps three and four for adding Companies (using the “Eligible Companies” button).

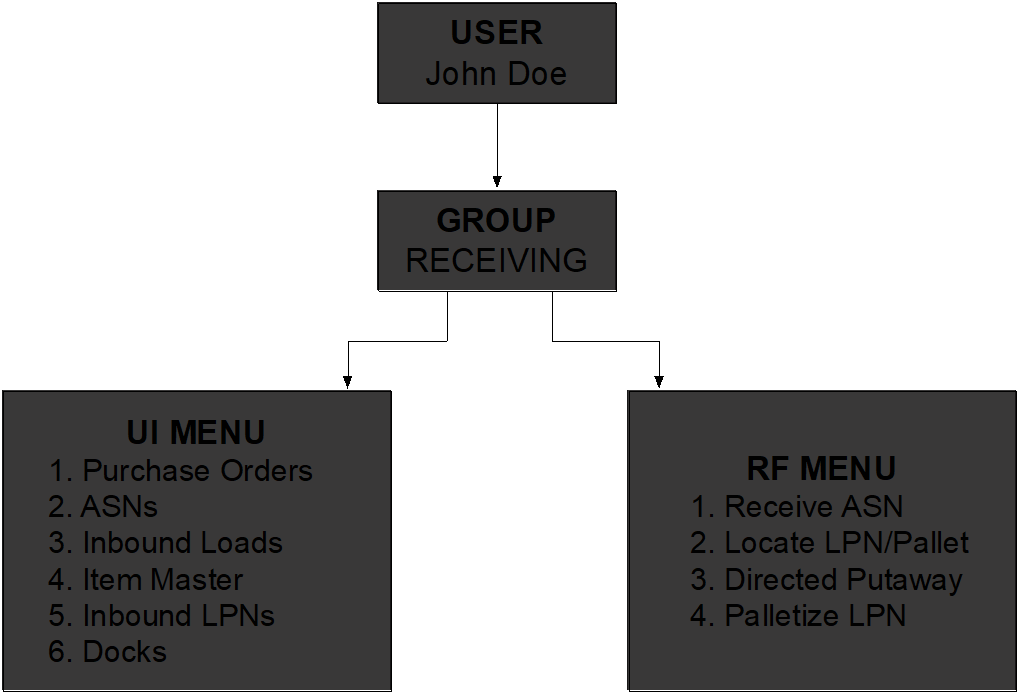
The following is an example of a User/Group set up:
System Integration Framework
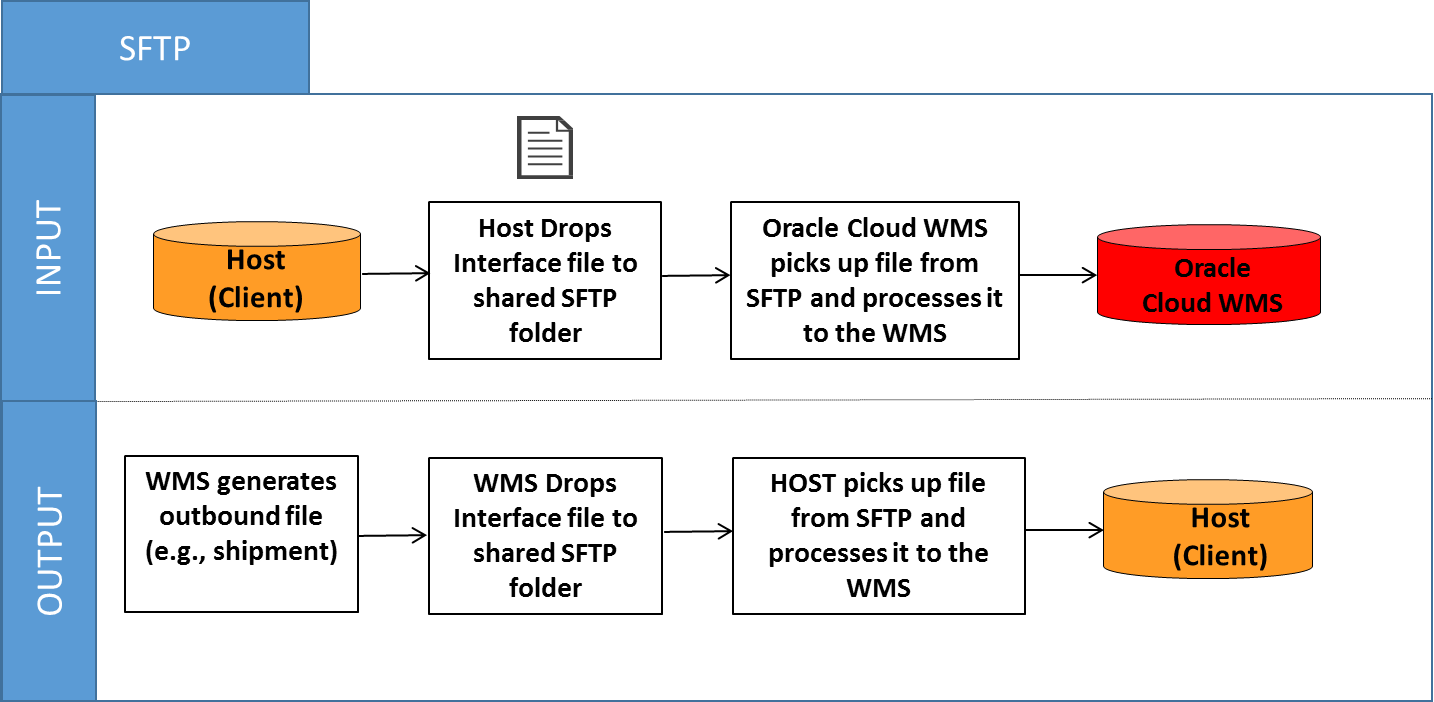
Oracle WMS Cloud uses the following methods for processing interface files into and out of WMS:

Supported Formats
- Flat files
- XML files
- CSV files
- XLS files
- EDI files (translated through a 3rd party application)
- MHE messages (translated through a 3rd party application)
- FedEx web services
- UPS web services
Input Interfaces
- Purchase order
- Item
- Item (facility specific)
- Item barcode
- Item pre-pack
- Inbound shipment
- Order
- Vendor
- Appointment
- Store
- Locations
- Route
- Price label
- Ship to company
- Site
- Asset
- Cubiscan
- Point of sale
Output Interfaces
- ASN verification
- Parcel Manifest shipment confirmation
- LTL Shipment confirmation
- Inventory Summary
- Inventory History
Note: For more details on each interface, please refer to the “Oracle WMS Cloud Interface File Formats” file.
Uploading Interface files with WMS
- The filename must start with the phrase as specified in the Input File Formats document (e.g. the filename must begin with “ORR” for uploading Order files).
- You must populate the columns specified as ‘required’ in the interface specification document.
- For Purchase Order, Order, and Inbound Shipment interfaces, the user must populate [H1] for every distinct header record [H2] for each of its detail records.
- The user must populate the correct sequence in the ‘seq_nbr’ field (i.e. no duplicate values).
Setting Email Notifications for Failed Interfaces
- The interface file that failed.
- Error message – the reason why the file failed.
- Go to the “Company Parameters” screen.
- Select “INTF_ERROR_EMAIL_LIST” parameter and click Edit.
- In the “Parameter Value”, populate the emails that will receive the error notifications. Separate multiple emails without spaces between emails.

