Cartonizing LPN by Cases
- From the “Inbound Shipment” screen, select the IB Shipment from which you want to cartonize the LPN.
- Click Details. The Inbound Shipment Detail page opens.

- Select the shipment details and click the “Cartonize LPN by Cases” button.
Note: By default, the Group permission is disabled for user roles with SUPERVISOR, GUARD, EMPLOYEE, and MANAGEMENT to perform action cartonizing. Therefore, users performing this action should be assigned to a group that has the "IB Shipment / Can Cartonize” permission check enabled for that group. Otherwise, the action button is disabled.
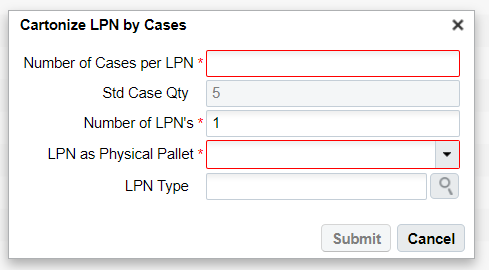
- A pop-up window “Cartonize LPN by Cases” is displayed for you to specify the
quantity for the items to be cartonized by cases in each LPN.
- After you enter the quantity, click Submit. Once you submit, the
“Cartonization successful” message displays.
Table 1. Cartonizing LPN by Cases Field Parameter Description Number of Cases per LPN Enter the number of cases you want to be cartonized per LPN. Std Case Qty Displays the Standard Case Quantity defined at the master level for an item. Number of LPNs Enter the number of LPNs. LPN as Physical Pallet Click the drop-down box to select either one of the following options:
- Yes: Consider an LPN as a Physical Pallet
- No: Do Not consider an LPN as a Physical Pallet
LPN Type Select an appropriate LPN Type. Example:
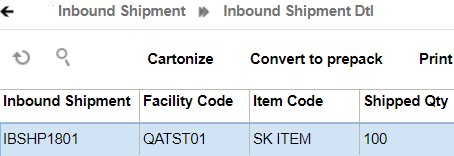
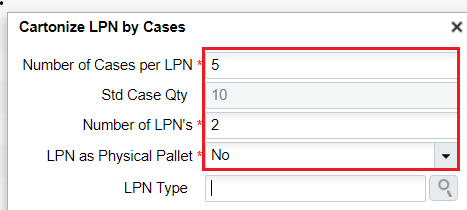
Suppose an IB Shipment Detail contains a shipment for Item SK ITEM, quantity 100. In the Item Master, SK ITEM has the “Standard Case Quantity” defined as 10.
Click the “Cartonize LPN by Cases” button and the system prompts you to define cases per LPN as shown in the figure below:
The system calculates the number of cases to be cartonized per LPN against the Standard Case Quantity and displays the following:
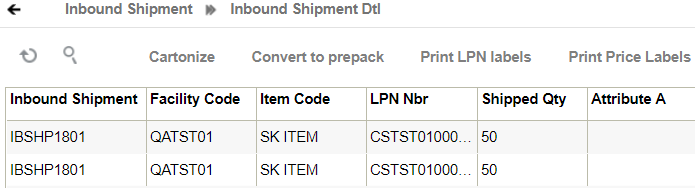
The system creates two LPNs that have a Shipped Quantity of 50 for SK ITEM.