Configuring Screens for Mobile App
Before using the Mobile Application, you need to configure the Menu Configuration for specific screens supported for the Mobile Application.
To setup Menu Configuration, do the following:
- From the Menu Configuration UI, click the "+" icon button at the top right of the Menu UI screen.
- Enter the Name and select the Screen Type = "VBCS-Mobile" for the Mobile
Application.

-
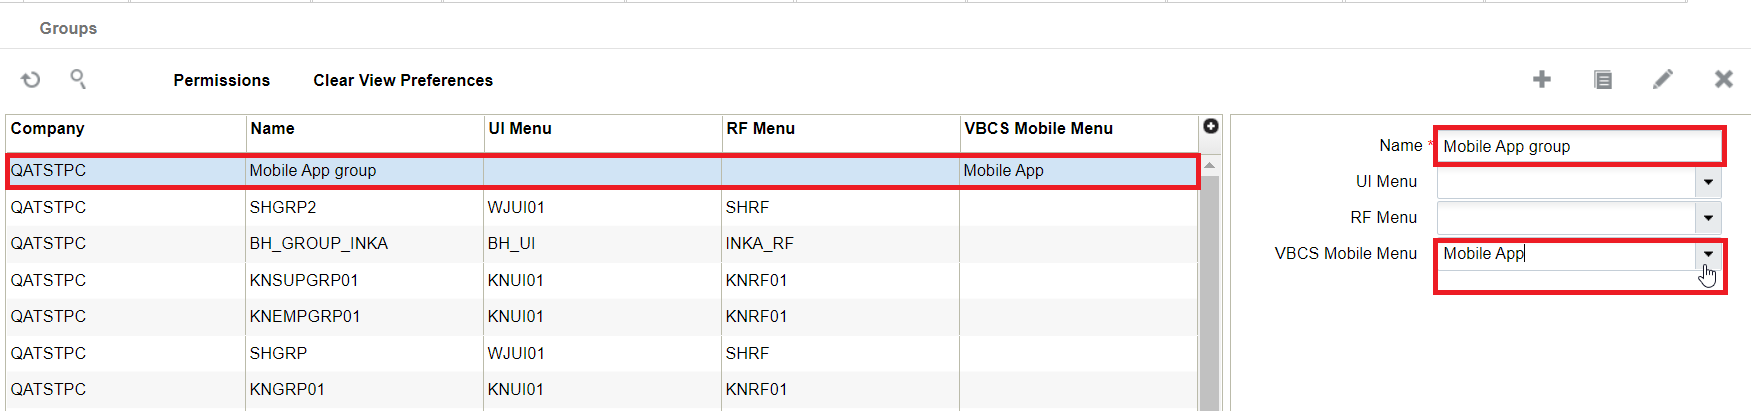
To assign the Menu to the group, go to the Group Configuration UI > click the VBCS Mobile Menu > add the Menu (here,Mobile App) to the existing or a new group.
-
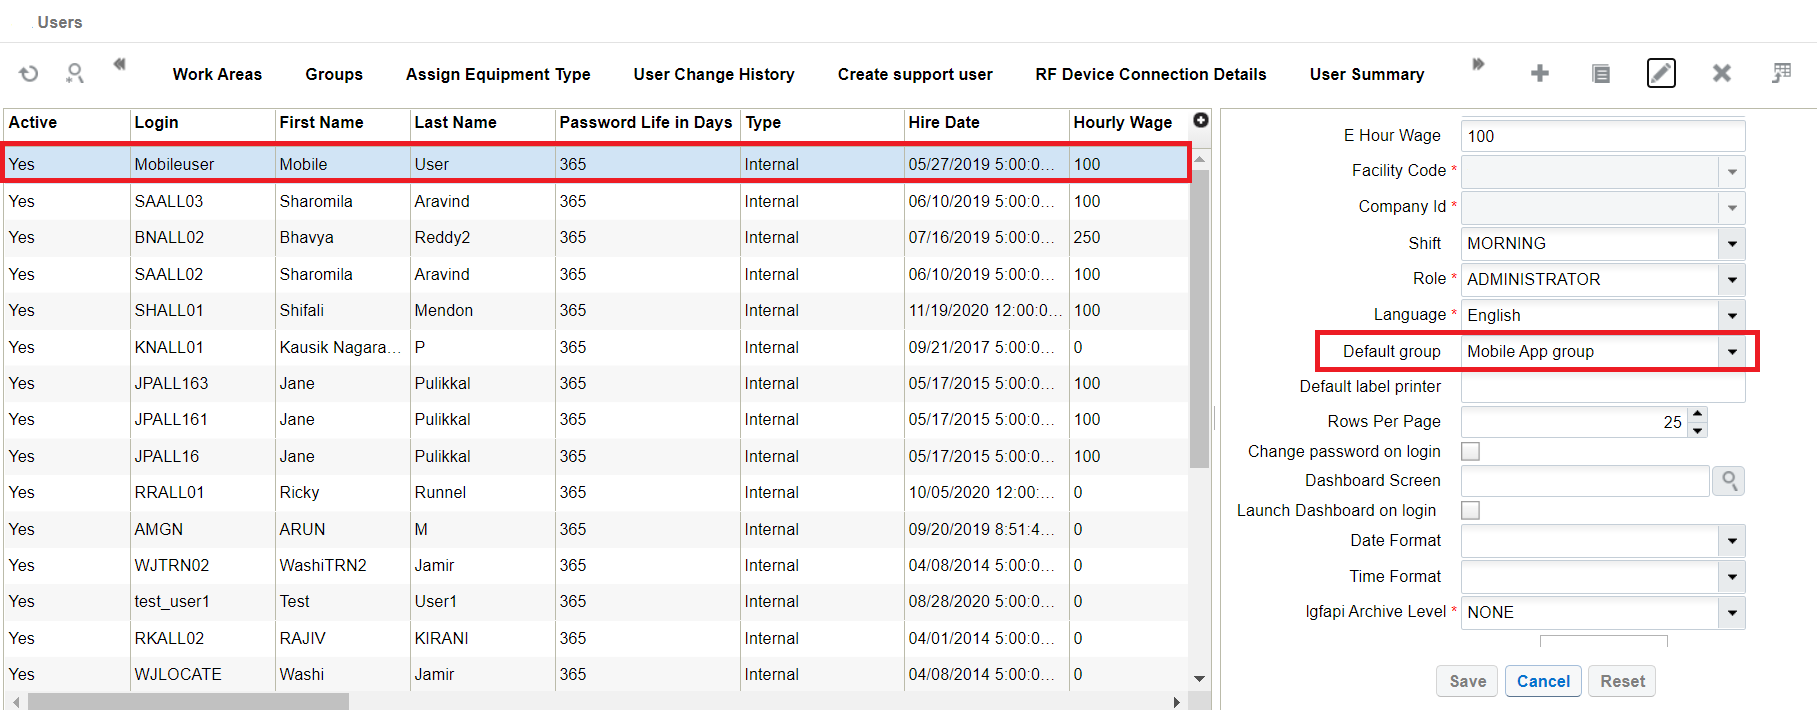
Create a user with your preferred group name (for example, Mobile App) or you can also update an existing user with the group. Assign the default group to the VBCS-Mobile (here, Mobile App) menu you created.
-
You can add module screens to the menu through one of the following ways:
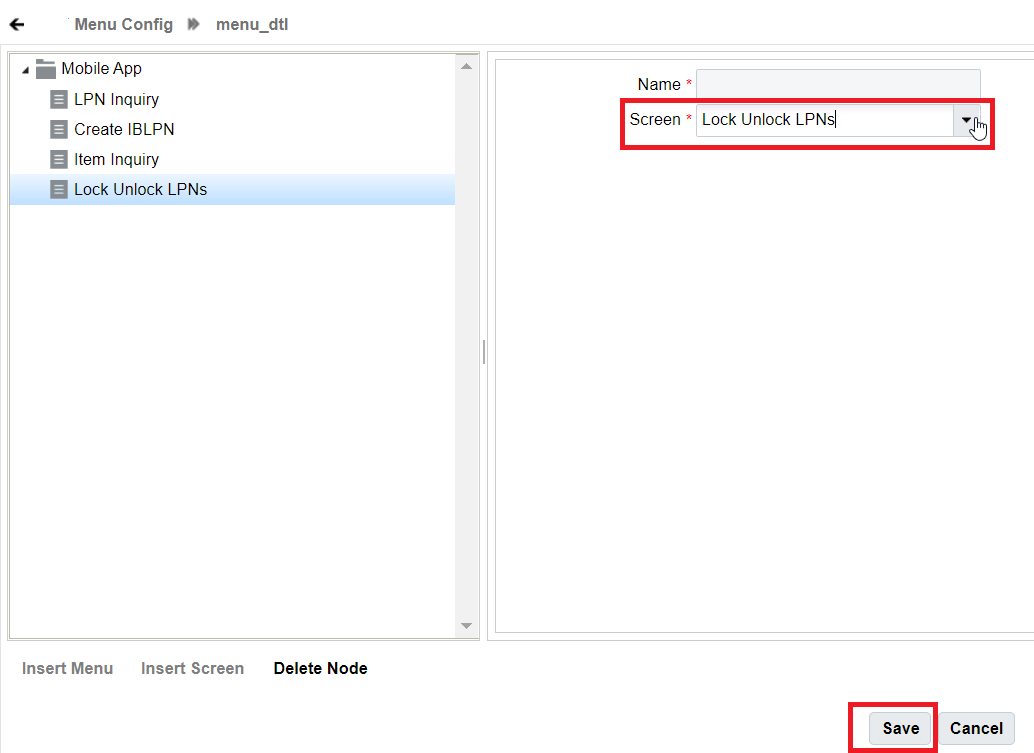
- From the Menu Configuration UI > select the menu that you created and click the detail icon button.
- The menu_dtl screen opens. Click the Insert Screen
button.
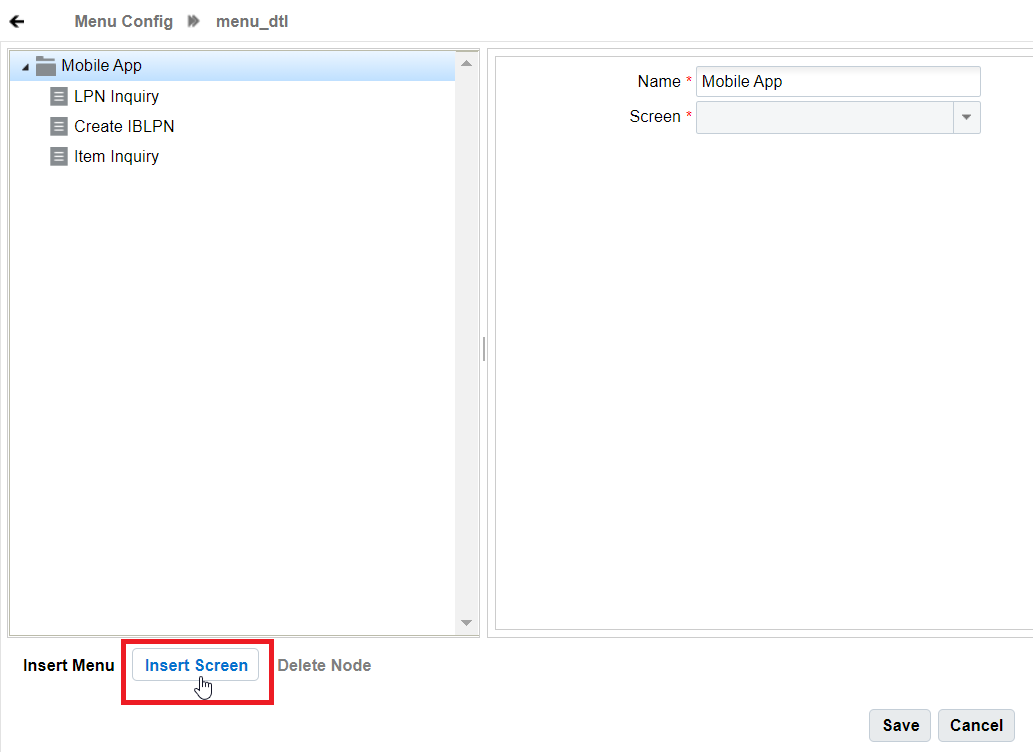
- The screen drop-down is enabled for you to add the screens to your
menu. Enter the screen name and click Save button.
- Alternatively, you can also go to the Modules UI and search using
the Screen Type = VBCS-Mobile. The UI will display all
the available modules for that screen type.
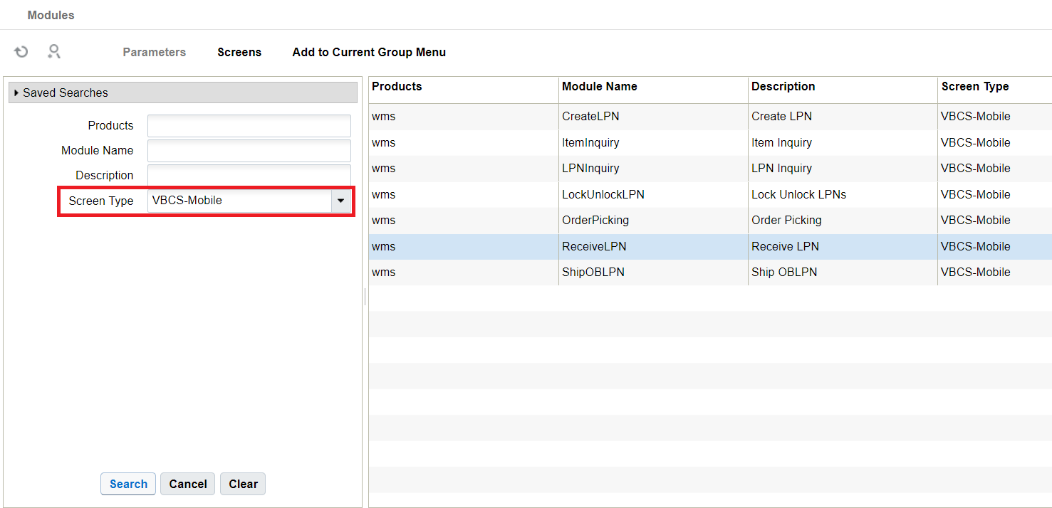
- Select a Module (Example: Ship OBLPN) and click
"Screens" button. Then, click the "+" icon to
create a new screen for the module.
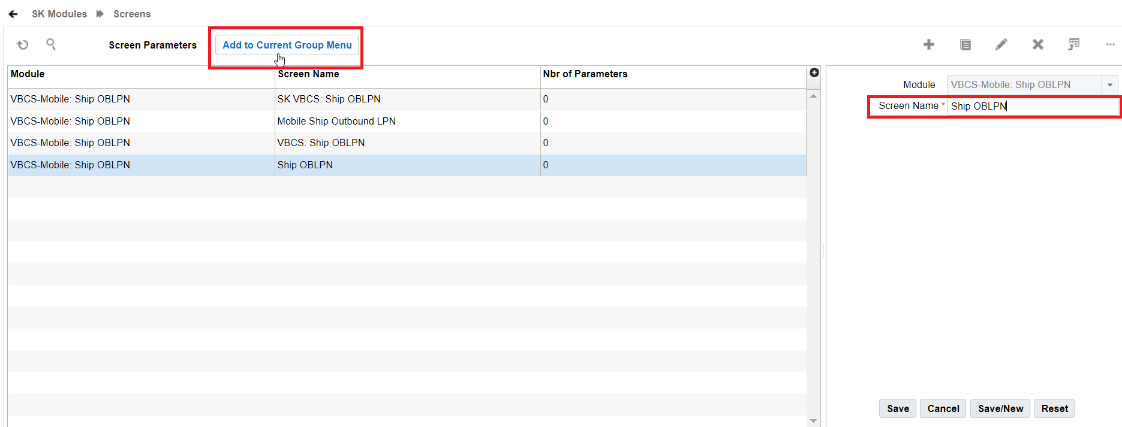
- Click "Add to Current Group Menu" to add the created screen to group menu.
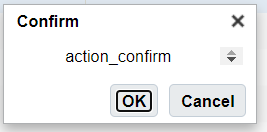
- Click OK to confirm the action.
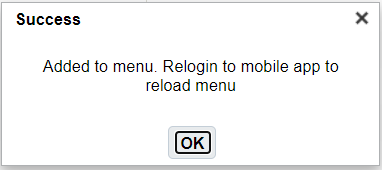
- After adding the screen successfully, the system displays the
following pop-up window. Click OK.