Upgrade Agent Factory
You can upgrade the Agent Factory application to the latest version by following the steps below. See Upgrade Marketplace Instance for instructions on upgrading your Marketplace instance.
Important: Release 26.4 is the final release that supports direct upgrades from Agent Factory version 25.3.0.0.0, the initial Agent Factory release. Direct upgrades from version 25.3.0.0.0 to releases later than 26.4 are not supported. To remain on a supported upgrade path, first upgrade to release 26.4, and then upgrade to a later release.
-
Download the latest kit according to your environment specifications. See Download Kit.
-
Create a directory and copy the downloaded tar.gz into the directory. Please note that this directory should not be the previous installation staging directory.
Important: If SSO was configured before the upgrade, you will need to add a new callback URL
https://<hostname>:8080/agentFactory/callbackto the SSO client to enable logging in after the upgrade.cd <directory where the zip was copied> tar xzf <installer>.tar.gz bash interactive_install.sh --reset bash interactive_install.sh[INFO] Running 'make build' for upgrade. [INFO] Running 'make install' for upgrade. bash deploy.sh ▗▄▖ ▗▄▄▖ ▗▄▖ ▗▄▄▖▗▖ ▗▄▄▄▖ ▐▌ ▐▌▐▌ ▐▌▐▌ ▐▌▐▌ ▐▌ ▐▌ ▐▌ ▐▌▐▛▀▚▖▐▛▀▜▌▐▌ ▐▌ ▐▛▀▀▘ ▝▚▄▞▘▐▌ ▐▌▐▌ ▐▌▝▚▄▄▖▐▙▄▄▖▐▙▄▄▖ ▗▄▖ ▗▄▄▖▗▄▄▄▖▗▖ ▗▖▗▄▄▄▖ ▗▄▄▄▖ ▗▄▖ ▗▄▄▖▗▄▄▄▖▗▄▖ ▗▄▄▖▗▖ ▗▖ ▐▌ ▐▌▐▌ ▐▌ ▐▛▚▖▐▌ █ ▐▌ ▐▌ ▐▌▐▌ █ ▐▌ ▐▌▐▌ ▐▌▝▚▞▘ ▐▛▀▜▌▐▌▝▜▌▐▛▀▀▘▐▌ ▝▜▌ █ ▐▛▀▀▘▐▛▀▜▌▐▌ █ ▐▌ ▐▌▐▛▀▚▖ ▐▌ ▐▌ ▐▌▝▚▄▞▘▐▙▄▄▖▐▌ ▐▌ █ ▐▌ ▐▌ ▐▌▝▚▄▄▖ █ ▝▚▄▞▘▐▌ ▐▌ ▐▌ Existing metadata file found: /home/.local/state/Oracle/AgentFactory/metadata.json Validated existing metadata mount directories: ["/scratch/aai_stage/applied-ai/dev-shared","/scratch/aai_stage/applied-ai/volume"] ✓ Mount Volume structure exists and is validated Starting upgrade process... Database snapshot before upgrade is mandatory. Proceeding with snapshot. Take Knowledge Agent (KA) tables snapshot? (Consumes additional storage) [Y/n]: [Y]n Upgrading the application to version: 25.3.0.0.8 Stopping legacy container oracle-applied-ai-label WARN[0010] StopSignal SIGTERM failed to stop container oracle-applied-ai-label in 10 seconds, resorting to SIGKILL oracle-applied-ai-label Error: renaming container b458a2dd53a899e714b224077222415b2fd7c3025515e6644471eab762f59d43: updating container config table with new configuration for container b458a2dd53a899e714b224077222415b2fd7c3025515e6644471eab762f59d43: UNIQUE constraint failed: ContainerConfig.Name Creating a snapshot of current volume state Restoring critical assets from snapshots Restoring assets from snapshot: upgrade_snapshot_25.3.0.0.8_2026_02_24_11_51 -> /scratch/aai_stage/applied-ai/volume/data/app/latest Restoring assets from snapshot: upgrade_snapshot_25.3.0.0.8_2026_02_24_11_06 -> /scratch/aai_stage/applied-ai/volume/config/app/latest ✓ Image 'localhost/applied-ai-label:25.3.0.0.8' found. ✓ Image 'localhost/applied-ai-label:25.3.0.0.8' found. Deploying Oracle AI Database Private Agent Factory in Production mode... Starting production containers... Confirming container 'oracle-applied-ai-label' is in a running state... - Waiting for container to be ready... ✓ Container is confirmed to be running. - Configuring application container 'oracle-applied-ai-label'... - Configuring application container: oracle-applied-ai-label... ✓ crond service started in oracle-applied-ai-label. ✓ Application container oracle-applied-ai-label configured successfully. Initiating startup for oracle-applied-ai-label container... ✓ oracle-applied-ai-label container is UP and RUNNING. - Please wait while the application is being set up within oracle-applied-ai-label container... This process may take a few minutes as we are creating a backup of the previous installation. ✓ Application setup successfully within the container 'oracle-applied-ai-label'. +------------------------------------------------+------------+ | Stage | Status | +------------------------------------------------+------------+ | Configuring the application | Successful | +------------------------------------------------+------------+ | Configuring the application | Successful | +------------------------------------------------+------------+ | Upgrade DB Migration | Successful | +------------------------------------------------+------------+ | Knowledge Agent Upgrade | Successful | +------------------------------------------------+------------+ | Knowledge Agent Restart | Successful | +------------------------------------------------+------------+ | Starting Oracle Private AI Agent agent_factory | Successful | +------------------------------------------------+------------+ The Oracle AI Database Private Agent Factory webapp can be accessed at: https://<host>:8080/agentFactory/ Metadata file check passed ✓ Production deployment complete. [SUCCESS] Upgrade flow completed. (venv) bash-4.4$ -
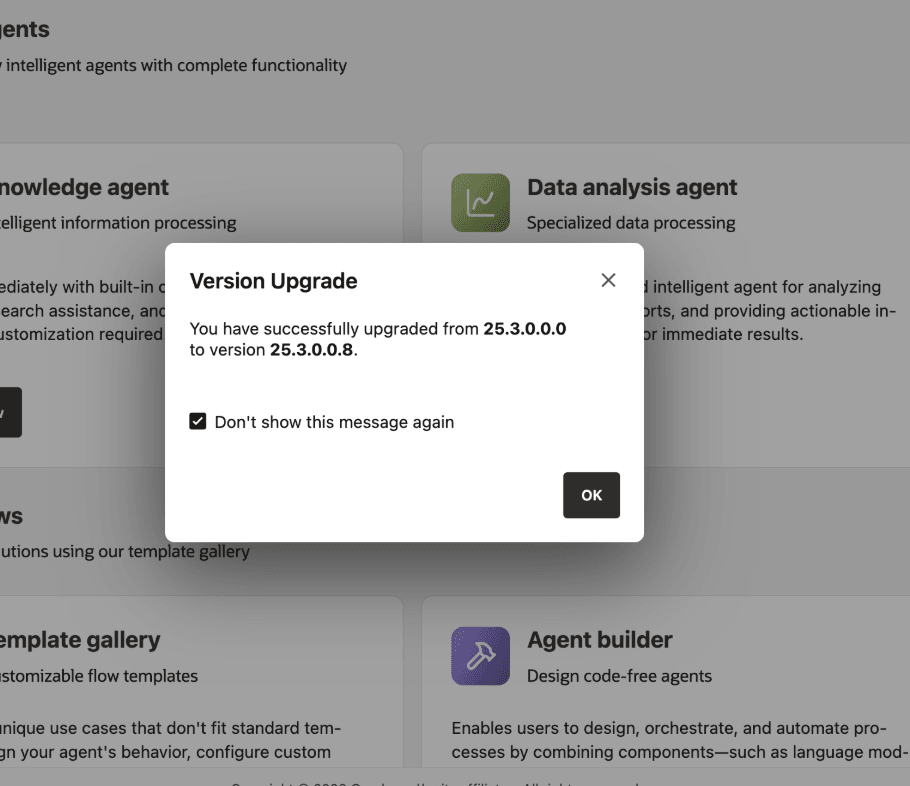
Log in using the application URL. A version upgrade notification should pop up, confirming that the update was successful.
See Upgrade Troubleshooting for upgrade-related FAQs.
Upgrade Your Marketplace Instance
Follow these steps to upgrade your Marketplace instance.
-
Download the latest installation kit. See Download Kit.
The filename
oracle_agent_factory_<version>_<architecture>.tar.gzvaries by version and architecture. Replace<version>and<architecture>with the appropriate values for your release. -
Generate and save a download token, and then download the corresponding
wget.shscript.Make sure to select the package that matches your VM architecture, ARM or x86. Review your VM details page or contact your tenancy administrator if you are unsure.
-
Copy the downloaded
wget.shfile to your VM usingscp, or copy and paste its contents directly.scp -i <path_to_private_key> wget.sh opc@<public_ip>:~ -
Connect to the VM.
The following command keeps the SSH session alive, so the upgrade is less likely to be interrupted:
ssh -i <path_to_private_key> -o ServerAliveInterval=60 -o ServerAliveCountMax=5 opc@<public_ip> -
Create a new staging directory for the upgrade and grant access to the installation user.
sudo mkdir -p /u01/staging_upgrade/ sudo chown opc:opc /u01/staging_upgrade/ cd /u01/staging_upgrade/ -
Execute the downloaded
wget.shscript.You are prompted for the previously generated token.
bash ~/wget.shThis command downloads the binary file into the current directory.
-
Extract the installation kit and start the installer.
tar -xzf oracle_agent_factory_<version>_<architecture>.tar.gz
./interactive_install.sh
When prompted for the staging location, enter the new staging directory you created earlier, such as
/u01/staging_upgrade.
The installer detects the existing installation and performs the upgrade while preserving your configuration and data.
Upgrade Validation and Recovery
After the installer completes, validate the upgraded deployment before returning it to users.
- Open
https://<host>:8080/agentFactory/and confirm that the login page loads. - Sign in as an administrator.
- Confirm that the version upgrade notification appears.
- Open Model Management and test the default generative and embedding model configurations.
- Open Data Sources and confirm that existing sources are present.
- Run a simple published agent or Agent Builder flow.
- Generate a diagnostics bundle. See Collect Diagnostics.
If the upgrade fails, keep the new staging directory and the previous staging directory intact until diagnostics have been collected. From the new staging directory, run:
make diagnoseThen review the generated diagnostics archive or provide it to support.