8.6.6 Editing a Smart Filters Page
Learn about how attributes can change the behavior of a smart filters page.
Tip:
Many examples in this section are built on the
EBA_PROJECT_TASKS table available in the
sample dataset, Project Data, or the EMP table
available in the sample dataset, EMP / DEPT. To install a sample
dataset, see Using Sample
Datasets in Oracle APEX SQL Workshop
Guide.
- Reviewing Smart Filters Page Components
Review the components that comprise a smart filters page by viewing attributes in Page Designer. - Understanding a Smart Filters Page
Learn about the regions that comprise a smart filters page. - Adding a New Filter
Add new filters in Page Designer by right-clicking filter and selecting Create Filter from the context menu. - Editing Filter Attributes
Edit attributes to change filter behavior.
Parent topic: Managing Smart Filters
8.6.6.1 Reviewing Smart Filters Page Components
Review the components that comprise a smart filters page by viewing attributes in Page Designer.
Tip:
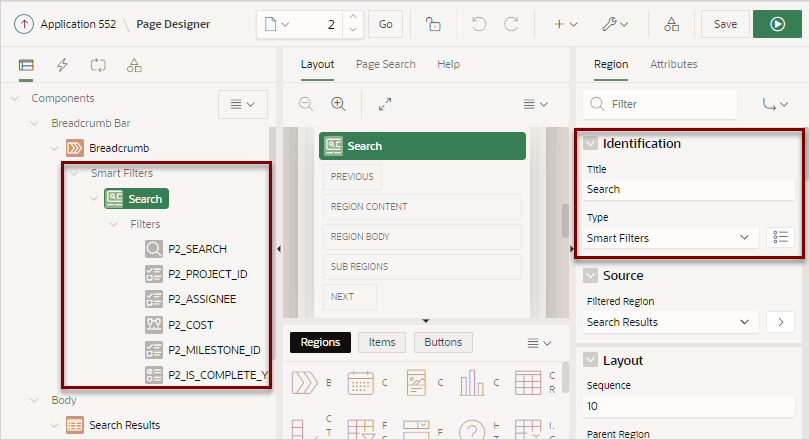
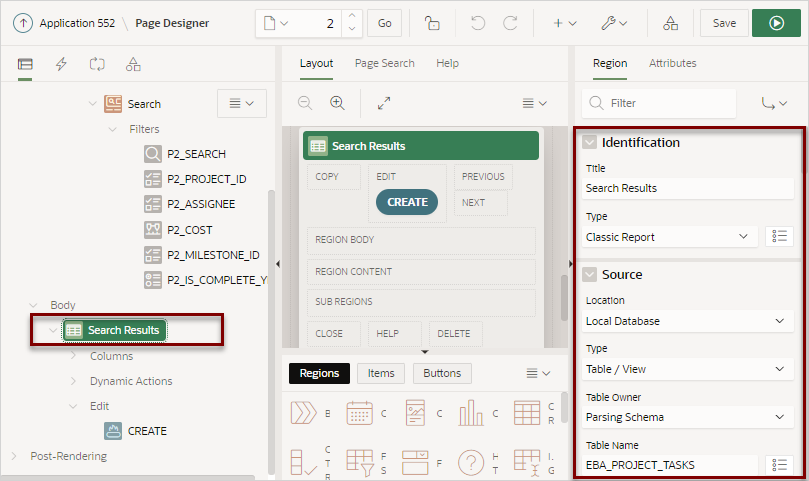
You must create maps and calendars manually since the Create Application and Create Page Wizards only support creating smart filter pages with a classic report and cards report.To review the components of a smart filters page:
See Also:
Parent topic: Editing a Smart Filters Page
8.6.6.2 Understanding a Smart Filters Page
Learn about the regions that comprise a smart filters page.
About the Search Region
A smart filters page features a Search region which enables users to narrow down the search result and a report region such as classic report or cards report.
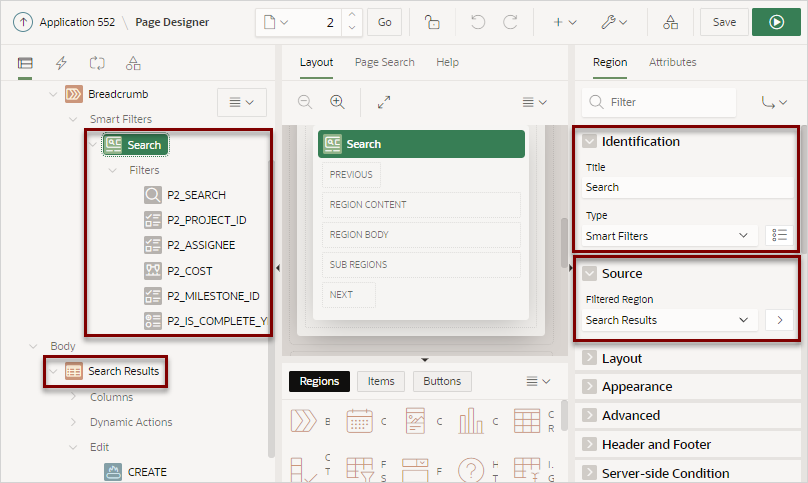
In Page Designer, the Search region displays in the left pane or Rendering tab. Selecting the Search region displays attributes in the Property Editor. In the following image, the Search region Type is defined as Smart Filters. The Filtered Region attribute identifies the Search Results region. In this example, Filtered Region is as a classic report named Search Results.
Tip:
Remember that each attribute in the Property Editor has associated Help. To view Help, select the attribute in the Property Editor and then click the Help tab in the central pane. Help describing the attribute appears in the central pane.
About Filters
Search filters display under Filters in the
Rendering tab. When you select a filter, the associated attributes display in the
Property Editor. Filters use the same naming convention as items. By default,
wizards prefix filters names using the following convention:
P<page
no>_<item
name>. For example, in the previous example, the first filter is
named P2_SEARCH).
Filters are similar to items but feature the following unique characteristics:
-
Associated with a Column - The filters are associated with a column from the report region.
-
Checkbox Group Filters - Filters with the Type Checkbox Group create a UI for selecting or entering the filter values. They are not implemented the same as page items even if they have the same type name. For this reason, most dynamic actions do not apply to filters.
About the Search Results
A smart filters page includes a Search Results region. If you create a smart filters
page using either the Create Application Wizard or Create Page Wizard, the Search
Results region is either a classic report or cards report. If you create a smart
filters page manually, the Search Results region can also be a manually created map
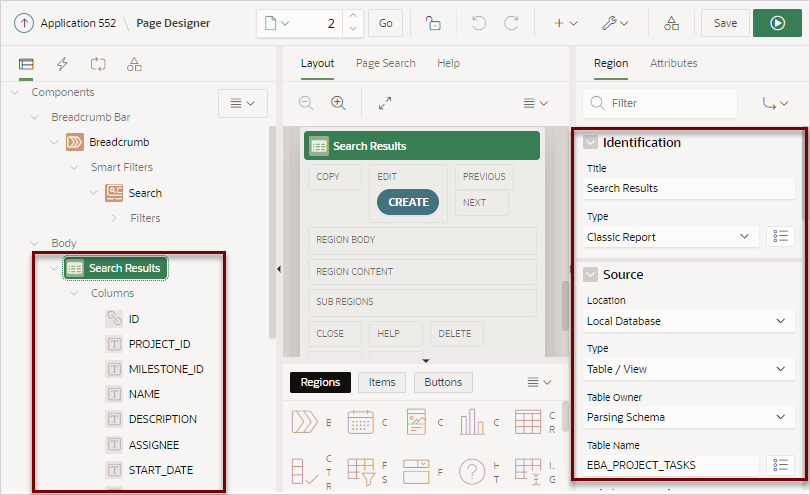
or calendar. In the following example, Search Results is a classic report built on
the EBA_PROJECT_TASKS table.
About Cards Page Search Results
The Search Results on a smart filter search page can display as a cards report. A cards page functions as a colorful way to display a subset of information and then enable the user to link to more detail. You can create an action to link from a full card, a title, a subtitle, media, or a button. To see an example, see Using Actions to Link from a Cards Page.
See Also:
Parent topic: Editing a Smart Filters Page
8.6.6.3 Adding a New Filter
Add new filters in Page Designer by right-clicking filter and selecting Create Filter from the context menu.
Filters map to specific database column. When creating a new filter, you can create the following types: Checkbox Group, Input Field, Radio Group, and Range.
You can control the filter order in the UI by reordering the filters in the Rendering tab. Note that there must always be one Search type filter.
The following example demonstrates how to create Range filter to filter
employee salary. In this example, the filter maps to the SAL column
in the EMP table available in the sample dataset, EMP / DEPT.
To create a Range filter:
- View the smart filters page in Page Designer.
- In the Rendering tab, right-click Filters and select Create Filter.
- Select the new filter and edit the following filter attributes in the Property
Editor:
- Identification, Name - Enter
PX_SALwhereXrepresents the page number. - Identification, Type - Select Range.
- Label, Label - Enter
Salary - Source, Database Column - Verify that the column is SAL.
- Source, Data Type - Select NUMBER.
- Settings, Select Multiple - Enable Select Multiple.
- Identification, Name - Enter
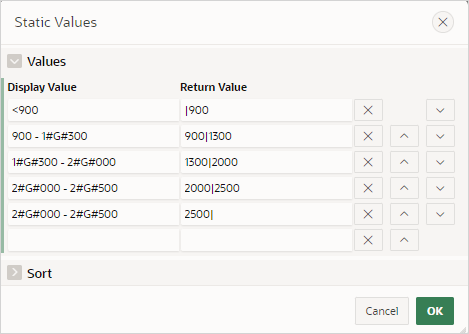
- Define the filter as a static list of values:
- Configure the Suggestions attributes for the the
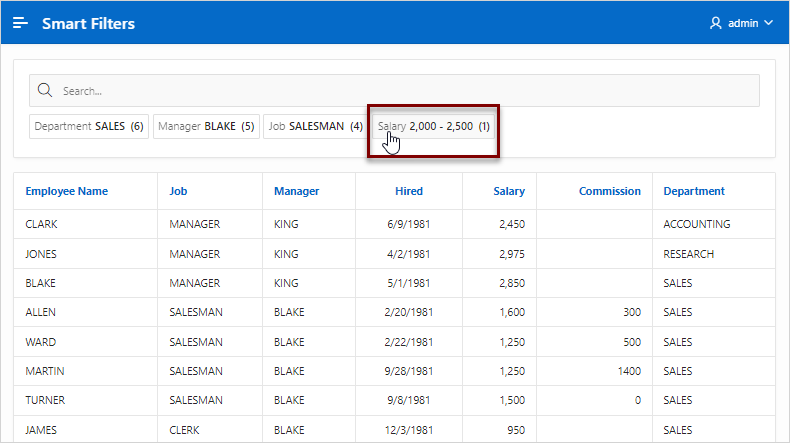
PX_SALfilter: - View the page.
Parent topic: Editing a Smart Filters Page
8.6.6.4 Editing Filter Attributes
Edit attributes to change filter behavior.
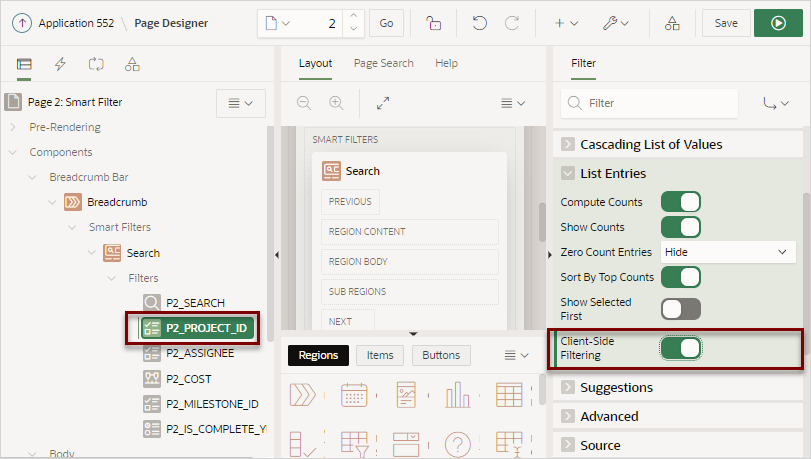
The following example demonstrates how to review and edit the
Client-Side Filtering and Depending
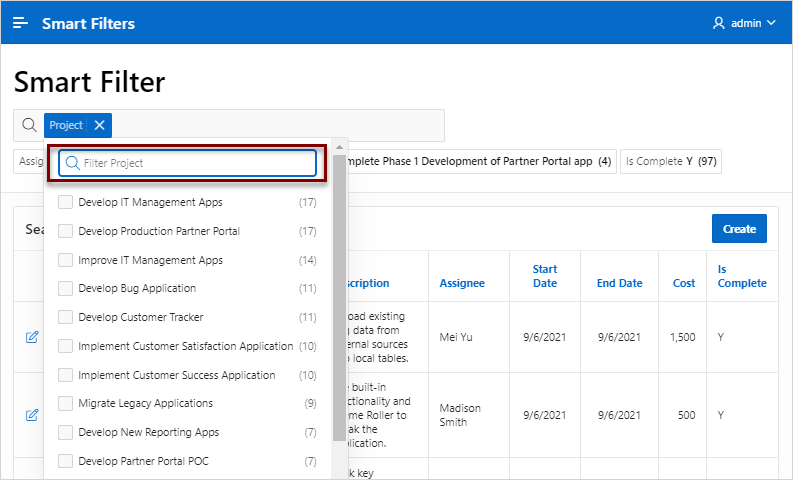
On attributes and change filter behavior. Enabling Client-Side Filtering adds a search field which enables users to filter
the list. Depending On makes the display of one filter
dependent upon another. The following example is also built on the
EBA_PROJECT_TASKS table available in the sample dataset,
Project Data.
Tip:
To view help for an attribute, select the attribute in the Property Editor and click the Help tab in the central pane.To view and edit filter attributes:
- View the smart filters page in Page Designer.
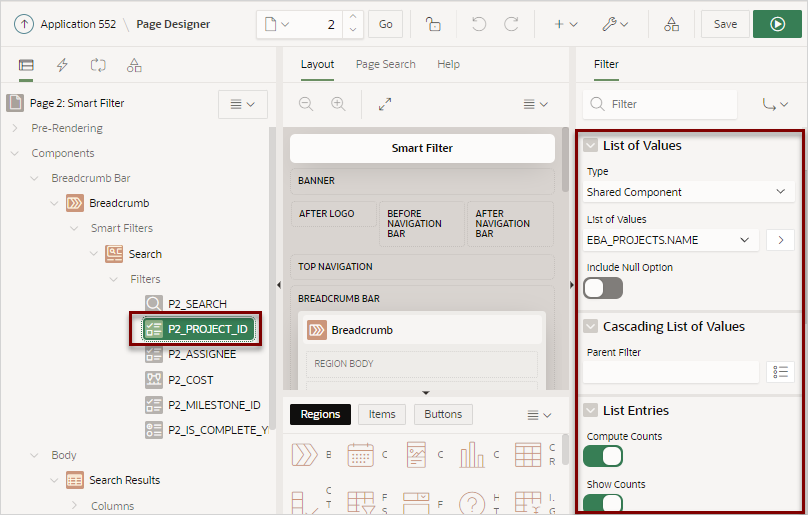
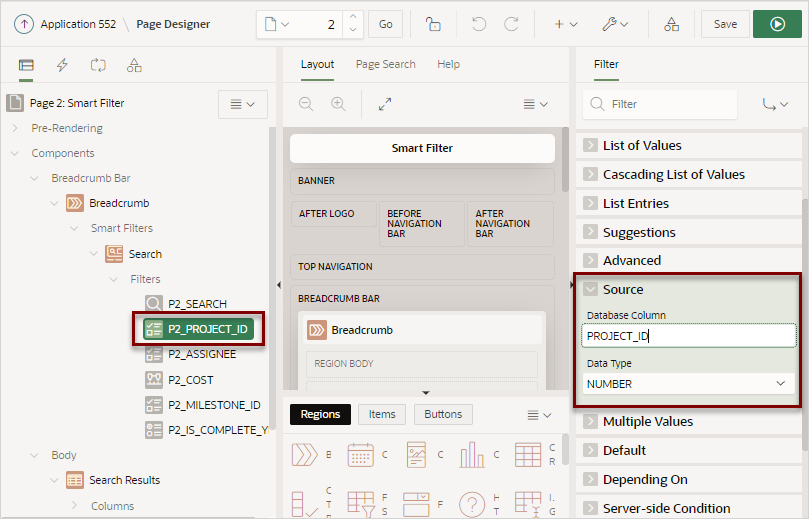
- View the filter attributes, P2_PROJECT_ID:
- Update P2_PROJECT_ID and enable the Client-Side
Filtering attribute:
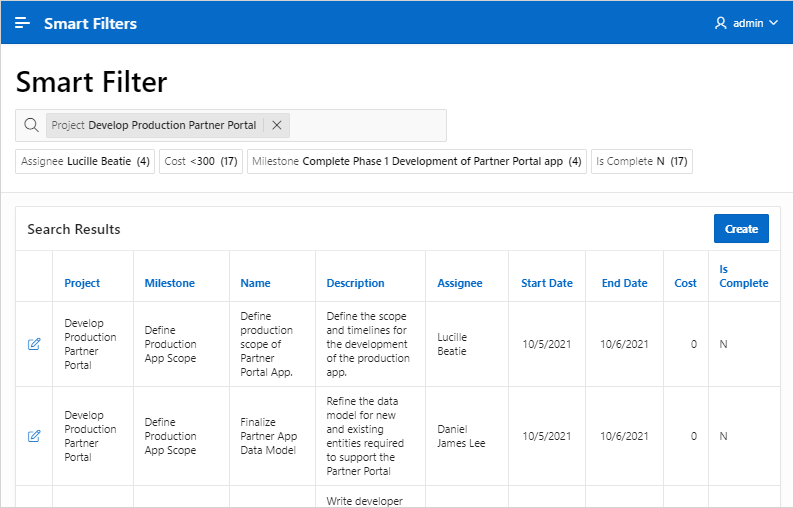
- Only show Milestones for the selected Project by enabling the
Depending On attribute.
Parent topic: Editing a Smart Filters Page
