2.4.2 Understanding the App Builder Home Page
Use App Builder to create new applications, select an application to edit, import previously exported applications, view the Dashboard, or access workspace utilities.
Tip:
In a new workspace, the bottom of the page displays two additional regions. Click Create a New App to access the Create Application Wizard and create a new application. Click Install a Productivity and Sample Apps to access the App Gallery page and install a Productivity and Sample App and load sample data. Once you create an application or install a sample or productivity application, these regions no longer appear.
- App Builder Home Page Icons and Navigation Bar
The top of the App Builder home page features four large icons (Create, Import, Dashboard, and Workspace Utilities) and the bottom of the page displays all currently installed applications. - Reset and Create Buttons
The Reset and Create buttons display in the center of the page to the right of the navigation bar. - Recent List and Tasks List
The App Builder home page feature two regions on the right side of the page: Recent and Tasks. - Workspace Utilities
See Also:
Parent topic: Understanding App Builder
2.4.2.1 App Builder Home Page Icons and Navigation Bar
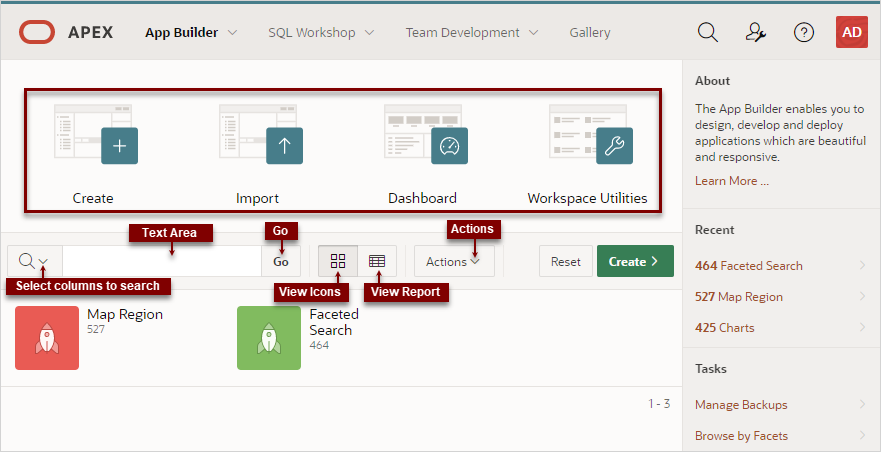
The top of the App Builder home page features four large icons (Create, Import, Dashboard, and Workspace Utilities) and the bottom of the page displays all currently installed applications.
About App Builder Home Page Icons
The top of App Builder home page contains four large icons:
-
Create. Launches the Create Application Wizard. Use the Create Application Wizard to build a complete application containing multiple pages.
-
Import. Launches the Import Wizard. Use this wizard to import export files from the export repository.
-
Dashboard. Links to the App Builder Dashboard which displays metrics about applications in the current workspace.
-
Workspace Utilities. Use the Workspace Utilities page to manage: App Builder Defaults, REST Enabled SQL Services, Remote Servers, Application Groups, Web Credentials, Workspace Themes, Export, Application Express Views, and Manage Backups.
About the Navigation Bar
The bottom of App Builder home page displays all installed applications. You can customize how the applications display using the navigation bar in the center of page.
Available controls include:
-
Select columns to search - This control features a magnifying glass button. Click this button to narrow your search to only specific columns. To search all columns, select All Columns.
-
Text area - Enter case insensitive search criteria (wildcard characters are implied) and click Go.
-
Go button - Executes a search or applies a filter.
-
View Icons (default) - Displays each application as a large icon identified by the application name.
-
View Report - Displays each application as a line in a report. Each line includes the application ID, the application name, when the application was last updated, the page count, and who last updated the application.
-
Actions menu - Displays the Actions menu. Use this menu to customize the report view.
Tip:
In a new workspace, the bottom of the App Builder home page displays two regions: Create a New App and Install a Starter or Sample App. Follow the on-screen instructions. Once you create or install an application, these region disappear.
Parent topic: Understanding the App Builder Home Page
2.4.2.2 Reset and Create Buttons
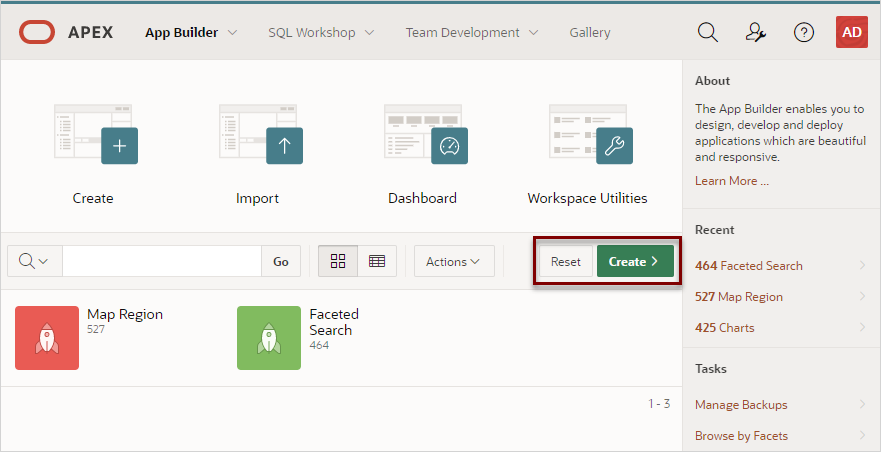
The Reset and Create buttons display in the center of the page to the right of the navigation bar.
Use the Reset and Create buttons as follows:
-
Click Reset to return the page to the default display.
-
Click Create to create a new application, create an application from a file, install a starter app, launch Quick SQL, or copy an application.
Parent topic: Understanding the App Builder Home Page
2.4.2.3 Recent List and Tasks List
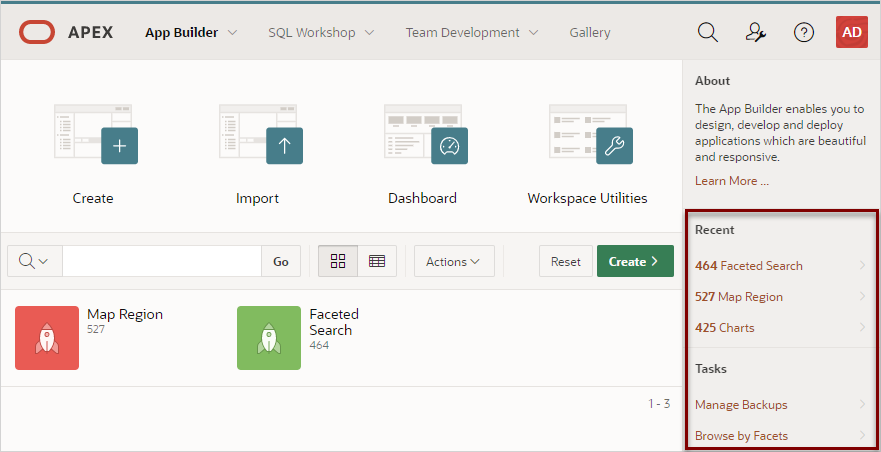
The App Builder home page feature two regions on the right side of the page: Recent and Tasks.
Recent
The Recent region contains links to recently viewed applications.
Tasks
The Tasks region displays on the middle of the right side of the page and features the following links:
-
Manage Backups - Links to the Manage Backups page.
-
Browse by Facets - Links to the Search Applications page.
See Also:
Parent topic: Understanding the App Builder Home Page
2.4.2.4 Workspace Utilities
Click the Workspace Utilities icon to access the Workspace Utilities page. The Workspace Utilities page contains links to common workspace utilities including App Builder Defaults, REST Enabled SQL services, Remote Servers, Application Groups, Web Credentials, Workspace Themes, Export, Application Express Views, and Manage Backups.
See Also:
Parent topic: Understanding the App Builder Home Page


