4 Post-Install Configuration Tasks
Learn about the post-installation tasks for Oracle Audit Vault and Database Firewall (Oracle AVDF).
4.1 Audit Vault Server Post-Installation Tasks
Complete these recommended post-installation tasks after installing the Audit Vault Server.
-
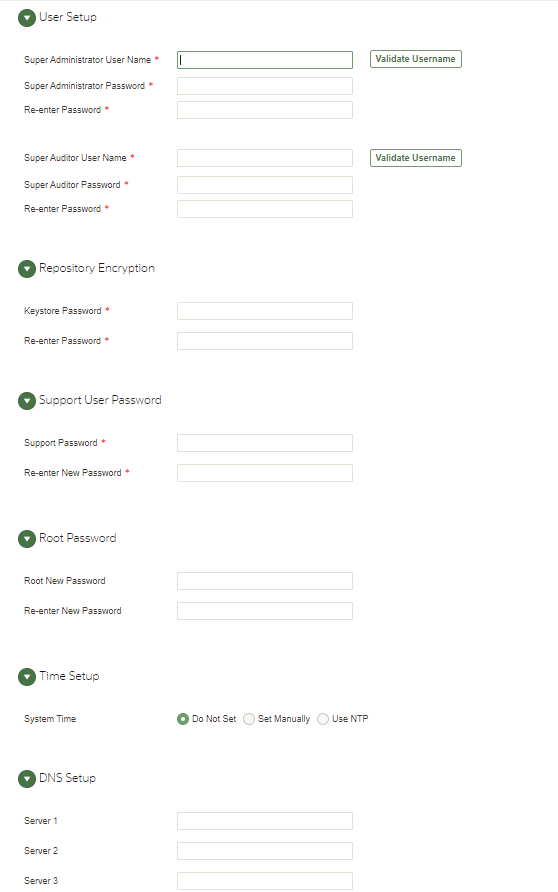
Complete the steps in section Accessing the Audit Vault Server Post-Install Configuration Page and set up user names and passwords.
-
Apply the patch to remove deprecated ciphers after an Audit Vault Server install or upgrade:
Deprecated-Cipher-Removal.zip.Note:
Apply this patch on Oracle Audit Vault Server 20.1 after an install or upgrade. For an upgrade, before applying the patch, make sure that all Audit Vault Agents are upgraded to 20.1 and Host Monitor Agents are in the
Installedstate. - Review the DNS and NTP system service configuration. See Configuring or Changing the Oracle Audit Vault Server Services.
- If using high availability, configure resilient pair of Audit Vault Servers. See Configuring High Availability for Audit Vault Servers.
- Register the targets for monitoring with Oracle Audit Vault and Database Firewall. See Configuring Targets, Audit Trails, and Database Firewall Monitoring Points.
- Configure the data retention policy for every target before configuring audit trails. See Configuring Archive Locations and Retention Policies.
-
Configure each audit trail for native audit collection. See Preparing Targets for Audit Data Collection.
-
Deploy an Audit Vault Agent on the machine where the target is installed or on a machine that can connect to the target.
Note:
Starting in Oracle AVDF 20.9, you can use agentless collection instead of the Audit Vault Agent for up to 20 Oracle Database table audit trails. Starting in Oracle AVDF 20.10, you can also use agentless collection for Microsoft SQL Server directory audit trails for.sqlauditand.xel(extended events). The total number of audit trails for agentless collection should not exceed 20. See Adding Audit Trails with Agentless Collection. - Enable native database auditing on the target.
- Review and configure the audit trails for the target.
- Configure the audit trail cleanup wherever necessary.
-
- For Oracle Database targets, consider provisioning Oracle recommended audit
policies. See Creating Audit Policies for Oracle
Databases.
After patching to Oracle AVDF 20.12, you will need to
- Rerun the Oracle privileges script for successful audit policy retrieval for container database targets. For more information see Oracle Database Setup Scripts.
- Retrieve audit policies before provisioning or viewing audit policies. For more information see Retrieving and Modifying Audit Policies from an Oracle Database
- Consider configuring alert policies. See Creating Alerts.
Note:
- The Audit Vault Server reads the audit log from the target that contains the time stamp of the event. Without this synchronization, events may appear to be archived to the Audit Vault Server before they occur and alerts may appear to be sent before their triggering events occur.
- Set the user names and passwords of the Audit Vault Server administrator and auditor, as well as the passwords of its root and support users. You can also set the time and domain name service (DNS) servers of the Audit Vault Server.
4.2 Database Firewall Post-Installation Tasks
Learn about Database Firewall post-installation tasks.
After installing the Database Firewall, set the password for
support user. This is the Linux operating system user account on
Database Firewall. Follow these steps to set the password:
-
After the installation is complete, log in as
rootuser on the console displayed. -
Execute the following command to set the password for the
supportuser:passwd support -
Enter the new password for the
supportuser when prompted. -
Re-enter the password when prompted.
-
After the password is set successfully, the following message is displayed on the console:
all authentication tokens updated successfully.
4.3 Accessing the Audit Vault Server Post-Install Configuration Page
Access the Audit Vault Server post-installation configuration page.
To access the Audit Vault Server Post-Install Configuration page:
4.4 Setting the Usernames and Passwords of Audit Vault Server Users
Set up usernames and passwords for Oracle Audit Vault and Database Firewall (Oracle AVDF).
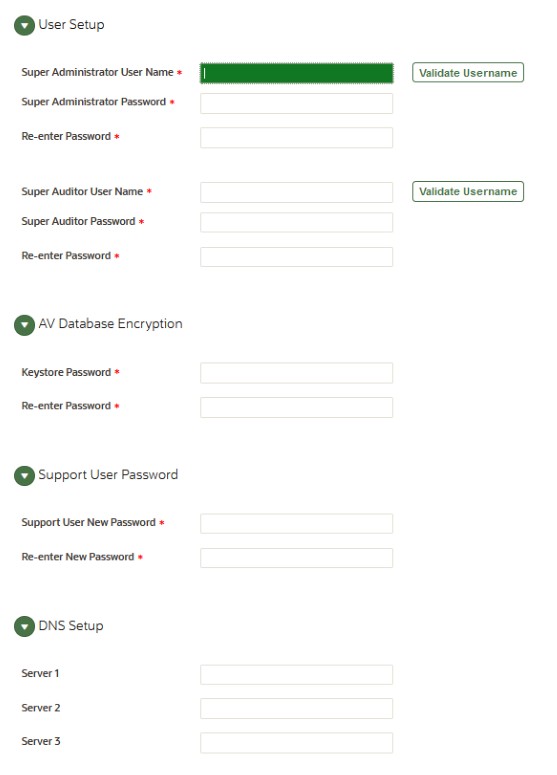
In the post-install configuration page, you set up usernames and passwords for the following Oracle Audit Vault and Database Firewall users:
Super AdministratorSuper AuditorRepository Encryption KeystoreSupportRoot
Changing the root user password on this screen is optional as it is
already set during installation.
See Also:
Separation of Duties for a description of each user.
Note:
Do not use the root or support users unless instructed to do so in documentation or by a customer support representative.
4.4.1 About Administrator and Auditor User Names
Oracle recommends that you create administrator and auditor user accounts after you install Oracle Audit Vault and Database Firewall (Oracle AVDF).
The administrator and auditor user names must follow these rules:
- The first character has to be alphabetical.
- 1 to 30 characters long.
- Each remaining character is either alphanumeric or an underscore (_), dollar sign ($), or number sign (#).
Note:
The administrator and auditor user names are upshifted (that is, any lowercase alphabetic characters are replaced by their uppercase equivalents). Also, the Audit Vault Server does not support quoted user names.
See Also:
Separation of Duties for a description of each user account.
4.4.2 Password Requirements
Set password management guidelines for the Audit Vault and Database Firewall (Oracle AVDF) user accounts.
For example, you may require that users change their passwords on a regular basis, such as every 120 days, and that they create passwords that are not easily guessed.
The following sections describe the minimum password requirements for Oracle Audit Vault and Database Firewall.
Requirements for Passwords Containing Unicode Characters
If your password contains unicode characters (such as non-English characters with accent marks), the password requirement is that it:
-
Be between 8 and 30 characters long.
Requirements for English-Only (ASCII) Passwords
If you are using English-only, ASCII printable characters, Oracle Audit Vault and Database Firewall requires that passwords:
-
Be between 8 and 30 characters long.
-
Contain at least one of each of the following:
-
Lowercase letters: a-z.
-
Uppercase letters: A-Z.
-
Digits: 0-9.
-
Punctuation marks: comma (,), period (.), plus sign (+), colon(:), exclamation mark (!), and underscore (_)
-
-
Not contain double quotes ("), back space, or control characters.
In addition, Oracle recommends that passwords:
-
Not be the same as the user name.
-
Not be an Oracle reserved word.
-
Not be an obvious word (such as welcome, account, database, and user).
-
Not contain any repeating characters.
See Also:
-
Oracle Database Security Guide for additional guidelines on how you can strengthen passwords for your site.
4.5 Setting the Audit Vault Server Time (Strongly Recommended)
Steps to set the Audit Vault Server time.
To set the Audit Vault Server time:
-
Access the Audit Vault Server Post-Install Configuration page.
-
Expand the Time Setup section.
-
Select either Set Manually or Use NTP.
Note:
Oracle strongly recommends that you select Use NTP. In addition, it is recommended that you also use an NTP service on your targets to avoid confusion on timestamps on the alerts raised by the Audit Vault Server. -
If in step 3 you selected Use NTP, then for each of the fields Server 1 Address, Server 2 Address, and Server 3 Address:
-
Type either the IP address or name of a preferred time server.
If you type a name, the DNS server specified in the System Services page is used for name resolution.
-
Click Test Server.
The time from the specified server appears.
-
-
If in step 3 you selected Set Manually, then set the Date fields to your current local day and time.
-
Either click Save or proceed to set the DNS servers for the Audit Vault Server.
4.6 Setting the Audit Vault Server DNS Servers (Recommended)
Steps to set the DNS servers for the Audit Vault Server.
The Audit Vault Server DNS servers are used to resolve any host names that Audit Vault Server might use.
Note:
Set Audit Vault Server DNS server values only if the network has DNS servers, otherwise system performance will be impaired.To set the DNS servers for the Audit Vault Server:

