3 Project and Workspaces
A project is a logical grouping of notebooks and experiments within a workspace. A workspace is a virtual space where your projects reside, and multiple users can work on different projects. Permissions are granted on workspaces, and not on projects.
- Create Projects
A project is a logical grouping of notebooks and experiments within a workspace. While you may own many projects, other workspaces and projects may be shared with you. - Create and Manage Workspaces and Projects
You can create and manage new projects and workspaces, provide access to your workspaces, manage permissions for users, and edit and delete workspaces. - Grant Workspace Permissions
You can collaborate with other users in Oracle Machine Learning User Interface (UI) by granting permissions to access your workspace. A workspace consists of projects. Projects consist of notebooks and experiments.
3.1 Create Projects
A project is a logical grouping of notebooks and experiments within a workspace. While you may own many projects, other workspaces and projects may be shared with you.
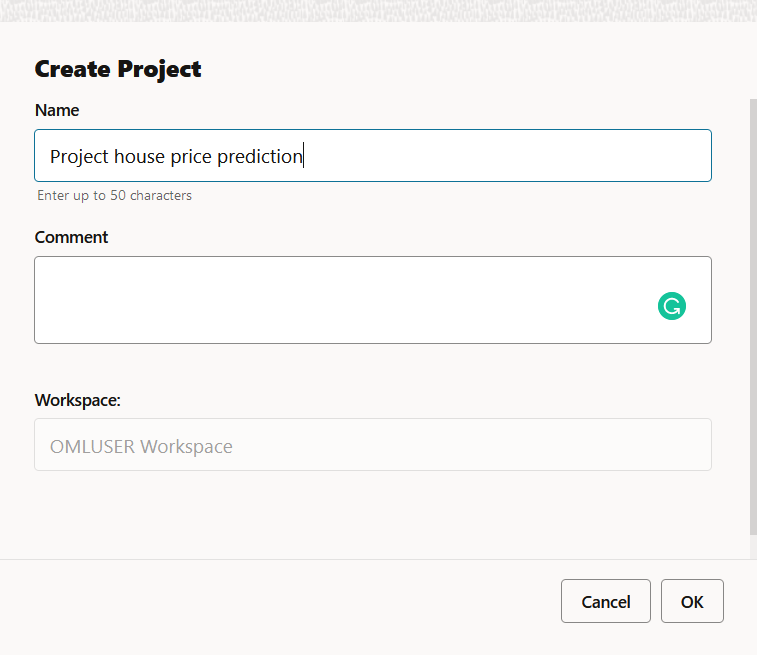
Project A is created and is assigned to the default workspace. In this example, the default workspace is OMLUSER.
Related Topics
Parent topic: Project and Workspaces
3.2 Create and Manage Workspaces and Projects
You can create and manage new projects and workspaces, provide access to your workspaces, manage permissions for users, and edit and delete workspaces.
Create and Manage Workspace
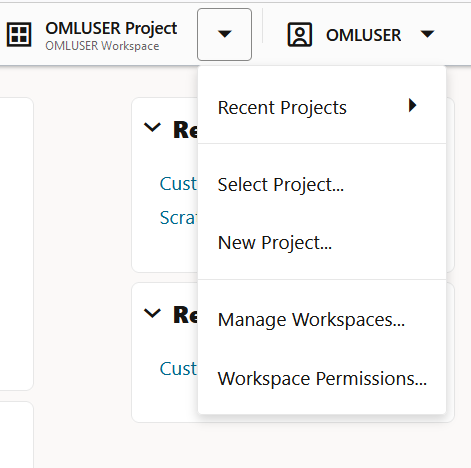
- On the top right corner of your home page, click the down arrow next to the
Project field, and click Manage
Workspaces. The Workspaces
page opens.
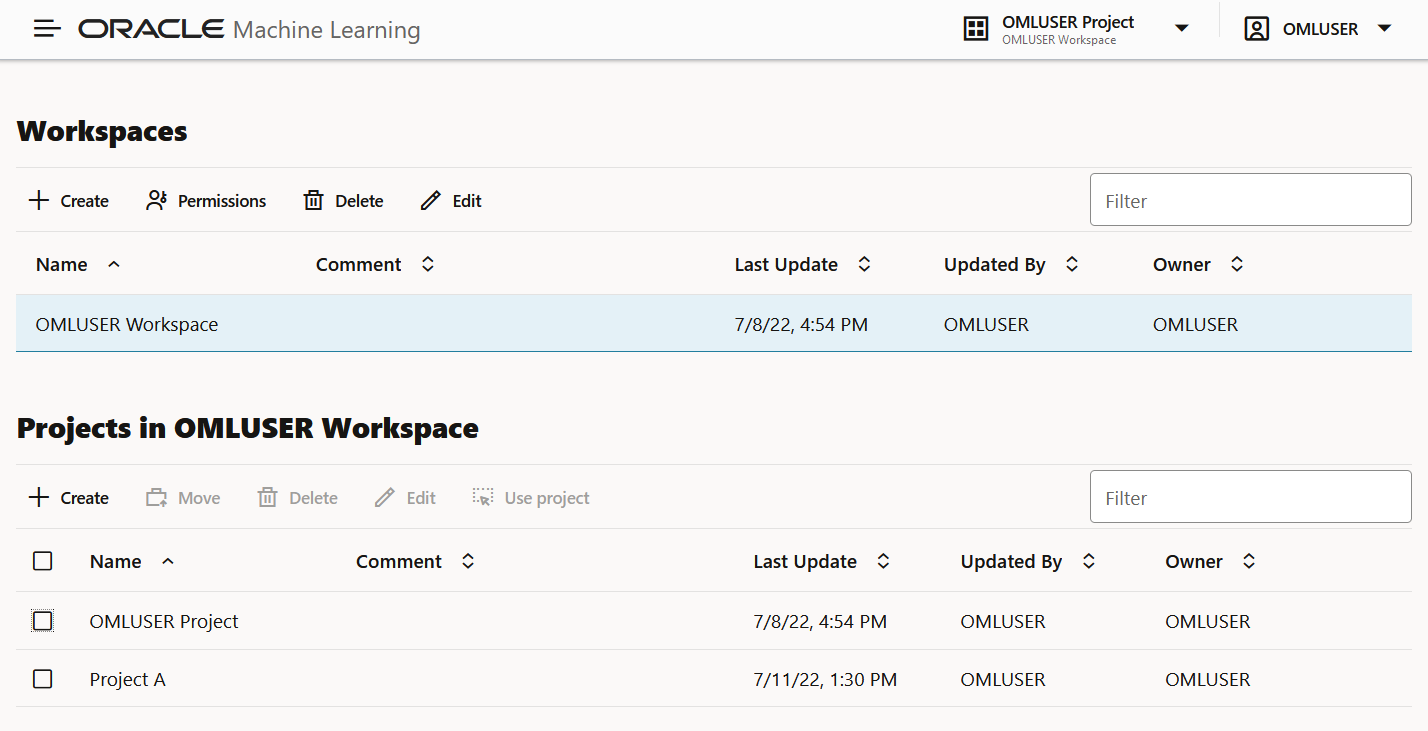
- On the Workspaces page, you can create and manage
workspaces and projects. To create and manage workspaces:
- On the upper section for workspace, click Create to create new workspace. In the Create Workspace dialog, enter a name for the workspace and click OK.
- Click Edit to edit the selected workspace. In the Edit Workspace dialog, you can edit the workspace name, and click OK.
- Click Delete to delete the selected workspace. Click OK to confirm the deletion of the selected workspace.
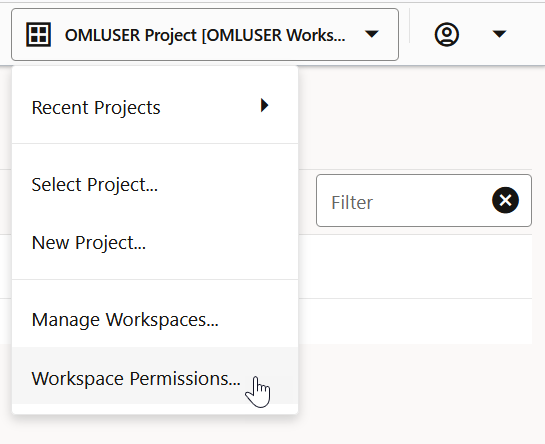
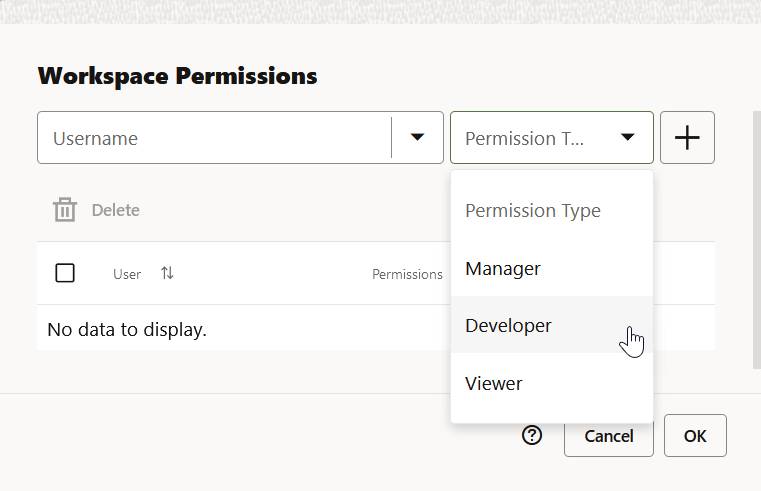
- Click Permissions to grant permissions to the selected users to access the workspace. In the Workspace Permission dialog, you can also delete users and modify their permissions.
Create and Manage Projects
You can create and manage projects in the Projects in Workspaces section on the
Workspaces page. 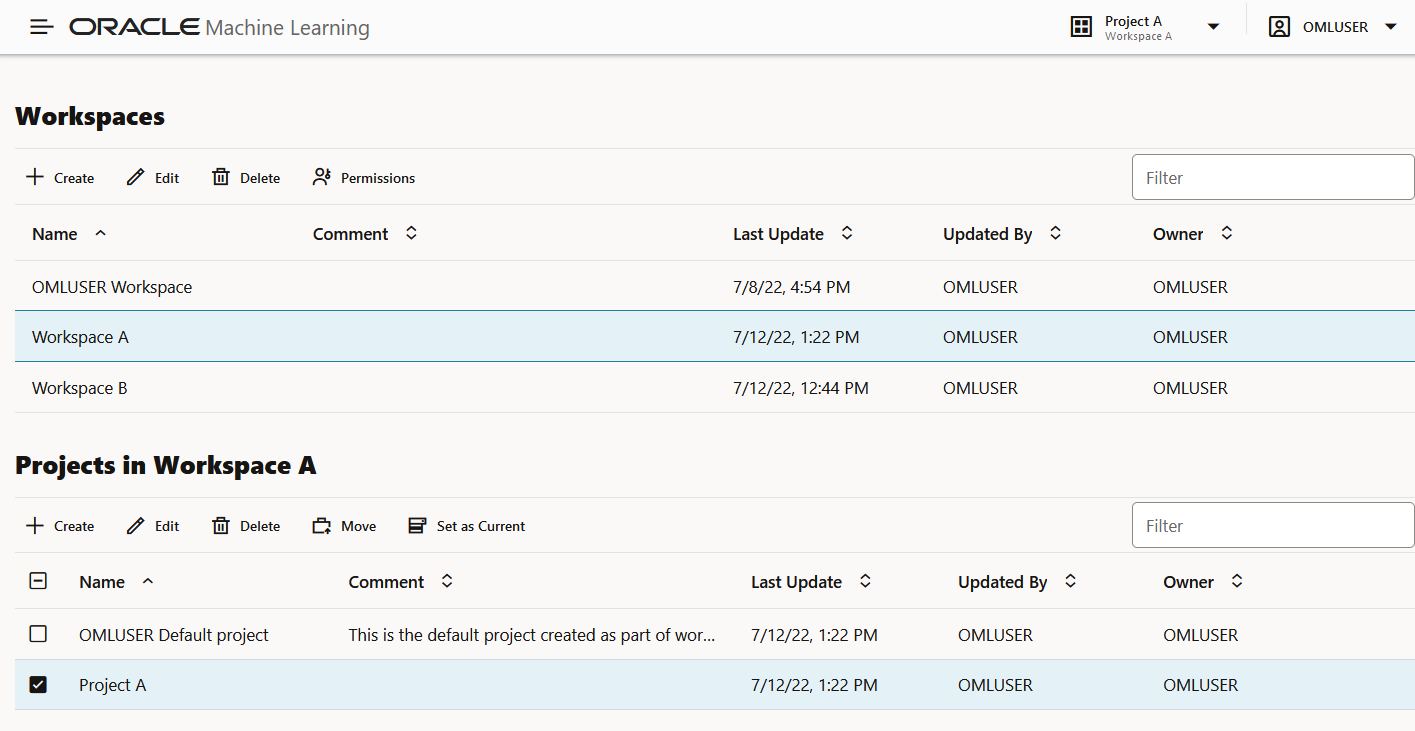
Description of the illustration manage-projects-manage-ws-page.eps
- On the upper section for workspace, click on the workspace in which you want to create the project.
- On the lower section for projects, click Create to create a
new project. The Create Project dialog opens. Enter a project name, enter
comments if any, and click OK. Note that the
Workspace field displays the workspace that you selected on the upper
section.
- Click on the project that you want to modify. The following options are enabled.
- Click Edit to change the project name.
- Click Delete to delete the selected project from the workspace.
- Click Move to move the selected project to another workspace.
- Click Set as Current to set the selected project as the default or current project.
Parent topic: Project and Workspaces
3.3 Grant Workspace Permissions
You can collaborate with other users in Oracle Machine Learning User Interface (UI) by granting permissions to access your workspace. A workspace consists of projects. Projects consist of notebooks and experiments.
Caution:
If you grant the permission type Manager or Developer, the user can also drop tables, create tables, and run any scripts at any time on your account. The user with Viewer permission type can only view your notebooks and is not authorized to run or make any changes to your notebooks.To grant permission to another user:
- About Workspace Permission Types
Oracle Machine Learning UI allows three types of permissions. Depending on the permission type, you can allow the user to view or perform different tasks in your workspace, projects, and notebooks.
Parent topic: Project and Workspaces
3.3.1 About Workspace Permission Types
Oracle Machine Learning UI allows three types of permissions. Depending on the permission type, you can allow the user to view or perform different tasks in your workspace, projects, and notebooks.
Developer permission is granted can only view scheduled jobs on shared notebooks; he cannot run these jobs. However, the user with Developer permission can always view and run scheduled jobs on notebooks that are created by him. The three types of permissions are listed in the following table along with the actions that are allowed.
Note:
Permissions are granted on workspaces, and not on projects.| Permission Types | Actions based on permission |
|---|---|
| Manager |
|
| Developer |
|
| Viewer |
|
Parent topic: Grant Workspace Permissions
