Modifying Snapshot Settings
By default, AWR generates snapshots of performance data once every hour. You can modify the default values of both the interval between snapshots and their retention period.
To modify the snapshot settings:
-
Access the Database Home page.
See "Accessing the Database Home Page" for more information.
-
From the Performance menu, select AWR, then select AWR Administration.
If the Database Login page appears, then log in as a user with administrator privileges. The Automatic Workload Repository page appears.
In the following screenshot of the General section of the page, the snapshot retention is set to 8 days and the snapshot interval is set to 60 minutes.
-
Click Edit.
The Edit Settings page appears.
-
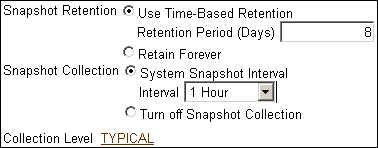
For Snapshot Retention, do one of the following:
-
Select Use Time-Based Retention Period (Days), and in the associated field enter the number of days to retain the snapshots.
-
Select Retain Forever to retain snapshots indefinitely.
It is recommended that you increase the snapshot retention period to the maximum allowed by the available disk space.
In the following screenshot of the Snapshot Retention group, the snapshot retention period is changed to 30 days.
-
-
For Snapshot Collection, do one of the following:
-
Select System Snapshot Interval, and in the Interval list, select the desired interval to change the interval between snapshots.
-
Select Turn off Snapshot Collection to disable snapshot collection.
In the following screenshot of the Snapshot Collection group, the snapshot collection interval is changed to 30 minutes.
-
-
Click the link next to Collection Level.
The Initialization Parameters page appears.
To change the statistics level, select
TYPICALorALLin the Value list for thestatistics_levelparameter. Click Save to File to set the value in the server parameter file.In the following screenshot of the Initialization Parameters table, the default value of Typical is used.
-
Click OK to apply the changes.
The Automatic Workload Repository page appears and displays the new settings.


