10 Getting Started with the Client Tools
You can use multiple client tools to interact with the graph server (PGX) or directly with the graph data in the database.
- Interactive Graph Shell CLIs
Both the Oracle Graph server and client packages contain interactive command-line applications for interacting with the Java APIs and the Python APIs of the product, locally or on remote computers. - Using Autonomous Database Graph Client
Using theAdbGraphClientAPI, you can access Graph Studio features in Autonomous Database programmatically using the Oracle Graph Client or through your Java or Python application. - Using the Graph Visualization Web Client
You can use the Graph Visualization application to visualize graphs that are either loaded into the graph server (PGX) or stored in the database. - Using the Jupyter Notebook Interface
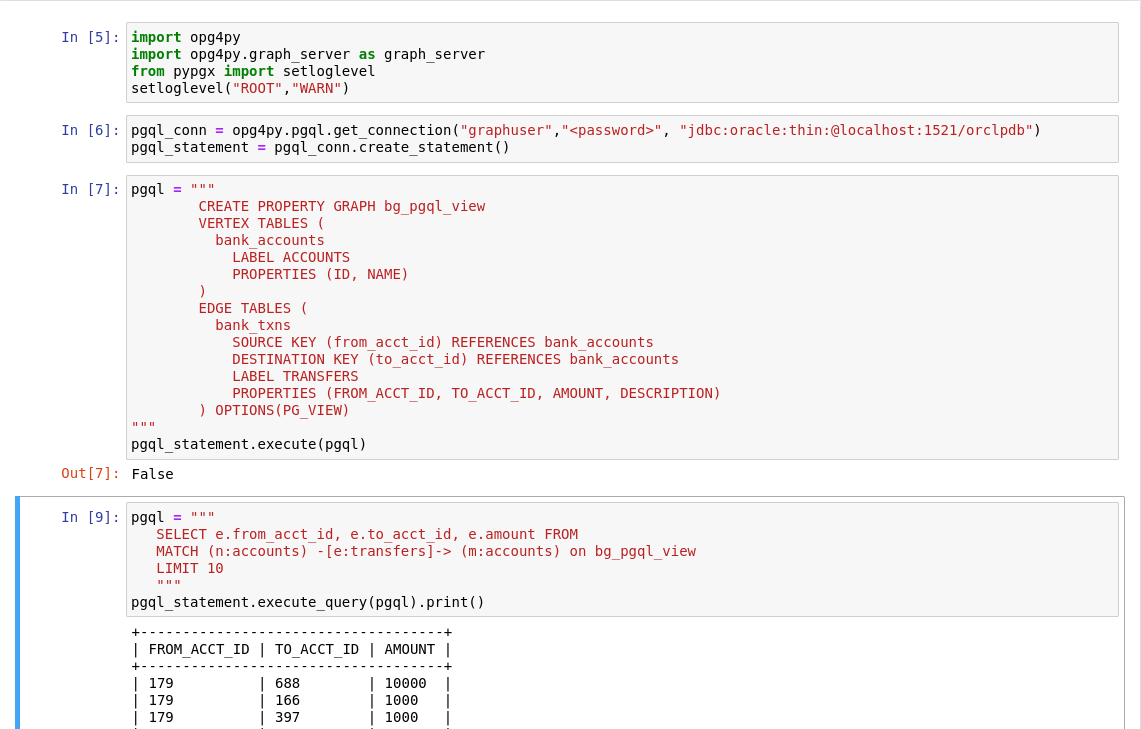
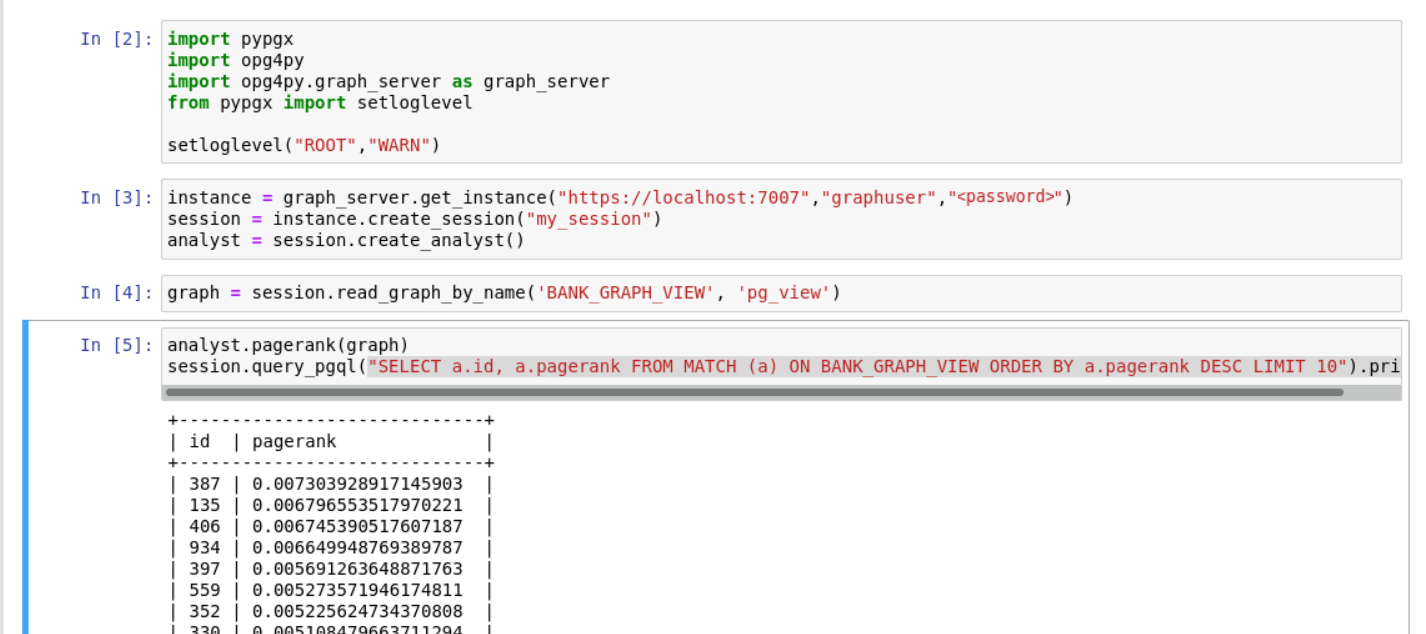
You can use the Jupyter notebook interface to create, load, and query property graphs through Python. - Additional Client Tools for Querying PG Views
When working with property graph views (PG Views) in the database, you can use other supported client tools.
Related Topics
Parent topic: Property Graph Views
10.1 Interactive Graph Shell CLIs
Both the Oracle Graph server and client packages contain interactive command-line applications for interacting with the Java APIs and the Python APIs of the product, locally or on remote computers.
The interactive graph shells dynamically interpret command-line inputs from the user, execute them by invoking the underlying functionality, and can print results or process them further. The graph shells provide a lightweight and interactive way of exercising graph functionality without creating a Java or Python application.
The graph shells are especially helpful if you want to do any of the following:
- Quickly run a "one-off" graph analysis on a specific data set, rather than creating a large application
- Run getting started examples and create demos on a sample data set
- Explore the data set, trying different graph analyses on the data set interactively
- Learn how to use the product and develop a sense of what the built-in algorithms are good for
- Develop and test custom graph analytics algorithms
The graph shell for the Java API (OPG4J) is implemented on top of the Java Shell tool (JShell). As such, it inherits all features provided by JShell such as tab-completion, history, reverse search, semicolon inference, script files, and internal variables. The graph shell for the Python API (OPG4Py) uses IPython in case it is installed.
The following sections explain in detail on how to start the graph shell CLIs:
See Also:
- Java API Reference for information on the Java APIs
- Python API Reference for information on the Python APIs
Parent topic: Getting Started with the Client Tools
10.1.1 Starting the OPG4J Shell
Launching the OPG4J Shell
The Java shell executables are found in
/opt/oracle/graph/bin after the graph server (PGX)
installation, and in <CLIENT_INSTALL_DIR>/bin after the Java
client installation.
The OPG4J shell uses JShell, which means the shell needs to run on Java 11 or later. See Installing the Java Client From the Graph Server and Client Downloads for more details on the prerequisites. You can then launch the OPG4J shell by entering the following in your terminal:
cd /opt/oracle/graph
./bin/opg4j
When the shell has started, the following command line prompt appears:
For an introduction type: /help intro
Oracle Graph Server Shell 23.1.0
Variables instance, session, and analyst ready to use.
opg4j>
By default, the OPG4J shell creates a local PGX instance, to run graph functions in the same JVM as the shell as described in Developing Applications Using Graph Server Functionality as a Library.
Command-line Options
To view the list of available command-line options, add
--help to the opg4j command:
./bin/opg4j --helpTo start the opg4j shell without
connecting to the graph server (PGX), use the --no_connect option
as shown:
./bin/opg4j --no_connectStarting the OPG4J Shell on Remote Mode
The OPG4J shell can connect to a graph server (PGX) instance that is running on another JVM (possibly on a different machine). In order to launch the OPG4J shell in remote mode, you must specify the--base_url parameter as
shown:./bin/opg4j --base_url https://<host>:7007 --username <graphuser>
<host>: is the server host<graphuser>: is the database userYou will be prompted for the database password.
Note:
The graph server (PGX), listens on port7007 by default. If needed, you can
configure the graph server to listen on a different port by changing the port value
in the server configuration file (server.conf). See Configuring the Graph Server (PGX) for details.
When the shell has started, the following command line prompt appears:
Oracle Graph Server Shell 23.1.0
Variables instance, session, and analyst ready to use.
opg4j>
If you have multiple versions of Java installed, you can easily switch between installations by setting the JAVA_HOME variable before starting the shell. For example:
export JAVA_HOME=/usr/lib/jvm/java-11-oracleBatch Execution of Scripts
The OPG4J shell can execute a script
by passing the path(s) to the script(s) to the opg4j command. For example:
./bin/opg4j /path/to/script.jshPredefined Functions
The OPG4J shell provides the following utility functions:
println(String): A shorthand for System.out.println(String).loglevel(String loggerName, String levelName): A convenient function to set the loglevel.
The loglevel function allows you to set the log level
for a logger. For example, loglevel("ROOT", "INFO") sets the level
of the root logger to INFO. This causes all logs of
INFO and higher (WARN, ERROR,
FATAL) to be printed to the console.
Script Arguments
You can also provide parameters to the script executed by the graph server (PGX). For example:
./bin/opg4j /path/to/script.jsh script-arg-1 script-arg-2The script /path/to/script.jsh can then access the
arguments through the arguments.scriptArgs variable. The arguments
are provided as an array of strings (String[]). For example:
Arrays.stream(arguments.scriptArgs).forEach((a) ->
    System.out.println(a));
The preceding example prints the output as shown:
script-arg-1
script-arg-2
Staying in Interactive Mode
By default, the OPG4J shell exits after
it finishes execution. To stay in interactive mode after the script finishes
successfully, pass the --keep_running flag to the shell.
For example:
./bin/opg4j -b https://myserver.com:7007/ /path/to/script.jsh --keep_runningParent topic: Interactive Graph Shell CLIs
10.1.2 Starting the OPG4Py Shell
Launching the OPG4Py Shell
The OPG4Py shell executables are
found in /opt/oracle/graph/bin after the graph server (PGX)
installation, and in <CLIENT_INSTALL_DIR>/bin after the
Python client installation.
Before launching the OPG4Py shell, verify that your system meets the prerequisites explained in Prerequisites for Installing the Python Client. You can then launch the OPG4Py shell by entering the following in your terminal:
cd /opt/oracle/graph
./bin/opg4py
When the shell has started, the following command line prompt appears:
Oracle Graph Server Shell 23.1.0
>>>
If IPython is installed the following prompt will appear:
In [1]:By default, the OPG4Py shell creates a local PGX instance, to run graph functions in the same JVM as the shell as described in Developing Applications Using Graph Server Functionality as a Library.
Command-line Options
To view the list of available command-line options, add
--help to the opg4py command:
./bin/opg4py --helpTo start the PyPGX shell without connecting to the graph server (PGX),
use the --no_connect option as shown:
./bin/opg4py --no_connectStarting the OPG4Py Shell on Remote Mode
The OPG4Py shell can connect to a graph server (PGX) instance that is running on another JVM (possibly on a different machine). In order to launch the OPG4Py shell in remote mode, you must specify the--base_url parameter as
shown:./bin/opg4py --base_url https://<host>:7007 --username <graphuser>
<host>: is the server host<graphuser>: is the database userYou will be prompted for the database password.
Note:
The graph server (PGX), listens on port7007 by default. If needed, you can
configure the graph server to listen on a different port by changing the port value
in the server configuration file (server.conf). See Configuring the Graph Server (PGX) for details.
When the OPG4Py shell has started, the following command line prompt appears:
Oracle Graph Server Shell 23.1.0
>>>
Parent topic: Interactive Graph Shell CLIs
10.2 Using Autonomous Database Graph Client
Using the AdbGraphClient API, you can access Graph Studio
features in Autonomous Database programmatically using the Oracle Graph Client or through
your Java or Python application.
This API provides the following capabilities:
- Authenticate with Autonomous Database
- Manage the Graph Studio environment
- Execute graph queries and algorithms against the graph server (PGX)
- Execute graph queries directly against Oracle Database
To use the AdbGraphClient API, you must have access to
Oracle Graph Client installation. The API is provided by the Oracle Graph Client
library which is a part of the Oracle Graph Server and Client distribution. See
Installing Oracle Graph Client on how to
install and get started with the graph client shell CLIs for Java or Python.
AdbGraphClient
API to establish a connection to Graph Studio, start an environment with allocated
memory, load a PG View graph into memory, execute PGQL queries and run algorithms
against the graph.
Parent topic: Getting Started with the Client Tools
10.2.1 Prerequisites for Using Autonomous Database Graph Client
As a prerequisite requirement to get started with the
AdbGraphClient API, you must:
- Provision an Autonomous Database instance in Oracle Autonomous Database.
- Obtain the following tenancy details to connect:
Key Description More Information tenancy OCID The Oracle Cloud ID (OCID) of your tenancy To determine the OCID for your tenancy, see "Where to Find your Tenancy's OCID" in: Oracle Cloud Infrastructure Documentation. database Database name of your Autonomous Database instance - Open the OCI console and click Oracle Database in the left navigation menu.
- Click Autonomous Database and navigate to the Autonomous Databases page.
- Select the required Autonomous Database under the Display Name column and navigate to the Autonomous Database Details page.
- Note the Database Name under "General Information" in the Autonomous Database Information tab.
database OCID The Oracle Cloud ID (OCID) of your Autonomous Database - Open the OCI console and click Oracle Database in the left navigation menu.
- Click Autonomous Database and navigate to the Autonomous Databases page.
- Select the required Autonomous Database under the Display Name column and navigate to the Autonomous Database Details page.
- Note the Database OCID under "General Information" in the Autonomous Database Information tab.
username Graph enabled Autonomous Database username, used for logging into Graph Studio See Create a Graph User for more information. password Database password for the graph user If the password for a graph user is forgotten, then you can always reset password for the graph user by logging into Database Actions as the ADMIN user. See Edit User for more information. endpoint Graph Studio endpoint URL - Select your Autonomous Database instance and navigate to the the Autonomous Database Details page.
- Click the Tools tab.
- Click on Graph Studio.
- Copy the URL of the new tab that opens the Graph Studio login screen.
- Edit the URL to remove the part after
oraclecloudapps.comto obtain the endpoint URL.For example, the following shows the format of a sample endpoint URL:
https://<hostname_prefix>.adb.<region_identifier>.oraclecloudapps.com
- Access Graph Studio and create a PG View graph.
- Download, install and start the Oracle Graph Java or Python client.
Parent topic: Using Autonomous Database Graph Client
10.3 Using the Graph Visualization Web Client
You can use the Graph Visualization application to visualize graphs that are either loaded into the graph server (PGX) or stored in the database.
To run the graph visualization application for your installation, see Graph Visualization Web Client.
Related Topics
Parent topic: Getting Started with the Client Tools
10.4 Using the Jupyter Notebook Interface
You can use the Jupyter notebook interface to create, load, and query property graphs through Python.
Parent topic: Getting Started with the Client Tools
10.5 Additional Client Tools for Querying PG Views
When working with property graph views (PG Views) in the database, you can use other supported client tools.
- Using Oracle SQLcl
You can access the graph in the database using SQLcl. - Using Oracle SQL Developer
You can use Oracle SQL Developer to execute PGQL statements and queries directly on graphs in Oracle Database.
Parent topic: Getting Started with the Client Tools
10.5.1 Using Oracle SQLcl
You can access the graph in the database using SQLcl.
You can run PGQL queries on the graph in SQLcl with a plug-in that is available with Oracle Graph Server and Client. See PGQL Plug-in for SQLcl in Oracle SQLcl User’s Guide for more information.
The example in this section helps you get started on executing PGQL queries on a graph in SQLcl. As a prerequisite, to perform the steps in the example, you must set up the bank graph data in your database schema using the sample data provided with the graph server installation. See Using Sample Data for Graph Analysis for more information.
The following example creates a property graph view using the PGQL
CREATE PROPERTY GRAPH statement, executes PGQL
queries against the graph and finally drops the graph using SQLcl.
- Start SQLcl with your database schema credentials. In the
following command, graphuser is the database user used to
connect to
SQLcl.
sql graphuser/<password_for_graphuser>@<tns_alias> SQLcl: Release 21.2 Production on Sun Jan 30 04:30:09 2022 Copyright (c) 1982, 2022, Oracle. All rights reserved. Connected to: Oracle Database 21c Enterprise Edition Release 21.0.0.0.0 - Production Version 21.3.0.0.0 - Enable PGQL mode as
shown:
SQL> pgql auto on;

PGQL Auto enabled for schema=[null], graph=[null], execute=[true], translate=[false]
Note that no arguments are used in the preceding PGQL command.
- Create a property graph view on the bank graph data
tables.
PGQL> CREATE PROPERTY GRAPH bank_graph 2 VERTEX TABLES ( 3 bank_accounts 4 LABEL ACCOUNTS 5 PROPERTIES (ID, NAME) 6 ) 7 EDGE TABLES ( 8 bank_txns 9 SOURCE KEY (from_acct_id) REFERENCES bank_accounts (id) 10 DESTINATION KEY (to_acct_id) REFERENCES bank_accounts (id) 11 LABEL TRANSFERS 12 PROPERTIES (FROM_ACCT_ID, TO_ACCT_ID, AMOUNT, DESCRIPTION) 13* ) OPTIONS(PG_VIEW); Graph created - Set
bank_graphas the default graph using thegraphargument when enabling PGQL mode.PGQL> pgql auto on graph bank_graph; PGQL Auto enabled for schema=[null], graph=[BANK_GRAPH], execute=[true], translate=[false] - Execute PGQL queries against the default graph. For example, the
following PGQL query retrieves the total number of vertices as
shown:
PGQL> SELECT COUNT(*) AS num_vertices FROM MATCH(n);

   NUM_VERTICES
_______________
           1000
Note that in the preceding query, the graph name is not specified using the
ONclause as part of theMATCHclause. - Reconnect to SQLcl as another schema
user.
PGQL> conn system/<password_for_system>@<tns_alias>; Connected. - Enable PGQL mode using the
schemaargument to set the default schema used for creating the graph. Also, setbank_graphas the default graph using thegraphargument :PGQL> pgql auto on schema graphuser graph bank_graph; PGQL Auto enabled for schema=[graphuser], graph=[BANK_GRAPH], execute=[true], translate=[false] - Execute a PGQL query to retrieve all the edge properties on the graph as
shown:
PGQL> SELECT e.* FROM MATCH (n:accounts) -[e:transfers]-> (m:accounts) LIMIT 10;

   AMOUNT    DESCRIPTION    FROM_ACCT_ID    TO_ACCT_ID
_________ ______________ _______________ _____________
     1000 transfer                   178           921
     1000 transfer                   178           462
     1000 transfer                   179           688
     1000 transfer                   179           166
     1000 transfer                   179           397
     1000 transfer                   179           384
     1000 transfer                   179           900
     1000 transfer                   180           855
     1000 transfer                   180           984
     1000 transfer                   180           352

10 rows selected.
Therefore, you can set a default schema and execute PGQL queries against a default graph in SQLcl.
- Finally, drop the graph after executing the required graph
queries.
PGQL> DROP PROPERTY GRAPH bank_graph;

Graph dropped
Also, see Execute PGQL Queries in SQLcl for more information.
Parent topic: Additional Client Tools for Querying PG Views
10.5.2 Using Oracle SQL Developer
You can use Oracle SQL Developer to execute PGQL statements and queries directly on graphs in Oracle Database.
- About Property Graph Support in SQL Developer
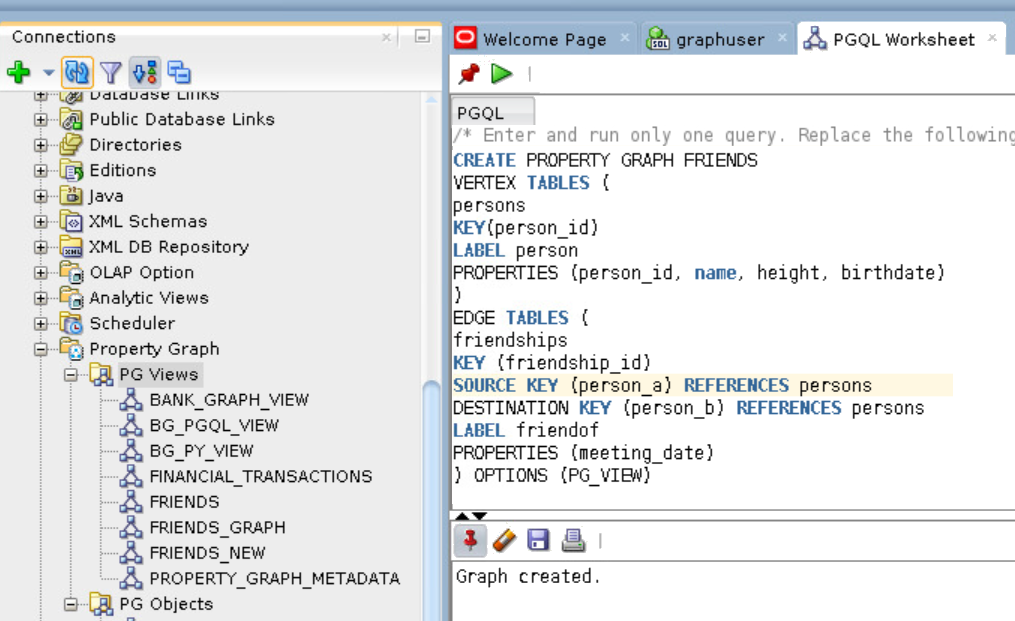
Starting from SQL Developer Release 22.2 onwards, property graph support is available in SQL Developer. Therefore, you can run PGQL queries on property graphs using SQL Developer. - Working with Property Graph Views
You can view all the property graph views existing in your database schema by expanding PG Views under the Property Graph node in the Connections navigator.
Parent topic: Additional Client Tools for Querying PG Views
10.5.2.1 About Property Graph Support in SQL Developer
Starting from SQL Developer Release 22.2 onwards, property graph support is available in SQL Developer. Therefore, you can run PGQL queries on property graphs using SQL Developer.
You can access the Property Graph node in the Connections navigator to work with property graphs.
Figure 10-3 Property Graph Support in SQL Developer
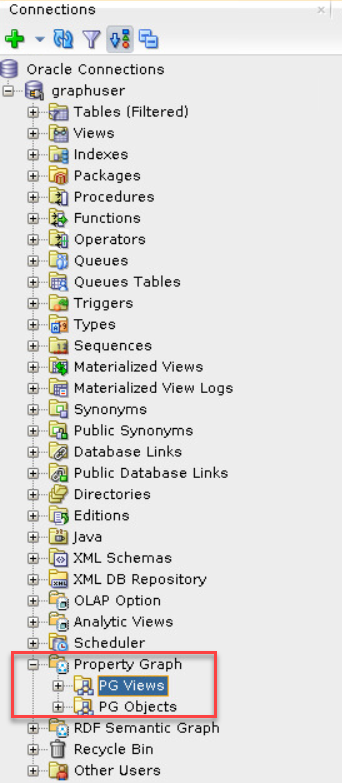
Description of "Figure 10-3 Property Graph Support in SQL Developer"
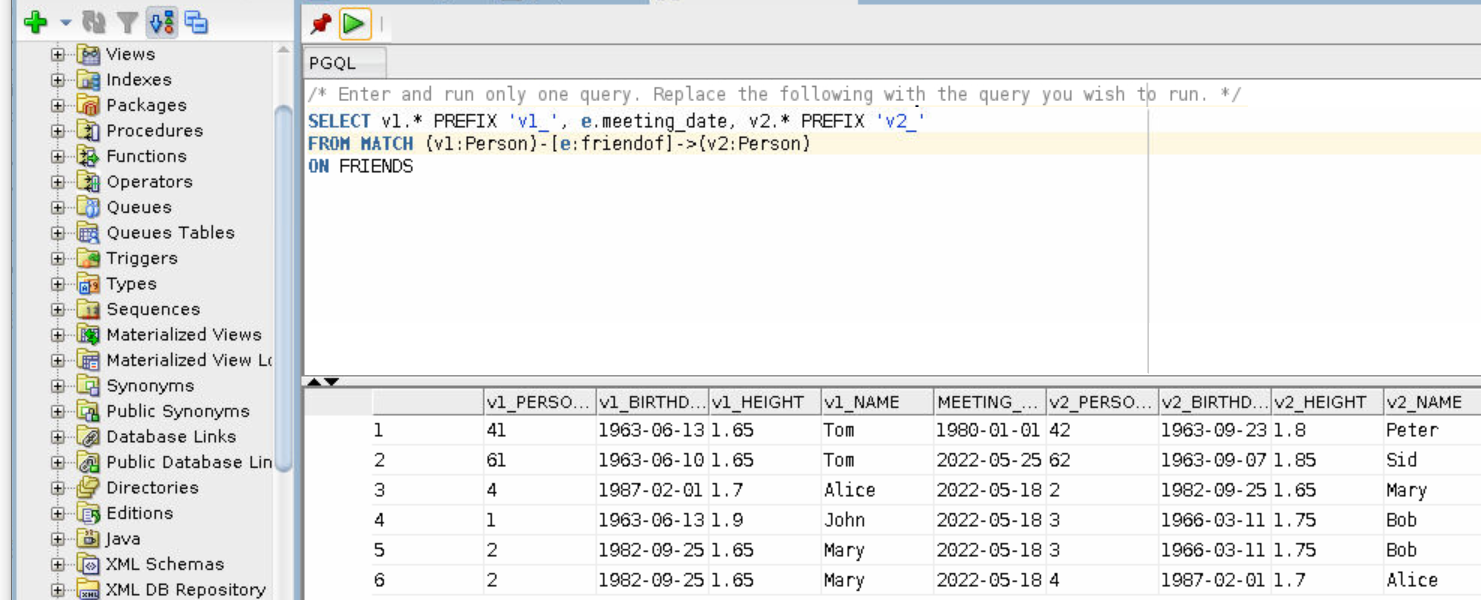
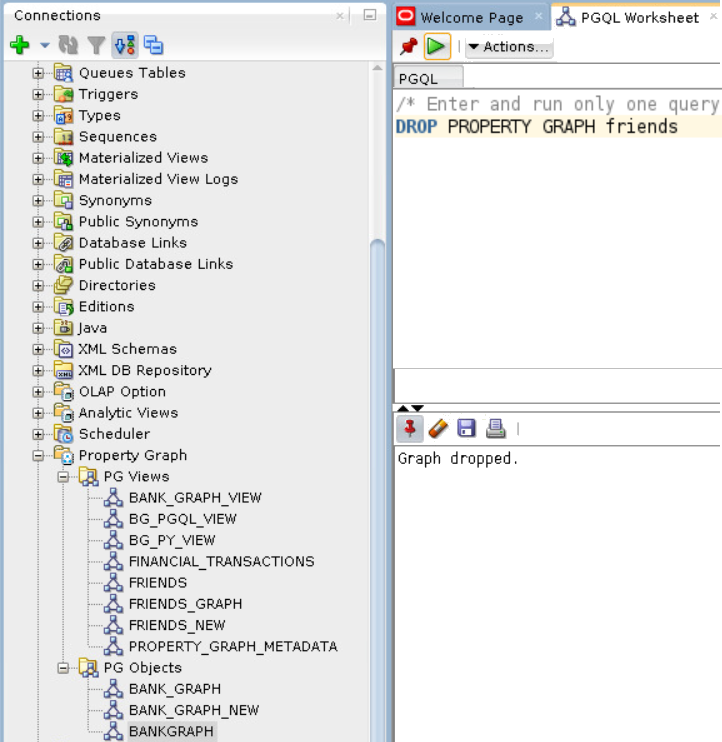
Using SQL Developer, you can perform the following PGQL operations in the PGQL Worksheet:
- Create a property graph view or a property graph object against the graph data in the database.
- Apply a filter on the PG Views or PG Objects node to list graphs based on the specified filter criteria.
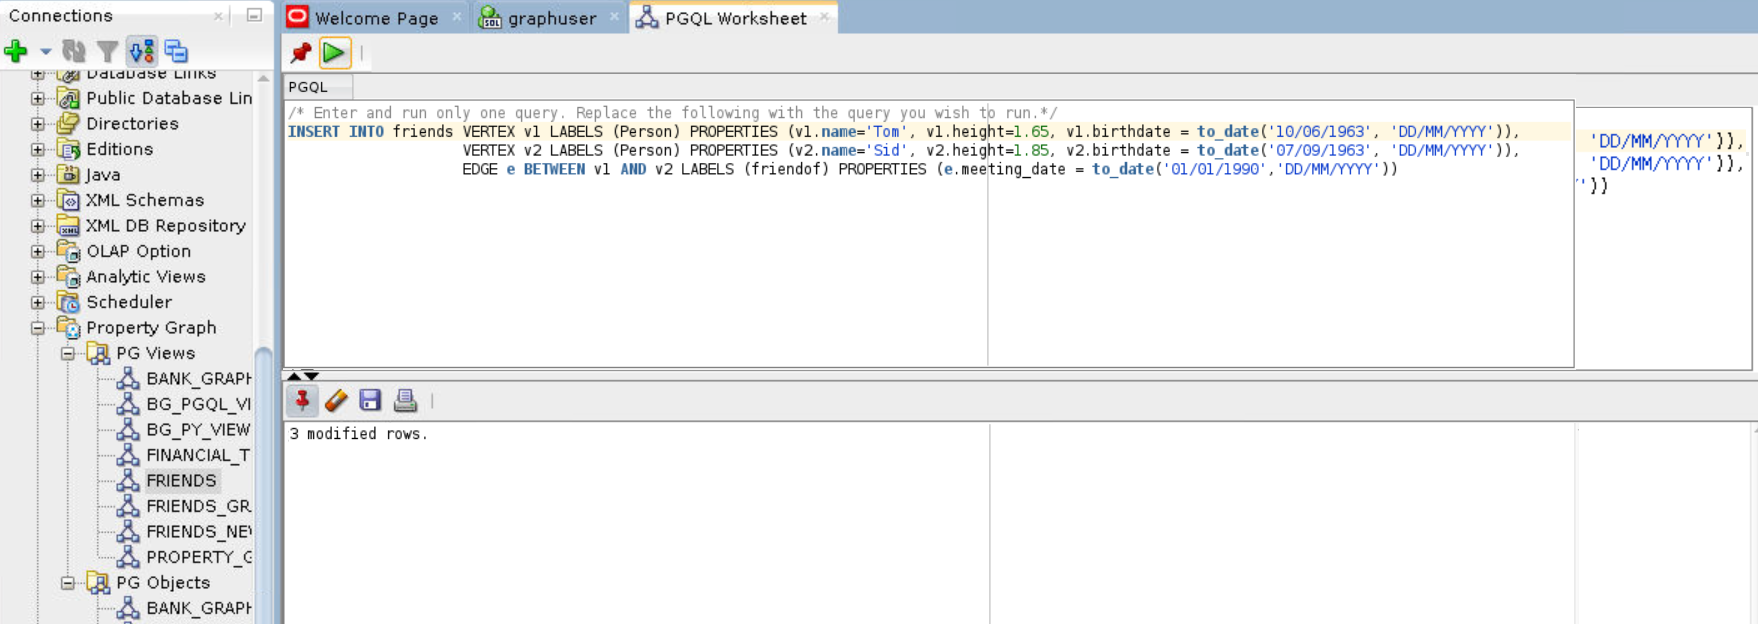
- Execute a PGQL
INSERT,UPDATE,SELECT, orDELETEquery against the graph. - Drop the property graph view or the property graph object.
Parent topic: Using Oracle SQL Developer
10.5.2.2 Working with Property Graph Views
You can view all the property graph views existing in your database schema by expanding PG Views under the Property Graph node in the Connections navigator.
You can run PGQL queries for a property graph view in a PGQL Worksheet. Note that you can execute only one PGQL query at a time in the worksheet.
The following steps show a few examples for creating, updating and dropping a property graph view using SQL Developer.
Parent topic: Using Oracle SQL Developer
