Creating a Property Graph Using Auto-Map
The Auto-map feature in Modeler enables you to automatically generate a property graph from the selected database tables by detecting foreign key relationships.
-
Click Modeler under Graph Tools in the Graph Studio navigation menu.
-
Click New Graph on the Modeler landing page.
A new graph tab opens. If Auto-name New Graphs is enabled in Settings, a default graph name is generated automatically and displayed as the tab name. Otherwise, you can specify the graph name before creating the graph.
-
Select the required Graph Type.
Modeler supports the creation of two types of property graphs:
-
SQL Property Graph: The option to create a SQL property graph is available only if you are using a database instance with Oracle Database 26ai.
-
PGQL Property Graph: The option to create a PGQL property graph is available on all supported database versions.
-
-
Click Auto-map in the Modeler toolbar at the top of the page.
Alternatively, click Open Auto map in the right panel.
The Auto-map slider opens.
-
Select the source data tables that are required as input for the graph.
Figure: Auto-map: Select Tables
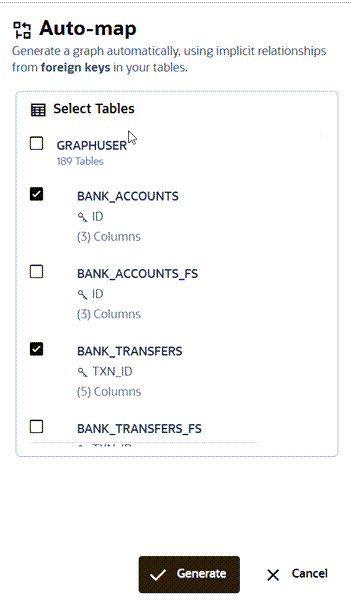
Description of the illustration modeler_auto_map_select_tables.png
See Mapping Oracle Data Types to PGX Types to learn how the Oracle data types are mapped to the graph server (PGX) data types.
-
Click Generate.
The vertices and edges of a graph are automatically deduced by Modeler and the graph is visually displayed on the canvas automatically.
Figure: Auto-map: Generated Graph
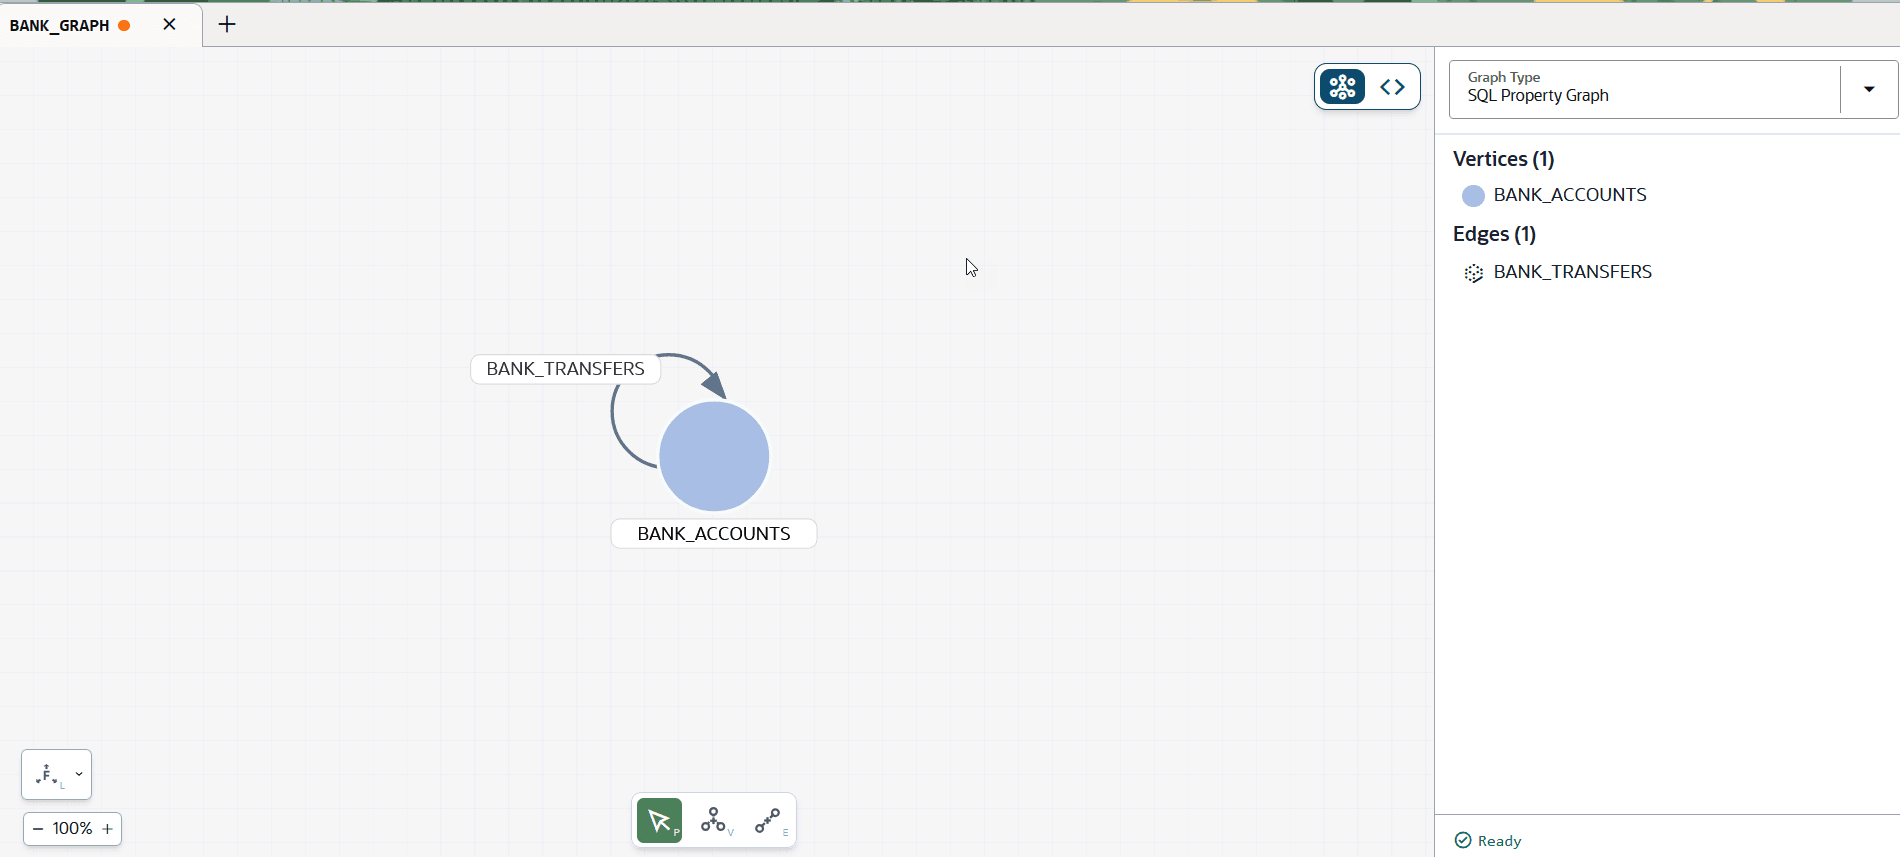
Description of the illustration modeler_auto_map_generate_graph.png
You can perform any of the following actions if required:
-
You can modify the graph definition using the visual editing tools. See Creating a Property Graph Using the Visual Editor on how to manually update the graph definition.
-
Switch ON the code editor toggle to review or update the
CREATE PROPERTY GRAPHDDL statement. -
Verify if the vertex and edge table keys are defined for the graph by clicking on the specific graph element or label name on the canvas. These keys are generated automatically by the modeler. In case the modeler is unable to generate the vertex and edge table keys, then you must manually specify these keys. See Managing Vertex and Edge Details for more information on how to add or edit the vertex and edge table keys.
-
Also, see Handling Errors and Warnings While Creating a Graph for more information.
-
-
Click Create Graph in the top right of the page.
The graph gets created and you can interact with the graph using Graph Explorer.