3.10.3.1 Visualizing a 3D Tileset Using a Cesium Map

You can visualize your dataset with 3D Tiles on a Cesium map using the following steps.
The instructions assume that the 3D Tiles are uploaded and the dataset is already added to the project in the Active Project page. To create a dataset with 3D Tiles, see Creating a Dataset from Cesium Datasets for more information.
  1. Click the Visualizations tab on the left pane in the Active Project page.
    This lists the various visualization options.
  2. Click and drag Cesium-Map from the list to the visualization canvas on the right to create a Cesium map visualization.
    A default Cesium map is displayed.

    Tip:

    You can configure new background Cesium maps by adding maps from the following two sources:
    • URL template
    • WMTS service
  3. Click the Data tab on the left pane in the Active Project page.
    This lists all the Datasets that are loaded for the project.
  4. Click and drag the desired 3D Tiles dataset from the list to the map view on the right.
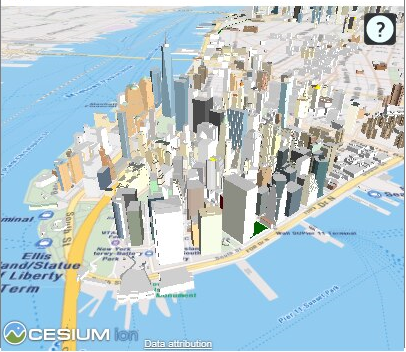
    A 3D layer is created on the map as shown:

    Figure 3-57 3D Cesium Map Visualization

    Description of Figure 3-57 follows
    Description of "Figure 3-57 3D Cesium Map Visualization"
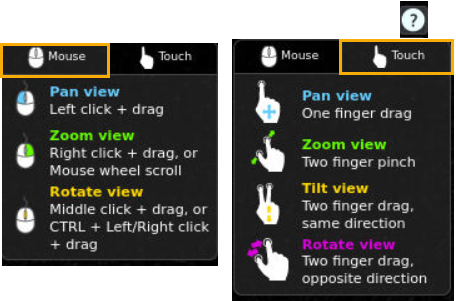
    To interact with the map, click the ? icon and use either of the following options shown: Description of pointer_options.png follows
    Description of the illustration pointer_options.png