3.7 Spatial Studio Connections Page

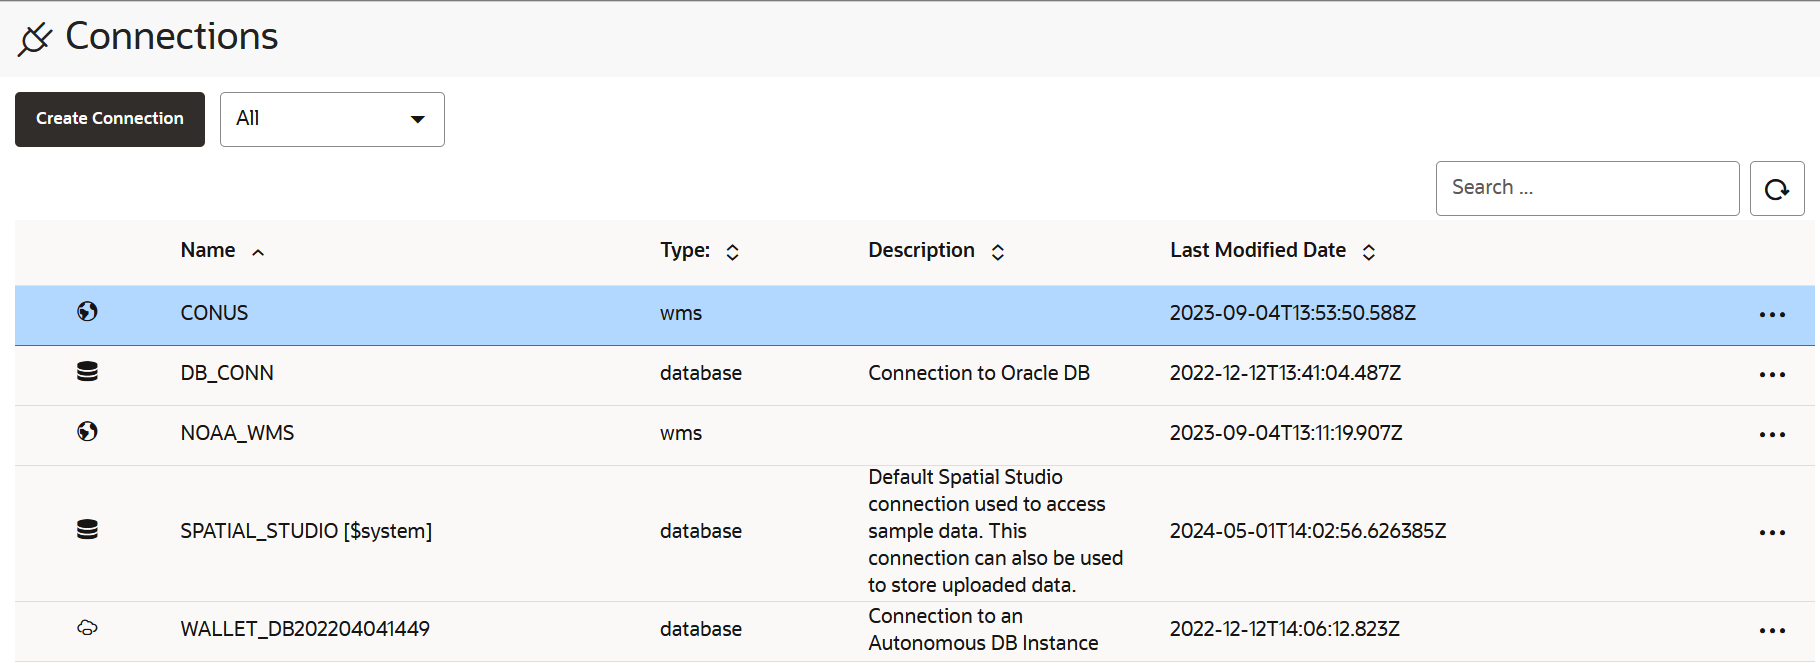
The Connections page displays all the existing connections and also allows you to create a new connection.

The following figure shows a layout of the Connections page:

You can perform the following actions on the Connections page:

  • You can create a new connection, by clicking Create Connection.

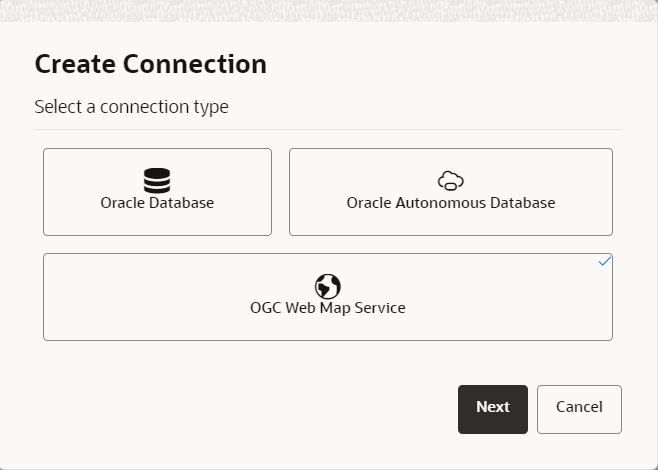
    As seen in the preceding figure, you can create a connection to the following sources:

    • Oracle Database: You must provide the host, port, schema, and other database authentication details.
    • Oracle Autonomous Database: You must provide the wallet and the connection details.
    • OGC Web Map Service: You must provide the URL to connect to the WMS service.
  • You can also perform the following actions by clicking the hamburger icon against any displayed connection or by right-clicking a connection row:
    • Properties: To view or modify properties of the connection
    • Edit: To update the connection details

      Note:

      You cannot edit the SPATIAL_STUDIO connection on the Connections page. Instead, refer to If the Spatial Studio Repository Schema Password Has Been Changed section.
    • Migrate: To migrate the connection from one environment to another
    • Replace Cloud Wallet: To replace the cloud wallet for your Autonomous Database Connection
    • Test Connection: To validate the connection
    • Delete: To delete the connection along with all its datasets

      Note:

      You cannot delete the SPATIAL_STUDIO connection.

3.7.1 Creating an Oracle Database Connection

You can create a Spatial Studio connection to any Oracle Database schema.

You can perform the following steps to setup a connection to the database:

  1. Navigate to the Connections page.
  2. Click Create Connection.
    The Create Connection dialog opens as shown in Figure 3-37.
  3. Select Oracle Database as the connection type and click Next.

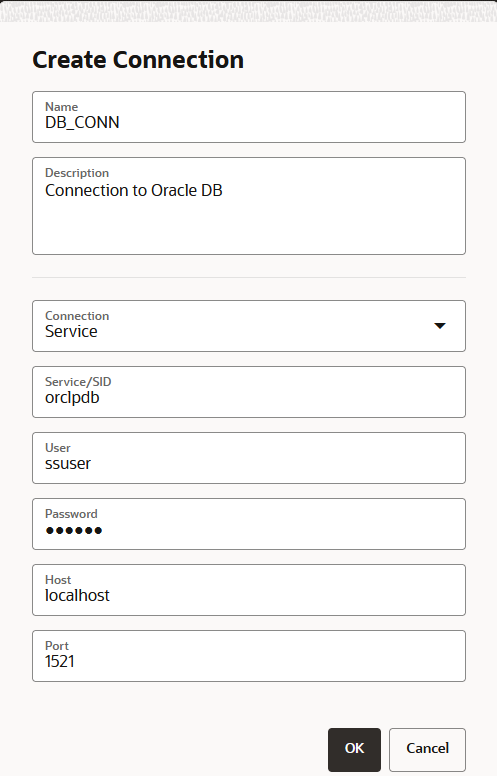
    The Create Connection dialog open as shown:

    Figure 3-38 Creating a Connection to the Oracle Database

    Description of Figure 3-38 follows
    Description of "Figure 3-38 Creating a Connection to the Oracle Database"
  4. Enter the Spatial Studio connection Name.
  5. Optionally, enter a Description.
  6. Select the database Connection type.
    The supported types are:
    • Service
    • SID
  7. Enter the Service/SID value depending on your connection type.
  8. Enter the database User name and the Password for the user.

    Note that when the database user password expires, Spatial Studio will prompt you to reestablish the schema connection. Then the Create Connection dialog is displayed with prefilled metadata schema details.

  9. Enter the Host and Port details.
  10. Click OK.
    The Oracle Database connection gets created. This database type connection is displayed on the Connections page.

3.7.2 Creating a Cloud Connection to an Autonomous Database Instance

You can create a Spatial Studio connection to an Autonomous Database instance.

As a prerequisite, you must download and save the wallet for your Autonomous Database instance from the Oracle Cloud Infrastructure (OCI) console. See Download Client Credentials (Wallets) for more information.

You can perform the following steps to setup a cloud connection to your Autonomous Database instance:

  1. Navigate to the Connections page.
  2. Click Create Connection.
    The Create Connection dialog opens as shown in Figure 3-37.
  3. Select Oracle Autonomous Database as the connection type and click Next.

    The Upload wallet dialog opens.

  4. Drag and drop your saved wallet file or click to upload the wallet from your system.
  5. Click OK.
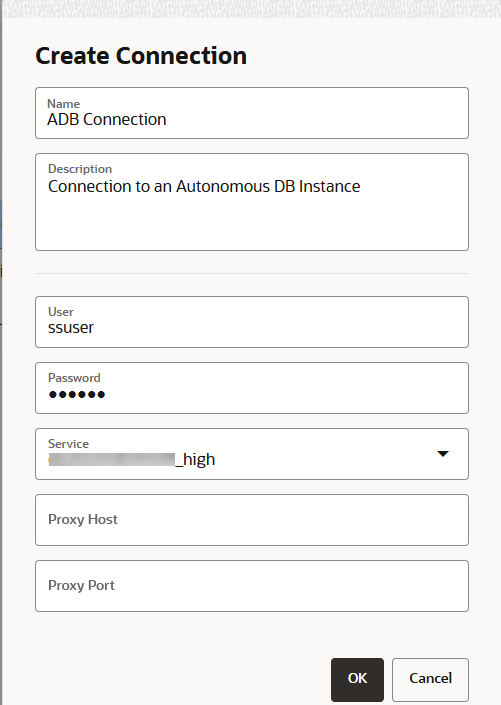
    The Create Connection dialog opens as shown:

    Figure 3-39 Creating a Connection to an Autonomous Database Instance

    Description of Figure 3-39 follows
    Description of "Figure 3-39 Creating a Connection to an Autonomous Database Instance"
  6. Optionally, change the default Spatial Studio connection Name.
  7. Optionally, enter a Description.
  8. Enter the Autonomous Database User name and the Password for the user.
  9. Select the appropriate Service from the drop-down list.
  10. Optionally, enter the Proxy Host and Proxy Port details.
  11. Click OK.
    The connection to the Autonomous Database instance gets created. This database type connection is displayed on the Connections page.

3.7.3 Creating an OGC WMS Connection

You can create a new connection to an external OGC (Open Geospatial Consortium) WMS (Web Map Service) service.

This enables you to create an OGC WMS dataset which can be used in map visualizations.

Note that a WMS service or server typically offers many individual map layers that can be combined in different orders. The full list of available map layers, as well as many other important supported functionalities are all advertised by the WMS server through a standard WMS GetCapabilities response.

When you create a new WMS connection, Spatial Studio will be querying such capabilities against the external WMS server using the standard GetCapabilities call. Based on the result of such a query, you will later be able to choose the required WMS map layers that must be included when creating a new Spatial Studio WMS dataset.

Prior to creating a WMS connection, if the Spatial Studio server is running behind a fire wall, then you must configure the Web Proxy using the General panel in the Administration page. This is to enable Spatial Studio to access the WMS server (which can either be running on the same data center or remotely) from the server side.

You can perform the following steps to create an OGC WMS connection:

  1. Navigate to the Connections page.
  2. Click Create Connection.
    The Create Connection dialog opens as shown in Figure 3-37.
  3. Select OGC Web Map Service as the connection type and click Next.

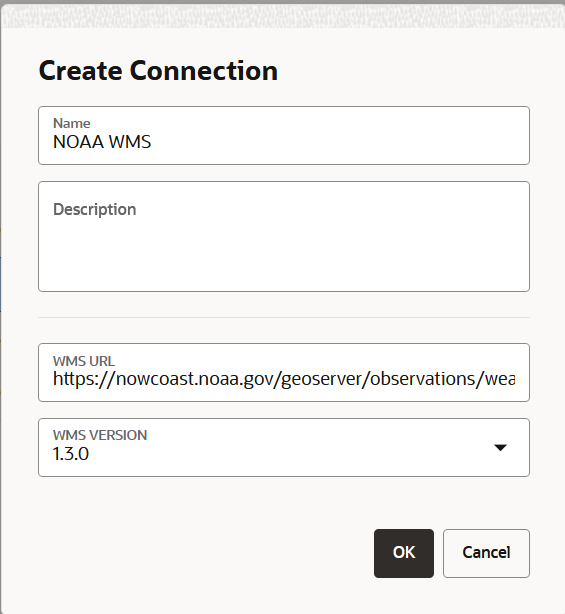
    The Create Connection dialog open as shown:

    Figure 3-40 Creating an OGC WMS Connection

    Description of Figure 3-40 follows
    Description of "Figure 3-40 Creating an OGC WMS Connection"
  4. Enter the connection Name.
  5. Optionally, enter a Description.
  6. Enter the WMS URL to connect to the WMS service.
    Also, note the following:
    • Ensure that the WMS URL is added to the Safe Domains list.
    • You can use one of the following two formats for the WMS URL:
      • A complete GetCapabilities request, including the version of the WMS specification (1.3.0 is recommended). For instance:

        https://nowcoast.noaa.gov/geoserver/observations/weather_radar/ows?SERVICE=WMS&VERSION=1.3.0&REQUEST=GetCapabilities

      • The base URL of the WMS server. For instance:

        https://nowcoast.noaa.gov/geoserver/observations/weather_radar/ows

  7. Optionally, select the WMS VERSION.
  8. Click OK.
    The OGC WMS connection gets created. This wms type connection is displayed on the Connections page.

    Also, the new WMS connection stores the names of all the available map layers (hosted by the WMS service) and a host of other information based on the GetCapabilities response as a part of its metadata.

  9. Right-click on the newly created connection, select Test connection, and verify that the connection tests successfully.

3.7.4 Migrating Database Connections

You can migrate your connections in Spatial Studio between on-premises and cloud database environments.

It is possible that you may want to migrate data from your on-premises database to an Autonomous Database instance or the other way around. In such scenarios, you can also migrate the Spatial Studio connection related to the data to the new target data source. Thus, Spatial Studio allows you to continue working with the datasets that were created using the earlier connection properties, without rendering them invalid.

You can perform the following steps to migrate a database connection.

  1. Navigate to the Connections page.
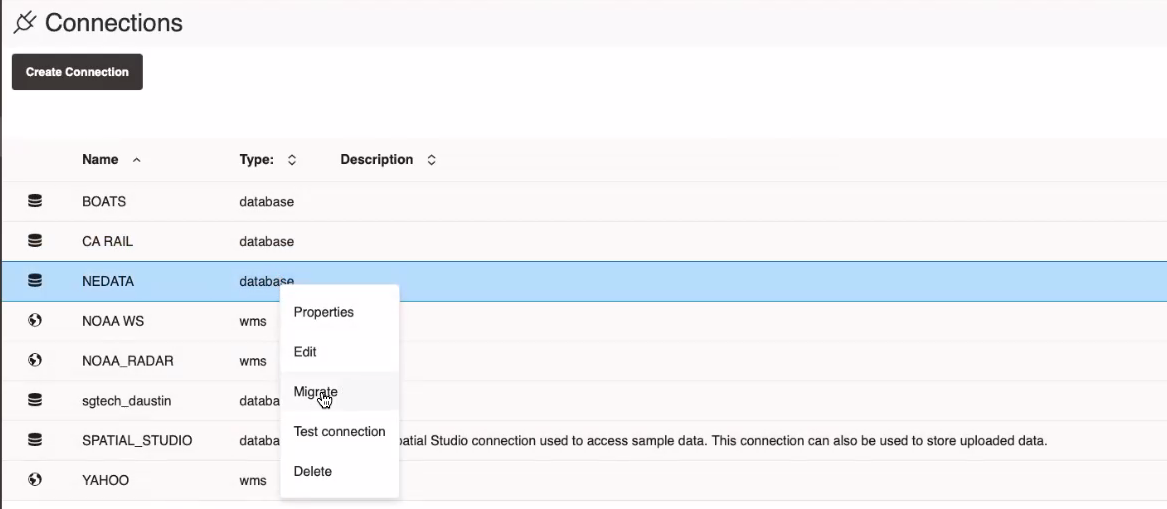
  2. Right-click on the required connection Name.
    The context menu for the database connection appears as shown:

    Figure 3-41 Migrate Option for a Database Connection

    Description of Figure 3-41 follows
    Description of "Figure 3-41 Migrate Option for a Database Connection"
  3. Click Migrate.
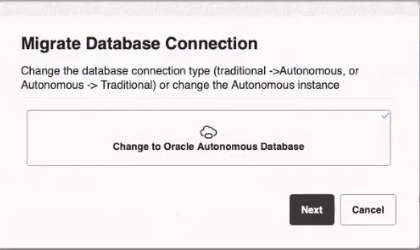
    Migrate Database Connection is displayed as shown:

    Figure 3-42 Migrate Database Connection

    Description of Figure 3-42 follows
    Description of "Figure 3-42 Migrate Database Connection"

    Note that in the preceding image, the target environment for migration may vary depending on the current source of the database connection. You can perform the following steps to configure the target environment that applies to you:

    • Migrating from On-Premises Database to Oracle Autonomous Database:
      1. Click Next and provide the Upload Wallet details.
      2. Click OK and provide the database connection details.
    • Migrating from Oracle Autonomous Database to On-Premises Database:
      1. Click Next and provide the database connection details.
      2. Click OK.
    The connection gets updated to the new data source.